
Watermelon growing without a garden? Absolutely! I know, it sounds crazy, right? Visions of sprawling vines and endless space might be dancing in your head, but trust me, you don’t need acres of land to enjoy the sweet, juicy taste of homegrown watermelon. This DIY guide is your ticket to fresh, delicious watermelon, even if you’re living in an apartment with just a balcony or have a tiny patio.
For centuries, watermelons have been a symbol of summer, abundance, and community. Originating in Africa, they’ve traveled the globe, becoming a beloved treat in countless cultures. But traditionally, growing them felt like a luxury reserved for those with ample garden space. Not anymore!
Let’s face it, store-bought watermelons can be a gamble. Sometimes they’re perfect, other times they’re bland and disappointing. Plus, knowing exactly where your food comes from is incredibly satisfying. That’s why learning how to achieve watermelon growing without a garden is so empowering. This DIY project will not only save you money but also give you the joy of nurturing something from seed to table. I’m going to show you simple, effective techniques to cultivate these summer delights in containers, maximizing your yield and minimizing the space required. Get ready to impress your friends and family with your green thumb and enjoy the sweetest, most rewarding watermelon you’ve ever tasted!
Growing Watermelons in Containers: A Beginner’s Guide
Hey there, fellow gardening enthusiasts! So, you’re dreaming of juicy, homegrown watermelons but lack the sprawling garden space? Don’t fret! I’m here to tell you that growing watermelons in containers is totally achievable, and I’m going to walk you through every step of the process. It might seem daunting, but trust me, with a little planning and effort, you’ll be enjoying sweet, refreshing watermelon slices before you know it.
Choosing the Right Watermelon Variety
First things first, not all watermelons are created equal when it comes to container gardening. We need to pick varieties that are more compact and manageable. Think bush or dwarf varieties. Here are a few of my personal favorites:
* Sugar Baby: This is a classic choice. It produces small, round watermelons that are incredibly sweet and perfect for a single serving. They mature relatively quickly, which is a bonus.
* Bush Sugar Baby: As the name suggests, this is a bush-type version of the Sugar Baby. It’s even more compact, making it ideal for smaller containers.
* Golden Midget: This variety produces small, yellow-skinned watermelons with pink flesh. They’re known for their early maturity and delicious flavor.
* Tiger Baby: Another compact option, Tiger Baby watermelons have striped skin and sweet, red flesh. They’re also relatively early maturing.
Important Note: Always check the seed packet for the specific variety’s size and growing requirements. This will help you choose the right container size and provide the appropriate support.
Gathering Your Supplies
Okay, now that we’ve chosen our watermelon variety, let’s gather everything we need. Here’s a checklist:
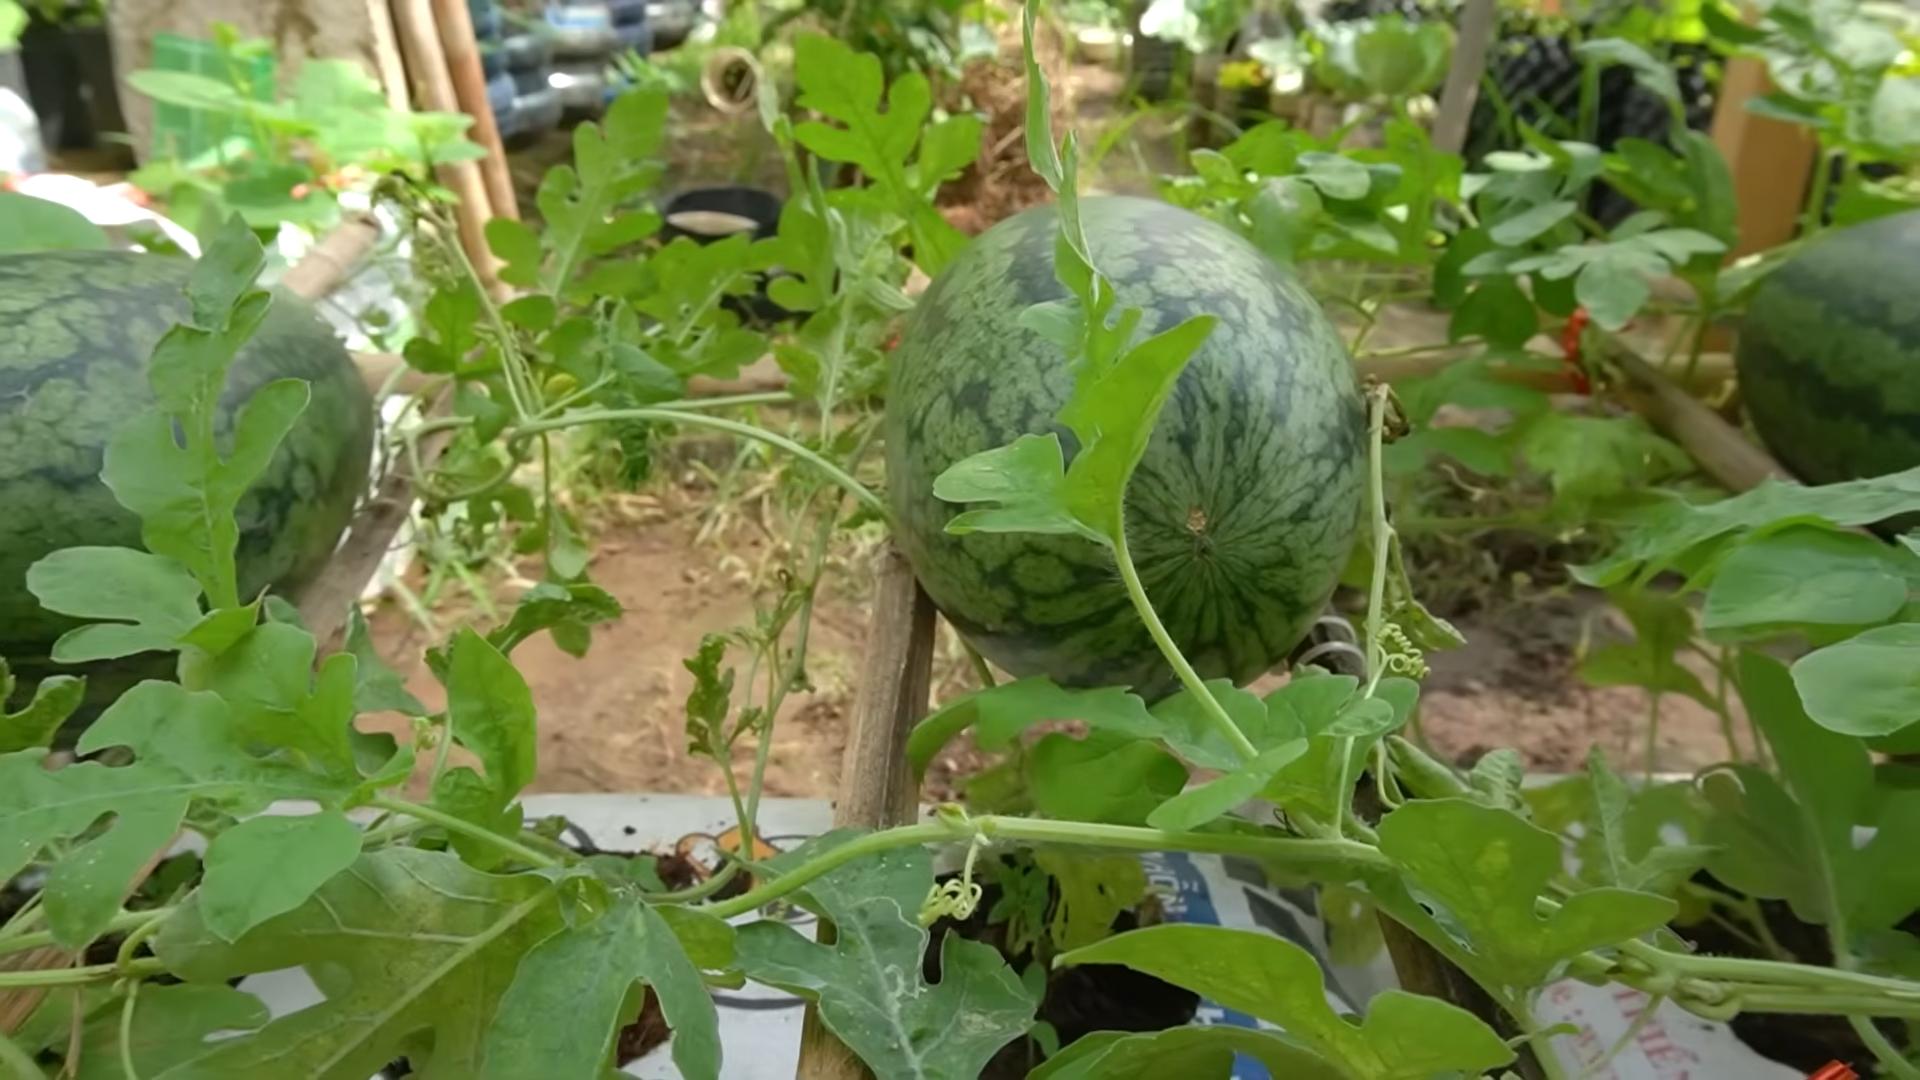
* Large Container: This is crucial! Watermelons need plenty of space for their roots to grow. I recommend a container that’s at least 24 inches in diameter and 24 inches deep. The bigger, the better, honestly. A half whiskey barrel works great.
* High-Quality Potting Mix: Don’t skimp on this! Use a well-draining potting mix specifically formulated for containers. Avoid using garden soil, as it can become compacted and doesn’t drain well.
* Water-Soluble Fertilizer: Watermelons are heavy feeders, so we’ll need to fertilize them regularly. Choose a fertilizer that’s high in phosphorus and potassium, which are essential for fruit development.
* Trellis or Support System: Even bush varieties can benefit from some support, especially as the watermelons start to grow. A small trellis or tomato cage will do the trick.
* Watering Can or Hose: Consistent watering is key to success.
* Seeds or Seedlings: Of course, you’ll need your watermelon seeds or seedlings! If you’re starting from seeds, I recommend starting them indoors a few weeks before the last expected frost.
* Gardening Gloves: Protect your hands!
* Optional: Mulch (straw or wood chips) to help retain moisture and suppress weeds.
Step-by-Step Planting Guide
Alright, let’s get our hands dirty! Here’s how to plant your watermelon in a container:
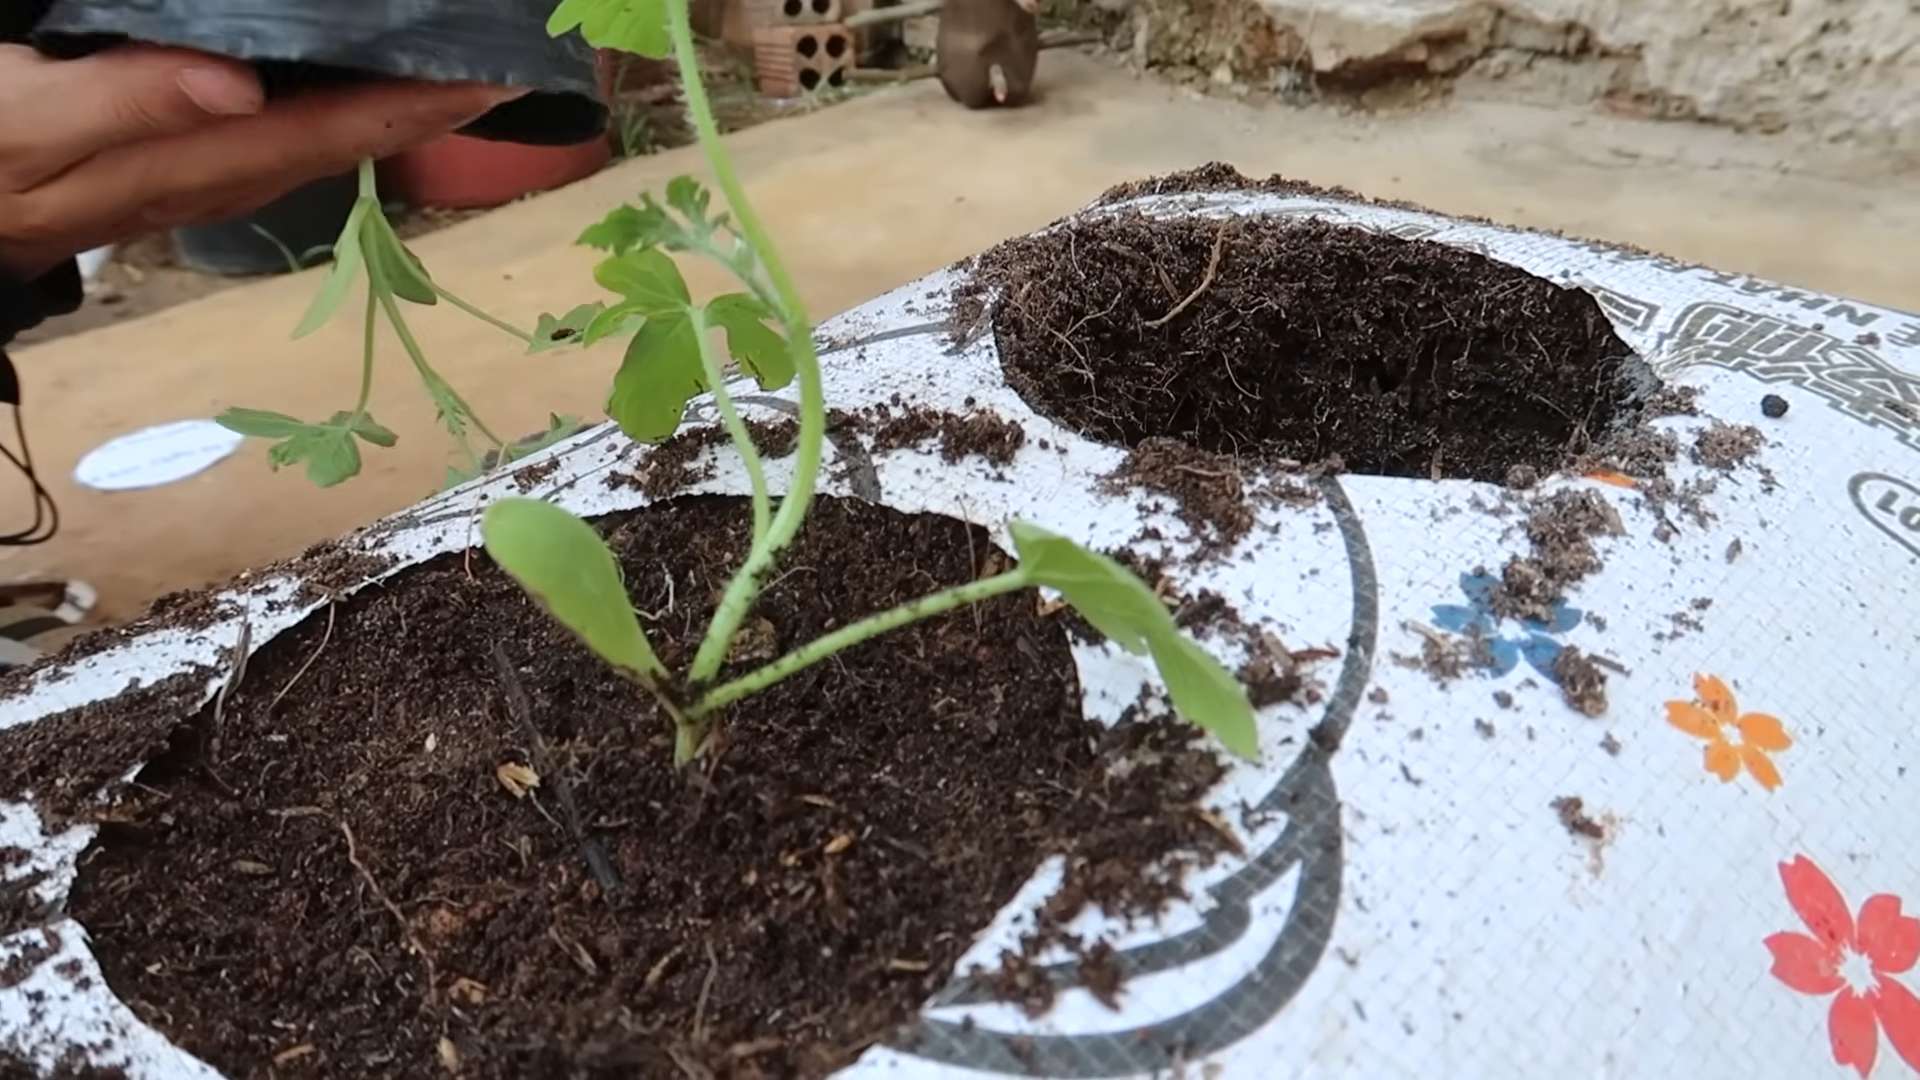
1. Prepare the Container: Make sure your container has drainage holes. If not, drill some! Good drainage is essential to prevent root rot.
2. Fill the Container: Fill the container with your high-quality potting mix, leaving a few inches of space at the top.
3. Plant the Seeds or Seedlings:
* From Seeds: Sow 2-3 seeds per container, about 1 inch deep. Water gently. Once the seedlings emerge, thin them to the strongest one.
* From Seedlings: Gently remove the seedling from its nursery pot and loosen the roots slightly. Dig a hole in the potting mix that’s large enough to accommodate the root ball. Place the seedling in the hole and backfill with potting mix. Water thoroughly.
4. Add Support: Install your trellis or support system now, before the watermelon plant starts to grow too large.
5. Mulch (Optional): Add a layer of mulch around the base of the plant to help retain moisture and suppress weeds.
6. Water Thoroughly: Water the container deeply until water drains out of the drainage holes.
Caring for Your Container Watermelon
Now that your watermelon is planted, it’s time to provide it with the care it needs to thrive.
1. Sunlight: Watermelons need at least 6-8 hours of direct sunlight per day. Place your container in a sunny location. If you don’t have a spot that gets enough sun, you might consider using grow lights.
2. Watering: Watermelons need consistent watering, especially during hot weather. Check the soil moisture regularly and water when the top inch of soil feels dry to the touch. Avoid overwatering, as this can lead to root rot. I usually water deeply every other day, but this depends on the weather.
3. Fertilizing: Start fertilizing your watermelon plant about two weeks after planting. Use a water-soluble fertilizer according to the package directions. Fertilize every 2-3 weeks throughout the growing season. When the plant starts to flower, switch to a fertilizer that’s higher in phosphorus and potassium to promote fruit development.
4. Pollination: Watermelons need to be pollinated in order to produce fruit. If you’re growing your watermelon indoors or in an area with limited bee activity, you may need to hand-pollinate the flowers. To do this, use a small paintbrush to transfer pollen from the male flowers to the female flowers. Female flowers have a small, immature watermelon at the base of the flower.
5. Pruning: While not always necessary, pruning can help improve air circulation and encourage fruit production. Remove any dead or yellowing leaves. You can also prune some of the side shoots to encourage the plant to focus its energy on producing fruit.
6. Support the Fruit: As your watermelons grow, they may become heavy and need additional support. You can use slings made from pantyhose or netting to support the fruit and prevent it from breaking off the vine.
7. Pest and Disease Control: Keep an eye out for pests and diseases. Common pests that affect watermelons include aphids, squash bugs, and cucumber beetles. Common diseases include powdery mildew and fusarium wilt. Treat any problems promptly with appropriate organic pesticides or fungicides. I prefer using neem oil for pest control.
Harvesting Your Watermelon
The moment we’ve all been waiting for! Knowing when to harvest your watermelon can be a bit tricky, but here are a few indicators:
* The Tendril: The tendril closest to the watermelon should be brown and dry.
* The Ground Spot: The spot where the watermelon rests on the ground (or the container) should be yellow or cream-colored.
* The Thump Test: Give the watermelon a gentle thump. A ripe watermelon will sound hollow.
* Days to Maturity: Check your seed packet for the variety’s days to maturity. This is a good guideline, but it’s not always exact.
Once you’re confident that your watermelon is ripe, use a sharp knife to cut it from the vine, leaving a few inches of stem attached.
Troubleshooting Common Problems
Even with the best care, you might encounter some problems along the way. Here are a few common issues and how to address them:
* Lack of Fruit: This could be due to poor pollination, insufficient sunlight, or lack of nutrients. Make sure your watermelon is getting enough sunlight, fertilize regularly, and hand-pollinate if necessary.
* Small Fruit: This could be due to insufficient watering or lack of nutrients. Water deeply and fertilize regularly.
* Blossom End Rot: This is a calcium deficiency that causes the blossom end of the watermelon to rot. Ensure consistent watering and amend the soil with calcium if necessary.
* Pests and Diseases: As mentioned earlier, keep an eye out for pests and diseases and treat them promptly.
Enjoying Your Homegrown Watermelon
Congratulations! You’ve successfully grown a watermelon in a container. Now it’s time to enjoy the fruits (or rather, the fruit) of your labor. Slice it up, share it with friends and family, and savor the sweet, refreshing taste of homegrown watermelon. There’s nothing quite like it!
I hope this guide has been helpful. Happy gardening!
Conclusion
So, you’ve reached the end of our guide, and hopefully, you’re brimming with excitement to embark on your own watermelon-growing adventure, even without a traditional garden! We’ve shown you that the dream of harvesting your own juicy, sweet watermelons isn’t confined to sprawling acres or meticulously planned vegetable patches. This DIY approach opens up a world of possibilities, allowing you to cultivate these summer delights on balconies, patios, rooftops, or even small, sunny corners of your property.
Why is this DIY trick a must-try? Because it democratizes watermelon growing! It empowers anyone, regardless of their living situation or gardening experience, to connect with nature and enjoy the unparalleled satisfaction of nurturing a plant from seed to fruit. Imagine the pride you’ll feel when you slice into a watermelon you’ve personally grown, knowing you overcame the limitations of space and embraced a creative solution. The taste? Unmatched. Store-bought watermelons simply can’t compare to the flavor of a vine-ripened fruit, bursting with sunshine and your own hard work.
Beyond the sheer joy of growing your own food, this method offers several practical advantages. You have complete control over the growing environment, allowing you to use organic fertilizers and pest control methods, ensuring a healthy and delicious harvest. Plus, it’s a fantastic way to recycle containers and reduce your environmental footprint. Think of all those unused buckets, barrels, or even repurposed kiddie pools that can be transformed into thriving watermelon habitats!
Ready to take your watermelon growing to the next level? Consider these variations:
* **Vertical Watermelon Growing:** Train your watermelon vines to climb a trellis or fence. This saves space and adds a beautiful, verdant touch to your outdoor area. Just be sure to provide adequate support for the heavy fruits as they develop.
* **Companion Planting:** Enhance your watermelon’s growth by planting beneficial companion plants in the same container. Marigolds deter pests, while basil improves flavor.
* **Different Watermelon Varieties:** Experiment with different watermelon varieties to find your favorite. Consider smaller, bush-type watermelons that are specifically bred for container growing. These varieties are perfect for limited spaces and often mature faster than larger varieties.
* Hydroponic Watermelon Growing: For the tech-savvy gardener, explore hydroponic watermelon cultivation. This method involves growing watermelons in a nutrient-rich water solution without soil, offering precise control over nutrient delivery and potentially faster growth rates.
We wholeheartedly encourage you to give this DIY watermelon growing trick a try. Don’t be intimidated by the prospect – it’s easier than you think! Start small, be patient, and enjoy the process. Remember to document your journey, take photos, and share your experiences with us and the wider gardening community. We’d love to hear about your successes, challenges, and any creative adaptations you make along the way. Your insights could inspire others to embark on their own watermelon-growing adventures. So, grab some seeds, find a sunny spot, and get ready to experience the magic of growing your own watermelons, no garden required! Let’s spread the joy of homegrown watermelons, one container at a time.
Frequently Asked Questions (FAQ)
Q: What is the best type of container to use for growing watermelons without a garden?
A: The ideal container should be large, sturdy, and have good drainage. A minimum of 20-gallon capacity is recommended, but larger is always better. Consider using plastic tubs, large pots, half-barrels, or even repurposed containers like kiddie pools. Ensure the container has drainage holes to prevent waterlogging, which can lead to root rot. Dark-colored containers can absorb more heat, which can be beneficial in cooler climates, but be mindful of overheating in hotter regions.
Q: What kind of soil should I use for growing watermelons in containers?
A: Watermelons thrive in well-draining, nutrient-rich soil. A good mix consists of equal parts potting soil, compost, and perlite or vermiculite. The potting soil provides a base, the compost adds essential nutrients, and the perlite or vermiculite improves drainage and aeration. Avoid using garden soil, as it can be too heavy and compact in containers. You can also add slow-release fertilizer to the soil mix to provide a steady supply of nutrients throughout the growing season.
Q: How much sunlight do watermelons need when grown in containers?
A: Watermelons are sun-loving plants and require at least 6-8 hours of direct sunlight per day to thrive. Choose a location that receives ample sunlight throughout the day. If you live in a particularly hot climate, providing some afternoon shade can prevent the plants from getting scorched. If you don’t have a naturally sunny spot, consider using grow lights to supplement the sunlight.
Q: How often should I water my container watermelons?
A: Watermelons need consistent moisture, especially during hot weather and fruit development. Water deeply whenever the top inch of soil feels dry to the touch. Avoid overwatering, as this can lead to root rot. The frequency of watering will depend on the weather, the size of the container, and the type of soil you’re using. Check the soil moisture regularly and adjust your watering schedule accordingly. During peak growing season, you may need to water daily or even twice a day.
Q: What kind of fertilizer should I use for container watermelons?
A: Watermelons are heavy feeders and require regular fertilization. Start with a balanced fertilizer (e.g., 10-10-10) during the early stages of growth. Once the plants start to flower, switch to a fertilizer that is higher in phosphorus and potassium to promote fruit development (e.g., 5-10-10). You can use either granular or liquid fertilizers, following the instructions on the product label. Fertilize every 2-3 weeks throughout the growing season. Consider using organic fertilizers like compost tea or fish emulsion for a more sustainable approach.
Q: How do I pollinate my watermelon flowers if I’m growing them indoors or on a balcony?
A: Watermelons have separate male and female flowers. If you’re growing them in an area where pollinators are scarce, you may need to hand-pollinate the flowers. To do this, use a small paintbrush to collect pollen from the male flowers (which have a long, thin stem) and transfer it to the female flowers (which have a small, immature watermelon at the base). Hand-pollinate in the morning, when the flowers are most receptive. You’ll know if pollination was successful if the small watermelon starts to grow.
Q: How do I know when my watermelon is ripe?
A: Determining when a watermelon is ripe can be tricky, but there are a few telltale signs to look for. The tendril closest to the fruit should be brown and dry. The spot where the watermelon rests on the ground (the “ground spot”) should be yellow or creamy in color. When you thump the watermelon, it should sound hollow and deep. These are general guidelines, and the best way to determine ripeness is to gain experience by growing watermelons yourself.
Q: How do I protect my container watermelons from pests and diseases?
A: Regularly inspect your plants for signs of pests or diseases. Common pests include aphids, squash bugs, and vine borers. You can control these pests with insecticidal soap, neem oil, or by hand-picking them off the plants. Common diseases include powdery mildew and fungal infections. Prevent these diseases by providing good air circulation, avoiding overwatering, and using a fungicide if necessary. Companion planting with marigolds can also help deter pests.
Q: Can I grow watermelons in hanging baskets?
A: While it’s possible to grow smaller, bush-type watermelon varieties in hanging baskets, it’s not ideal. The weight of the developing fruit can be too much for the basket to support. If you do attempt to grow watermelons in hanging baskets, choose a sturdy basket and provide ample support for the fruit as it grows.
Q: What are some good companion plants for watermelons grown in containers?
A: Good companion plants for watermelons include marigolds (which deter pests), basil (which improves flavor), nasturtiums (which attract beneficial insects), and radishes (which break up the soil). Avoid planting watermelons near potatoes or other members of the nightshade family, as they can compete for nutrients.
Q: How do I deal with blossom end rot in my container watermelons?
A: Blossom end rot is a common problem in watermelons, characterized by a dark, sunken spot on the bottom of the fruit. It’s caused by a calcium deficiency, which can be exacerbated by inconsistent watering. To prevent blossom end rot, ensure your soil is rich in calcium, water consistently, and avoid over-fertilizing with nitrogen. You can also add calcium supplements to the soil.
Q: Can I save seeds from my homegrown watermelons?
A: Yes, you can save seeds from your homegrown watermelons, but keep in mind that if you grew a hybrid variety, the seeds may not produce plants that are true to type. To save seeds, scoop them out of a ripe watermelon, rinse them thoroughly, and dry them on a paper towel for several days. Store the dried seeds in an airtight

Leave a Comment