
Vinegar and salt stain removal – sounds like a science experiment gone wrong, right? Actually, it’s your secret weapon for tackling those stubborn, unsightly stains that seem determined to ruin your favorite items! I’m sure you’ve been there, staring in dismay at a coffee spill on your rug or a mysterious mark on your beloved t-shirt, wondering if it’s destined for the trash.
For generations, resourceful homemakers have turned to simple, natural ingredients to solve everyday problems. Think of your grandmother’s cleaning rituals – often relying on the power of vinegar and salt long before fancy, chemical-laden products lined store shelves. This isn’t just about cleaning; it’s about connecting to a tradition of resourcefulness and sustainability.
Why do you need this vinegar and salt stain removal trick in your arsenal? Because life happens! Spills, splatters, and accidents are inevitable. But with this simple DIY solution, you can save money, avoid harsh chemicals, and breathe new life into stained items. I’m going to show you exactly how to harness the cleaning power of these two humble ingredients to banish stains and restore your belongings to their former glory. Get ready to say goodbye to stain-related stress and hello to a cleaner, happier home!
DIY Stain Removal Powerhouse: Vinegar and Salt to the Rescue!
Hey there, fellow DIY enthusiasts! Let’s face it, life is messy. And sometimes, that mess ends up on our favorite clothes, carpets, or furniture. But don’t despair! Before you reach for those harsh chemical cleaners, let me introduce you to a simple, effective, and eco-friendly solution: vinegar and salt. This dynamic duo can tackle a surprising number of stains, and I’m going to walk you through exactly how to use them.
Understanding the Power of Vinegar and Salt
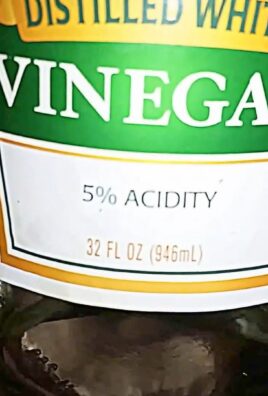
Vinegar, specifically white distilled vinegar, is a mild acid. This acidity helps to break down stains and dissolve mineral deposits. It’s also a natural deodorizer, which is a bonus! Salt, on the other hand, acts as a gentle abrasive and absorbent. It helps to lift stains away from surfaces and prevent them from setting. Together, they create a powerful stain-fighting team.
General Guidelines Before You Start
Before we dive into specific stain types, here are a few general rules to keep in mind:
* Test in an Inconspicuous Area: This is crucial! Always test the vinegar and salt mixture on a hidden area of the fabric or surface first. This will ensure that it doesn’t cause any discoloration or damage.
* Act Fast: The sooner you treat a stain, the better your chances of removing it completely. Fresh stains are always easier to tackle than old, set-in ones.
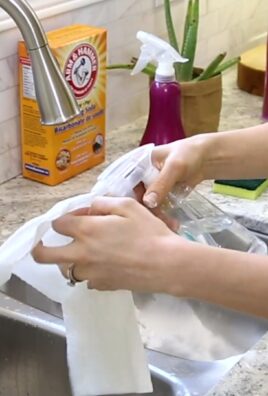
* Blot, Don’t Rub: When treating stains, always blot the area with a clean cloth or paper towel. Rubbing can spread the stain and damage the fabric.
* Use White Distilled Vinegar: Avoid using other types of vinegar, such as apple cider vinegar or balsamic vinegar, as they can contain pigments that could stain your items.
* Rinse Thoroughly: After treating the stain, rinse the area thoroughly with clean water to remove any vinegar or salt residue.
* Air Dry: Allow the treated area to air dry completely. Avoid using a dryer, as heat can set the stain if any residue remains.
Tackling Common Stains with Vinegar and Salt
Now, let’s get to the good stuff! Here’s how to use vinegar and salt to remove some of the most common household stains:
1. Removing Coffee Stains
Coffee stains are a morning menace! Here’s how to banish them:
Materials You’ll Need:
* White distilled vinegar
* Salt
* Clean cloth or sponge
* Spray bottle (optional)
Step-by-Step Instructions:
1. Blot the Stain: If the coffee stain is fresh, blot up as much of the liquid as possible with a clean cloth or paper towel.
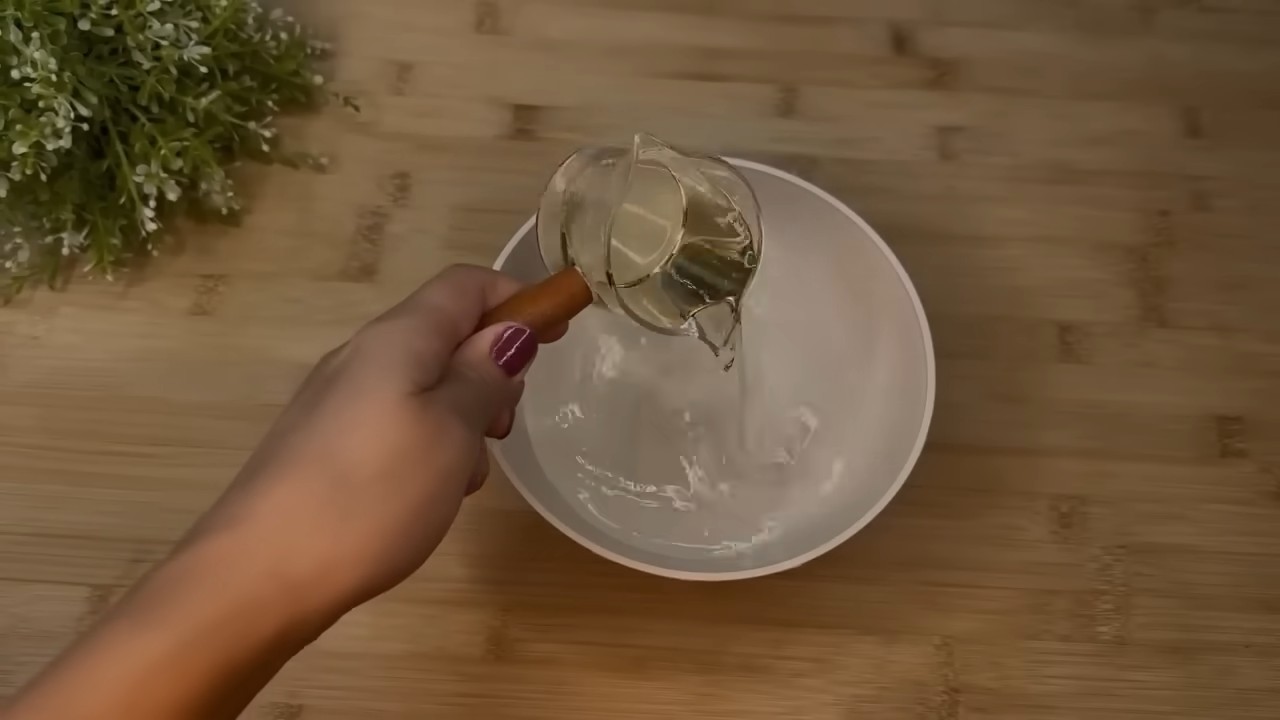
2. Prepare the Solution: Mix equal parts white distilled vinegar and water in a bowl or spray bottle.
3. Apply the Solution: Apply the vinegar solution to the coffee stain. You can either spray it on or dab it with a clean cloth.
4. Sprinkle with Salt: Generously sprinkle salt over the stained area. The salt will help to absorb the remaining coffee and lift the stain.
5. Let it Sit: Allow the salt and vinegar mixture to sit on the stain for at least 30 minutes, or even longer for stubborn stains. I sometimes leave it overnight!
6. Scrub Gently: After the soaking time, gently scrub the area with a clean, damp cloth or sponge.
7. Rinse Thoroughly: Rinse the treated area thoroughly with clean water to remove any vinegar and salt residue.
8. Air Dry: Allow the area to air dry completely. If the stain persists, repeat the process.
2. Fighting Red Wine Stains
Oh, red wine! So delicious, but so unforgiving when spilled. Here’s how to minimize the damage:
Materials You’ll Need:
* White distilled vinegar
* Salt (lots of it!)
* Clean cloth or paper towels
Step-by-Step Instructions:
1. Act Fast!: The key to removing red wine stains is to act quickly. The longer the wine sits, the harder it will be to remove.
2. Blot, Blot, Blot: Immediately blot up as much of the spilled wine as possible with clean paper towels or a cloth. Don’t rub!
3. Cover with Salt: Generously cover the entire red wine stain with a thick layer of salt. The salt will absorb the wine and help to lift the stain.
4. Wait Patiently: Allow the salt to sit on the stain for several hours, or even overnight. You’ll notice that the salt will turn pink as it absorbs the wine.
5. Vacuum or Brush Away the Salt: Once the salt has absorbed as much wine as possible, vacuum it up or brush it away.
6. Vinegar Rinse (Optional): If a faint stain remains, you can try rinsing the area with a solution of equal parts white distilled vinegar and water. Blot the area with the solution and then rinse with clean water.
7. Air Dry: Allow the area to air dry completely.
3. Eradicating Grass Stains
Grass stains are a common problem, especially if you have kids or pets. Here’s how to tackle them:
Materials You’ll Need:
* White distilled vinegar
* Salt
* Old toothbrush or scrub brush
* Clean cloth
Step-by-Step Instructions:
1. Pre-Treat with Vinegar: Apply white distilled vinegar directly to the grass stain. Let it sit for about 15-30 minutes.
2. Make a Paste: Mix a small amount of salt with a little bit of water to create a paste.
3. Apply the Paste: Apply the salt paste to the grass stain.
4. Scrub Gently: Use an old toothbrush or scrub brush to gently scrub the paste into the stain.
5. Rinse Thoroughly: Rinse the treated area thoroughly with clean water.
6. Launder as Usual: Launder the garment as usual, following the care instructions on the label.
4. Removing Mildew Stains
Mildew can be a real nuisance, especially in damp areas like bathrooms. Here’s how to combat it with vinegar and salt:
Materials You’ll Need:
* White distilled vinegar
* Salt
* Spray bottle
* Scrub brush or sponge
* Clean cloth
Step-by-Step Instructions:
1. Spray with Vinegar: Fill a spray bottle with white distilled vinegar and spray the mildewed area thoroughly.
2. Sprinkle with Salt: Sprinkle salt over the vinegar-soaked area.
3. Let it Sit: Allow the vinegar and salt mixture to sit on the mildew for at least 30 minutes, or longer for heavy mildew.
4. Scrub Vigorously: Use a scrub brush or sponge to vigorously scrub the mildewed area.
5. Rinse Thoroughly: Rinse the treated area thoroughly with clean water.
6. Dry Completely: Dry the area completely with a clean cloth.
5. Dealing with Rust Stains
Rust stains can be tough, but vinegar and salt can help!
Materials You’ll Need:
* White distilled vinegar
* Salt
* Clean cloth or sponge
Step-by-Step Instructions:
1. Apply Vinegar: Pour white distilled vinegar directly onto the rust stain.
2. Sprinkle with Salt: Sprinkle a generous amount of salt over the vinegar-soaked area.
3. Let it Sit: Allow the vinegar and salt mixture to sit on the rust stain for at least 30 minutes, or longer for stubborn stains. I’ve left it for a few hours before!
4. Scrub Gently: Gently scrub the area with a clean cloth or sponge.
5. Rinse Thoroughly: Rinse the treated area thoroughly with clean water.
6. Air Dry: Allow the area to air dry completely. You may need to repeat this process several times for older or more severe rust stains.
6. Removing Sweat Stains
Sweat stains, especially in the underarms of shirts, can be embarrassing. Here’s how to tackle them:
Materials You’ll Need:
* White distilled vinegar
* Salt
* Water
* Spray bottle or bowl
* Clean cloth
Step-by-Step Instructions:
1. Prepare the Solution: Mix equal parts white distilled vinegar and water in a spray bottle or bowl.
2. Apply to Stain: Spray or dab the vinegar solution onto the sweat stain.
3. Sprinkle with Salt: Sprinkle a generous amount of salt over the treated area.
4. Let it Sit: Allow the mixture to sit for at least

Conclusion
So, there you have it! This simple yet incredibly effective DIY trick using vinegar and salt offers a powerful and natural solution for tackling stubborn stains. Forget harsh chemicals and expensive stain removers; with just two pantry staples, you can restore your fabrics and surfaces to their former glory. The beauty of this method lies not only in its simplicity and affordability but also in its versatility. It’s a must-try for anyone looking for an eco-friendly and effective way to combat everyday stains.
This isn’t just about removing stains; it’s about embracing a more sustainable and resourceful approach to home care. By utilizing the natural cleaning power of vinegar and salt, you’re reducing your reliance on potentially harmful chemicals and minimizing your environmental impact. Plus, you’ll be amazed at how much money you can save by ditching those pricey commercial stain removers.
Why is this DIY stain removal method a must-try? Because it’s effective, affordable, eco-friendly, and incredibly easy to implement. It’s a win-win situation for you, your wallet, and the planet.
Variations and Suggestions:
* For delicate fabrics: Dilute the vinegar solution further with water to prevent any potential damage. Always test on an inconspicuous area first.
* For set-in stains: Allow the vinegar and salt paste to sit on the stain for a longer period, even overnight, before rinsing.
* For colored fabrics: While vinegar is generally safe for colored fabrics, it’s always wise to test a small, hidden area first to ensure colorfastness.
* Boosting power: Add a squeeze of lemon juice to the mixture for extra stain-fighting power, especially on light-colored fabrics.
* Pre-treatment: Use the vinegar and salt solution as a pre-treatment before washing clothes to tackle tough stains before they even hit the washing machine.
We are confident that this vinegar and salt stain removal method will become your go-to solution for tackling all sorts of stains around your home. It’s a game-changer that will save you time, money, and frustration.
Now it’s your turn! We encourage you to try this DIY trick and experience the amazing results for yourself. Don’t just take our word for it; see the stain-removing magic of vinegar and salt firsthand.
And most importantly, we want to hear about your experience! Share your before-and-after photos, tips, and variations in the comments below. Let’s create a community of stain-fighting experts and help each other discover even more ways to utilize the power of vinegar and salt. Your insights could be invaluable to others struggling with stubborn stains. Let us know what kind of stains you tackled, what fabrics you used it on, and any tweaks you made to the method. Together, we can unlock the full potential of this simple yet powerful stain removal solution.
Frequently Asked Questions (FAQ)
Q: What types of stains does this vinegar and salt mixture work best on?
A: This DIY stain remover is effective on a wide range of stains, including but not limited to: food stains (like coffee, tea, wine, and sauces), dirt and mud stains, grass stains, sweat stains, and even some types of ink stains. However, its effectiveness can vary depending on the age and severity of the stain, as well as the type of fabric or surface. For particularly stubborn or old stains, multiple applications or a longer soaking time may be necessary. It’s always a good idea to test the solution on a hidden area first to ensure it doesn’t damage the material.
Q: Is this method safe for all types of fabrics?
A: While vinegar and salt are generally considered safe for most fabrics, it’s crucial to exercise caution, especially with delicate materials like silk, wool, or rayon. The acidity of vinegar can potentially damage these fabrics if used undiluted or for prolonged periods. Always test the solution on an inconspicuous area of the fabric before applying it to the entire stain. For delicate fabrics, consider diluting the vinegar solution with water or using a gentler alternative stain removal method. If you’re unsure about the fabric type, it’s best to consult the garment’s care label or seek professional cleaning advice.
Q: How long should I leave the vinegar and salt mixture on the stain?
A: The ideal soaking time depends on the severity and type of stain. For fresh, light stains, 15-30 minutes may be sufficient. For more stubborn or set-in stains, you can leave the mixture on for several hours or even overnight. However, it’s essential to monitor the stain and the fabric regularly to ensure no damage occurs. If you notice any discoloration or weakening of the fabric, rinse the solution immediately. For delicate fabrics, it’s best to start with a shorter soaking time and gradually increase it as needed.
Q: Can I use this method on carpets and upholstery?
A: Yes, the vinegar and salt mixture can be used on carpets and upholstery, but with some precautions. First, always test the solution on a hidden area to ensure it doesn’t damage or discolor the material. When applying the mixture, avoid oversaturating the carpet or upholstery, as this can lead to mold growth or water damage. Use a clean cloth or sponge to gently blot the stain, working from the outside in. After applying the mixture, rinse the area thoroughly with clean water and blot dry with a clean towel. You can also use a wet/dry vacuum to remove excess moisture. Ensure the area is completely dry to prevent mold or mildew.
Q: What if the stain doesn’t come out after the first application?
A: Don’t give up! Stubborn stains may require multiple applications of the vinegar and salt mixture. You can also try increasing the concentration of vinegar or extending the soaking time. Another option is to add a small amount of baking soda to the mixture, which can help to lift the stain. If the stain persists after several attempts, it may be necessary to seek professional cleaning assistance. Remember to always test any new cleaning solution on a hidden area first.
Q: Does the type of vinegar matter? Can I use white wine vinegar or apple cider vinegar?
A: White distilled vinegar is generally recommended for stain removal due to its clear color and higher acidity. However, you can use other types of vinegar, such as white wine vinegar or apple cider vinegar, as long as they are clear and unflavored. Avoid using colored vinegars, such as balsamic vinegar, as they can potentially stain the fabric. When using alternative vinegars, it’s always a good idea to test them on a hidden area first to ensure they don’t cause any discoloration.
Q: Will the vinegar smell linger after using this method?
A: Vinegar does have a distinct smell, but it typically dissipates quickly after the area is rinsed and dried. To minimize the vinegar smell, you can add a few drops of essential oil, such as lavender or lemon, to the mixture. You can also open windows or use a fan to ventilate the area. If the vinegar smell persists, you can try sprinkling baking soda on the area and vacuuming it up after a few hours.
Q: Can I use this method on old or dried stains?
A: While this method is most effective on fresh stains, it can also work on old or dried stains, but it may require more effort and patience. Before applying the vinegar and salt mixture, try pre-treating the stain by soaking it in warm water for a few minutes. You can also gently scrub the stain with a soft brush to loosen the dried particles. After applying the mixture, allow it to sit on the stain for a longer period, even overnight. You may need to repeat the process several times to completely remove the stain.
Q: Is there anything I should avoid using this method on?
A: Avoid using this method on materials that are known to be sensitive to acids, such as marble, limestone, or other natural stones. The acidity of vinegar can etch or damage these surfaces. Also, avoid using this method on fabrics that are labeled as “dry clean only,” as water and vinegar can potentially damage them. Always consult the care label before attempting to clean any garment or surface.

Leave a Comment