
Tomato sack gardening: Ever dreamed of harvesting juicy, sun-ripened tomatoes right outside your doorstep, even if you don’t have a sprawling backyard? I know I have! For centuries, humans have cultivated tomatoes, tracing back to their origins in South America, where the Aztecs and Incas first enjoyed these vibrant fruits. Now, you can join this rich history with a modern twist – using a simple sack!
This DIY guide unlocks the secrets to successful tomato sack gardening, a fantastic solution for urban dwellers, apartment residents, or anyone with limited space. Forget tilling soil and building raised beds; we’re going vertical! Imagine the satisfaction of nurturing your own tomato plants from tiny seedlings to bountiful producers, all within the confines of a repurposed sack.
Why is this trick a game-changer? Because it’s incredibly space-efficient, cost-effective, and surprisingly easy! Plus, it’s a fantastic way to recycle and reduce waste. In this article, I’ll walk you through every step, from choosing the right sack and soil to planting, watering, and harvesting your delicious, homegrown tomatoes. Get ready to transform your balcony, patio, or even a sunny windowsill into a thriving tomato garden!
DIY Tomato Sack Gardening: Grow a Bumper Crop in a Bag!
Hey there, fellow gardening enthusiasts! I’m so excited to share one of my favorite gardening hacks with you: tomato sack gardening! It’s a fantastic way to grow delicious, juicy tomatoes, even if you’re short on space or have less-than-ideal soil. Trust me, once you try this, you’ll be hooked!
What is Tomato Sack Gardening?
Tomato sack gardening, also known as bag gardening, is a simple and effective method of growing tomatoes (and other vegetables!) in large bags filled with soil. It’s perfect for patios, balconies, small yards, or anywhere you want to add a touch of green. The bags provide excellent drainage and aeration, and they warm up quickly in the spring, giving your tomato plants a head start. Plus, it’s a super affordable and easy DIY project!
Why I Love Tomato Sack Gardening
* Space-Saving: Ideal for small spaces like balconies, patios, or decks.
* Easy to Move: You can easily relocate your tomato plants to follow the sun or protect them from harsh weather.
* Improved Drainage: The bags provide excellent drainage, preventing root rot.
* Warmer Soil: The dark bags absorb heat, warming the soil and promoting faster growth.
* Cost-Effective: It’s a budget-friendly way to grow your own tomatoes.
* Less Weeding: The enclosed environment reduces weed growth.
* Fun and Rewarding: There’s nothing quite like harvesting your own homegrown tomatoes!
Materials You’ll Need
Before we dive into the step-by-step instructions, let’s gather all the necessary materials. Don’t worry, you probably already have some of these lying around!
* Large, Heavy-Duty Bags: I recommend using heavy-duty polypropylene bags, like those used for animal feed or potting soil. These are durable and can withstand the weight of the soil and plants. Aim for bags that are at least 24 inches wide and 36 inches tall. You can often find these at farm supply stores or garden centers. Alternatively, you can use burlap sacks for a more rustic look, but they may not last as long.
* Potting Mix: This is crucial! Don’t use garden soil directly in the bags, as it can become compacted and doesn’t drain well. Instead, opt for a high-quality potting mix specifically formulated for containers. I like to use a mix that contains peat moss, perlite, and vermiculite for optimal drainage and aeration.
* Compost: Compost is like gold for your tomato plants! It adds essential nutrients to the soil and improves its structure. I usually mix in about 25% compost with my potting mix. You can use homemade compost or purchase it from a garden center.
* Slow-Release Fertilizer: To ensure your tomato plants get a steady supply of nutrients throughout the growing season, I recommend adding a slow-release fertilizer to the potting mix. Look for a fertilizer specifically formulated for tomatoes, with a balanced NPK ratio (nitrogen, phosphorus, and potassium).
* Tomato Seedlings: Choose healthy tomato seedlings from a reputable nursery or start your own from seeds. Select varieties that are well-suited to your climate and growing conditions. Determinate varieties (bush tomatoes) are generally better suited for container gardening than indeterminate varieties (vining tomatoes), but you can grow either with proper support.
* Watering Can or Hose: You’ll need a way to water your tomato plants regularly.
* Scissors or Utility Knife: For cutting the bags and creating drainage holes.
* Stakes or Tomato Cages: Tomato plants, especially indeterminate varieties, need support to prevent them from sprawling and breaking. Use sturdy stakes or tomato cages to provide support as they grow.
* Gloves: To protect your hands from dirt and fertilizer.
Step-by-Step Instructions: Planting Your Tomato Sack
Alright, let’s get our hands dirty! Follow these steps to create your own thriving tomato sack garden.
1. Prepare the Bags:
* First, lay the bags flat on the ground.
* Using scissors or a utility knife, carefully cut several drainage holes in the bottom of each bag. This is super important to prevent waterlogging. I usually make about 6-8 holes, spaced evenly apart.
* Next, roll down the top edges of the bags a few times to create a sturdy rim. This will make it easier to fill the bags with soil and will also provide extra support.
2. Mix the Soil:
* In a large container or wheelbarrow, combine the potting mix, compost, and slow-release fertilizer. I usually use a ratio of 75% potting mix, 25% compost, and follow the instructions on the fertilizer package for the correct amount.
* Mix everything thoroughly until it’s well combined.
3. Fill the Bags:
* Now, carefully fill the bags with the soil mixture, leaving about 6-8 inches of space at the top. Don’t pack the soil down too tightly, as this can restrict drainage.
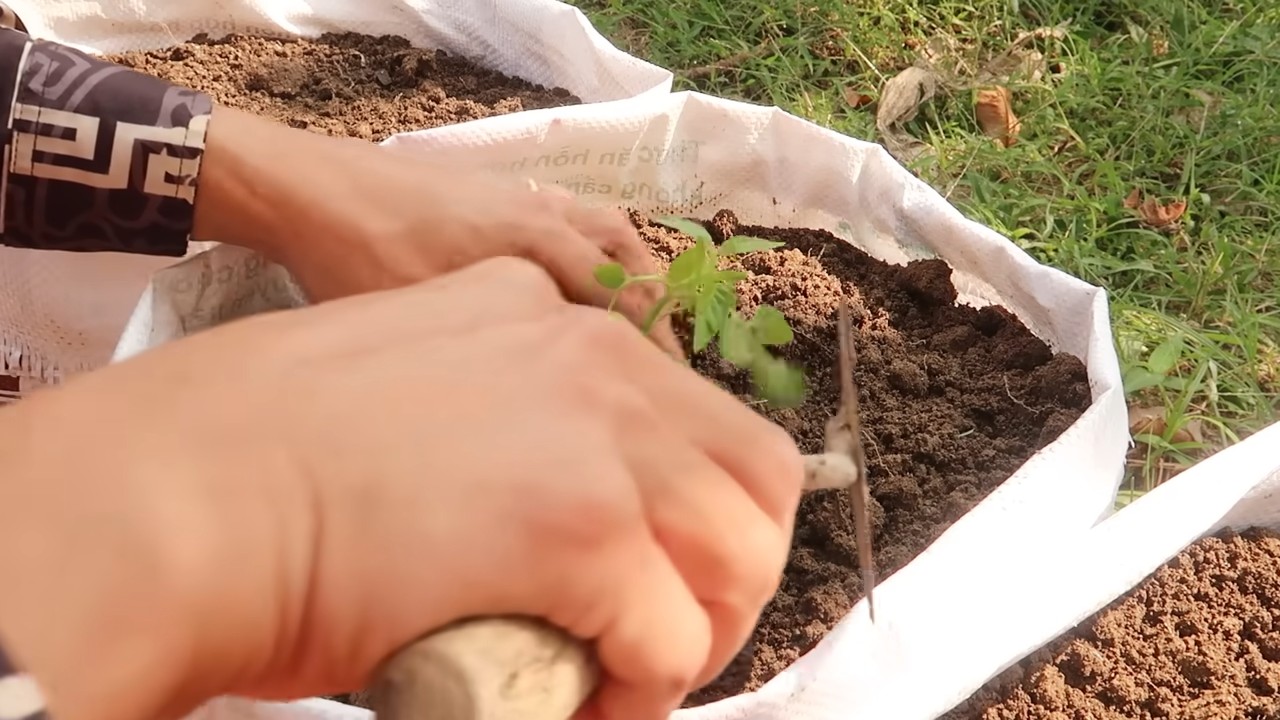
4. Plant the Tomato Seedlings:
* Gently remove the tomato seedlings from their containers. If the roots are tightly bound, gently loosen them with your fingers.
* Dig a hole in the center of each bag, deep enough to accommodate the root ball of the seedling.
* Place the seedling in the hole and backfill with soil, gently firming it around the base of the plant.
* Water the seedlings thoroughly after planting.
5. Add Support:
* Insert a stake or tomato cage into the bag, next to the tomato plant. Make sure the support is firmly anchored in the soil.
* As the tomato plant grows, tie it to the stake or guide it through the tomato cage to provide support.
6. Watering and Fertilizing:
* Water your tomato plants regularly, especially during hot, dry weather. Check the soil moisture by sticking your finger into the soil. If the top inch feels dry, it’s time to water.
* Water deeply, until the water drains out of the drainage holes at the bottom of the bag.
* In addition to the slow-release fertilizer, you can also supplement with a liquid fertilizer every few weeks. Follow the instructions on the fertilizer package for the correct dosage.
7. Sunlight:
* Tomato plants need at least 6-8 hours of sunlight per day to thrive. Place your tomato sacks in a sunny location where they will receive plenty of direct sunlight.
* If you live in a particularly hot climate, you may need to provide some afternoon shade to prevent the plants from overheating.
8. Pruning:
* Pruning your tomato plants can help improve air circulation and encourage fruit production.
* Remove any suckers (small shoots that grow between the main stem and the branches) to direct the plant’s energy towards fruit development.
* Also, remove any yellowing or diseased leaves.
9. Pest and Disease Control:
* Keep an eye out for common tomato pests and diseases, such as aphids, whiteflies, and blight.
* Inspect your plants regularly and take action promptly if you notice any problems.
* You can use organic pest control methods, such as insecticidal soap or neem oil, to control pests.
* To prevent diseases, ensure good air circulation and avoid overwatering.
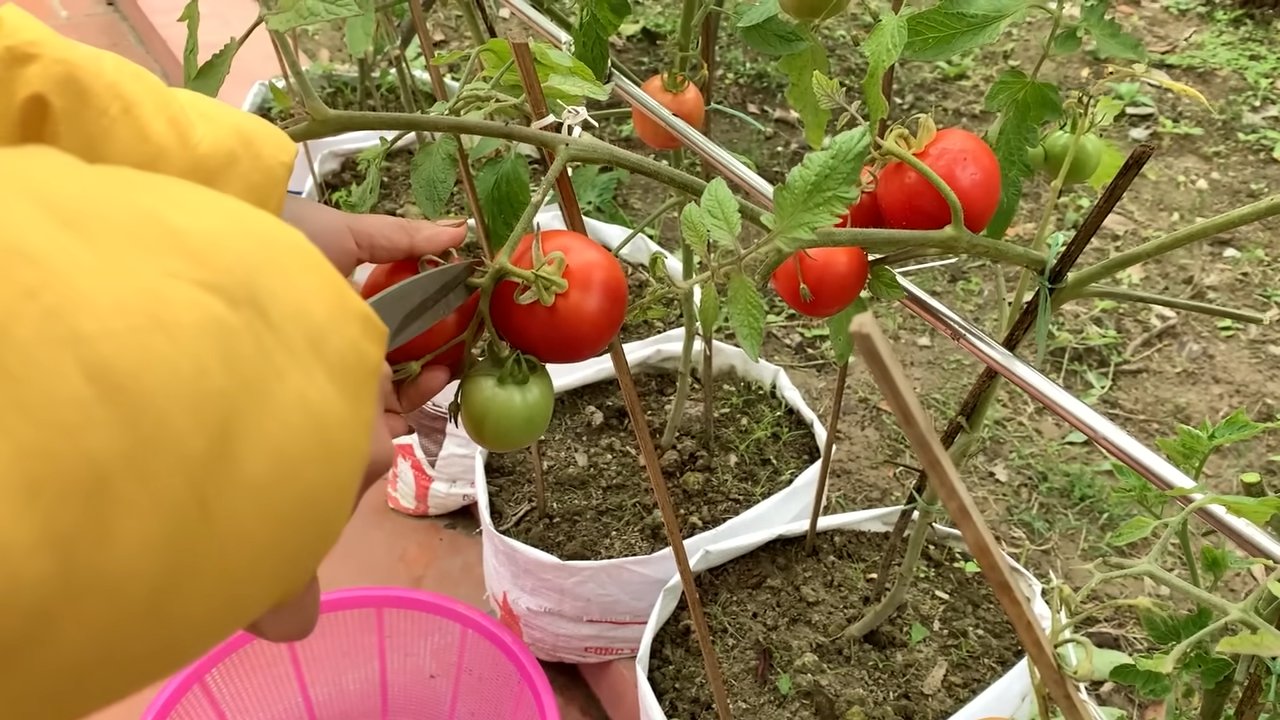
10. Harvesting:
* The moment we’ve all been waiting for! Your tomatoes will be ready to harvest when they are fully colored and slightly soft to the touch.
* Gently twist the tomatoes off the vine, being careful not to damage the plant.
* Enjoy your homegrown tomatoes in salads, sandwiches, sauces, or simply eat them fresh off the vine!
Troubleshooting Tips
Even with the best planning, sometimes things don’t go exactly as expected. Here are a few common issues you might encounter and how to address them:
* Yellowing Leaves: This could be a sign of overwatering, underwatering, nutrient deficiency, or disease. Check the soil moisture and adjust your watering accordingly. If the problem persists, try fertilizing with a balanced fertilizer.
* Blossom End Rot: This is a common problem in tomatoes, characterized by a dark, leathery spot on the bottom of the fruit. It’s usually caused by a calcium deficiency. To prevent blossom end rot, ensure your soil is well-drained and add calcium to the soil by incorporating bone meal or crushed eggshells.
* Pests: Aphids, whiteflies, and other pests can damage your tomato plants. Use organic pest control methods, such as insecticidal soap or neem oil, to control pests.
* Slow Growth: If your tomato plants are growing slowly, it could be due to lack of sunlight, poor soil, or nutrient deficiency. Make sure your plants are getting enough
Conclusion
So, there you have it! Tomato sack gardening: a simple, space-saving, and incredibly rewarding way to grow your own delicious tomatoes. We’ve walked you through the process, highlighting the ease and accessibility of this method, even for those with limited gardening experience or space. But why is this DIY trick a must-try?
Firstly, it’s the sheer efficiency. Forget tilling vast plots of land or investing in expensive raised beds. Tomato sack gardening allows you to maximize your yield in a minimal footprint. Perfect for balconies, patios, or even small urban gardens, it brings the joy of homegrown tomatoes to everyone.
Secondly, it’s the control you gain over your growing environment. By using a high-quality potting mix, you ensure your tomatoes receive the nutrients they need, free from the weeds and pests that often plague traditional gardens. This translates to healthier plants and a more abundant harvest.
Thirdly, it’s the cost-effectiveness. Compared to purchasing pre-grown tomato plants or investing in elaborate gardening setups, tomato sack gardening is a budget-friendly option. You can repurpose materials, start from seeds, and enjoy fresh, organic tomatoes without breaking the bank.
But the beauty of tomato sack gardening lies in its adaptability. Feel free to experiment with different tomato varieties. Cherry tomatoes, Roma tomatoes, beefsteak tomatoes – the choice is yours! Consider adding companion plants like basil or marigolds to your sack to deter pests and enhance the flavor of your tomatoes. You could even try a vertical tomato sack garden by hanging multiple sacks from a sturdy structure, creating a stunning and productive green wall.
Don’t be afraid to get creative! Try using different types of sacks, such as burlap sacks for a rustic look or colorful woven bags for a vibrant display. Just ensure the sack is sturdy enough to hold the weight of the soil and plants and has adequate drainage.
We’ve provided you with the knowledge and inspiration to embark on your own tomato sack gardening adventure. Now, it’s time to get your hands dirty! Gather your supplies, follow our simple steps, and prepare to be amazed by the abundance of fresh, juicy tomatoes you can grow in a single sack.
We are confident that you will find this method to be both enjoyable and fruitful. But the real magic happens when you share your experiences with others.
We encourage you to try tomato sack gardening and share your results with us! Post photos of your thriving tomato sacks on social media using #TomatoSackGardening and tag us so we can see your amazing creations. Share your tips, tricks, and variations in the comments section below. Let’s build a community of tomato sack gardening enthusiasts and inspire others to embrace this simple and sustainable way to grow their own food.
Happy gardening!
Frequently Asked Questions (FAQ)
What kind of sack should I use for tomato sack gardening?
The ideal sack for tomato sack gardening should be durable, breathable, and have good drainage. Burlap sacks are a popular choice due to their natural breathability and rustic aesthetic. Woven polypropylene sacks, often used for animal feed or fertilizer, are also a good option as they are strong and readily available. Avoid using plastic bags, as they don’t allow for proper drainage and can lead to root rot. Ensure the sack is large enough to accommodate the mature size of your chosen tomato variety, typically around 20-25 gallons. Before using any sack, thoroughly clean it to remove any residual chemicals or contaminants.
What type of soil is best for tomato sack gardening?
A high-quality potting mix is crucial for successful tomato sack gardening. Avoid using garden soil, as it can be too heavy and compact, hindering drainage and root growth. Opt for a well-draining potting mix specifically formulated for vegetables. You can also create your own mix by combining equal parts of peat moss, perlite, and compost. The compost will provide essential nutrients, while the peat moss and perlite will improve drainage and aeration. Consider adding a slow-release fertilizer to the mix to provide a steady supply of nutrients throughout the growing season.
How often should I water my tomato sack garden?
Watering frequency depends on several factors, including the weather, the size of the plant, and the type of sack you’re using. Generally, you’ll need to water your tomato sack garden more frequently than a traditional garden, as the soil in the sack tends to dry out faster. Check the soil moisture level daily by sticking your finger about an inch into the soil. If it feels dry, it’s time to water. Water deeply until water drains out of the bottom of the sack. Avoid overwatering, as this can lead to root rot. During hot, sunny weather, you may need to water twice a day.
How do I fertilize my tomato sack garden?
Tomatoes are heavy feeders and require regular fertilization to produce a bountiful harvest. In addition to incorporating a slow-release fertilizer into the potting mix at planting time, you’ll need to supplement with liquid fertilizer throughout the growing season. Use a balanced fertilizer specifically formulated for tomatoes, following the instructions on the label. Fertilize every 2-3 weeks, or as needed based on the plant’s growth and appearance. Look for signs of nutrient deficiencies, such as yellowing leaves or stunted growth, and adjust your fertilization schedule accordingly.
How do I support my tomato plants in a sack garden?
As your tomato plants grow, they will need support to prevent them from toppling over. You can use tomato cages, stakes, or trellises to provide support. For determinate tomato varieties, which grow to a fixed size, a sturdy tomato cage is usually sufficient. For indeterminate varieties, which continue to grow and produce fruit throughout the season, a taller stake or trellis is recommended. Insert the support structure into the sack when you plant the tomato seedling to avoid damaging the roots later. Tie the tomato stems to the support structure as they grow, using soft twine or plant ties.
What are some common pests and diseases that affect tomato sack gardens, and how can I prevent them?
Tomato sack gardens are susceptible to the same pests and diseases as traditional tomato gardens. Common pests include aphids, whiteflies, and tomato hornworms. Common diseases include early blight, late blight, and blossom end rot. To prevent pests and diseases, choose disease-resistant tomato varieties, practice good sanitation, and monitor your plants regularly. Remove any infected leaves or plants immediately. Use organic pest control methods, such as insecticidal soap or neem oil, to control pests. Ensure proper drainage and avoid overwatering to prevent fungal diseases. For blossom end rot, ensure consistent watering and add calcium to the soil.
Can I grow other vegetables in a sack garden besides tomatoes?
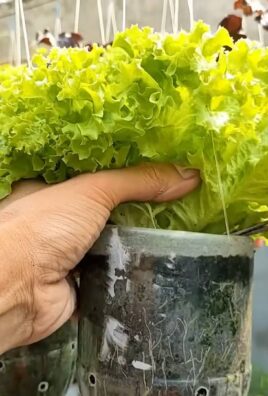
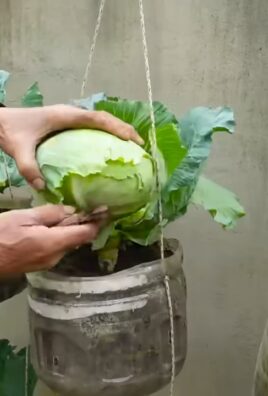
Yes, you can grow other vegetables in a sack garden besides tomatoes. Peppers, eggplants, cucumbers, and herbs are all good candidates for sack gardening. Choose vegetables that have similar growing requirements as tomatoes, such as full sun and well-draining soil. Be sure to select varieties that are appropriate for the size of the sack. Avoid overcrowding the sack, as this can lead to stunted growth and reduced yields.
How do I overwinter my tomato plants in a sack garden?
In regions with mild winters, you may be able to overwinter your tomato plants in a sack garden. Before the first frost, prune back the plants and move them to a sheltered location, such as a garage or greenhouse. Water sparingly throughout the winter, allowing the soil to dry out slightly between waterings. In the spring, gradually acclimate the plants to outdoor conditions and resume regular watering and fertilizing. Keep in mind that overwintered tomato plants may not produce as abundantly as new plants. In areas with harsh winters, it’s best to start with new tomato seedlings each year.

Leave a Comment