
Tomato Growing Secrets unlocked! Imagine biting into a sun-warmed, juicy tomato, bursting with flavor, that you grew yourself. Sounds idyllic, right? But let’s be honest, sometimes growing tomatoes can feel more like a battle against pests, diseases, and unpredictable weather than a relaxing hobby. Don’t worry, I’ve been there!
For centuries, tomatoes have been a staple in cuisines around the world, from the vibrant sauces of Italy to the refreshing salsas of Mexico. Their journey from the Andes Mountains to our gardens is a testament to their adaptability and deliciousness. But even with all that history, getting a truly bountiful harvest can still feel like a mystery.
That’s why I’m so excited to share these tomato growing secrets with you. This isn’t just another gardening guide; it’s a collection of tried-and-true DIY tricks and hacks that will help you overcome common challenges and achieve tomato-growing success, no matter your experience level. Whether you’re dealing with blossom end rot, struggling with pests, or simply want to maximize your yield, these tips will empower you to grow the best tomatoes you’ve ever tasted. Let’s get started and transform your garden into a tomato paradise!
Unlock Tomato Growing Secrets: From Seed to Salsa!
Hey fellow garden enthusiasts! I’m super excited to share my tried-and-true methods for growing the juiciest, most flavorful tomatoes you’ve ever tasted. Forget those bland, store-bought imposters – we’re talking homegrown goodness that will elevate your salads, sauces, and sandwiches to a whole new level. This isn’t just about throwing some seeds in the ground; it’s about understanding the needs of your tomato plants and giving them the royal treatment they deserve. So, grab your gardening gloves, and let’s dive in!
Choosing the Right Tomato Variety
Before we even think about planting, we need to pick the perfect tomato variety for our needs and climate. This is a crucial step, so don’t rush it!
* Consider your climate: Are you in a hot, humid area or a cooler, drier one? Some varieties thrive in heat, while others prefer cooler temperatures. Look for varieties specifically bred for your region.
* Think about your space: Do you have a sprawling garden or just a small patio? Determinate varieties are bush-type tomatoes that grow to a certain size and then stop, making them ideal for containers and smaller spaces. Indeterminate varieties, on the other hand, keep growing and producing fruit throughout the season, requiring staking or caging.
* Decide on your purpose: Are you planning on making sauces, slicing for sandwiches, or snacking on cherry tomatoes? Different varieties are better suited for different uses. Roma tomatoes are great for sauces, while beefsteak tomatoes are perfect for slicing. Cherry tomatoes are, well, perfect for snacking!
* Disease resistance is key: Look for varieties that are resistant to common tomato diseases like Fusarium wilt, Verticillium wilt, and nematodes. This will save you a lot of headaches (and heartache) down the road. You’ll usually see codes like “VFNT” after the tomato name, indicating resistance to these diseases.
Some of my personal favorites include:
* ‘Early Girl’: A reliable early producer, perfect for cooler climates.
* ‘Roma’: Excellent for making sauces and pastes.
* ‘Beefsteak’: Huge, juicy tomatoes ideal for slicing.
* ‘Sungold’: Incredibly sweet and flavorful cherry tomatoes.
Starting Your Tomato Seeds Indoors (Optional, but Recommended)
Starting your tomato seeds indoors gives you a head start on the growing season, especially if you live in a region with a short growing season. I highly recommend it!
* When to start: About 6-8 weeks before the last expected frost in your area.
* What you’ll need:
* Seed starting trays or small pots
* Seed starting mix (not regular potting soil!)
* Tomato seeds
* A spray bottle
* A heat mat (optional, but helpful)
* A grow light (essential if you don’t have a very sunny window)
Step-by-Step Instructions:
1. Prepare your seed starting trays: Fill each cell or pot with seed starting mix. Gently tap the tray to settle the mix.
2. Sow the seeds: Make a small indentation (about 1/4 inch deep) in the center of each cell. Place 2-3 seeds in each indentation. This increases your chances of at least one seed germinating.
3. Cover the seeds: Gently cover the seeds with seed starting mix.
4. Water gently: Use a spray bottle to moisten the soil. Avoid overwatering, which can lead to damping off (a fungal disease that kills seedlings).
5. Provide warmth: Place the trays on a heat mat (if using) and cover them with a humidity dome or plastic wrap to create a humid environment.
6. Provide light: Place the trays under a grow light or in a very sunny window. If using a grow light, keep it a few inches above the seedlings.
7. Monitor and water: Check the soil moisture daily and water as needed to keep it consistently moist but not soggy.
8. Remove the humidity dome: Once the seedlings emerge (usually within 5-10 days), remove the humidity dome.
9. Thin the seedlings: Once the seedlings have their first true leaves (the leaves that appear after the initial seed leaves), thin them to one seedling per cell. Choose the strongest seedling and snip off the others at the soil line. Don’t pull them out, as this can disturb the roots of the remaining seedling.
10. Harden off the seedlings: About a week before you plan to transplant the seedlings outdoors, you need to “harden them off.” This means gradually exposing them to outdoor conditions to acclimate them to the sun, wind, and temperature changes. Start by placing them outdoors in a sheltered location for an hour or two each day, gradually increasing the amount of time they spend outdoors each day.
Preparing Your Garden Bed
Now that our seedlings are growing (or if you’re buying transplants), it’s time to prepare the garden bed. This is where the magic really happens!
* Choose a sunny location: Tomatoes need at least 6-8 hours of sunlight per day.
* Test your soil: A soil test will tell you the pH level and nutrient content of your soil. Tomatoes prefer a slightly acidic soil pH of 6.0-6.8. You can buy a soil test kit at most garden centers.
* Amend the soil: Based on your soil test results, amend the soil with compost, aged manure, or other organic matter to improve drainage, fertility, and water retention. I like to add a generous amount of compost to my tomato beds.
* Consider raised beds: Raised beds offer excellent drainage and allow you to control the soil quality.
* Remove weeds: Clear the area of any weeds and grass.
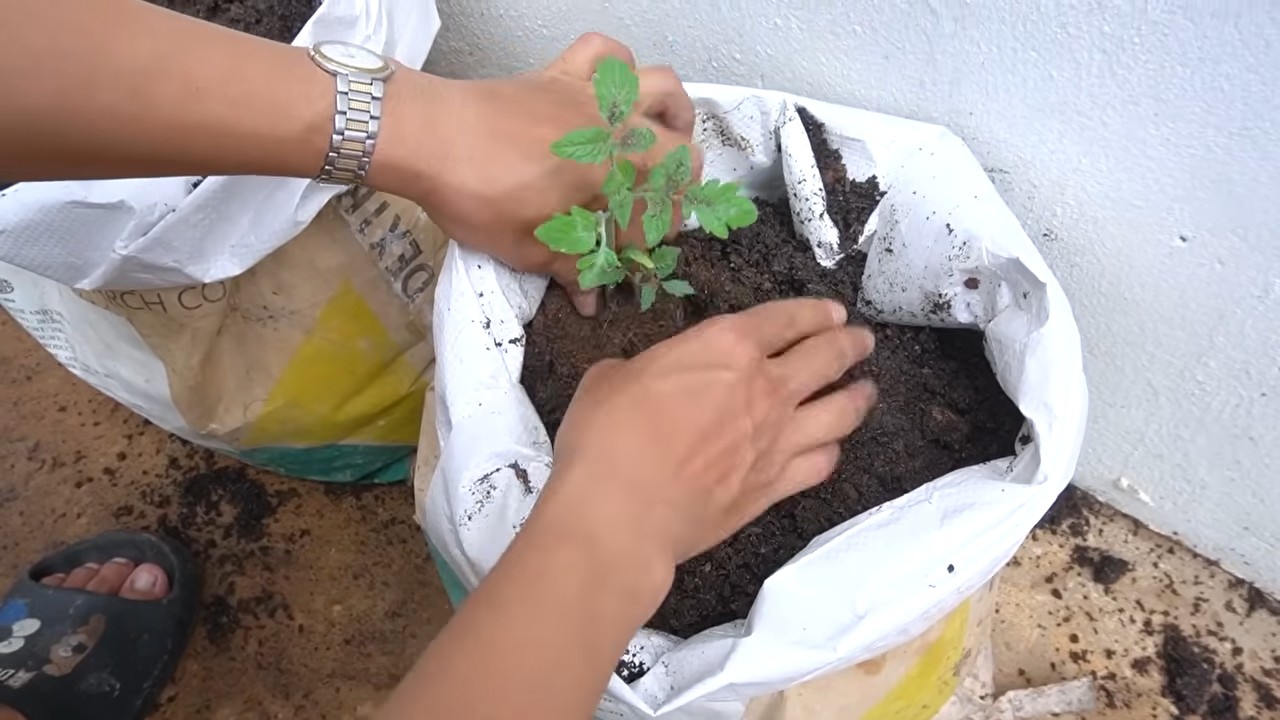
Transplanting Your Tomato Seedlings
The big day has arrived! It’s time to transplant your tomato seedlings into the garden.
* Wait for warm weather: Make sure the danger of frost has passed and the soil has warmed up to at least 60°F (15°C).
* Dig the holes: Dig holes that are slightly larger than the root balls of your seedlings. Space the holes according to the mature size of the tomato variety you’re growing. Determinate varieties can be spaced closer together than indeterminate varieties.
* Plant deeply: This is a crucial step! Tomatoes can grow roots along their stems, so planting them deeply will encourage a stronger root system. Remove the lower leaves from the seedling and plant it so that the lowest remaining leaves are just above the soil line.
* Add fertilizer: Add a slow-release tomato fertilizer to the bottom of each hole. This will provide the seedlings with a steady supply of nutrients as they grow.
* Water thoroughly: Water the seedlings thoroughly after planting.
* Mulch: Apply a layer of mulch around the plants to help retain moisture, suppress weeds, and regulate soil temperature. I like to use straw or shredded leaves.
Staking or Caging Your Tomatoes
Supporting your tomato plants is essential, especially for indeterminate varieties. This will prevent the fruits from touching the ground, which can lead to rot and disease.
* Staking: Drive a sturdy stake into the ground next to each plant. As the plant grows, tie the stem to the stake with soft twine or plant ties.
* Caging: Place a tomato cage around each plant. Make sure the cage is tall enough to accommodate the mature size of the plant.
I personally prefer caging because it provides more support and allows the plant to grow more naturally.
Watering and Fertilizing
Proper watering and fertilizing are crucial for healthy tomato plants and abundant fruit production.
* Water deeply and regularly: Water deeply at the base of the plants, avoiding wetting the foliage. Aim for about 1-2 inches of water per week, depending on the weather.
* Fertilize regularly: Fertilize every 2-3 weeks with a tomato-specific fertilizer. Follow the instructions on the fertilizer package.
* Avoid over-fertilizing: Too much fertilizer can lead to excessive foliage growth and reduced fruit production.
Pruning Your Tomato Plants
Pruning can help improve air circulation, reduce disease, and encourage fruit production.
* Remove suckers: Suckers are the small shoots that grow in the “V” between the main stem and the branches. Remove these suckers regularly to encourage the plant to focus its energy on fruit production.
* Remove yellowing or diseased leaves: Remove any yellowing or diseased leaves to prevent the spread of disease.
Dealing with Pests and Diseases
Unfortunately, tomatoes are susceptible to a variety of pests and diseases. Here are some common problems and how to deal with them:
* Aphids: These small, sap-sucking insects can weaken plants. Spray them with a strong stream of water or use insecticidal soap.
* Tomato hornworms: These large, green caterpillars can
Conclusion
So, there you have it! Unlocking the secrets to truly exceptional tomato harvests isn’t about expensive fertilizers or complicated techniques. It’s about understanding the plant’s needs and leveraging simple, effective DIY tricks like the ones we’ve explored. From optimizing soil conditions to providing targeted support, these methods empower you to take control of your tomato growing journey and reap the rewards of juicy, flavorful fruits.
Why is this a must-try? Because it’s not just about growing tomatoes; it’s about growing *better* tomatoes. Tomatoes bursting with flavor, tomatoes that are resistant to common diseases, and tomatoes that yield abundantly throughout the season. This DIY approach is cost-effective, environmentally friendly, and incredibly satisfying. Imagine the pride you’ll feel serving up a salad made entirely from your own homegrown, perfectly ripened tomatoes!
Don’t be afraid to experiment! Consider these variations to tailor the techniques to your specific needs and environment:
* **Compost Tea Boost:** Instead of plain water, try watering your tomato plants with diluted compost tea. This provides a nutrient-rich boost that can significantly enhance growth and fruit production. Experiment with different compost tea recipes to find what works best for your soil.
* Epsom Salt Foliar Spray: For plants showing signs of magnesium deficiency (yellowing leaves), try a foliar spray of Epsom salt diluted in water. This allows for rapid absorption of magnesium, helping to correct the deficiency quickly.
* Companion Planting Power:** Explore the benefits of companion planting. Basil, marigolds, and garlic are known to deter pests and improve tomato growth. Plant them strategically around your tomato plants to create a thriving ecosystem.
* DIY Tomato Cages with a Twist: Instead of using standard wire cages, get creative with repurposed materials like bamboo stakes or even old ladders to create unique and supportive structures for your plants.
* Sunlight Optimization: Pay close attention to the amount of sunlight your tomato plants receive. If you live in a particularly hot climate, consider providing some afternoon shade to prevent sunscald. Conversely, if you’re in a cooler climate, maximize sunlight exposure by planting in a south-facing location.
We encourage you to embrace these **tomato growing secrets** and witness the difference they can make in your garden. The beauty of these DIY methods is that they are adaptable and can be customized to suit your specific growing conditions.
But the real magic happens when you share your experiences! We want to hear about your successes, your challenges, and any variations you’ve tried. Did you find a particular companion plant that worked wonders? Did you develop a unique method for supporting your tomato plants? Share your insights in the comments below and let’s learn from each other. Together, we can unlock even more secrets to growing the most delicious and abundant tomatoes imaginable. So, get your hands dirty, experiment with these techniques, and let’s cultivate a community of thriving tomato growers! Your journey to tomato-growing mastery starts now!
Frequently Asked Questions (FAQ)
What are the most common mistakes people make when growing tomatoes, and how can I avoid them?
One of the biggest mistakes is inconsistent watering. Tomatoes need consistent moisture, especially during fruit development. Avoid overwatering, which can lead to root rot, and underwatering, which can cause blossom end rot. Use a moisture meter or stick your finger a couple of inches into the soil to check moisture levels. Another common mistake is not providing adequate support. As tomato plants grow, they become heavy with fruit and need support to prevent them from collapsing. Use sturdy cages, stakes, or trellises. Finally, neglecting to prune suckers (the shoots that grow between the main stem and branches) can lead to overcrowded plants with reduced fruit production. Prune suckers regularly to improve airflow and direct energy towards fruit development.
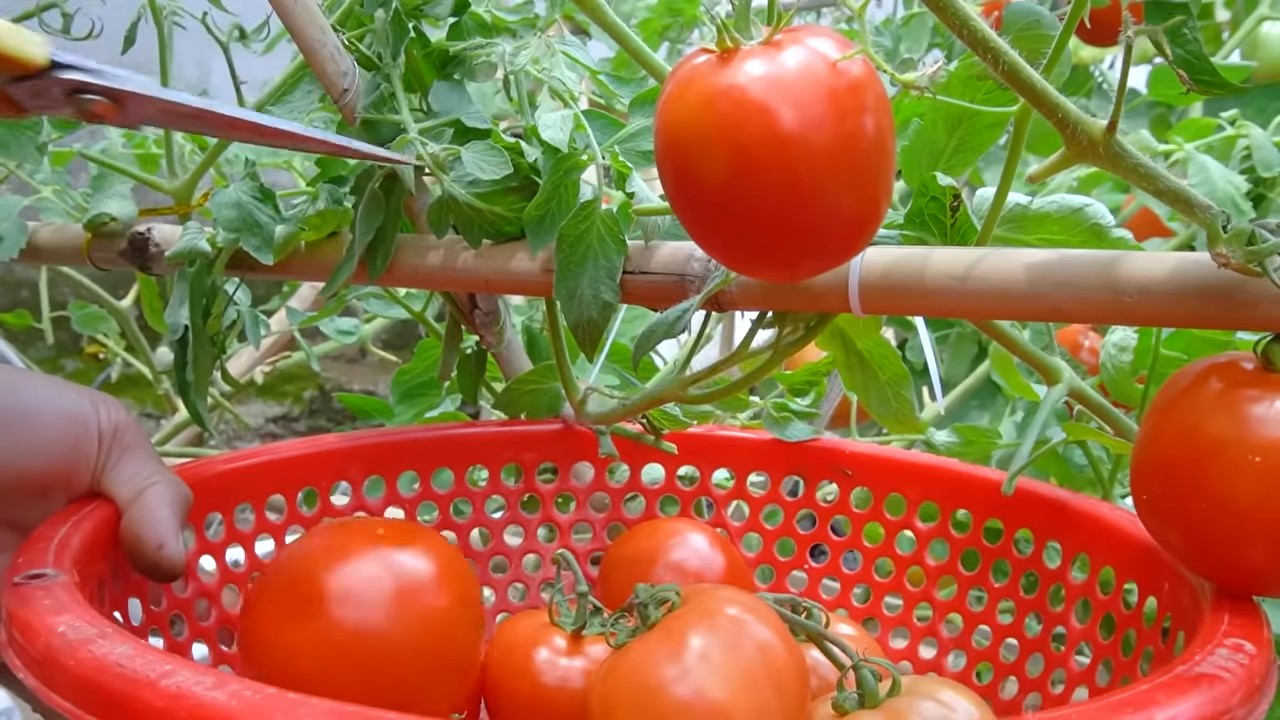
How do I know when my tomatoes are ripe and ready to pick?
The color of the tomato is a good indicator of ripeness, but it’s not the only factor. The tomato should also feel slightly soft to the touch and have a noticeable aroma. Gently squeeze the tomato; if it gives slightly, it’s likely ripe. The stem should also detach easily from the vine when the tomato is ripe. Avoid picking tomatoes that are still hard or green, as they may not ripen properly off the vine.
My tomato plants are getting yellow leaves. What could be causing this, and how can I fix it?
Yellowing leaves can be caused by several factors, including nutrient deficiencies, overwatering, underwatering, and disease. Check the soil moisture levels to rule out overwatering or underwatering. If the leaves are yellowing from the bottom up, it could indicate a nitrogen deficiency. Amend the soil with compost or a nitrogen-rich fertilizer. If the leaves have yellow spots or blotches, it could be a sign of a fungal disease. Remove affected leaves and apply a fungicide if necessary. Magnesium deficiency can also cause yellowing between the veins of the leaves. Epsom salt can be used to correct this.
What are some natural ways to control pests and diseases in my tomato garden?
Companion planting is a great way to deter pests and attract beneficial insects. Basil, marigolds, and garlic are known to repel common tomato pests. Neem oil is a natural insecticide and fungicide that can be used to control a variety of pests and diseases. Insecticidal soap is another effective option for controlling aphids, whiteflies, and other soft-bodied insects. Ensure good air circulation around your plants by pruning regularly and spacing them adequately. This helps to prevent fungal diseases. Regularly inspect your plants for signs of pests or diseases and take action promptly to prevent them from spreading.
Can I grow tomatoes in containers, and if so, what are the best varieties to choose?
Yes, you can definitely grow tomatoes in containers! Choose determinate or bush varieties, as they are more compact and better suited for container growing. Some good options include ‘Patio’, ‘Roma’, ‘Celebrity’, and ‘Bush Early Girl’. Use a large container (at least 20 gallons) with good drainage. Fill the container with a high-quality potting mix. Provide adequate sunlight (at least 6-8 hours per day) and water regularly. Fertilize your container tomatoes every 2-3 weeks with a balanced fertilizer.
How can I improve the flavor of my homegrown tomatoes?
Several factors contribute to the flavor of tomatoes, including sunlight, soil quality, and watering practices. Ensure your tomato plants receive at least 6-8 hours of sunlight per day. Amend the soil with compost or other organic matter to improve its fertility and drainage. Avoid overwatering, as this can dilute the flavor of the tomatoes. Allow the tomatoes to ripen fully on the vine before picking them. The longer they stay on the vine, the more flavorful they will be. Some varieties, like heirloom tomatoes, are known for their exceptional flavor.
What is blossom end rot, and how can I prevent it?
Blossom end rot is a condition that causes the bottom of the tomato to turn black and leathery. It’s caused by a calcium deficiency, which is often due to inconsistent watering. To prevent blossom end rot, ensure consistent watering throughout the growing season. Avoid allowing the soil to dry out completely between waterings. Amend the soil with calcium-rich materials, such as bone meal or crushed eggshells. You can also use a calcium-containing fertilizer. Mulching around the plants can help to retain moisture in the soil.
How do I save seeds from my tomato plants for next year?
Saving seeds from your tomato plants is a great way to preserve your favorite varieties. Choose ripe, healthy tomatoes from disease-free plants. Squeeze the seeds and pulp into a jar and add a little water. Let the mixture ferment for 3-4 days, stirring daily. This process helps to remove the gelatinous coating around the seeds. After fermentation, rinse the seeds thoroughly and spread them out on a paper towel to dry completely. Store the dried seeds in an airtight container in a cool, dark place. Be aware that hybrid tomatoes will not produce true-to-type seeds, so it’s best to save seeds from heirloom or open-pollinated varieties.
Leave a Comment