
Strawberry plastic bottle gardening: sounds like something out of a futuristic farm, right? Well, it’s surprisingly simple, incredibly rewarding, and a fantastic way to bring the joy of fresh strawberries right to your doorstep, even if you’re short on space! I’m so excited to share this DIY trick with you.
Growing your own food has deep roots in human history. From ancient civilizations cultivating crops to modern-day victory gardens, the desire to connect with the earth and provide for ourselves is timeless. While large-scale farming has become the norm, there’s a growing movement towards urban gardening and sustainable living, and that’s where this strawberry plastic bottle gardening hack comes in!
Let’s face it, not everyone has a sprawling backyard perfect for a traditional garden. Apartment dwellers, balcony enthusiasts, and those with limited mobility often miss out on the satisfaction of growing their own produce. But what if I told you that you could create a thriving strawberry patch using recycled plastic bottles? This method is not only eco-friendly, giving those bottles a second life, but it’s also incredibly space-saving and easy to manage. Imagine plucking juicy, sun-ripened strawberries straight from your vertical garden – the taste is simply unbeatable! Plus, it’s a fun and engaging project for the whole family. So, if you’re looking for a creative, sustainable, and delicious way to enjoy fresh strawberries, keep reading! I’m going to walk you through everything you need to know to get started with your own strawberry plastic bottle gardening adventure.
Erdbeer-Garten aus Plastikflaschen: Eine DIY-Anleitung
Hallo liebe Gartenfreunde! Habt ihr auch das Gefühl, dass der Platz im Garten nie ausreicht? Oder vielleicht habt ihr gar keinen Garten, sondern nur einen Balkon oder eine Terrasse? Keine Sorge, ich habe die perfekte Lösung für euch: einen Erdbeer-Garten aus recycelten Plastikflaschen! Das ist nicht nur super nachhaltig, sondern auch platzsparend und sieht richtig cool aus. Lasst uns gemeinsam loslegen!
Was ihr für euren Erdbeer-Garten braucht:
* Plastikflaschen: Am besten eignen sich große PET-Flaschen (z.B. von Wasser oder Saft). Je mehr, desto größer wird euer Erdbeer-Garten! Ich empfehle mindestens 5-6 Flaschen für den Anfang.
* Erdbeerpflanzen: Wählt am besten robuste Sorten, die sich für den Anbau in Töpfen eignen. Frag am besten in eurem Gartencenter nach.
* Blumenerde: Gute, nährstoffreiche Blumenerde ist das A und O für gesunde Erdbeerpflanzen.
* Schere oder Cuttermesser: Zum Zuschneiden der Plastikflaschen. Achtung: Sei vorsichtig!
* Bohrmaschine oder Nagel und Hammer: Zum Anbringen von Löchern für die Aufhängung und den Wasserablauf.
* Starkes Seil oder Draht: Zum Aufhängen der Flaschen.
* Gießkanne oder Schlauch: Zum Bewässern eurer Erdbeerpflanzen.
* Optional: Kleine Steine oder Tonscherben für die Drainage.
* Optional: Sprühfarbe oder Marker zum Dekorieren der Flaschen.
Schritt-für-Schritt-Anleitung:
1. Vorbereitung der Plastikflaschen
1. Reinigung: Zuerst müsst ihr die Plastikflaschen gründlich reinigen. Entfernt alle Etiketten und spült sie mit warmem Wasser und Spülmittel aus. Lasst sie anschließend gut trocknen.
2. Zuschneiden: Jetzt kommt der spannende Teil! Mit der Schere oder dem Cuttermesser schneidet ihr ein großes Loch in die Seite jeder Flasche. Dieses Loch sollte groß genug sein, um eine Erdbeerpflanze hineinzusetzen. Ich empfehle, ein rechteckiges Loch zu schneiden, das etwa 10-15 cm breit und 8-10 cm hoch ist. Achtet darauf, dass die Kanten glatt sind, damit sich niemand daran verletzt.
3. Drainagelöcher: Damit das Wasser gut ablaufen kann und eure Erdbeerpflanzen nicht im Wasser stehen, bohrt ihr mit der Bohrmaschine oder dem Nagel und Hammer mehrere kleine Löcher in den Boden jeder Flasche. Ich mache meistens 4-5 Löcher.
4. Aufhängungslöcher: Um die Flaschen aufzuhängen, bohrt ihr zwei Löcher in den oberen Rand jeder Flasche. Die Löcher sollten sich gegenüberliegen und groß genug sein, um das Seil oder den Draht hindurchzufädeln.
2. Bepflanzung der Flaschen
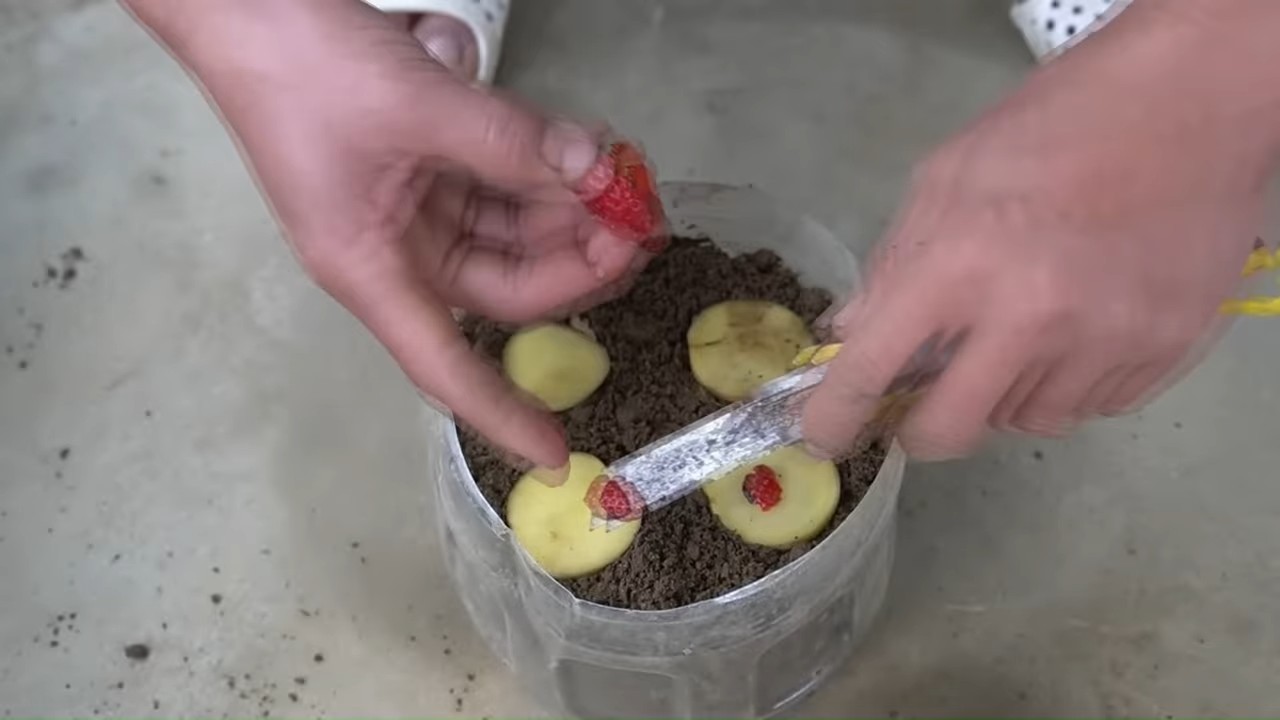
1. Drainage: Wenn ihr möchtet, könnt ihr eine Schicht kleine Steine oder Tonscherben auf den Boden jeder Flasche legen. Das verbessert die Drainage und verhindert Staunässe.
2. Befüllen mit Erde: Füllt die Flaschen mit Blumenerde. Lasst dabei etwa 2-3 cm Platz bis zum Rand.
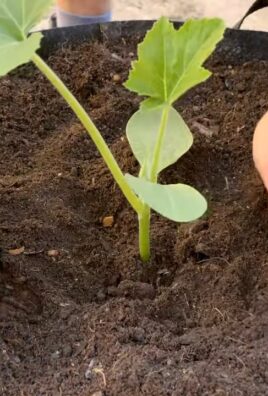
3. Einsetzen der Erdbeerpflanzen: Nehmt die Erdbeerpflanzen vorsichtig aus ihren Töpfen und lockert die Wurzeln etwas auf. Setzt die Pflanzen in die Löcher in den Flaschen und füllt die restlichen Hohlräume mit Erde auf. Drückt die Erde leicht an.
4. Gießen: Gießt die Erdbeerpflanzen nach dem Einsetzen gründlich.
3. Aufhängen des Erdbeer-Gartens
1. Seil oder Draht vorbereiten: Schneidet das Seil oder den Draht in passende Stücke. Die Länge hängt davon ab, wie hoch ihr euren Erdbeer-Garten aufhängen möchtet.
2. Flaschen aufhängen: Fädelt das Seil oder den Draht durch die Aufhängungslöcher jeder Flasche und knotet es fest. Achtet darauf, dass die Flaschen sicher hängen und nicht herunterfallen können.
3. Anbringen: Sucht euch einen geeigneten Platz zum Aufhängen eures Erdbeer-Gartens. Das kann ein Balkongeländer, ein Zaun, ein Baumast oder eine andere stabile Konstruktion sein. Befestigt die Seile oder Drähte an der Konstruktion.
4. Anordnung: Ihr könnt die Flaschen in einer Reihe, versetzt oder in einer anderen kreativen Anordnung aufhängen. Lasst eurer Fantasie freien Lauf!
4. Pflege eures Erdbeer-Gartens
1. Bewässerung: Erdbeerpflanzen brauchen regelmäßig Wasser, besonders an heißen Tagen. Gießt sie am besten morgens oder abends, wenn die Sonne nicht so stark scheint. Achtet darauf, dass die Erde immer leicht feucht ist, aber nicht nass.
2. Düngung: Um eure Erdbeerpflanzen mit ausreichend Nährstoffen zu versorgen, solltet ihr sie regelmäßig düngen. Verwendet am besten einen speziellen Erdbeerdünger oder einen organischen Dünger.
3. Sonneneinstrahlung: Erdbeerpflanzen brauchen viel Sonne, um gut zu wachsen und Früchte zu tragen. Stellt euren Erdbeer-Garten an einen sonnigen Standort, an dem die Pflanzen mindestens 6 Stunden Sonne pro Tag bekommen.
4. Schutz vor Schädlingen: Erdbeerpflanzen können von verschiedenen Schädlingen befallen werden, wie z.B. Schnecken, Blattläusen oder Erdbeermilben. Kontrolliert eure Pflanzen regelmäßig und entfernt Schädlinge gegebenenfalls von Hand oder mit einem geeigneten Pflanzenschutzmittel.
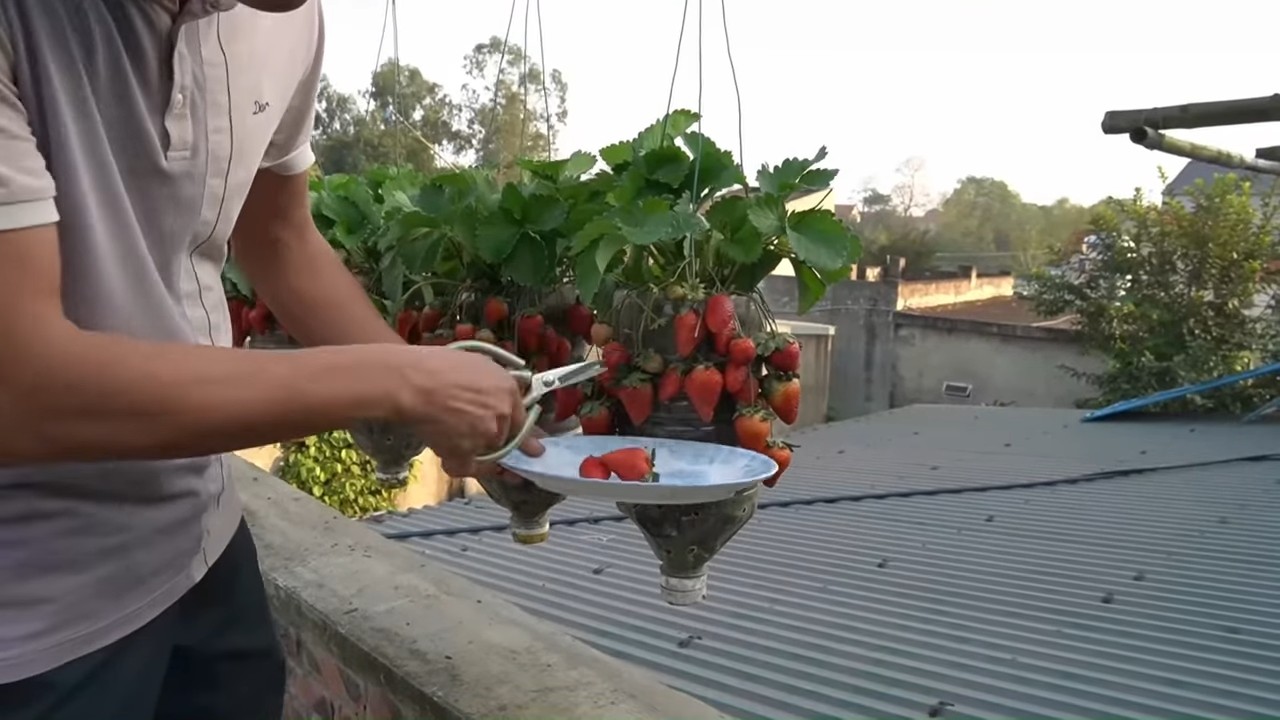
5. Ernte: Wenn die Erdbeeren rot und reif sind, könnt ihr sie ernten. Pflückt sie vorsichtig ab, damit ihr die Pflanzen nicht beschädigt.
Zusätzliche Tipps und Tricks:
* Dekoration: Ihr könnt die Plastikflaschen mit Sprühfarbe oder Markern bemalen und dekorieren. Das macht euren Erdbeer-Garten noch individueller und bunter.
* Verschiedene Sorten: Probiert verschiedene Erdbeersorten aus, um herauszufinden, welche euch am besten schmecken und am besten in eurem Erdbeer-Garten wachsen.
* Vertikale Gärten: Ihr könnt euren Erdbeer-Garten auch als vertikalen Garten an einer Wand anbringen. Dazu benötigt ihr eine stabile Wandhalterung oder ein Rankgitter.
* Andere Pflanzen: Neben Erdbeeren könnt ihr auch andere Pflanzen in den Plastikflaschen anbauen, wie z.B. Kräuter, Salat oder kleine Gemüsesorten.
* Upcycling: Nutzt euren Erdbeer-Garten als Upcycling-Projekt und verwendet alte Plastikflaschen, die sonst im Müll landen würden. Das ist gut für die Umwelt und spart Geld.
* Schneckenabwehr: Um Schnecken von euren Erdbeeren fernzuhalten, könnt ihr Kupferband um die Flaschen kleben oder eine Schicht Kaffeesatz um die Pflanzen streuen.
* Vogelschutz: Vögel lieben Erdbeeren! Um eure Ernte vor ihnen zu schützen, könnt ihr ein Netz über euren Erdbeer-Garten spannen.
* Überwinterung: Erdbeerpflanzen sind mehrjährig und können überwintert werden. Schneidet die Pflanzen im Herbst zurück und stellt sie an einen kühlen, frostfreien Ort. Im Frühjahr könnt ihr sie dann wieder ins Freie stellen.
Ich hoffe, diese Anleitung hat euch geholfen, euren eigenen Erdbeer-Garten aus Plastikflaschen zu bauen. Es ist ein tolles Projekt, das Spaß macht und euch mit leckeren, selbstgezogenen Erdbeeren belohnt. Viel Erfolg und viel Spaß beim Gärtnern! Lasst mich wissen, wie es bei euch geklappt hat! Ich freue mich über eure Kommentare und Fotos!
Conclusion
So, there you have it! Transforming ordinary plastic bottles into a thriving vertical strawberry garden is not just a fun project; it’s a game-changer for anyone looking to maximize space, minimize waste, and enjoy the freshest, most delicious strawberries imaginable. This DIY trick is a must-try for several compelling reasons.
Firstly, it’s incredibly eco-friendly. We’re all becoming more aware of the impact of plastic waste on our planet, and this project offers a tangible way to repurpose those bottles that might otherwise end up in landfills. By giving them a new life as planters, you’re actively contributing to a more sustainable lifestyle.
Secondly, it’s a fantastic space-saver. Whether you have a sprawling backyard or a tiny balcony, vertical gardening allows you to grow a surprising amount of produce in a limited area. This is especially beneficial for apartment dwellers or those with small urban gardens. Imagine the joy of stepping outside your door and picking ripe, juicy strawberries, even if you only have a small patio!
Thirdly, it’s surprisingly easy and affordable. The materials are readily available – you likely already have a collection of plastic bottles waiting to be used. The process is straightforward and doesn’t require any specialized tools or skills. It’s a project that the whole family can enjoy together, from collecting the bottles to planting the seedlings and watching them grow.
But the benefits don’t stop there. A plastic bottle strawberry garden offers excellent drainage, which is crucial for healthy strawberry plants. The bottles also provide protection from soil-borne diseases and pests, helping your plants thrive. Plus, the vertical arrangement allows for better air circulation and sunlight exposure, leading to more abundant harvests.
Looking for variations? Absolutely! You can experiment with different sizes and shapes of plastic bottles to create unique designs. Consider painting the bottles to add a splash of color to your garden. You can also use different types of soil mixes to cater to the specific needs of your strawberry plants. For example, adding some compost or perlite can improve drainage and aeration. You could even incorporate other herbs or flowers into your vertical garden alongside your strawberries, creating a beautiful and functional display. Think about adding some basil or marigolds, which are known to deter pests and attract pollinators.
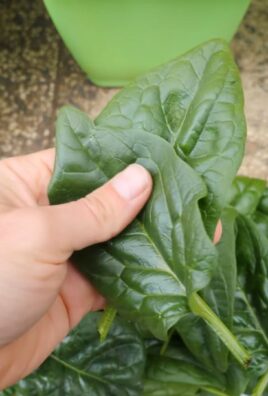
Don’t limit yourself to just strawberries! This method can be adapted for growing other small fruits, vegetables, and herbs. Imagine a vertical garden filled with lettuce, spinach, herbs, and even cherry tomatoes. The possibilities are endless!
We wholeheartedly encourage you to give this DIY trick a try. It’s a rewarding and sustainable way to grow your own food, beautify your space, and reduce your environmental footprint. Once you’ve created your own plastic bottle strawberry garden, we’d love to hear about your experience! Share your photos, tips, and challenges in the comments below. Let’s inspire each other to create greener, more sustainable communities, one strawberry plant at a time. Let us know what kind of strawberries you planted, what kind of soil you used, and any challenges you faced. Your insights could help other gardeners succeed! We are confident that you will find that this **strawberry plastic bottle gardening** method is a great way to grow your own food.
Frequently Asked Questions (FAQ)
What type of plastic bottles are best for this project?
Ideally, you should use food-grade plastic bottles, such as those used for water, soda, or juice. These are generally made from PET (polyethylene terephthalate) or HDPE (high-density polyethylene), which are considered safe for growing food. Avoid using bottles that have contained harsh chemicals or cleaning products. Make sure to thoroughly clean and rinse the bottles before using them. Also, consider the size of the bottle in relation to the size of the strawberry plant you intend to grow. Larger bottles will provide more room for the roots to develop.
How do I ensure proper drainage in the plastic bottles?
Drainage is crucial for preventing root rot. Before planting, drill or poke several drainage holes in the bottom of each bottle. You can also add a layer of gravel or small stones to the bottom of the bottle to further improve drainage. When watering, be careful not to overwater, as this can lead to waterlogging. Check the soil moisture regularly and only water when the top inch or two feels dry.
What type of soil should I use for growing strawberries in plastic bottles?
Strawberries thrive in well-draining, slightly acidic soil. A good potting mix specifically formulated for fruits and vegetables is a great option. You can also create your own soil mix by combining equal parts of potting soil, compost, and perlite. The compost will provide nutrients, while the perlite will improve drainage and aeration. Avoid using garden soil, as it can be too heavy and compact, leading to drainage problems.
How much sunlight do strawberries need when grown in plastic bottles?
Strawberries need at least 6-8 hours of direct sunlight per day to produce abundant fruit. Place your vertical strawberry garden in a sunny location where it will receive plenty of sunlight. If you don’t have a sunny spot, you can supplement with grow lights. Rotate the bottles regularly to ensure that all sides of the plants receive adequate sunlight.
How often should I water my strawberry plants in plastic bottles?
The frequency of watering will depend on the weather, the type of soil you’re using, and the size of the bottles. In general, you should water your strawberry plants when the top inch or two of soil feels dry to the touch. During hot, dry weather, you may need to water them more frequently. Be careful not to overwater, as this can lead to root rot. Water deeply, allowing the water to drain out of the drainage holes.
How do I fertilize my strawberry plants in plastic bottles?
Strawberries are heavy feeders and benefit from regular fertilization. Use a balanced fertilizer specifically formulated for fruits and vegetables. Follow the instructions on the fertilizer package for application rates. You can also use organic fertilizers, such as compost tea or fish emulsion. Fertilize your strawberry plants every 2-4 weeks during the growing season.
How do I protect my strawberry plants from pests and diseases?
Regularly inspect your strawberry plants for signs of pests or diseases. Common pests include aphids, spider mites, and slugs. You can control these pests with insecticidal soap, neem oil, or by handpicking them off the plants. To prevent diseases, ensure good air circulation and avoid overwatering. Remove any dead or diseased leaves promptly. You can also use organic fungicides if necessary.
Can I grow strawberries in plastic bottles indoors?
Yes, you can grow strawberries in plastic bottles indoors, but you’ll need to provide them with adequate light. Place them near a sunny window or use grow lights to supplement the natural light. You’ll also need to ensure good air circulation and maintain a consistent temperature. Indoor strawberry plants may require more frequent watering and fertilization than outdoor plants.
How long does it take for strawberries to grow in plastic bottles?
The time it takes for strawberries to grow will depend on the variety of strawberry, the growing conditions, and the size of the plants you start with. Generally, you can expect to harvest your first strawberries within a few months of planting. Everbearing varieties will produce fruit throughout the growing season, while June-bearing varieties will produce a large crop in the spring.
What do I do with my strawberry plants in the winter?
If you live in a cold climate, you’ll need to protect your strawberry plants from freezing temperatures. You can move the plastic bottles indoors or insulate them with straw or burlap. Water the plants sparingly during the winter months and avoid fertilizing them. In the spring, gradually acclimate the plants to outdoor conditions before placing them back in their permanent location.
Leave a Comment