
Square Watermelon Growing Guide: Unlock the Secrets to a Unique Harvest!
Have you ever seen a square watermelon and wondered, “How on earth did they do that?” Well, you’re not alone! These quirky fruits have captured the imagination of gardeners and foodies alike. While they might seem like a modern novelty, the practice of shaping fruits and vegetables actually has roots in ancient Japanese agricultural techniques. Farmers used molds to create unique shapes for aesthetic appeal and to maximize space during shipping – a testament to human ingenuity and our desire to play with nature’s bounty.
But beyond the novelty, learning how to grow square watermelons is a fantastic DIY project that adds a touch of fun and wonder to your home garden. Imagine the looks on your friends’ faces when you present them with a perfectly cubed watermelon! More than just a conversation starter, this project teaches you valuable skills in plant management, mold construction, and patience. Plus, square watermelons are easier to store in the fridge!
This Square Watermelon Growing Guide isn’t just about aesthetics; it’s about embracing creativity in your garden and learning a new skill. I’m excited to share my tips and tricks to help you successfully cultivate these unique fruits. So, grab your gardening gloves, and let’s embark on this exciting journey together! I’ll guide you through every step, from choosing the right watermelon variety to crafting the perfect mold. Get ready to impress your neighbors and enjoy a truly one-of-a-kind harvest!

Growing Square Watermelons: A Fun DIY Project!
Hey there, fellow gardening enthusiasts! Ever seen those perfectly square watermelons and wondered how they’re grown? Well, it’s not magic, just a little bit of DIY ingenuity! I’m going to walk you through the process of growing your own square watermelons. It’s a fun project that’s sure to impress your friends and family.
What You’ll Need
Before we dive in, let’s gather our supplies. Here’s what you’ll need to grow your own square watermelons:
* Watermelon Seeds: Choose a variety known for its size and growth rate. Smaller varieties might be easier to manage in the mold. I recommend starting with a few seeds to increase your chances of success.
* Seed Starting Supplies (Optional): If you live in a cooler climate, you might want to start your seeds indoors. This includes seed starting trays, potting mix, and a grow light.
* Well-Draining Soil: Watermelons need soil that drains well. Amend your garden soil with compost or other organic matter to improve drainage.
* Fertilizer: A balanced fertilizer will help your watermelon plants thrive. Look for one that’s specifically formulated for fruits and vegetables.
* Water: Watermelons need plenty of water, especially during hot weather.
* Square Mold: This is the key to growing square watermelons! You can buy a commercially made mold, or you can build your own. I’ll show you how to build your own mold later on.
* Support Structure (Optional): Depending on the size of your mold and the watermelon variety, you might need a support structure to keep the mold from tipping over.
* Patience: Growing square watermelons takes time and patience. Don’t get discouraged if your first attempt isn’t perfect.
Building Your Own Square Watermelon Mold
If you’re feeling crafty, you can build your own square watermelon mold. It’s a fun project that will save you money.
* Materials:
* Plywood or sturdy plastic sheets (about 1/4 inch thick)
* Screws or bolts
* Drill
* Saw
* Measuring tape
* Sandpaper (optional)
* Instructions:
1. Determine the Size: Decide how big you want your square watermelon to be. A good starting size is around 8 inches by 8 inches by 8 inches. This will give you a manageable size for your first attempt.
2. Cut the Pieces: Cut six pieces of plywood or plastic to the desired size. You’ll need four pieces for the sides, one for the top, and one for the bottom.
3. Assemble the Box: Assemble the four side pieces to form a square box. Use screws or bolts to secure the corners. Make sure the box is sturdy and won’t fall apart when you put the watermelon inside.
4. Attach the Bottom: Attach the bottom piece to the box. Again, use screws or bolts to secure it.
5. Create a Hinged Top (Optional): You can attach the top piece with hinges to make it easier to check on the watermelon’s progress. If you don’t want to use hinges, you can simply screw the top piece on and remove it when needed.
6. Drill Drainage Holes: Drill several drainage holes in the bottom of the mold. This will prevent water from pooling inside and rotting the watermelon.
7. Sand the Edges (Optional): If you used plywood, you can sand the edges to make them smoother and prevent splinters.
8. Consider Ventilation: Drill small holes in the sides of the mold for ventilation. This helps prevent moisture buildup and mold growth.
Planting Your Watermelon Seeds
Now that you have your mold ready, it’s time to plant your watermelon seeds.
1. Start Seeds Indoors (Optional): If you live in a cooler climate, start your seeds indoors about 4-6 weeks before the last expected frost. Plant the seeds in seed starting trays filled with potting mix. Keep the soil moist and warm.
2. Direct Sow Seeds: If you live in a warmer climate, you can direct sow the seeds in your garden after the last frost. Plant the seeds about 1 inch deep and 2-3 feet apart.
3. Choose a Sunny Location: Watermelons need at least 6-8 hours of sunlight per day. Choose a location in your garden that gets plenty of sun.
4. Prepare the Soil: Watermelons need well-draining soil that’s rich in organic matter. Amend your garden soil with compost or other organic matter to improve drainage and fertility.
5. Water Regularly: Water the seeds or seedlings regularly to keep the soil moist.
6. Thin Seedlings: If you planted multiple seeds in the same spot, thin the seedlings to one plant per spot.
Placing the Mold
This is the trickiest part, but also the most rewarding!
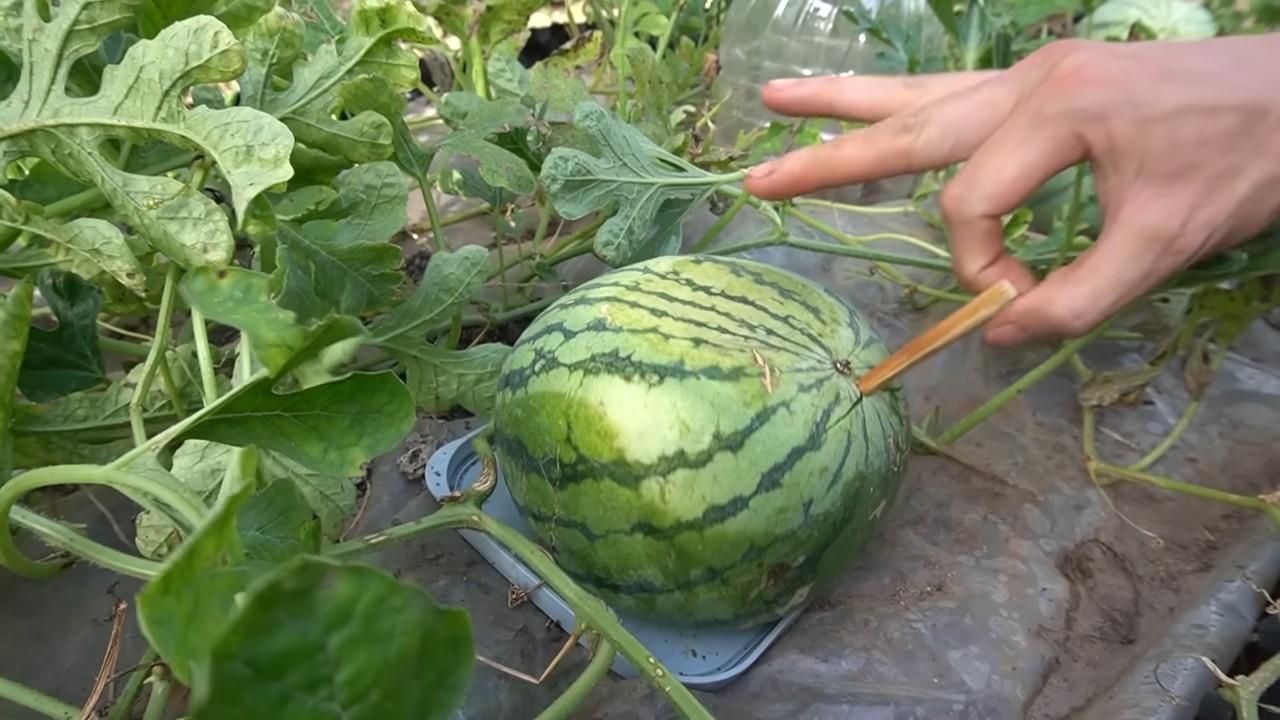
1. Monitor Watermelon Growth: Keep a close eye on your watermelon plants. You’ll need to place the mold around the watermelon when it’s about the size of a small cantaloupe or a large grapefruit. This is usually about 10-14 days after the fruit sets.
2. Carefully Place the Mold: Gently place the mold around the watermelon. Make sure the watermelon is centered in the mold.
3. Secure the Mold: If you’re using a hinged top, close it and secure it. If you’re using a removable top, screw it on.
4. Provide Support (If Needed): If the mold is heavy or the watermelon is growing quickly, you might need to provide some support to keep the mold from tipping over. You can use stakes or other supports to stabilize the mold.
5. Monitor the Watermelon’s Growth: Check on the watermelon regularly to make sure it’s growing properly. If the watermelon is growing too quickly and is pressing against the sides of the mold, you might need to loosen the mold slightly.
6. Be Patient: It takes time for the watermelon to fill out the mold. Be patient and don’t remove the mold too early.
Caring for Your Square Watermelon
Once the mold is in place, you’ll need to continue caring for your watermelon plant.
1. Water Regularly: Watermelons need plenty of water, especially during hot weather. Water deeply and regularly, but avoid getting the leaves wet.
2. Fertilize: Continue to fertilize your watermelon plants with a balanced fertilizer. Follow the instructions on the fertilizer package.
3. Control Pests and Diseases: Keep an eye out for pests and diseases. Treat any problems promptly to prevent them from spreading.
4. Protect from Sunburn: If the watermelon is exposed to direct sunlight, you might need to provide some shade to prevent it from getting sunburned. You can use shade cloth or other materials to protect the watermelon.
Harvesting Your Square Watermelon
The moment you’ve been waiting for!
1. Check for Ripeness: Watermelons are usually ready to harvest about 80-90 days after planting. There are several ways to check for ripeness:
* Thump Test: Thump the watermelon. A ripe watermelon will sound hollow.
* Tendril Test: The tendril closest to the watermelon should be brown and dry.
* Ground Spot: The spot where the watermelon rests on the ground should be yellow or cream-colored.
2. Remove the Mold: Once the watermelon is ripe, carefully remove the mold. You might need to use a screwdriver or other tool to loosen the mold.
3. Harvest the Watermelon: Cut the watermelon from the vine with a sharp knife. Leave a few inches of stem attached.
4. Enjoy Your Square Watermelon! Now you can enjoy your perfectly square watermelon. It’s a fun and unique treat that’s sure to impress your friends and family.
Troubleshooting
Even with the best planning, things can sometimes go wrong. Here are a few common problems and how to fix them:
* Watermelon Rotting Inside the Mold: This is usually caused by too much moisture. Make sure the mold has adequate drainage and ventilation. You can also try loosening the mold slightly to allow more air to circulate.
* Watermelon Not Filling Out the Mold: This could be due to several factors, such as poor soil, lack of water, or not enough sunlight. Make sure your watermelon plants are getting everything they need to thrive.
* Mold Tipping Over: This is usually caused by the weight of the watermelon. Provide additional support to stabilize the mold.
* Pests and Diseases: Keep an eye out for pests and diseases and treat them promptly.
Conclusion
So, there you have it! The seemingly impossible feat of growing your own square watermelon is not only achievable but also a rewarding and conversation-starting project for any gardener. This isn’t just about novelty; it’s about understanding plant behavior, experimenting with controlled environments, and ultimately, enjoying the fruits (or rather, the watermelon) of your labor in a unique and memorable way.
Why is this DIY trick a must-try? Because it pushes the boundaries of traditional gardening, offering a hands-on lesson in plant manipulation and the power of controlled growth. Imagine the look on your friends’ faces when you present them with a perfectly cubed watermelon at your next barbecue! Beyond the novelty, it’s a fantastic educational experience, especially for children, demonstrating how external factors can influence a plant’s development. Plus, square watermelons are easier to store and transport, making them surprisingly practical.
Don’t be afraid to experiment with variations! While the acrylic box method is the most common, you could explore different materials for your mold. Consider using food-grade plastic or even creating a custom mold from wood, ensuring it’s properly sealed and waterproofed. You can also adjust the size of the mold to create rectangular or even triangular watermelons – the possibilities are endless! Think about the variety of watermelon you choose. While smaller, personal-sized watermelons are generally easier to manage, you could try a larger variety if you have a particularly sturdy mold. Just be sure to provide adequate support as the watermelon grows.
Remember to monitor your watermelon closely throughout the growing process. Adjust the box as needed to accommodate its growth, and be vigilant about pests and diseases. The key to success lies in patience, observation, and a willingness to learn from your mistakes.
We wholeheartedly encourage you to embark on this exciting gardening adventure. Growing a square watermelon is more than just a fun project; it’s a testament to your creativity and dedication. It’s a chance to connect with nature in a new and innovative way.
So, grab your seeds, build your mold, and get ready to witness the magic of transforming a round fruit into a perfectly shaped cube. We’re confident that you’ll find the experience both challenging and incredibly rewarding.
Once you’ve successfully grown your own square watermelon, we’d love to hear about your experience! Share your photos, tips, and challenges in the comments below. Let’s create a community of square watermelon enthusiasts and inspire others to try this unique and rewarding gardening project. Happy growing!
Frequently Asked Questions (FAQ)
What is the best time to start growing square watermelons?
The best time to start growing square watermelons is generally the same as when you would typically start growing regular watermelons in your region. This usually falls after the last frost, when the soil has warmed up to at least 70°F (21°C). Starting seeds indoors 4-6 weeks before the last expected frost can give you a head start. Consider your local climate and growing season when determining the optimal planting time.
What type of watermelon is best suited for growing in a square mold?
Smaller, personal-sized watermelon varieties are generally the best choice for growing in square molds. These varieties tend to be more manageable and less likely to outgrow the mold before they are ripe. Some popular choices include Sugar Baby, Yellow Doll, and Golden Midget. However, you can experiment with larger varieties if you have a sturdy mold and are prepared to provide extra support. Be sure to research the specific growth habits of the variety you choose to ensure it’s a good fit for your growing conditions.
How do I choose the right size mold for my watermelon?
The size of the mold should be slightly smaller than the expected size of the mature watermelon. A good rule of thumb is to choose a mold that is approximately 8-10 inches square for a personal-sized watermelon. It’s crucial to allow some room for the watermelon to expand within the mold without being overly constricted. Too small of a mold can stunt the watermelon’s growth, while too large of a mold may not effectively shape it.
How do I prevent the watermelon from rotting inside the mold?
Preventing rot is crucial for successfully growing a square watermelon. Ensure the mold has adequate ventilation to prevent moisture buildup. Drill small holes in the sides of the mold to allow for airflow. Regularly inspect the watermelon for any signs of rot or disease. If you notice any issues, remove the affected area immediately. Good soil drainage is also essential. Avoid overwatering, as this can create a damp environment that promotes rot. Consider using a fungicide if you live in a humid climate or have a history of fungal problems.
How long does it take to grow a square watermelon?
The time it takes to grow a square watermelon is similar to the time it takes to grow a regular watermelon of the same variety. Generally, it takes about 75-90 days from planting to harvest. However, the exact time can vary depending on the variety, growing conditions, and climate. Monitor the watermelon closely and harvest it when it reaches its mature size and the rind has a dull, slightly rough texture.
How do I know when my square watermelon is ripe?
Determining ripeness can be tricky since you can’t easily thump the watermelon inside the mold. Look for the following signs: The tendril closest to the watermelon stem should be brown and dry. The spot where the watermelon rests on the ground (or the bottom of the mold) should be yellow or cream-colored. The rind should have a dull, slightly rough texture. If possible, gently lift the watermelon out of the mold to check its weight. A ripe watermelon will feel heavy for its size.
Can I reuse the mold for multiple watermelons?
Yes, you can reuse the mold for multiple watermelons, provided it’s properly cleaned and disinfected between uses. Wash the mold thoroughly with soap and water to remove any dirt or debris. Then, disinfect it with a solution of bleach and water (1 part bleach to 10 parts water) to kill any bacteria or fungi. Rinse the mold thoroughly with clean water and allow it to dry completely before using it again.
What are some common problems I might encounter when growing square watermelons?
Some common problems include:
* **Rot:** As mentioned earlier, rot can be a significant issue. Ensure adequate ventilation and avoid overwatering.
* **Pests:** Watermelons are susceptible to various pests, such as aphids, squash bugs, and vine borers. Monitor your plants regularly and take appropriate measures to control pests.
* **Diseases:** Fungal diseases like powdery mildew and anthracnose can also affect watermelons. Use disease-resistant varieties and apply fungicides if necessary.
* **Mold Issues:** The mold itself can sometimes cause problems if it’s not properly ventilated or if it’s made of a material that retains moisture.
* **Inadequate Support:** As the watermelon grows, it can become heavy and may require additional support to prevent the vine from breaking.
Is growing a square watermelon worth the effort?
Absolutely! While it requires some extra effort and attention, growing a square watermelon is a unique and rewarding experience. It’s a fun project that can teach you a lot about plant growth and manipulation. Plus, the novelty of having a perfectly shaped square watermelon is sure to impress your friends and family. The easier storage and transport are added bonuses.
Leave a Comment