
Spring Radish Gardening Guide
Spring Radish Gardening Guide: I’ve always loved the crisp, peppery bite of a fresh radish, and there’s nothing quite like pulling one straight from the garden. That’s why I’m so excited to share my Spring Radish Gardening Guide with you! This isn’t just another gardening article; it’s your passport to a bountiful harvest of these vibrant root vegetables, bursting with flavor. We’ll explore simple, effective DIY techniques that will transform your gardening experience, even if you’re a complete beginner.
Radishes have a rich history, cultivated for thousands of years across various cultures. From ancient Egypt to modern-day kitchens, they’ve held a place of honor, prized not only for their taste but also for their nutritional value. But growing them successfully can sometimes feel like a gamble. Many gardeners struggle with issues like bolting (premature flowering) or uneven growth. That’s where this Spring Radish Gardening Guide comes in!
Why This Guide is Essential for You
This guide isn’t just about planting seeds; it’s about mastering the art of radish cultivation. You’ll learn how to select the perfect variety for your climate, prepare the soil for optimal growth, and implement clever DIY tricks to overcome common challenges. This Spring Radish Gardening Guide will empower you to grow your own delicious, healthy radishes, saving you money at the grocery store and providing a rewarding connection to nature. Imagine the satisfaction of enjoying homegrown radishes in your salads, sandwiches, or as a simple, yet elegant side dish – all thanks to your newfound gardening expertise!
So, let’s dive into this Spring Radish Gardening Guide and unlock the secrets to a successful radish harvest. Get ready to experience the joy of homegrown goodness!
My Spring Radish Gardening Guide: From Seed to Supper
I love spring, and nothing says spring to me like the crisp bite of a freshly pulled radish. Growing your own is incredibly rewarding, and even easier than you might think! This guide will walk you through everything you need to know, from seed selection to harvest.
Phase 1: Planning and Preparation
- Choose your radish variety: There’s a huge variety available! Consider factors like size (from tiny French Breakfast to larger, globe-shaped varieties), color (red, white, black), and days to maturity. For a first-time grower, I recommend a fast-maturing variety (around 20-25 days) to get quick results and build confidence.
- Select your location: Radishes need full sun (at least 6 hours a day) and well-drained soil. Poor drainage can lead to cracking and bitterness. Observe your garden – where does the sun hit most consistently? Is the soil loose and crumbly, or compacted?
- Prepare your soil: Radishes prefer loose, fertile soil. Amend heavy clay soil with compost or other organic matter to improve drainage and aeration. If your soil is sandy, add some peat moss or composted manure to retain moisture. I usually till my garden bed to a depth of about 6-8 inches.
- Gather your supplies: You’ll need radish seeds, a garden trowel or hand cultivator, a watering can, and possibly some row markers or garden twine. If you’re starting seeds indoors, you’ll also need seed starting trays and seed starting mix.
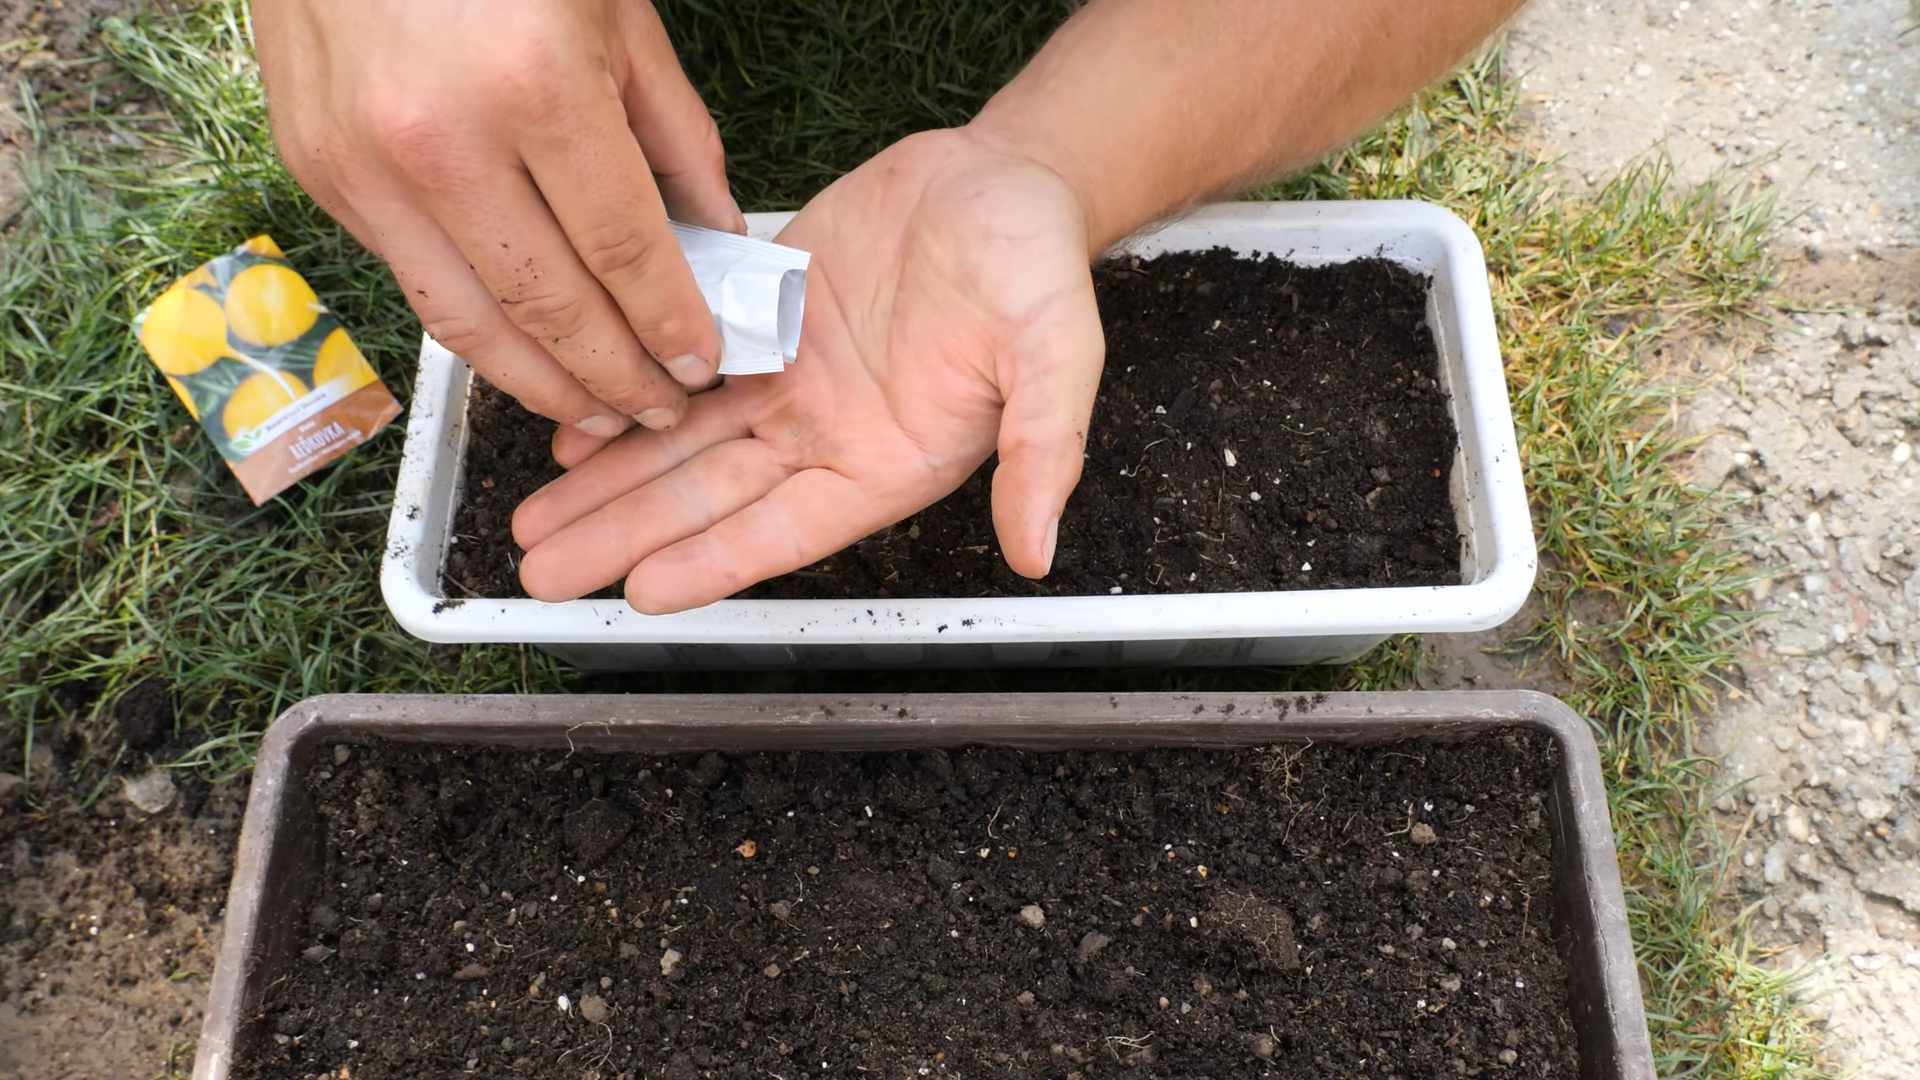
Phase 2: Sowing Your Radish Seeds
- Direct sowing (recommended): Radishes are best sown directly into the garden bed. This avoids the stress of transplanting, which can stunt their growth. Wait until the soil has warmed up (at least 45-50°F) and the danger of frost has passed. In my area, this is usually around late March or early April.
- Prepare the seedbed: Rake the soil to create a smooth, level surface. If you’ve amended the soil, make sure it’s well-mixed.
- Sow the seeds: Make shallow furrows (about ½ inch deep) about 1 inch apart. Space the seeds about ½ inch apart within the furrows. Don’t overcrowd them! Overcrowding leads to smaller, less flavorful radishes.
- Cover the seeds: Gently cover the seeds with soil, firming it lightly with your hand. Don’t press down too hard, as this can damage the delicate seeds.
- Water gently: Water the seeds thoroughly but gently, using a gentle spray or a watering can with a rose attachment. Avoid dislodging the seeds.
- Label your rows: Use row markers or garden twine to label your radish rows. This will help you keep track of your plants and avoid accidentally disturbing them.
Phase 3: Radish Care and Maintenance
- Watering: Radishes need consistent moisture to grow well. Water regularly, especially during dry periods. Aim to keep the soil consistently moist but not soggy. Overwatering can lead to root rot.
- Weeding: Keep the area around your radish plants free of weeds. Weeds compete with radishes for water and nutrients. Regular weeding is crucial, especially in the early stages of growth.
- Thinning: Once the seedlings have developed their first true leaves (the leaves that appear after the cotyledons), thin them to about 2 inches apart. This gives the remaining plants enough space to grow to their full size. You can eat the thinned seedlings!
- Pest and disease control: Radishes are relatively pest-resistant, but they can be susceptible to flea beetles and root maggots. If you notice any pests, consider using row covers or insecticidal soap. Good soil drainage helps prevent fungal diseases.
- Monitoring growth: Keep a close eye on your radishes. They grow quickly, so regular observation is key. Check for signs of pests, diseases, or nutrient deficiencies.
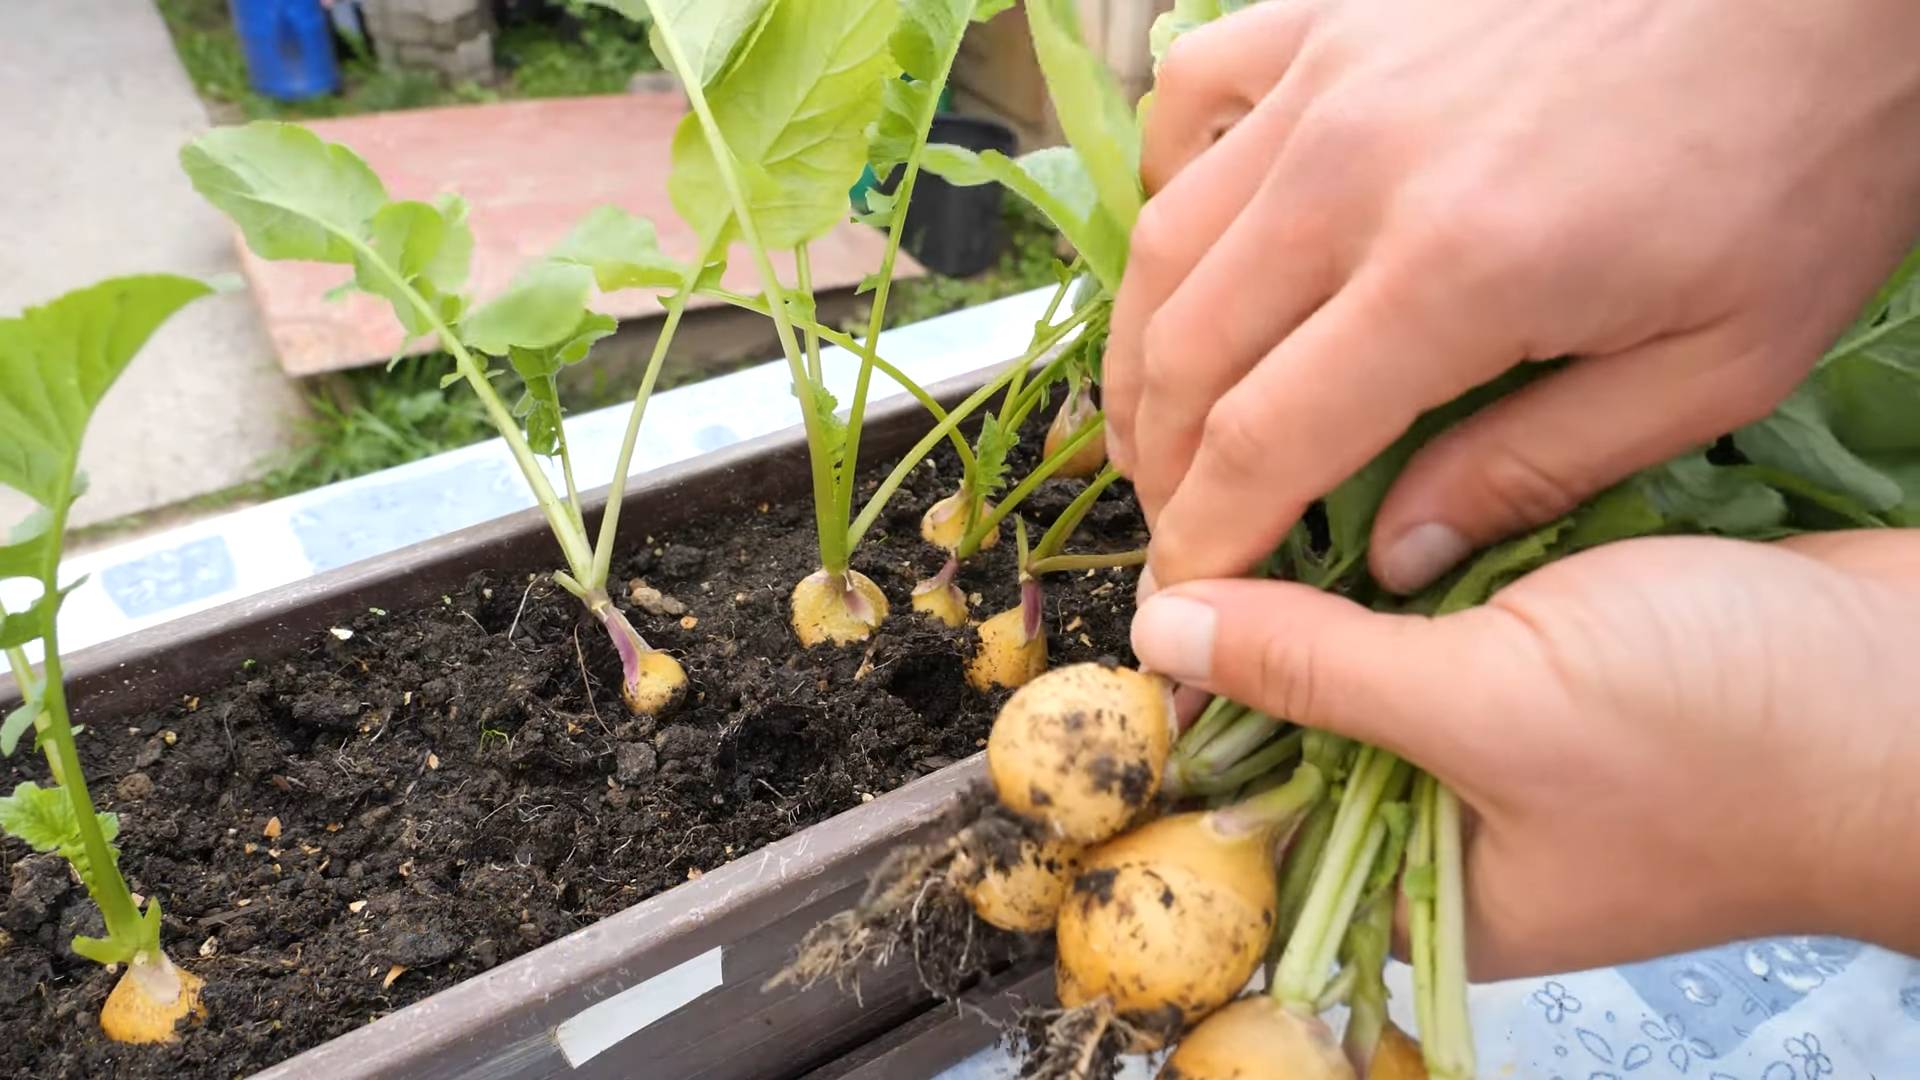
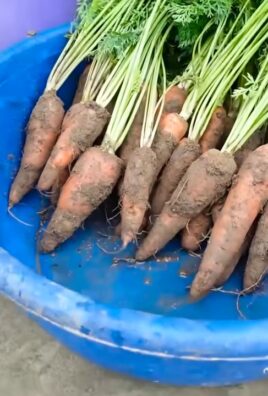
Phase 4: Harvesting Your Radishes
- Harvesting time: Harvest your radishes when they reach the desired size, usually around 20-25 days after sowing (depending on the variety). Check the seed packet for specific maturity times.
- Harvesting technique: Gently pull the radishes from the soil, being careful not to damage the roots. If the soil is particularly dry, you may need to loosen it slightly with a trowel before pulling.
- Cleaning and storage: Wash the radishes gently to remove any soil. Store them in a cool, dark place, such as the refrigerator’s crisper drawer. They’re best eaten fresh, but they can last for a few days in the refrigerator.
Phase 5: Troubleshooting Common Radish Problems
Problem: Cracked Radishes
This is often caused by inconsistent watering. Make sure to keep the soil consistently moist, but avoid overwatering. Hard, compacted soil can also contribute to cracking.
Problem: Pithy or Bitter Radishes
This can be due to hot weather, poor soil drainage, or overcrowding. Ensure your radishes have adequate water and space to grow. Consider planting them in a cooler part of the garden during hot weather.
Problem: Pest Infestation
Flea beetles can cause significant damage to radish leaves. Use row covers to protect your plants, or consider using insecticidal soap if necessary. Root maggots can attack the roots. Good soil drainage and crop rotation can help prevent this.
I love spring, and nothing says spring to me like the crisp bite of a freshly pulled radish. Growing your own is incredibly rewarding, and even easier than you might think! This guide will walk you through everything you need to know, from seed selection to harvest.
Phase 1: Planning and Preparation
- Choose your radish variety: There’s a huge variety available! Consider factors like size (from tiny French Breakfast to larger, globe-shaped varieties), color (red, white, black), and days to maturity. For a first-time grower, I recommend a fast-maturing variety (around 20-25 days) to get quick results and build confidence.
- Select your location: Radishes need full sun (at least 6 hours a day) and well-drained soil. Poor drainage can lead to cracking and bitterness. Observe your garden – where does the sun hit most consistently? Is the soil loose and crumbly, or compacted?
- Prepare your soil: Radishes prefer loose, fertile soil. Amend heavy clay soil with compost or other organic matter to improve drainage and aeration. If your soil is sandy, add some peat moss or composted manure to retain moisture. I usually till my garden bed to a depth of about 6-8 inches.
- Gather your supplies: You’ll need radish seeds, a garden trowel or hand cultivator, a watering can, and possibly some row markers or garden twine. If you’re starting seeds indoors, you’ll also need seed starting trays and seed starting mix.
Phase 2: Sowing Your Radish Seeds
- Direct sowing (recommended): Radishes are best sown directly into the garden bed. This avoids the stress of transplanting, which can stunt their growth. Wait until the soil has warmed up (at least 45-50°F) and the danger of frost has passed. In my area, this is usually around late March or early April.
- Prepare the seedbed: Rake the soil to create a smooth, level surface. If you’ve amended the soil, make sure it’s well-mixed.
- Sow the seeds: Make shallow furrows (about ½ inch deep) about 1 inch apart. Space the seeds about ½ inch apart within the furrows. Don’t overcrowd them! Overcrowding leads to smaller, less flavorful radishes.
- Cover the seeds: Gently cover the seeds with soil, firming it lightly with your hand. Don’t press down too hard, as this can damage the delicate seeds.
- Water gently: Water the seeds thoroughly but gently, using a gentle spray or a watering can with a rose attachment. Avoid dislodging the seeds.
- Label your rows: Use row markers or garden twine to label your radish rows. This will help you keep track of your plants and avoid accidentally disturbing them.
Phase 3: Radish Care and Maintenance
- Watering: Radishes need consistent moisture to grow well. Water regularly, especially during dry periods. Aim to keep the soil consistently moist but not soggy. Overwatering can lead to root rot.
- Weeding: Keep the area around your radish plants free of weeds. Weeds compete with radishes for water and nutrients. Regular weeding is crucial, especially in the early stages of growth.
- Thinning: Once the seedlings have developed their first true leaves (the leaves that appear after the cotyledons), thin them to about 2 inches apart. This gives the remaining plants enough space to grow to their full size. You can eat the thinned seedlings!
- Pest and disease control: Radishes are relatively pest-resistant, but they can be susceptible to flea beetles and root maggots. If you notice any pests, consider using row covers or insecticidal soap. Good soil drainage helps prevent fungal diseases.
- Monitoring growth: Keep a close eye on your radishes. They grow quickly, so regular observation is key. Check for signs of pests, diseases, or nutrient deficiencies.
Phase 4: Harvesting Your Radishes
- Harvesting time: Harvest your radishes when they reach the desired size, usually around 20-25 days after sowing (depending on the variety). Check the seed packet for specific maturity times.
- Harvesting technique: Gently pull the radishes from the soil, being careful not to damage the roots. If the soil is particularly dry, you may need to loosen it slightly with a trowel before pulling.
- Cleaning and storage: Wash the radishes gently to remove any soil. Store them in a cool, dark place, such as the refrigerator’s crisper drawer. They’re best eaten fresh, but they can last for a few days in the refrigerator.
Phase 5: Troubleshooting Common Radish Problems
Problem: Cracked Radishes
This is often caused by inconsistent watering. Make sure to keep the soil consistently moist, but avoid overwatering. Hard, compacted soil can also contribute to cracking.
Problem: Pithy or Bitter Radishes
This can be due to hot weather, poor soil drainage, or overcrowding. Ensure your radishes have adequate water and space to grow. Consider planting them in a cooler part of the garden during hot weather.
Problem: Pest Infestation
Flea beetles can cause significant damage to radish leaves. Use row covers to protect your plants, or consider using insecticidal soap if necessary. Root maggots can attack the roots. Good soil drainage and crop rotation can help prevent this.
Bonus Tip: Successive Sowing
For a continuous harvest, sow new radish seeds every two weeks. This will ensure you have a steady supply of fresh radishes throughout the spring.
Conclusion
This spring radish gardening guide has equipped you with the knowledge and techniques to cultivate a bountiful harvest of these crisp, peppery root vegetables right in your own backyard. From seed selection to harvesting, we’ve covered all the essential steps to ensure success. But why is this DIY approach to growing spring radishes a must-try? Simply put, there’s nothing quite like the taste of a freshly pulled, homegrown radish. The vibrant flavor surpasses anything you’ll find in the supermarket, and the satisfaction of nurturing a plant from seed to maturity is unparalleled. This spring radish gardening guide empowers you to control the quality, freshness, and even the variety of your radishes, offering a truly rewarding gardening experience. Beyond the superior taste, growing your own radishes is a sustainable choice, reducing your carbon footprint and minimizing reliance on industrial agriculture. It’s a fantastic way to connect with nature and enjoy the fruits (or rather, roots!) of your labor.
Beyond the basic techniques outlined, there are numerous exciting variations you can explore. Experiment with different radish varieties – from the classic red globe to the elongated white icicle or the vibrant purple French breakfast radish. Each variety offers a unique flavor profile and texture, allowing you to diversify your culinary creations. Consider companion planting, interspersing your radishes with other vegetables like lettuce or spinach to maximize space and potentially improve growth. You can also try succession planting, sowing new seeds every couple of weeks for a continuous harvest throughout the spring season. Don’t be afraid to get creative! Try different soil compositions, experiment with different watering techniques, and observe how your radishes respond. The beauty of gardening is in the learning process, and each experiment brings you closer to mastering the art of growing your own delicious spring radishes.
We strongly encourage you to embark on this rewarding gardening journey. The process is surprisingly simple, even for beginners, and the rewards are immense. Share your experiences with us! Post pictures of your flourishing radish patch on social media using #SpringRadishGardening, and tag us so we can celebrate your success. Let’s build a community of home gardeners, sharing tips, tricks, and the joy of harvesting our own delicious, homegrown produce. Remember, even a small patch of radishes can bring immense satisfaction and a burst of fresh flavor to your meals. So, grab your seeds, prepare your soil, and get ready to experience the magic of growing your own spring radishes. You won’t regret it!
Frequently Asked Questions
What type of soil is best for growing spring radishes?
Spring radishes thrive in loose, well-drained soil that is rich in organic matter. Avoid heavy clay soils, which can hinder root development. Amend heavy clay soils with compost or other organic materials to improve drainage and aeration. Sandy loam is ideal, offering a good balance of drainage and nutrient retention.
How often should I water my spring radishes?
Consistent moisture is crucial for optimal radish growth. Water regularly, keeping the soil consistently moist but not waterlogged. The frequency of watering will depend on factors such as weather conditions, soil type, and the amount of sunlight your garden receives. Aim for about 1 inch of water per week, either through rainfall or supplemental irrigation. Check the soil moisture regularly by sticking your finger a couple of inches into the ground. If it feels dry, it’s time to water.
How long does it take for spring radishes to mature?
The time it takes for spring radishes to mature varies depending on the variety and growing conditions. Most varieties are ready for harvest in 21-30 days, but some can take up to 40 days. Check the seed packet for specific maturity information for the variety you’ve chosen. You can start checking for readiness by gently pulling on a few radishes after the minimum time has passed. If they feel firm and are the desired size, they’re ready to harvest.
What are some common problems when growing spring radishes?
Some common problems include bolting (premature flowering), pest infestations (such as flea beetles), and root diseases. Bolting is often caused by hot weather or inconsistent watering. Pest infestations can be controlled using organic methods like row covers or insecticidal soap. Root diseases are often associated with poor drainage. Ensuring proper soil drainage, consistent watering, and using disease-resistant varieties can help prevent these problems.
Can I grow spring radishes in containers?
Absolutely! Spring radishes are well-suited for container gardening. Choose a container at least 6 inches deep to allow for adequate root development. Use a well-draining potting mix and ensure the container has drainage holes to prevent waterlogging. Containers allow for greater control over soil conditions and watering, making them a great option for those with limited space.
What should I do with my harvested spring radishes?
Freshly harvested spring radishes are best enjoyed immediately. Their crisp texture and peppery flavor are at their peak when eaten soon after picking. However, you can store them in the refrigerator for a few days in a plastic bag. For longer storage, consider pickling or fermenting your radishes to preserve their flavor and extend their shelf life. Experiment with different recipes – from simple radish salads to more elaborate dishes incorporating these vibrant root vegetables.
Leave a Comment