
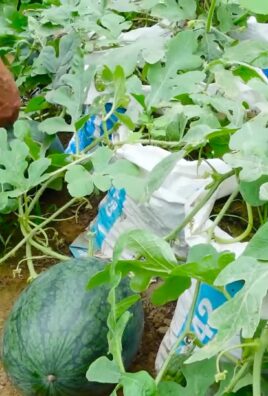
Spinach in plastic bottles? Sounds a little crazy, right? But trust me, this ingenious DIY gardening trick is about to revolutionize your small-space gardening game! Forget sprawling gardens and back-breaking labor; we’re bringing fresh, vibrant spinach right to your windowsill or balcony with this super simple, eco-friendly method.
The concept of container gardening, of which this is a clever variation, has roots stretching back centuries. From the Hanging Gardens of Babylon to the intricate rooftop gardens of ancient Rome, people have always found ways to cultivate greenery in limited spaces. While we might not be building architectural wonders, we *are* tapping into that same resourceful spirit, repurposing everyday materials to create thriving mini-gardens.
Why spinach in plastic bottles, though? Well, let’s face it, not everyone has access to a large garden plot. Apartment dwellers, urbanites, and even those with limited mobility can struggle to enjoy the joys of fresh, homegrown produce. This DIY hack offers a solution! It’s incredibly space-saving, cost-effective (hello, recycling!), and surprisingly productive. Plus, it’s a fantastic way to teach kids about gardening and sustainability. I’m excited to show you how easy it is to grow your own delicious, nutritious spinach, one plastic bottle at a time!
Spinat im Plastikflaschen-Garten: Ein DIY-Leitfaden für üppige Ernten
Hallo liebe Gartenfreunde! Habt ihr auch das Problem, dass euer Garten nicht genug Platz für all eure Lieblingsgemüsesorten bietet? Oder vielleicht habt ihr gar keinen Garten, sondern nur einen Balkon oder eine Terrasse? Keine Sorge, ich habe die perfekte Lösung für euch: Spinat im Plastikflaschen-Garten! Diese Methode ist nicht nur platzsparend, sondern auch super nachhaltig, da wir alten Plastikflaschen ein neues Leben schenken. Lasst uns gemeinsam loslegen und unseren eigenen kleinen Spinat-Dschungel erschaffen!
Was ihr für euren Plastikflaschen-Spinatgarten braucht:
* Plastikflaschen: Am besten eignen sich 1,5-Liter- oder 2-Liter-Flaschen. Je mehr, desto mehr Spinat! Achtet darauf, dass sie sauber und trocken sind.
* Spinatsamen: Wählt eine Sorte, die euch schmeckt und für den Anbau im Topf geeignet ist.
* Erde: Normale Blumenerde oder spezielle Gemüseerde ist perfekt.
* Schere oder Messer: Zum Zuschneiden der Flaschen.
* Bohrer oder Nagel: Für die Entwässerungslöcher.
* Gießkanne oder Sprühflasche: Zum Bewässern.
* Optional: Etiketten und Stift zum Beschriften der Flaschen.
* Optional: Eine Schnur oder Draht, um die Flaschen aufzuhängen (wenn ihr einen hängenden Garten wollt).
Schritt-für-Schritt-Anleitung: Spinat im Plastikflaschen-Garten anlegen
1. Flaschen vorbereiten:
* Zuerst müsst ihr die Plastikflaschen gründlich reinigen. Entfernt alle Etiketten und spült sie mit warmem Wasser und Spülmittel aus. Lasst sie anschließend gut trocknen.
* Jetzt kommt der spaßige Teil: das Zuschneiden! Es gibt verschiedene Möglichkeiten, die Flaschen zu bearbeiten, je nachdem, wie ihr euren Garten gestalten wollt. Hier sind ein paar Ideen:
* Horizontale Pflanzgefäße: Schneidet die Flasche horizontal in der Mitte durch. Ihr erhaltet zwei Hälften, die ihr als separate Pflanzgefäße verwenden könnt.
* Vertikale Pflanzgefäße: Schneidet ein rechteckiges Loch in die Seite der Flasche. Die Größe des Lochs hängt davon ab, wie viel Platz ihr für den Spinat benötigt.
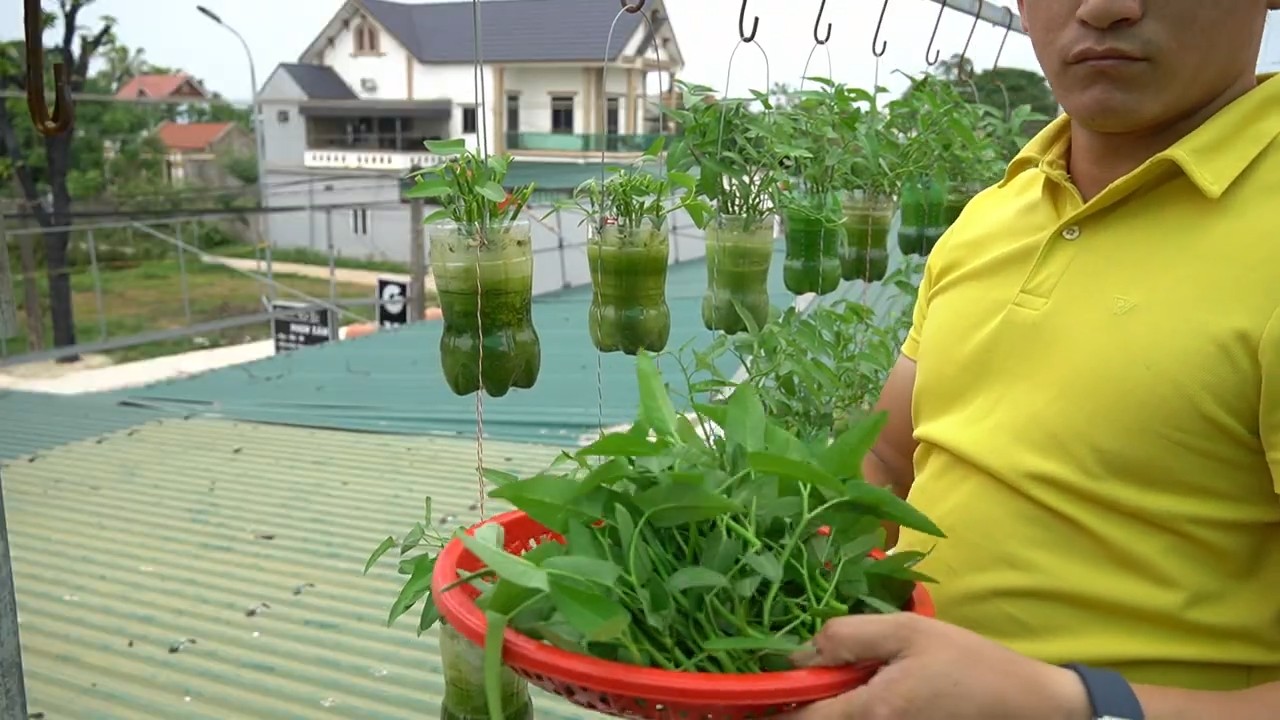
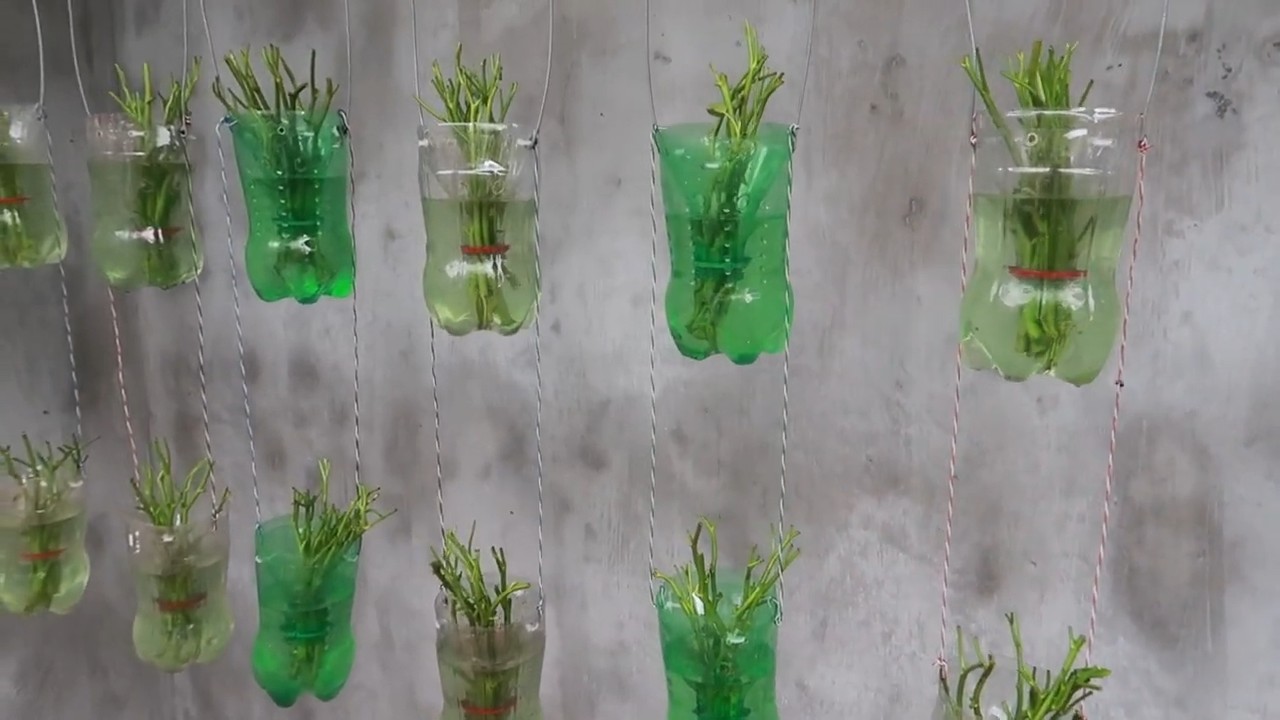
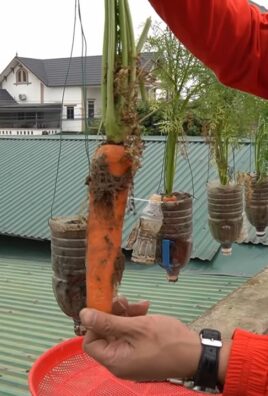
* Hängende Pflanzgefäße: Schneidet den oberen Teil der Flasche ab (etwa ein Drittel). Dreht den abgeschnittenen Teil um und steckt ihn kopfüber in den unteren Teil der Flasche. So entsteht ein selbstbewässerndes System.
* Vergesst nicht, Entwässerungslöcher in den Boden der Flaschen zu bohren oder zu stechen. Das ist wichtig, damit überschüssiges Wasser ablaufen kann und die Wurzeln nicht faulen.
2. Erde einfüllen:
* Füllt die vorbereiteten Flaschen mit Erde. Achtet darauf, dass die Erde locker und luftig ist. Drückt sie nicht zu fest an, damit die Wurzeln gut wachsen können.
* Lasst oben einen kleinen Rand frei, damit das Gießen einfacher ist und die Erde nicht gleich überläuft.
3. Spinatsamen säen:
* Verteilt die Spinatsamen gleichmäßig auf der Erde. Achtet darauf, dass sie nicht zu dicht liegen, da die Pflanzen sonst zu wenig Platz haben.
* Bedeckt die Samen mit einer dünnen Schicht Erde (etwa 0,5 cm).
* Gießt die Erde vorsichtig an, am besten mit einer Sprühflasche, damit die Samen nicht weggeschwemmt werden.
4. Standort wählen:
* Spinat braucht viel Licht, aber keine pralle Mittagssonne. Ein halbschattiger Standort ist ideal.
* Stellt die bepflanzten Flaschen an einen Ort, an dem sie vor Wind und Regen geschützt sind. Ein Balkon, eine Terrasse oder ein Fensterbrett sind gut geeignet.
* Wenn ihr einen hängenden Garten anlegen wollt, befestigt die Flaschen mit Schnur oder Draht an einem Geländer oder einer Stange.
5. Pflege:
* Gießen: Haltet die Erde feucht, aber nicht nass. Gießt regelmäßig, besonders an warmen Tagen. Vermeidet Staunässe, da dies zu Wurzelfäule führen kann.
* Düngen: Spinat ist ein Starkzehrer und benötigt regelmäßig Dünger. Verwendet einen organischen Flüssigdünger oder Komposttee.
* Ernten: Spinat kann geerntet werden, sobald die Blätter groß genug sind. Schneidet die äußeren Blätter ab, damit die inneren Blätter weiterwachsen können.
* Schädlinge: Achtet auf Schädlinge wie Blattläuse oder Schnecken. Bei Bedarf könnt ihr biologische Schädlingsbekämpfungsmittel einsetzen.
Zusätzliche Tipps und Tricks für euren Spinat-Erfolg
* Sortenwahl: Es gibt viele verschiedene Spinatsorten. Wählt eine Sorte, die für den Anbau im Topf geeignet ist und euch schmeckt. Einige beliebte Sorten sind ‘Matador’, ‘Butterflay’ und ‘Winterriesen’.
* Aussaatzeitpunkt: Spinat kann im Frühjahr (März/April) oder im Herbst (August/September) ausgesät werden. Im Sommer ist es oft zu heiß, da Spinat kühle Temperaturen bevorzugt.
* Fruchtfolge: Baut Spinat nicht jedes Jahr am selben Standort an, um Krankheiten und Schädlingen vorzubeugen.
* Mulchen: Eine Mulchschicht aus Stroh oder Rasenschnitt hilft, die Feuchtigkeit im Boden zu halten und Unkraut zu unterdrücken.
* Beschriften: Beschriftet die Flaschen mit dem Namen der Spinatsorte und dem Aussaatdatum. So behaltet ihr den Überblick.
* Kreativität: Seid kreativ bei der Gestaltung eures Plastikflaschen-Gartens! Bemalt die Flaschen, beklebt sie mit Mustern oder hängt sie in verschiedenen Höhen auf.
Hängender Spinatgarten: Eine platzsparende Alternative
Wenn ihr wenig Platz habt, ist ein hängender Spinatgarten eine tolle Alternative. Hier sind ein paar zusätzliche Tipps für die Umsetzung:
1. Stabile Aufhängung: Verwendet eine stabile Schnur oder Draht, um die Flaschen aufzuhängen. Achtet darauf, dass die Aufhängung das Gewicht der bepflanzten Flaschen tragen kann.
2. Abstand: Hängt die Flaschen in ausreichendem Abstand zueinander auf, damit die Pflanzen genügend Licht und Luft bekommen.
3. Bewässerung: Ein hängender Garten trocknet schneller aus als ein Garten am Boden. Gießt regelmäßig und kontrolliert die Feuchtigkeit der Erde.
4. Windschutz: Schützt den hängenden Garten vor starkem Wind, da die Pflanzen sonst beschädigt werden können.
Spinat ernten und genießen
Die Ernte ist der schönste Teil! Sobald die Spinatblätter groß genug sind, könnt ihr sie ernten. Schneidet die äußeren Blätter ab, damit die inneren Blätter weiterwachsen können. Spinat schmeckt am besten frisch geerntet. Ihr könnt ihn roh in Salaten verwenden, kochen, dünsten oder in Smoothies mixen.
Ich hoffe, diese Anleitung hat euch inspiriert, euren eigenen Plastikflaschen-Spinatgarten anzulegen. Es ist eine einfache, nachhaltige und platzsparende Möglichkeit, frischen Spinat anzubauen. Viel Spaß beim Gärtnern! Und vergesst nicht, eure Erfolge mit mir zu teilen! Ich freue mich auf eure Fotos und Berichte!
Conclusion
So, there you have it! Growing spinach in plastic bottles isn’t just a quirky gardening experiment; it’s a game-changer for anyone looking to maximize their space, minimize waste, and enjoy fresh, homegrown greens year-round. We’ve walked you through the simple steps, highlighting the benefits of this innovative approach. From the reduced risk of soilborne diseases to the ease of pest control and the sheer convenience of having your spinach garden right at your fingertips, the advantages are undeniable.
This DIY trick is a must-try because it empowers you to take control of your food source, even if you only have a small balcony, patio, or even a sunny windowsill. Imagine stepping outside and harvesting a handful of vibrant, nutrient-rich spinach leaves for your salad, smoothie, or omelet, knowing exactly where they came from and how they were grown. That’s the power of this simple yet effective technique.
But the beauty of this method lies in its adaptability. Feel free to experiment with different types of plastic bottles – larger ones for bigger yields, or smaller ones for a more compact setup. You can also explore different spinach varieties, from baby spinach to savoy spinach, to find your personal favorite. Consider adding companion plants like basil or marigolds to your bottle garden to deter pests and enhance the flavor of your spinach. You could even create a vertical garden by stacking the bottles, adding a visually appealing element to your space.
Don’t be afraid to get creative with your setup. Paint the bottles to add a splash of color, or decorate them with labels to identify the different spinach varieties you’re growing. The possibilities are endless!
We are confident that once you try growing spinach in plastic bottles, you’ll be amazed by the results. It’s a rewarding and sustainable way to enjoy fresh, healthy greens, and it’s a fantastic conversation starter, too.
So, what are you waiting for? Gather your plastic bottles, grab some potting soil and spinach seeds, and get ready to embark on this exciting gardening adventure. We encourage you to try this DIY trick and share your experiences with us. Let us know how it goes, what challenges you encounter, and what successes you celebrate. Share your photos and tips on social media using [Your Hashtag Here] so we can all learn from each other. Let’s build a community of bottle-gardeners and inspire others to embrace this sustainable and rewarding practice. Happy growing!
Frequently Asked Questions (FAQ)
What type of plastic bottles are best for growing spinach?
Ideally, you should use food-grade plastic bottles, such as those that previously contained water, juice, or soda. Make sure to thoroughly clean the bottles with soap and water to remove any residue. Avoid using bottles that have contained harsh chemicals or pesticides. The size of the bottle will depend on the amount of spinach you want to grow. Larger bottles will provide more space for the roots to develop, resulting in larger plants and higher yields. However, smaller bottles are more manageable and can be easily moved around.
What kind of soil should I use for growing spinach in plastic bottles?
A well-draining potting mix is essential for growing healthy spinach in plastic bottles. Avoid using garden soil, as it can be too heavy and compact, hindering root growth and drainage. A good potting mix will provide the necessary nutrients and aeration for your spinach plants to thrive. You can also amend the potting mix with compost or other organic matter to improve its fertility and water retention.
How often should I water my spinach plants in plastic bottles?
The frequency of watering will depend on several factors, including the size of the bottle, the type of potting mix, the temperature, and the humidity. Generally, you should water your spinach plants when the top inch of soil feels dry to the touch. Avoid overwatering, as this can lead to root rot. Make sure the bottles have drainage holes to allow excess water to escape. During hot and dry weather, you may need to water your plants more frequently.
How much sunlight do spinach plants need?
Spinach thrives in full sun to partial shade. Ideally, your spinach plants should receive at least 4-6 hours of direct sunlight per day. If you live in a hot climate, providing some afternoon shade can help prevent the leaves from wilting or burning. If you’re growing spinach indoors, you may need to supplement with artificial lighting, such as grow lights.
How do I fertilize my spinach plants in plastic bottles?
Spinach is a heavy feeder, so it’s important to provide it with adequate nutrients. You can fertilize your spinach plants with a balanced liquid fertilizer every 2-3 weeks. Follow the instructions on the fertilizer label for proper dilution rates. You can also use organic fertilizers, such as compost tea or fish emulsion. Avoid over-fertilizing, as this can lead to excessive leaf growth and reduced flavor.
How do I protect my spinach plants from pests and diseases?
Growing spinach in plastic bottles can help reduce the risk of soilborne diseases and pests. However, it’s still important to monitor your plants regularly for any signs of problems. Common pests that can affect spinach include aphids, spider mites, and slugs. You can control these pests with insecticidal soap, neem oil, or by handpicking them off the plants. To prevent diseases, ensure good air circulation and avoid overwatering.
When and how do I harvest my spinach?
You can start harvesting spinach leaves when they are about 4-6 inches long. Simply cut the outer leaves with scissors or a knife, leaving the inner leaves to continue growing. This will allow you to harvest spinach continuously over several weeks. Harvest spinach in the morning, when the leaves are crisp and cool.
Can I grow spinach in plastic bottles indoors?
Yes, you can absolutely grow spinach in plastic bottles indoors. Just make sure to provide your plants with adequate light, either from a sunny window or grow lights. Indoor spinach may require more frequent watering and fertilization than outdoor spinach.
What are some variations I can try with this method?
There are many ways to customize this method to suit your needs and preferences. You can try growing different varieties of spinach, such as baby spinach, savoy spinach, or red spinach. You can also experiment with different types of plastic bottles, such as gallon jugs or smaller water bottles. Consider creating a vertical garden by stacking the bottles or hanging them from a wall. You can also add companion plants, such as basil or marigolds, to your bottle garden.
Is growing spinach in plastic bottles sustainable?
Yes, growing spinach in plastic bottles is a very sustainable practice. It allows you to recycle plastic waste, reduce your reliance on commercially grown produce, and minimize your carbon footprint. By growing your own spinach, you can also avoid the use of pesticides and herbicides, which can harm the environment.
Leave a Comment