
Soil bag pumpkin growing – sounds a little unconventional, right? But trust me, it’s a game-changer! Forget tilling vast fields or building elaborate raised beds. I’m about to show you how to cultivate those glorious gourds right in the very bag the soil came in. Think of it as pumpkin patch magic, simplified and accessible to everyone, even if you only have a tiny balcony.
Pumpkins, with their vibrant orange hues, have been a symbol of autumn harvests and festive celebrations for centuries. From ancient indigenous traditions to modern-day jack-o’-lantern carving, these fruits hold a special place in our hearts and cultural heritage. But growing them can seem daunting. That’s where this DIY trick comes in!
Let’s face it, not everyone has acres of land or the time for intensive gardening. But who says you can’t enjoy the satisfaction of growing your own pumpkins? This soil bag pumpkin growing method is perfect for urban dwellers, beginner gardeners, or anyone looking for a low-effort, high-reward gardening project. It’s all about maximizing space and minimizing work, so you can focus on the fun part – watching your pumpkins grow!
Ready to ditch the traditional garden bed and embrace a simpler, more sustainable way to grow pumpkins? Let’s get started!
Kürbisse im Erdsack ziehen: Eine DIY-Anleitung für Riesenernte
Hallo Kürbisfreunde! Habt ihr schon immer davon geträumt, riesige Kürbisse im eigenen Garten zu ziehen, aber der Platz fehlt oder der Boden ist nicht ideal? Keine Sorge, ich zeige euch, wie ihr mit einem einfachen Erdsack-Hack trotzdem eine beeindruckende Kürbisernte erzielen könnt. Diese Methode ist nicht nur platzsparend, sondern auch super effektiv, da wir die Bedingungen für die Kürbispflanzen optimal gestalten können. Los geht’s!
Was du brauchst: Die Materialliste
Bevor wir loslegen, hier eine Liste aller Materialien, die du für dein Erdsack-Kürbisprojekt benötigst:
* Ein großer Erdsack: Am besten einen Sack mit mindestens 70 Litern Fassungsvermögen. Achte darauf, dass der Sack stabil ist und keine Löcher hat. Gebrauchte Säcke von Pflanzerde oder Kompost sind ideal, aber du kannst auch einen neuen Sack kaufen.
* Kürbissamen: Wähle eine Sorte, die dir gefällt. Für Riesenkürbisse empfehle ich Sorten wie ‘Atlantic Giant’. Aber auch kleinere Sorten wie ‘Hokkaido’ oder ‘Butternut’ funktionieren super im Erdsack.
* Gute Pflanzerde: Verwende hochwertige Pflanzerde, die gut drainiert und reich an Nährstoffen ist. Du kannst auch Kompost oder organischen Dünger untermischen.
* Kompost oder organischer Dünger: Für eine extra Portion Nährstoffe.
* Gartenschere oder Messer: Zum Öffnen des Erdsacks und zum Ausdünnen der Kürbispflanze.
* Gießkanne oder Gartenschlauch: Zum Bewässern der Kürbispflanzen.
* Mulchmaterial: Stroh, Holzhackschnitzel oder Rasenschnitt, um die Feuchtigkeit im Boden zu halten und Unkraut zu unterdrücken.
* Optional: Rankhilfe: Je nach Kürbissorte kann eine Rankhilfe sinnvoll sein, um die Pflanze zu stützen.
* Optional: Schneckenschutz: Kürbispflanzen sind bei Schnecken sehr beliebt. Ein Schneckenzaun oder Schneckenkorn kann helfen, die Pflanzen zu schützen.
Schritt-für-Schritt-Anleitung: So gelingt dein Erdsack-Kürbis
Jetzt, wo wir alles zusammen haben, können wir mit dem Pflanzen beginnen. Folge einfach diesen Schritten:
1. Den Erdsack vorbereiten:
* Lege den Erdsack an den gewünschten Standort. Wähle einen sonnigen Platz, an dem die Kürbispflanze mindestens 6-8 Stunden Sonne pro Tag bekommt.
* Schneide die Oberseite des Erdsacks vorsichtig auf. Achte darauf, den Sack nicht zu beschädigen.
* Lockere die Erde im Sack etwas auf. Das erleichtert das Einpflanzen der Kürbissamen oder Jungpflanzen.
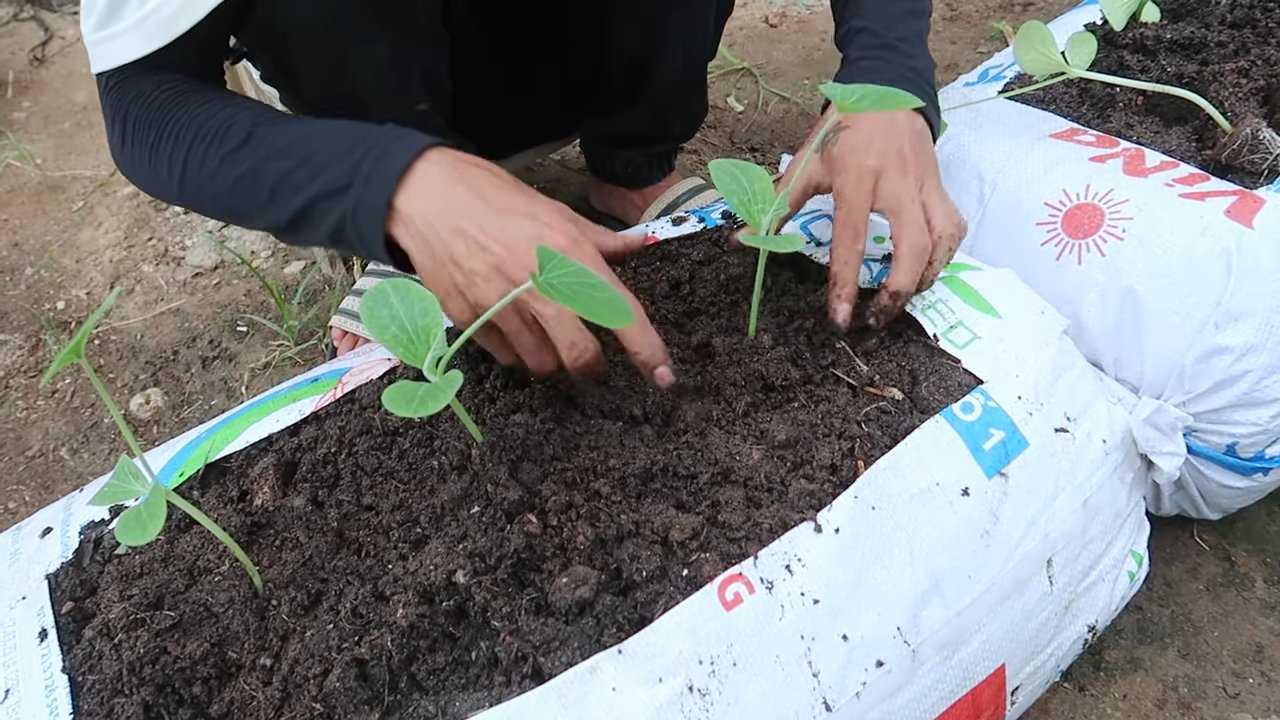
2. Die Kürbissamen aussäen oder Jungpflanzen einpflanzen:
* Aussaat: Drücke 2-3 Kürbissamen etwa 2-3 cm tief in die Erde. Achte darauf, dass die Samen ausreichend Abstand zueinander haben. Bedecke die Samen mit Erde und gieße sie vorsichtig an.
* Jungpflanzen: Grabe ein Loch in die Erde, das groß genug für den Wurzelballen der Jungpflanze ist. Setze die Jungpflanze vorsichtig in das Loch und fülle es mit Erde auf. Drücke die Erde leicht an und gieße die Pflanze gut an.
3. Gießen und düngen:
* Gieße die Kürbispflanze regelmäßig, besonders während trockener Perioden. Die Erde sollte immer feucht, aber nicht nass sein.
* Dünge die Kürbispflanze alle 2-3 Wochen mit einem organischen Dünger oder Kompost. Achte darauf, die Dosierungsanleitung des Düngers zu befolgen.
4. Mulchen:
* Bringe eine Schicht Mulchmaterial um die Kürbispflanze herum auf. Das hilft, die Feuchtigkeit im Boden zu halten, Unkraut zu unterdrücken und den Boden kühl zu halten.
5. Ausdünnen:
* Sobald die Kürbispflanzen gekeimt sind oder die Jungpflanzen gut angewachsen sind, solltest du die schwächsten Pflanzen entfernen. Lasse nur die stärkste Pflanze im Erdsack stehen. Das gibt der Pflanze genügend Platz und Nährstoffe, um optimal zu wachsen.
6. Rankhilfe (optional):
* Wenn du eine Kürbissorte anbaust, die zum Klettern neigt, kannst du eine Rankhilfe installieren. Das kann ein einfaches Gitter, ein Zaun oder ein selbstgebautes Gerüst sein. Befestige die Ranken der Kürbispflanze vorsichtig an der Rankhilfe.
7. Schneckenschutz (optional):
* Schütze deine Kürbispflanze vor Schnecken, indem du einen Schneckenzaun aufstellst oder Schneckenkorn streust.
8. Pflege und Beobachtung:
* Kontrolliere die Kürbispflanze regelmäßig auf Schädlinge und Krankheiten. Entferne befallene Blätter oder Früchte.
* Achte darauf, dass die Kürbispflanze ausreichend Wasser und Nährstoffe bekommt.
* Drehe die Kürbisse regelmäßig, damit sie gleichmäßig wachsen.
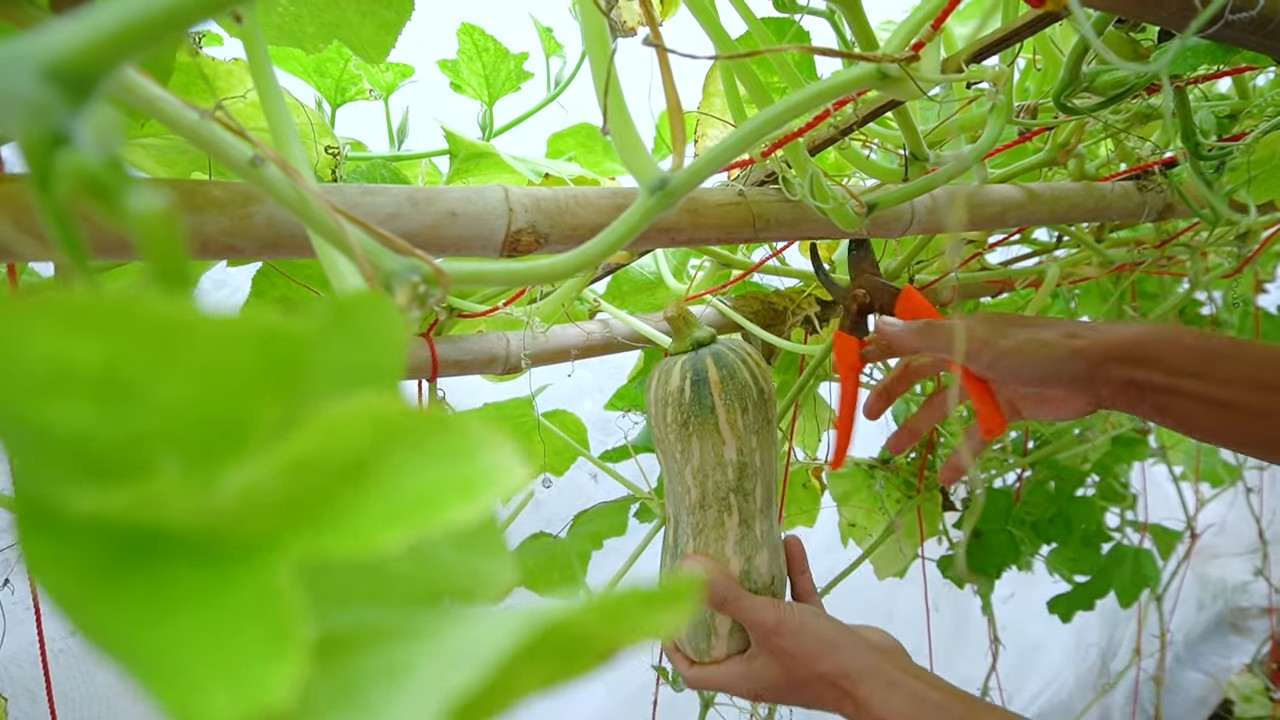
9. Die Ernte:
* Die Kürbisse sind reif, wenn sie eine intensive Farbe haben und die Schale hart ist. Klopfe auf den Kürbis. Wenn er hohl klingt, ist er reif.
* Schneide den Kürbis vorsichtig vom Stiel ab. Lasse dabei einen Stielansatz von etwa 5-10 cm stehen.
* Lagere die Kürbisse an einem kühlen, trockenen und gut belüfteten Ort.
Zusätzliche Tipps für eine erfolgreiche Kürbisernte im Erdsack
Hier sind noch ein paar zusätzliche Tipps, die dir helfen können, eine noch bessere Kürbisernte zu erzielen:
* Wähle den richtigen Standort: Kürbisse brauchen viel Sonne. Wähle einen Standort, an dem die Pflanze mindestens 6-8 Stunden Sonne pro Tag bekommt.
* Verwende hochwertige Erde: Eine gute Pflanzerde ist die Grundlage für eine erfolgreiche Kürbisernte. Verwende hochwertige Pflanzerde, die gut drainiert und reich an Nährstoffen ist.
* Gieße richtig: Kürbisse brauchen viel Wasser, besonders während trockener Perioden. Gieße die Pflanze regelmäßig, aber vermeide Staunässe.
* Dünge regelmäßig: Kürbisse sind Starkzehrer. Dünge die Pflanze regelmäßig mit einem organischen Dünger oder Kompost.
* Schütze vor Schädlingen und Krankheiten: Kontrolliere die Kürbispflanze regelmäßig auf Schädlinge und Krankheiten. Entferne befallene Blätter oder Früchte.
* Bestäubung: Kürbisse sind auf Bestäubung angewiesen, um Früchte zu bilden. Wenn du keine Bienen oder andere Bestäuber in deinem Garten hast, kannst du die Blüten von Hand bestäuben.
* Beschneiden: Das Beschneiden der Kürbispflanze kann helfen, die Fruchtbildung zu fördern. Entferne überflüssige Blätter und Triebe.
* Unterlage: Lege unter die wachsenden Kürbisse eine Unterlage (z.B. ein Brett oder Stroh), um Fäulnis zu vermeiden.
Häufige Probleme und Lösungen
Auch beim Kürbisanbau im Erdsack können Probleme auftreten. Hier sind einige häufige Probleme und wie du sie lösen kannst:
* Gelbe Blätter: Gelbe Blätter können ein Zeichen für Nährstoffmangel, Wassermangel oder Krankheiten sein. Überprüfe die Bewässerung und Dünung und behandle die Pflanze gegebenenfalls mit einem Fungizid.
* Schädlinge: Kürbispflanzen können von verschiedenen Schädlingen befallen werden, wie z.B. Blattläusen, Schnecken oder Kürbiswanzen. Bekämpfe die Schädlinge mit geeigneten Mitteln.
* Fäulnis: Fäulnis kann auftreten, wenn die Kürbisse auf feuchter Erde liegen. Lege eine Unterlage unter die Kürbisse, um Fäulnis zu vermeiden.
* Keine Früchte: Wenn die Kürbispflanze keine Früchte
Conclusion
So, there you have it! Transforming a simple soil bag into a thriving pumpkin patch is not just a fun gardening project; it’s a game-changer for anyone looking to maximize their space and yield impressive results. This DIY soil bag pumpkin growing method offers a multitude of benefits, from superior drainage and aeration to a contained environment that minimizes weed competition and soilborne diseases. It’s a cost-effective, space-saving, and incredibly rewarding way to cultivate these autumnal giants.
Why is this a must-try? Because it simplifies the often-intimidating process of pumpkin cultivation. No more back-breaking tilling, extensive weeding, or worrying about poor soil quality. The soil bag acts as a self-contained ecosystem, providing the perfect environment for your pumpkin vines to flourish. Plus, the dark color of the bag helps to warm the soil, giving your pumpkins a head start in cooler climates.
But the beauty of this method lies in its adaptability. Feel free to experiment with different pumpkin varieties. Smaller pie pumpkins, like ‘Sugar Pie’ or ‘Baby Boo,’ are excellent choices for beginners and require less space. For the ambitious gardener, larger varieties like ‘Atlantic Giant’ can also be grown in soil bags, although you may need to provide additional support for the developing fruit.
Consider adding companion plants around the base of your soil bag to further enhance your pumpkin’s growth. Marigolds can deter pests, while nasturtiums attract beneficial insects. You can also incorporate a slow-release fertilizer into the soil mix to provide a steady stream of nutrients throughout the growing season.
Don’t be afraid to get creative with your soil bag setup. You can paint the bag with fun designs, add trellises for vertical growth, or even create a mini-pumpkin patch by grouping several soil bags together. The possibilities are endless!
We wholeheartedly encourage you to give this DIY soil bag pumpkin growing trick a try. It’s a fantastic way to connect with nature, learn about the growing process, and enjoy the satisfaction of harvesting your own homegrown pumpkins. Whether you’re a seasoned gardener or a complete novice, this method is accessible, rewarding, and sure to bring a smile to your face.
Once you’ve embarked on your soil bag pumpkin adventure, we’d love to hear about your experience! Share your photos, tips, and triumphs with us in the comments section below. Let’s build a community of soil bag pumpkin growers and inspire others to embrace this innovative and sustainable gardening technique. Happy growing!
Frequently Asked Questions (FAQ)
What type of soil should I use in my soil bag for growing pumpkins?
The ideal soil mix for soil bag pumpkin growing is a well-draining, nutrient-rich blend. A combination of equal parts topsoil, compost, and peat moss or coco coir works well. The topsoil provides a good base, the compost adds essential nutrients and improves soil structure, and the peat moss or coco coir helps retain moisture while ensuring good drainage. You can also incorporate a slow-release fertilizer into the mix to provide a steady supply of nutrients throughout the growing season. Avoid using heavy clay soil, as it can become waterlogged and hinder root development.
How big should the soil bag be for growing pumpkins?
The size of the soil bag depends on the pumpkin variety you plan to grow. For smaller pie pumpkins, a bag that is approximately 24 inches in diameter and 12 inches deep should suffice. For larger varieties like ‘Atlantic Giant,’ you’ll need a much larger bag, ideally around 36 inches in diameter and 18 inches deep. The larger the bag, the more room the roots will have to grow, and the more nutrients and water the soil can hold. Remember to choose a bag that is sturdy enough to support the weight of the soil and the growing pumpkin.
How often should I water my soil bag pumpkins?
Watering frequency depends on the weather conditions and the size of your pumpkin plant. Generally, you should water deeply whenever the top inch of soil feels dry to the touch. During hot, dry weather, you may need to water daily. Ensure that the water penetrates the entire soil bag. Avoid overwatering, as this can lead to root rot. A good way to check if your pumpkin needs water is to stick your finger into the soil near the base of the plant. If the soil feels dry, it’s time to water.
How much sunlight do soil bag pumpkins need?
Pumpkins are sun-loving plants and require at least 6-8 hours of direct sunlight per day to thrive. Choose a location for your soil bag that receives ample sunlight throughout the day. If you live in a particularly hot climate, some afternoon shade may be beneficial to prevent the leaves from scorching.
Do I need to fertilize my soil bag pumpkins?
Yes, pumpkins are heavy feeders and require regular fertilization to produce large, healthy fruits. Start by incorporating a slow-release fertilizer into the soil mix when you plant your pumpkin seeds or seedlings. Throughout the growing season, supplement with a liquid fertilizer every 2-3 weeks. Choose a fertilizer that is high in phosphorus and potassium, as these nutrients are essential for fruit development. Avoid over-fertilizing, as this can lead to excessive vine growth at the expense of fruit production.
How do I protect my soil bag pumpkins from pests and diseases?
Several pests and diseases can affect pumpkins, including squash bugs, squash vine borers, powdery mildew, and downy mildew. To prevent these problems, start by choosing disease-resistant pumpkin varieties. Regularly inspect your plants for signs of pests or diseases. Handpick squash bugs and squash vine borer eggs. Use insecticidal soap or neem oil to control pests. Apply a fungicide to prevent or treat powdery mildew and downy mildew. Good air circulation can also help prevent fungal diseases.
Can I grow multiple pumpkin plants in one soil bag?
While it’s technically possible to grow multiple pumpkin plants in one large soil bag, it’s generally not recommended. Pumpkins require a lot of space and nutrients, and overcrowding can lead
So, there you have it! Transforming a simple soil bag into a thriving pumpkin patch is not just a fun gardening project; it’s a game-changer for anyone looking to maximize their space and yield impressive results. This DIY soil bag pumpkin growing method offers a multitude of benefits, from superior drainage and aeration to a contained environment that minimizes weed competition and soilborne diseases. It’s a cost-effective, space-saving, and incredibly rewarding way to cultivate these autumnal giants.
Why is this a must-try? Because it simplifies the often-intimidating process of pumpkin cultivation. No more back-breaking tilling, extensive weeding, or worrying about poor soil quality. The soil bag acts as a self-contained ecosystem, providing the perfect environment for your pumpkin vines to flourish. Plus, the dark color of the bag helps to warm the soil, giving your pumpkins a head start in cooler climates.
But the beauty of this method lies in its adaptability. Feel free to experiment with different pumpkin varieties. Smaller pie pumpkins, like ‘Sugar Pie’ or ‘Baby Boo,’ are excellent choices for beginners and require less space. For the ambitious gardener, larger varieties like ‘Atlantic Giant’ can also be grown in soil bags, although you may need to provide additional support for the developing fruit.
Consider adding companion plants around the base of your soil bag to further enhance your pumpkin’s growth. Marigolds can deter pests, while nasturtiums attract beneficial insects. You can also incorporate a slow-release fertilizer into the soil mix to provide a steady stream of nutrients throughout the growing season.
Don’t be afraid to get creative with your soil bag setup. You can paint the bag with fun designs, add trellises for vertical growth, or even create a mini-pumpkin patch by grouping several soil bags together. The possibilities are endless!
We wholeheartedly encourage you to give this DIY soil bag pumpkin growing trick a try. It’s a fantastic way to connect with nature, learn about the growing process, and enjoy the satisfaction of harvesting your own homegrown pumpkins. Whether you’re a seasoned gardener or a complete novice, this method is accessible, rewarding, and sure to bring a smile to your face.
Once you’ve embarked on your soil bag pumpkin adventure, we’d love to hear about your experience! Share your photos, tips, and triumphs with us in the comments section below. Let’s build a community of soil bag pumpkin growers and inspire others to embrace this innovative and sustainable gardening technique. Happy growing!
Frequently Asked Questions (FAQ)
What type of soil should I use in my soil bag for growing pumpkins?
The ideal soil mix for soil bag pumpkin growing is a well-draining, nutrient-rich blend. A combination of equal parts topsoil, compost, and peat moss or coco coir works well. The topsoil provides a good base, the compost adds essential nutrients and improves soil structure, and the peat moss or coco coir helps retain moisture while ensuring good drainage. You can also incorporate a slow-release fertilizer into the mix to provide a steady supply of nutrients throughout the growing season. Avoid using heavy clay soil, as it can become waterlogged and hinder root development.
How big should the soil bag be for growing pumpkins?
The size of the soil bag depends on the pumpkin variety you plan to grow. For smaller pie pumpkins, a bag that is approximately 24 inches in diameter and 12 inches deep should suffice. For larger varieties like ‘Atlantic Giant,’ you’ll need a much larger bag, ideally around 36 inches in diameter and 18 inches deep. The larger the bag, the more room the roots will have to grow, and the more nutrients and water the soil can hold. Remember to choose a bag that is sturdy enough to support the weight of the soil and the growing pumpkin.
How often should I water my soil bag pumpkins?
Watering frequency depends on the weather conditions and the size of your pumpkin plant. Generally, you should water deeply whenever the top inch of soil feels dry to the touch. During hot, dry weather, you may need to water daily. Ensure that the water penetrates the entire soil bag. Avoid overwatering, as this can lead to root rot. A good way to check if your pumpkin needs water is to stick your finger into the soil near the base of the plant. If the soil feels dry, it’s time to water.
How much sunlight do soil bag pumpkins need?
Pumpkins are sun-loving plants and require at least 6-8 hours of direct sunlight per day to thrive. Choose a location for your soil bag that receives ample sunlight throughout the day. If you live in a particularly hot climate, some afternoon shade may be beneficial to prevent the leaves from scorching.
Do I need to fertilize my soil bag pumpkins?
Yes, pumpkins are heavy feeders and require regular fertilization to produce large, healthy fruits. Start by incorporating a slow-release fertilizer into the soil mix when you plant your pumpkin seeds or seedlings. Throughout the growing season, supplement with a liquid fertilizer every 2-3 weeks. Choose a fertilizer that is high in phosphorus and potassium, as these nutrients are essential for fruit development. Avoid over-fertilizing, as this can lead to excessive vine growth at the expense of fruit production.
How do I protect my soil bag pumpkins from pests and diseases?
Several pests and diseases can affect pumpkins, including squash bugs, squash vine borers, powdery mildew, and downy mildew. To prevent these problems, start by choosing disease-resistant pumpkin varieties. Regularly inspect your plants for signs of pests or diseases. Handpick squash bugs and squash vine borer eggs. Use insecticidal soap or neem oil to control pests. Apply a fungicide to prevent or treat powdery mildew and downy mildew. Good air circulation can also help prevent fungal diseases.
Can I grow multiple pumpkin plants in one soil bag?
While it’s technically possible to grow multiple pumpkin plants in one large soil bag, it’s generally not recommended. Pumpkins require a lot of space and nutrients, and overcrowding can lead to stunted growth and reduced fruit production. If you want to grow multiple pumpkin plants, it’s best to use separate soil bags for each plant.
How do I support the weight of a large pumpkin growing in a soil bag?
As your pumpkin grows larger, it may require additional support to prevent the vine from breaking. You can use a sling made of cloth or netting to support the pumpkin. Tie the sling to a sturdy stake or trellis. You can also place a piece of plywood or a pallet underneath the pumpkin to protect it from contact with the soil.
When is the best time to harvest my soil bag pumpkins?
Pumpkins are typically ready to harvest in the fall, when the skin has hardened and turned a deep, uniform color. The stem should also be dry and brown. To harvest, use a sharp knife or pruning shears to cut the stem a few inches from the pumpkin. Avoid lifting the pumpkin by the stem, as this can damage it.
Can I reuse the soil from my soil bag after harvesting my pumpkins?
Yes, you can reuse the soil from your soil bag, but it’s important to amend it with fresh compost and fertilizer to replenish the nutrients that were used by the pumpkin plant. You can also use the soil to grow other vegetables or flowers. Consider rotating your crops each year to prevent the buildup of soilborne diseases.
Leave a Comment