
Rooftop kale plant growing can seem like a daunting task, especially if you’re new to the world of urban gardening. But trust me, with a few clever tricks and a little DIY ingenuity, you can transform your rooftop into a thriving kale oasis!
For centuries, humans have cultivated gardens in unexpected places. From the Hanging Gardens of Babylon to the window boxes of Parisian apartments, the desire to connect with nature and grow our own food has always been strong. Today, with increasing urbanization and limited green spaces, rooftop gardening is experiencing a major resurgence. And why not? It’s a fantastic way to enjoy fresh, healthy produce, beautify your surroundings, and even reduce your carbon footprint.
But let’s be honest, successfully growing kale on a rooftop presents unique challenges. Limited space, harsh weather conditions, and the need for efficient watering systems all require creative solutions. That’s where this DIY guide comes in! I’m going to share my favorite hacks and tricks for maximizing your rooftop kale harvest, even if you’re a complete beginner. Imagine stepping out onto your roof and harvesting fresh, vibrant kale for your salads, smoothies, and stir-fries. It’s not just a dream – it’s an achievable reality with the right knowledge and a little elbow grease. So, let’s dive in and unlock the secrets to successful rooftop kale plant growing!
Dein eigener Dachgarten-Kohl: Eine Schritt-für-Schritt-Anleitung
Hallo liebe Gartenfreunde! Habt ihr euch jemals gefragt, ob ihr auf eurem Dach ein kleines Paradies für Gemüse schaffen könnt? Ich zeige euch, wie ihr ganz einfach euren eigenen Dachgarten-Kohl anbauen könnt. Es ist einfacher als ihr denkt und das Ergebnis ist super lecker und gesund!
Was du brauchst: Die Materialliste
Bevor wir loslegen, sollten wir sicherstellen, dass wir alles griffbereit haben. Hier ist eine Liste mit den Dingen, die wir benötigen:
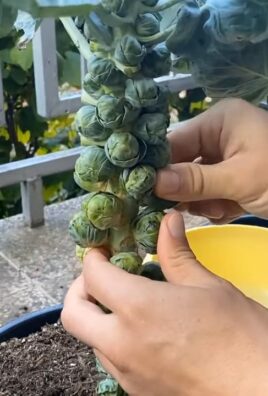
* Kohl-Setzlinge oder Samen: Wähle deine Lieblingssorte! Grünkohl, Palmkohl, Rosenkohl – die Auswahl ist riesig.
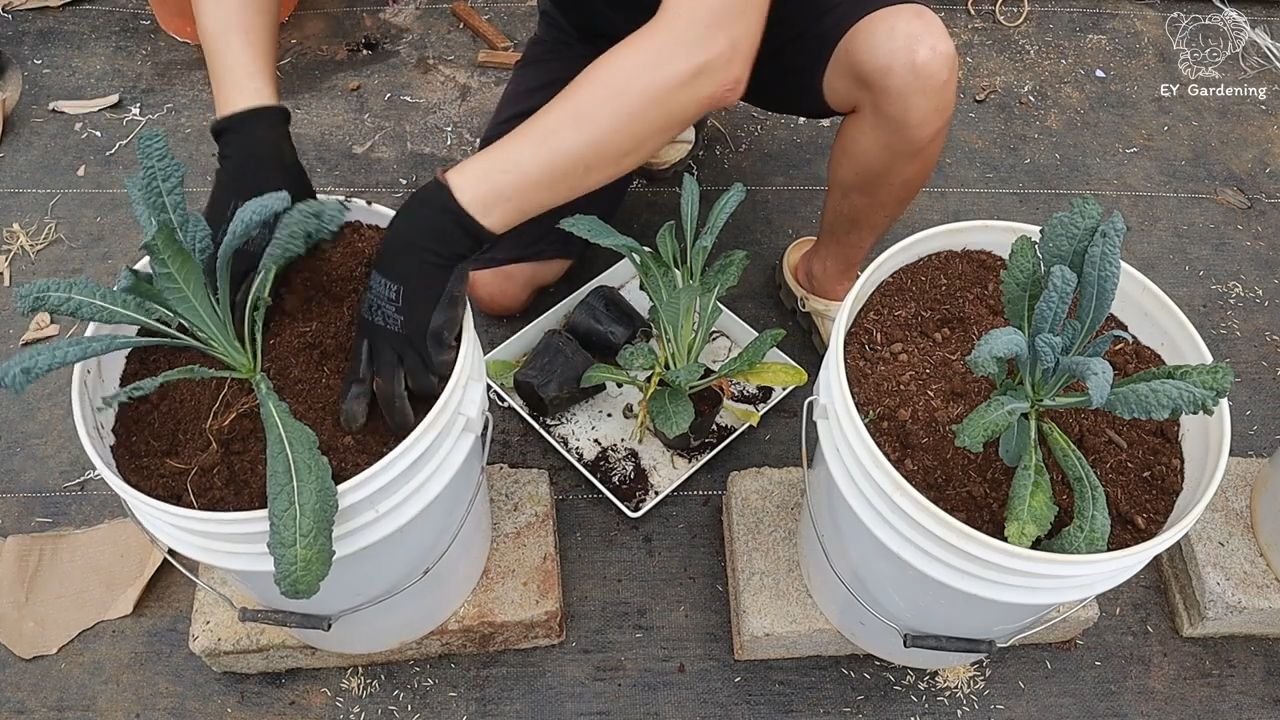
* Pflanzgefäße: Achte darauf, dass sie groß genug sind (mindestens 30 cm tief und breit) und über Abzugslöcher verfügen.
* Hochwertige Pflanzerde: Eine Mischung aus Gartenerde, Kompost und Kokosfasern ist ideal.
* Drainagematerial: Blähton, Kies oder Tonscherben für den Boden der Pflanzgefäße.
* Gießkanne oder Schlauch: Zum Bewässern deiner Kohlpflanzen.
* Gartenschere oder Messer: Zum Ernten des Kohls.
* Dünger: Organischer Dünger oder Komposttee für die Nährstoffversorgung.
* Handschuhe: Zum Schutz deiner Hände.
* Schaufel oder Spaten: Zum Befüllen der Pflanzgefäße.
* Mulchmaterial: Stroh, Holzhackschnitzel oder Grasschnitt, um die Feuchtigkeit im Boden zu halten und Unkraut zu unterdrücken.
* (Optional) Schneckenschutz: Kohl ist leider sehr beliebt bei Schnecken.
* (Optional) Rankhilfe: Für Sorten, die hoch wachsen.
Sicherheit geht vor: Vorbereitung des Daches
Bevor wir mit dem Bepflanzen beginnen, müssen wir sicherstellen, dass unser Dach dafür geeignet ist.
* Überprüfe die Tragfähigkeit: Ein Dachgarten kann ganz schön schwer werden, besonders wenn die Erde feucht ist. Informiere dich, ob dein Dach das Gewicht tragen kann. Im Zweifelsfall solltest du einen Statiker konsultieren.
* Dachabdichtung: Stelle sicher, dass dein Dach gut abgedichtet ist, um Wasserschäden zu vermeiden. Eine zusätzliche Schutzschicht unter den Pflanzgefäßen kann nicht schaden.
* Zugänglichkeit: Überlege dir, wie du deinen Dachgarten erreichen kannst, um ihn zu pflegen und zu ernten. Ein sicherer Zugang ist wichtig.
* Windschutz: Dächer sind oft windig. Wähle einen geschützten Standort oder installiere einen Windschutz, um deine Kohlpflanzen vor Schäden zu bewahren.
Schritt-für-Schritt-Anleitung: Kohl pflanzen und pflegen
Jetzt geht’s ans Eingemachte! Hier ist eine detaillierte Anleitung, wie du deinen Dachgarten-Kohl erfolgreich anbaust:
1. Pflanzgefäße vorbereiten:
* Lege eine Schicht Drainagematerial (Blähton, Kies oder Tonscherben) auf den Boden der Pflanzgefäße. Das sorgt für eine gute Drainage und verhindert Staunässe.
* Fülle die Pflanzgefäße mit hochwertiger Pflanzerde. Lass dabei etwa 5 cm Platz bis zum Rand.
* Befeuchte die Erde leicht.
2. Kohl pflanzen:
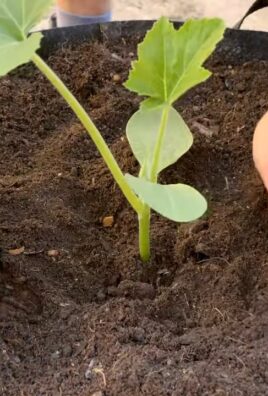
* Wenn du Setzlinge verwendest, grabe kleine Löcher in die Erde, die groß genug sind, um die Wurzelballen aufzunehmen.
* Setze die Setzlinge vorsichtig in die Löcher und fülle sie mit Erde auf. Drücke die Erde leicht an.
* Wenn du Samen verwendest, säe sie gemäß den Anweisungen auf der Samenpackung. In der Regel werden die Samen etwa 1-2 cm tief in die Erde gesät.
* Gieße die Pflanzen oder Samen nach dem Pflanzen gründlich.
3. Standort wählen:
* Kohl braucht viel Sonne! Wähle einen Standort auf deinem Dach, der mindestens 6 Stunden Sonnenlicht pro Tag bekommt.
* Achte auf Windschutz, besonders wenn dein Dach sehr windig ist.
4. Bewässerung:
* Kohl braucht regelmäßige Bewässerung, besonders während trockener Perioden.
* Gieße die Pflanzen, wenn sich die oberste Erdschicht trocken anfühlt.
* Vermeide Staunässe, da dies zu Wurzelfäule führen kann.
* Am besten gießt du am Morgen, damit die Blätter tagsüber abtrocknen können.
5. Düngung:
* Kohl ist ein Starkzehrer und benötigt regelmäßige Düngung.
* Dünge die Pflanzen alle 2-3 Wochen mit organischem Dünger oder Komposttee.
* Befolge die Anweisungen auf der Düngerpackung.
6. Mulchen:
* Bedecke die Erde um die Kohlpflanzen mit Mulchmaterial (Stroh, Holzhackschnitzel oder Grasschnitt).
* Mulch hilft, die Feuchtigkeit im Boden zu halten, Unkraut zu unterdrücken und den Boden zu schützen.
7. Schutz vor Schädlingen:
* Kohl ist anfällig für verschiedene Schädlinge, wie z.B. Kohlweißlinge, Blattläuse und Schnecken.
* Kontrolliere deine Pflanzen regelmäßig auf Schädlinge.
* Entferne Schädlinge von Hand oder verwende biologische Schädlingsbekämpfungsmittel.
* Schnecken können mit Schneckenkorn oder Schneckenzäunen bekämpft werden.
* Kohlweißlinge können mit Netzen abgedeckt werden.
8. Rankhilfe (optional):
* Einige Kohlsorten, wie z.B. Palmkohl, können sehr hoch wachsen und benötigen eine Rankhilfe.
* Installiere eine Rankhilfe, um die Pflanzen zu stützen und zu verhindern, dass sie umfallen.
9. Ernte:
* Die Erntezeit hängt von der Kohlsorte ab.
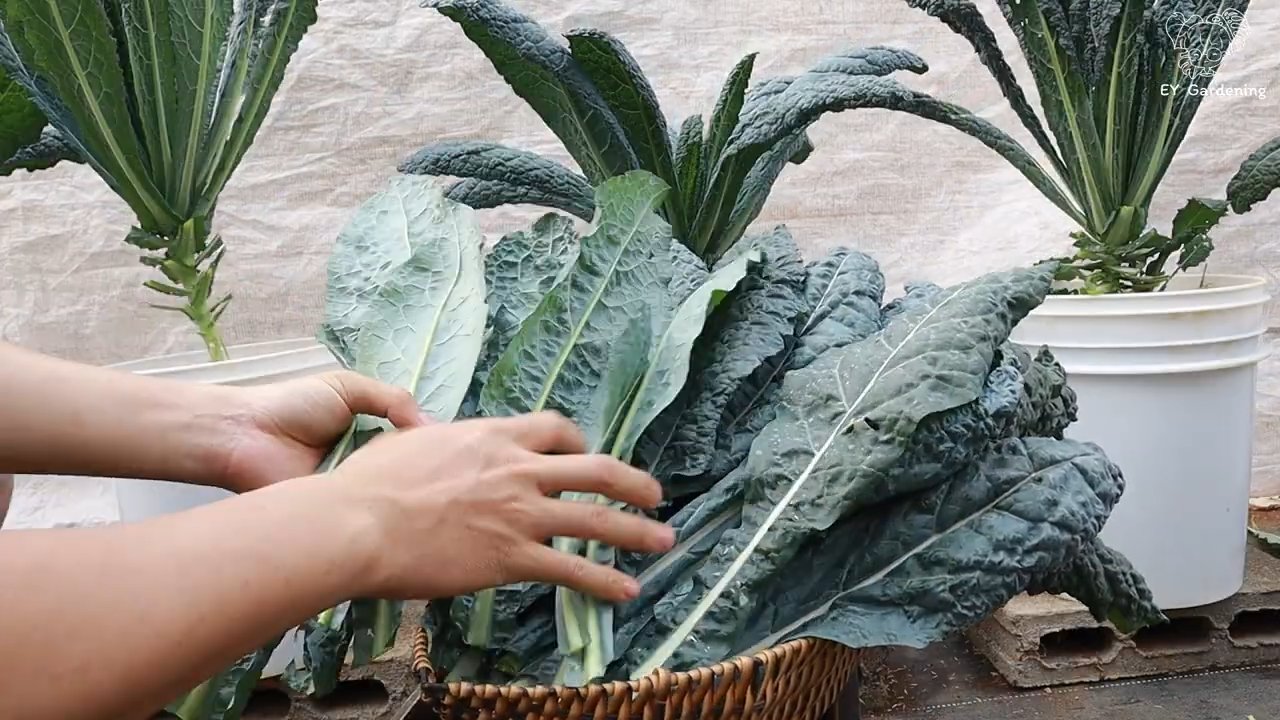
* Grünkohl kann geerntet werden, sobald die Blätter groß genug sind.
* Rosenkohl kann geerntet werden, wenn die Röschen fest und geschlossen sind.
* Schneide die Blätter oder Röschen mit einer Gartenschere oder einem Messer ab.
* Ernte die Blätter von unten nach oben, damit die Pflanze weiterwachsen kann.
Spezielle Tipps für den Dachgarten
Ein Dachgarten hat seine eigenen Herausforderungen. Hier sind ein paar zusätzliche Tipps, die dir helfen, erfolgreich zu sein:
* Wind: Wie bereits erwähnt, kann Wind ein Problem sein. Wähle windresistente Kohlsorten oder installiere einen Windschutz.
* Sonne: Dächer können sehr heiß werden. Achte darauf, dass deine Pflanzen ausreichend bewässert werden und schütze sie vor direkter Sonneneinstrahlung während der heißesten Stunden des Tages.
* Gewicht: Achte darauf, dass die Pflanzgefäße nicht zu schwer werden. Verwende leichte Pflanzerde und vermeide es, die Gefäße zu überfüllen.
* Bewässerungssystem: Wenn du nicht regelmäßig gießen kannst, solltest du ein automatisches Bewässerungssystem in Betracht ziehen.
* Dachabdichtung: Überprüfe regelmäßig die Dachabdichtung, um sicherzustellen, dass sie intakt ist.
Häufige Probleme und Lösungen
Auch beim Kohlanbau auf dem Dach kann es zu Problemen kommen. Hier sind einige häufige Probleme und wie du sie lösen kannst:
* Gelbe Blätter: Gelbe Blätter können ein Zeichen für Nährstoffmangel sein. Dünge die Pflanzen mit einem ausgewogenen Dünger.
* Löcher in den Blättern: Löcher in den Blättern werden oft durch Schädlinge verursacht. Kontrolliere die Pflanzen auf Schädlinge und bekämpfe sie gegebenenfalls.
* Wurzelfäule: Wurzelfäule wird durch Staunässe verursacht. Achte auf eine gute Drainage und vermeide es, die Pflanzen zu überwässern.
* Krankheiten: Kohl kann von verschiedenen Krankheiten befallen werden. Achte auf Anzeichen von Krankheiten und behandle sie gegebenenfalls mit einem geeigneten Fungizid.
Fazit: Dein eigener
Conclusion
So, there you have it! Transforming your rooftop into a thriving kale garden is not only achievable, but surprisingly simple with this DIY trick. We’ve walked you through the process, highlighting the ease and affordability of creating a nutrient-rich oasis right above your head. Forget expensive grocery store kale – imagine stepping outside and harvesting fresh, vibrant greens whenever you need them.
This isn’t just about saving money; it’s about connecting with your food source, reducing your carbon footprint, and enjoying the unparalleled flavor of homegrown produce. The satisfaction of nurturing a plant from seed to harvest is incredibly rewarding, and knowing that you’re providing your family with healthy, organic kale makes it even better.
But the benefits don’t stop there. A rooftop kale garden can also improve your home’s insulation, helping to regulate temperature and reduce energy costs. Plus, the lush greenery adds a touch of natural beauty to your urban landscape, creating a peaceful and inviting space.
Why is this DIY trick a must-try? Because it empowers you to take control of your food supply, embrace sustainable living, and enjoy the freshest, most delicious kale imaginable. It’s a simple, cost-effective, and incredibly rewarding project that anyone can undertake.
Ready to take your rooftop garden to the next level? Consider these variations:
* Vertical Gardening: If space is limited, explore vertical gardening techniques using pallets, hanging planters, or stacked containers. This maximizes your growing area and adds visual interest to your rooftop.
* Companion Planting: Plant kale alongside other beneficial herbs and vegetables, such as marigolds (to deter pests) or dill (to attract beneficial insects).
* Succession Planting: Plant new kale seedlings every few weeks to ensure a continuous harvest throughout the growing season.
* Experiment with Varieties: Don’t limit yourself to just one type of kale! Try different varieties like Lacinato (dinosaur kale), Red Russian kale, or Curly kale to add variety to your meals.
* Hydroponics: For a more advanced approach, consider a small-scale hydroponic system for growing your rooftop kale. This can increase yields and reduce water consumption.
We’re confident that you’ll be amazed by the results of this DIY rooftop kale garden trick. It’s a game-changer for anyone who wants to enjoy fresh, healthy greens without breaking the bank.
So, what are you waiting for? Gather your supplies, choose your favorite kale varieties, and get started today! We can’t wait to hear about your experiences. Share your photos, tips, and questions in the comments below. Let’s build a community of rooftop kale gardeners and inspire others to embrace sustainable living. Don’t forget to use the hashtag #RooftopKaleGarden so we can all follow your progress!
Frequently Asked Questions (FAQ)
What kind of containers are best for growing kale on a rooftop?
The best containers for growing kale on a rooftop are those that are durable, lightweight, and provide adequate drainage. Plastic pots, fabric grow bags, and repurposed containers like old buckets or tubs are all good options. Ensure the containers are large enough to accommodate the kale’s root system, ideally at least 12 inches in diameter and depth. Consider the weight of the filled containers, especially if your rooftop has weight restrictions. Lightweight potting mixes can help reduce the overall load.
How much sunlight does rooftop kale need?
Kale thrives in full sun, requiring at least 6 hours of direct sunlight per day. If your rooftop receives less than 6 hours of sunlight, consider using grow lights to supplement the natural light. Monitor your kale plants closely and adjust their position as needed to ensure they receive adequate sunlight. If the leaves appear pale or leggy, it’s a sign that they need more light.
What type of soil is best for growing kale in containers?
Kale prefers well-draining, nutrient-rich soil. A good potting mix for container gardening is ideal. You can also create your own mix by combining equal parts of compost, peat moss (or coconut coir), and perlite or vermiculite. Compost provides essential nutrients, peat moss or coconut coir helps retain moisture, and perlite or vermiculite improves drainage. Avoid using garden soil, as it can be too heavy and compact for container gardening.
How often should I water my rooftop kale plants?
Water your kale plants regularly, especially during hot and dry weather. Check the soil moisture by sticking your finger about an inch into the soil. If it feels dry, it’s time to water. Water deeply, until water drains out of the bottom of the container. Avoid overwatering, as this can lead to root rot. Mulching around the base of the plants can help retain moisture and reduce the need for frequent watering.
What are some common pests and diseases that affect kale, and how can I prevent them?
Common pests that affect kale include aphids, cabbage worms, flea beetles, and slugs. To prevent pest infestations, inspect your plants regularly and remove any pests you find. You can also use organic pest control methods, such as insecticidal soap, neem oil, or diatomaceous earth. Row covers can also be used to protect your plants from pests. Common diseases that affect kale include black rot, clubroot, and downy mildew. To prevent diseases, ensure good air circulation around your plants, avoid overwatering, and practice crop rotation.
How do I harvest kale from my rooftop garden?
You can start harvesting kale leaves when they are about 6-8 inches long. Harvest the outer leaves first, leaving the inner leaves to continue growing. This allows the plant to produce new leaves throughout the growing season. To harvest, simply cut the leaves off at the base of the stem with a sharp knife or scissors. Avoid tearing the leaves, as this can damage the plant.
Can I grow kale on my rooftop during the winter?
Yes, kale is a cold-hardy vegetable that can tolerate frost and even snow. In mild climates, you can grow kale throughout the winter. In colder climates, you may need to protect your plants from extreme temperatures by covering them with a cold frame or greenhouse. You can also choose winter-hardy kale varieties, such as Red Russian kale or Lacinato kale.
How can I fertilize my rooftop kale plants?
Kale is a heavy feeder and benefits from regular fertilization. You can use a balanced organic fertilizer, such as compost tea, fish emulsion, or seaweed extract. Apply fertilizer every 2-3 weeks during the growing season. Avoid over-fertilizing, as this can lead to excessive leaf growth and reduced flavor.
Is rooftop gardening safe for my roof?
Before starting a rooftop garden, it’s essential to assess the structural integrity of your roof and ensure it can support the added weight of the containers, soil, and plants. Consult with a structural engineer or building professional if you have any concerns. Also, consider the waterproofing of your roof and take steps to prevent leaks or water damage. Use waterproof containers and consider installing a drainage system to prevent water from pooling on the roof.
What are the benefits of growing kale on my rooftop?
Growing kale on your rooftop offers numerous benefits, including:
* Fresh, organic produce: Enjoy the taste of homegrown kale without the need for pesticides or herbicides.
* Cost savings: Reduce your grocery bill by growing your own vegetables.
* Environmental benefits: Reduce your carbon footprint by growing your own food locally.
* Improved air quality: Plants absorb carbon dioxide and release oxygen, improving air quality.
* Increased property value: A well-maintained rooftop garden can add value to your home.
* Therapeutic benefits: Gardening can be a relaxing and rewarding activity that reduces stress and improves mental well-being.
* DIY kale is a great way to get started with gardening.

Leave a Comment