
Radish gardening weekly harvest – sounds like a dream, right? Imagine stepping into your backyard and plucking crisp, peppery radishes fresh from the soil every week. No more sad, wilted supermarket radishes! This isn’t just a pipe dream; it’s an achievable reality with a few clever tricks and a little DIY know-how.
For centuries, radishes have been a staple in gardens around the world. From ancient Egypt to modern-day kitchen gardens, these speedy little vegetables have provided a burst of flavor and nutrition. Their quick growth cycle makes them incredibly rewarding for even the most impatient gardener (like me!).
But let’s be honest, sometimes getting that consistent, bountiful radish gardening weekly harvest can feel a bit elusive. Maybe your radishes are bolting, cracking, or just plain refusing to grow. That’s where these DIY tricks come in! I’m going to share my secrets to ensuring a steady supply of delicious radishes all season long. We’ll cover everything from seed spacing and watering techniques to companion planting and pest control. So, grab your gardening gloves, and let’s get ready to enjoy a radish-filled feast!
DIY Weekly Radish Harvest: From Seed to Salad in a Month!
Hey there, fellow garden enthusiasts! I’m so excited to share my foolproof method for achieving a weekly radish harvest. Radishes are fantastic because they’re quick to grow, adding a peppery zing to salads and snacks. Plus, with this method, you’ll have a continuous supply, so no more radish cravings going unsatisfied!
Understanding Radish Growth and Succession Planting
Before we dive into the nitty-gritty, let’s talk about why this weekly harvest works. Radishes are incredibly fast growers, maturing in as little as 21-30 days, depending on the variety. This rapid growth makes them perfect for succession planting, which is the key to our weekly harvest.
Succession planting simply means planting small batches of seeds at regular intervals, ensuring a continuous supply of crops. In our case, we’ll be planting a new batch of radishes every week.
Key Concepts for Radish Success:
* Timing is Everything: Radishes prefer cool weather. Spring and fall are ideal. In hotter climates, provide afternoon shade.
* Soil Matters: Loose, well-drained soil is crucial. Radishes need room to expand. Amend heavy clay soil with compost.
* Water Wisely: Consistent moisture is essential for plump, flavorful radishes. Avoid letting the soil dry out completely.
* Thinning is Necessary: Overcrowding leads to small, spindly radishes. Thin seedlings to allow adequate space.
* Harvest Promptly: Radishes become woody and bitter if left in the ground too long. Harvest when they reach the desired size.
Materials You’ll Need
Okay, let’s gather our supplies. This is a pretty low-key project, so you probably have most of this stuff already.
* Radish Seeds: Choose your favorite varieties! I personally love ‘Cherry Belle’ for its classic flavor and ‘French Breakfast’ for its mildness. Experiment to find what you like best.
* Gardening Soil: A good quality potting mix or garden soil amended with compost.
* Containers or Garden Bed: You can use containers (at least 6 inches deep) or a dedicated section of your garden bed.
* Watering Can or Hose: For gentle watering.
* Small Trowel or Hand Rake: For preparing the soil and planting seeds.
* Plant Labels and Marker: To keep track of your planting dates. This is super important for knowing when to harvest!
* Optional: Organic fertilizer (like compost tea or fish emulsion) for an extra boost.
Step-by-Step Guide to Weekly Radish Planting
Here’s the breakdown of how to get those radishes growing on a weekly schedule.
Week 1: Initial Planting
1. Prepare the Soil: Whether you’re using containers or a garden bed, make sure the soil is loose and free of rocks and debris. If using containers, ensure they have drainage holes. I like to add a generous amount of compost to improve drainage and fertility.
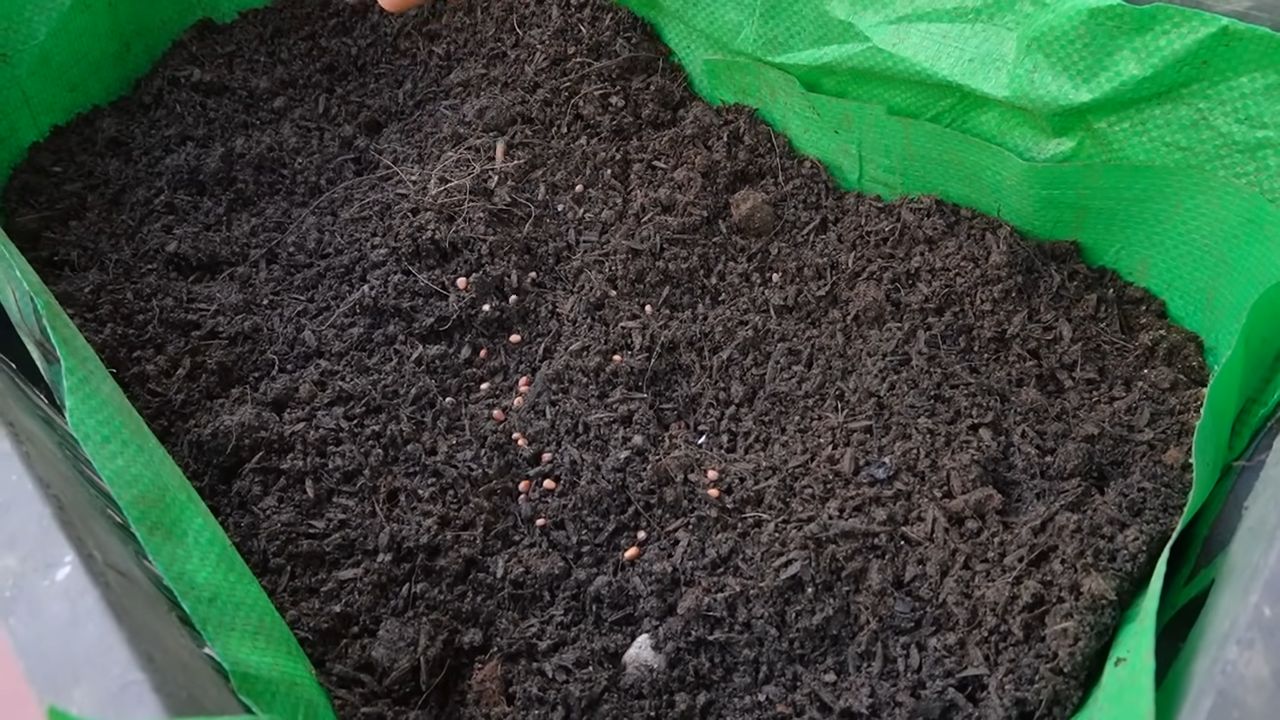
2. Sow the Seeds: Sow radish seeds about ½ inch deep and ½ inch apart. You can sow them in rows or broadcast them evenly over the soil surface. I prefer rows because it makes thinning easier.
3. Water Gently: Water the soil thoroughly but gently, so you don’t wash away the seeds. I use a watering can with a rose head to create a gentle shower.
4. Label and Date: Label the planting area with the date you planted the seeds. This is crucial for tracking your harvest schedule. I use simple plastic plant labels and a permanent marker.
Week 2: Second Planting
1. Repeat Steps 1-4: Exactly as you did in Week 1, prepare the soil, sow the seeds, water gently, and label the planting area with the current date. Make sure to choose a different spot from your first planting.
Week 3: Third Planting
1. Repeat Steps 1-4: You guessed it! Repeat the process from Week 1 and Week 2.
Week 4: Fourth Planting
1. Repeat Steps 1-4: Keep the momentum going! Plant your fourth batch of radish seeds.
Maintaining Your Radish Patch
Now that you’ve got your radishes planted, let’s talk about how to keep them happy and healthy.
1. Watering: Keep the soil consistently moist, but not waterlogged. Water deeply whenever the top inch of soil feels dry to the touch. I usually water every other day, but this depends on the weather.
2. Thinning: Once the seedlings emerge (usually within a few days), thin them to about 1-2 inches apart. This gives the radishes enough room to develop properly. Don’t be afraid to pull out the weaker seedlings.
3. Weeding: Keep the planting area free of weeds. Weeds compete with radishes for nutrients and water. Hand-pull weeds carefully to avoid disturbing the radish roots.
4. Fertilizing (Optional): If your soil is poor, you can give your radishes a boost with a diluted organic fertilizer, such as compost tea or fish emulsion. Follow the instructions on the fertilizer package. I usually fertilize once or twice during the growing season.
5. Pest Control: Radishes are generally pest-resistant, but flea beetles can sometimes be a problem. If you notice small holes in the leaves, you can try covering the plants with row covers or spraying them with insecticidal soap.
Harvesting Your Radishes
This is the fun part! Remember those labels you made? They’re about to come in handy.
1. Check the Planting Dates: Starting about 21-30 days after your first planting, check the size of the radishes. They should be about 1 inch in diameter, depending on the variety.
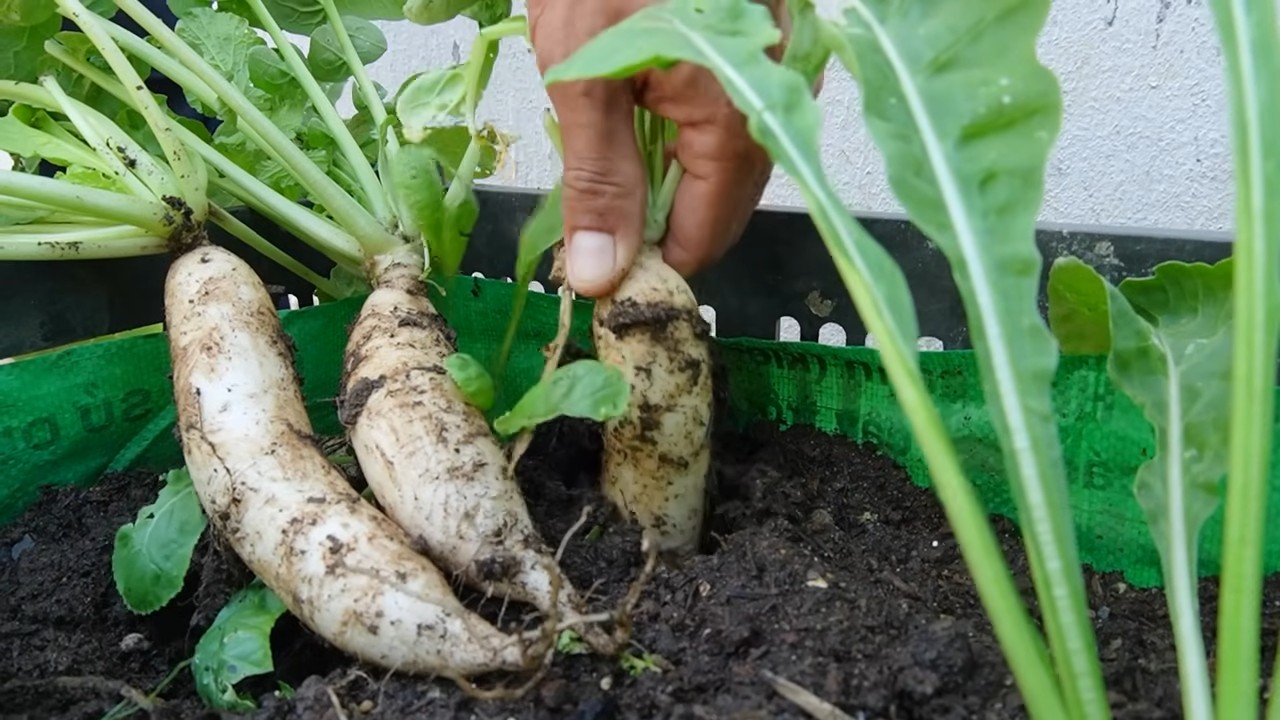
2. Harvest the First Batch: Gently pull the radishes from the soil. If the soil is dry, you may need to loosen it with a trowel first.
3. Wash and Enjoy: Wash the radishes thoroughly and enjoy them fresh in salads, sandwiches, or as a crunchy snack.
4. Repeat Weekly: Each week, harvest the radishes from the planting you did four weeks prior. This will ensure a continuous supply of fresh radishes.
Troubleshooting Common Radish Problems
Even with the best planning, things can sometimes go wrong. Here are a few common radish problems and how to fix them.
* Radishes are Small and Spindly: This is usually caused by overcrowding. Make sure to thin your seedlings properly.
* Radishes are Bitter: This can be caused by hot weather or inconsistent watering. Provide afternoon shade and water regularly.
* Radishes are Cracked: This is often caused by uneven watering. Keep the soil consistently moist.
* Radishes are Woody: This means you’ve left them in the ground too long. Harvest them promptly when they reach the desired size.
* Flea Beetles are Attacking: Cover the plants with row covers or spray them with insecticidal soap.
Choosing the Right Radish Variety
There are so many radish varieties to choose from! Here are a few of my favorites:
* Cherry Belle: A classic red radish with a mild, slightly peppery flavor.
* French Breakfast: An elongated red and white radish with a mild, crisp flavor.
* Easter Egg: A mix of colorful radishes in shades of red, pink, purple, and white.
* Black Spanish: A large, black-skinned radish with a strong, pungent flavor.
* Watermelon Radish: A large, round radish with a green and white exterior and a bright pink interior.
Experiment with different varieties to find your favorites!
Extending Your Radish Season
To enjoy radishes for as long as possible, consider these tips:
* Plant in Succession: Continue planting small batches of seeds every week or two throughout the spring and fall.
* Choose Heat-Tolerant Varieties: Some radish varieties are more tolerant of hot weather than others. Look for varieties that are specifically bred for summer growing.
* Provide Shade: In hot weather, provide afternoon shade to protect your radishes from the intense sun.
* Use Row Covers: Row covers can help protect your radishes from pests and extreme weather conditions.
* Plant in Containers: Containers can be easily moved to a cooler location during hot weather.
Enjoying Your Radish Harvest
Now that you’ve got a steady supply of fresh radishes, it’s time to get creative in the kitchen! Here are a few ideas:
* Salads: Add sliced radishes to your favorite salads for a peppery crunch.
* Sandwiches: Use thinly sliced radishes as a topping for sandwiches and wraps.
* Snacks: Enjoy radishes
Conclusion
So, there you have it! Mastering the art of radish gardening and achieving a weekly harvest isn’t just a pipe dream; it’s an achievable reality with a little planning and consistent effort. We’ve explored the key elements, from selecting the right radish varieties and preparing the soil to implementing succession planting and providing optimal growing conditions. But why is this DIY approach to radish cultivation a must-try?
First and foremost, it puts you in complete control. You know exactly what goes into your radishes – no mystery chemicals or questionable farming practices. You’re nurturing your own food, connecting with nature, and enjoying the unparalleled satisfaction of harvesting something you’ve grown yourself. The taste difference alone is worth the effort. Freshly harvested radishes, bursting with peppery flavor and crisp texture, are a world apart from the store-bought variety.
Beyond the superior taste and control, this method promotes sustainability. By growing your own radishes, you reduce your reliance on commercially produced vegetables, which often travel long distances and contribute to carbon emissions. You can also compost your radish greens and other garden waste, further minimizing your environmental impact.
But the benefits don’t stop there. Radish gardening is incredibly rewarding. It’s a therapeutic activity that can help reduce stress and improve your overall well-being. Plus, it’s a fantastic way to get kids involved in gardening and teach them about where their food comes from.
Now, let’s talk about variations. While we’ve focused on a general approach to weekly radish harvests, feel free to experiment and adapt the techniques to suit your specific needs and preferences.
* Consider companion planting: Plant radishes alongside carrots, lettuce, or spinach to deter pests and improve soil health.
* Explore different growing mediums: If you don’t have a garden, you can grow radishes in containers on your balcony or patio.
* Try different radish varieties: Experiment with different colors, shapes, and flavors to find your favorites. From the classic Cherry Belle to the elongated French Breakfast, there’s a radish variety for every palate.
* Don’t forget the greens: Radish greens are edible and nutritious. Add them to salads, soups, or stir-fries for a peppery kick.
Ultimately, the key to success is to be patient, observant, and willing to learn. Pay attention to your plants, monitor the soil moisture, and adjust your watering and fertilizing schedule as needed. Don’t be afraid to make mistakes – they’re all part of the learning process.
We wholeheartedly encourage you to embark on your own radish gardening adventure and experience the joy of harvesting fresh, homegrown radishes every week. It’s a simple, rewarding, and sustainable way to add flavor and nutrition to your diet.
So, grab your seeds, prepare your soil, and get ready to enjoy a bountiful harvest of delicious radishes. And most importantly, don’t forget to share your experiences with us! We’d love to hear about your successes, challenges, and favorite radish recipes. Share your photos and stories on social media using [Your Hashtag] and let’s inspire others to embrace the joys of home gardening. Happy gardening!
Frequently Asked Questions (FAQ)
What is succession planting, and why is it important for a weekly radish harvest?
Succession planting is the practice of planting crops at intervals, rather than all at once. For radishes, this means sowing a small batch of seeds every week or two. This ensures a continuous supply of radishes, as each batch matures at different times. Without succession planting, you’d likely have a large harvest all at once, followed by a period with no radishes at all. It’s the cornerstone of achieving that consistent weekly harvest we’re aiming for.
How do I know when my radishes are ready to harvest?
Radishes are typically ready to harvest within 3-4 weeks of planting, depending on the variety and growing conditions. The best way to determine readiness is to check the size of the radish root. Gently brush away some soil around the base of the plant to expose the top of the radish. If it’s about an inch in diameter (or the size specified for your chosen variety), it’s likely ready to harvest. You can also gently pull up a test radish to check its size and maturity. Don’t leave them in the ground too long, as they can become woody and bitter.
What kind of soil is best for growing radishes?
Radishes prefer loose, well-drained soil that is rich in organic matter. Amend your soil with compost or well-rotted manure before planting to improve its fertility and drainage. Avoid heavy clay soils, as they can restrict root growth and lead to misshapen radishes. A slightly acidic to neutral soil pH (around 6.0-7.0) is ideal.
How much sunlight do radishes need?
Radishes need at least 6 hours of sunlight per day to thrive. However, they can tolerate partial shade, especially in hot climates. If you’re growing radishes in a container, place it in a sunny location where it will receive plenty of direct sunlight.
How often should I water my radishes?
Radishes need consistent moisture to grow quickly and develop crisp, flavorful roots. Water deeply whenever the top inch of soil feels dry to the touch. Avoid overwatering, as this can lead to root rot. Mulching around your radish plants can help retain moisture and suppress weeds.
What are some common pests and diseases that affect radishes, and how can I prevent them?
Common radish pests include flea beetles, root maggots, and aphids. Flea beetles can be controlled with row covers or insecticidal soap. Root maggots can be prevented by rotating crops and using diatomaceous earth. Aphids can be washed off with a strong stream of water or treated with insecticidal soap. Diseases that can affect radishes include damping-off and white rust. Damping-off can be prevented by using sterile potting mix and avoiding overwatering. White rust can be controlled with fungicides. Good air circulation and proper spacing between plants can also help prevent disease.
Can I grow radishes in containers?
Yes, radishes are well-suited for container gardening. Choose a container that is at least 6 inches deep and has drainage holes. Use a high-quality potting mix and follow the same planting and care instructions as you would for growing radishes in the ground.
What can I do with radish greens?
Radish greens are edible and nutritious. They have a peppery flavor similar to the radish root. You can add them to salads, soups, stir-fries, or pesto. Be sure to wash them thoroughly before using.
How do I store radishes after harvesting?
To store radishes, remove the greens and wash the roots. Place them in a plastic bag or container lined with a damp paper towel. Store them in the refrigerator for up to two weeks.
What if my radishes are all tops and no bottoms?
This is a common problem, and it usually indicates that the radishes are not getting enough sunlight, water, or nutrients. Make sure your radishes are planted in a sunny location, water them regularly, and fertilize them with a balanced fertilizer. Also, ensure the soil is loose and well-drained. Compacted soil can hinder root development.
Can I save radish seeds for next year?
Yes, you can save radish seeds, but it requires allowing some radishes to bolt (flower and produce seeds). This typically happens in warmer weather. Let the seed pods dry on the plant, then harvest them and extract the seeds. Store the seeds in a cool, dry place. However, be aware that radishes are cross-pollinated, so the seeds may not produce plants that are exactly like the parent plant.
Are there any specific radish varieties that are better for succession planting?
Early maturing varieties like Cherry Belle, French Breakfast, and Sparkler are excellent choices for succession planting because they mature quickly, allowing for frequent harvests. Experiment with different varieties to find your favorites and see which ones perform best in your garden.
Leave a Comment