
Radicchio Growing Guide: Unlock the Secrets to a Vibrant Harvest!
Have you ever gazed upon a beautifully bitter radicchio salad and thought, “I wish I could grow that myself?” Well, you absolutely can! This often-overlooked leafy vegetable, with its striking crimson and white leaves, is easier to cultivate than you might think. And that’s where this DIY guide comes in – I’m here to share all the insider tips and tricks to help you succeed.
Radicchio, with its Italian roots, has been enjoyed for centuries, adding a unique flavor and visual appeal to dishes across the globe. From the Veneto region, where it’s a culinary staple, to your very own backyard, radicchio brings a touch of sophistication to any garden. But let’s be honest, sometimes growing it can feel a little intimidating. That’s why I’ve put together this comprehensive radicchio growing guide.
Many gardeners shy away from radicchio, fearing its bitterness or believing it’s too difficult to grow. But with the right knowledge and a few simple techniques, you can overcome these challenges and enjoy a bountiful harvest of this delicious and nutritious vegetable. This guide will provide you with the knowledge you need to successfully grow radicchio. I’ll walk you through everything from seed selection and soil preparation to watering, pest control, and harvesting. So, get ready to transform your garden and impress your friends with your newfound radicchio-growing prowess!
DIY Radicchio Growing Guide: From Bitter Beginnings to Beautiful Harvests
Hey there, fellow garden enthusiasts! I’m so excited to share my experiences and tips for growing radicchio. It’s a fantastic vegetable that adds a unique, slightly bitter flavor and a beautiful pop of color to salads and cooked dishes. Don’t be intimidated by its reputation; with a little know-how, you can easily cultivate this Italian gem in your own backyard. Let’s dive in!
Choosing the Right Radicchio Variety
First things first, you need to pick the right radicchio for your climate and taste preferences. There are several types, each with its own distinct characteristics:
* Chioggia: This is probably the most common type. It forms a round, tight head with vibrant red leaves and white veins. It’s relatively easy to grow and has a classic bitter flavor.
* Treviso: Treviso comes in two main forms: Early Treviso (Precoce) and Late Treviso (Tardivo). Early Treviso has elongated heads with slightly looser leaves, while Late Treviso is more dramatic, with long, slender, tightly closed heads that are forced in the dark to produce a milder flavor and blanched white ribs.
* Castelfranco: This variety is also known as “variegated radicchio” because of its beautiful, creamy white leaves speckled with red. It’s milder and more delicate in flavor than Chioggia.
* Verona: Similar to Chioggia, but often slightly smaller and more compact.
My Recommendation: If you’re a beginner, I suggest starting with Chioggia. It’s reliable and readily available. Once you’ve mastered that, you can experiment with other varieties like Treviso or Castelfranco.
Preparing Your Garden Bed
Radicchio thrives in well-drained soil that’s rich in organic matter. Here’s how I prepare my garden bed:
* Sunlight: Radicchio needs at least 6 hours of sunlight per day. Choose a sunny spot in your garden.
* Soil Testing: It’s always a good idea to test your soil’s pH. Radicchio prefers a slightly acidic to neutral pH of 6.0 to 7.0. You can buy a soil testing kit at most garden centers.
* Amending the Soil: Amend the soil with plenty of compost or well-rotted manure. This will improve drainage, add nutrients, and help retain moisture. I usually add a 2-3 inch layer of compost and work it into the top 6-8 inches of soil.
* Drainage: Make sure your soil drains well. Radicchio doesn’t like to sit in soggy soil, which can lead to root rot. If your soil is heavy clay, consider adding sand or perlite to improve drainage.
* Fertilizing: Before planting, I like to add a balanced organic fertilizer to the soil. Follow the instructions on the fertilizer package for application rates.
Sowing the Seeds
You can start radicchio seeds indoors or sow them directly in the garden. I prefer to start them indoors, especially for fall crops, to get a head start.
* Starting Seeds Indoors:
1. Timing: Start seeds indoors about 4-6 weeks before the last expected frost in spring or 6-8 weeks before the first expected frost in fall.
2. Containers: Use seed starting trays or small pots filled with seed starting mix.
3. Sowing: Sow seeds about ¼ inch deep.
4. Watering: Keep the soil consistently moist but not soggy.
5. Light: Provide plenty of light. A sunny windowsill might work, but I prefer using grow lights for more consistent results.
6. Hardening Off: Before transplanting seedlings outdoors, you’ll need to harden them off. This means gradually exposing them to outdoor conditions over a period of 7-10 days. Start by placing them in a sheltered spot for a few hours each day, gradually increasing the amount of time they spend outdoors.
* Direct Sowing:
1. Timing: Sow seeds directly in the garden in early spring or late summer.
2. Spacing: Sow seeds about ½ inch deep and 1-2 inches apart in rows.
3. Thinning: Once the seedlings emerge, thin them to 8-12 inches apart, depending on the variety.
My Tip: I always soak my radicchio seeds in water for a few hours before sowing. This helps to soften the seed coat and improve germination rates.
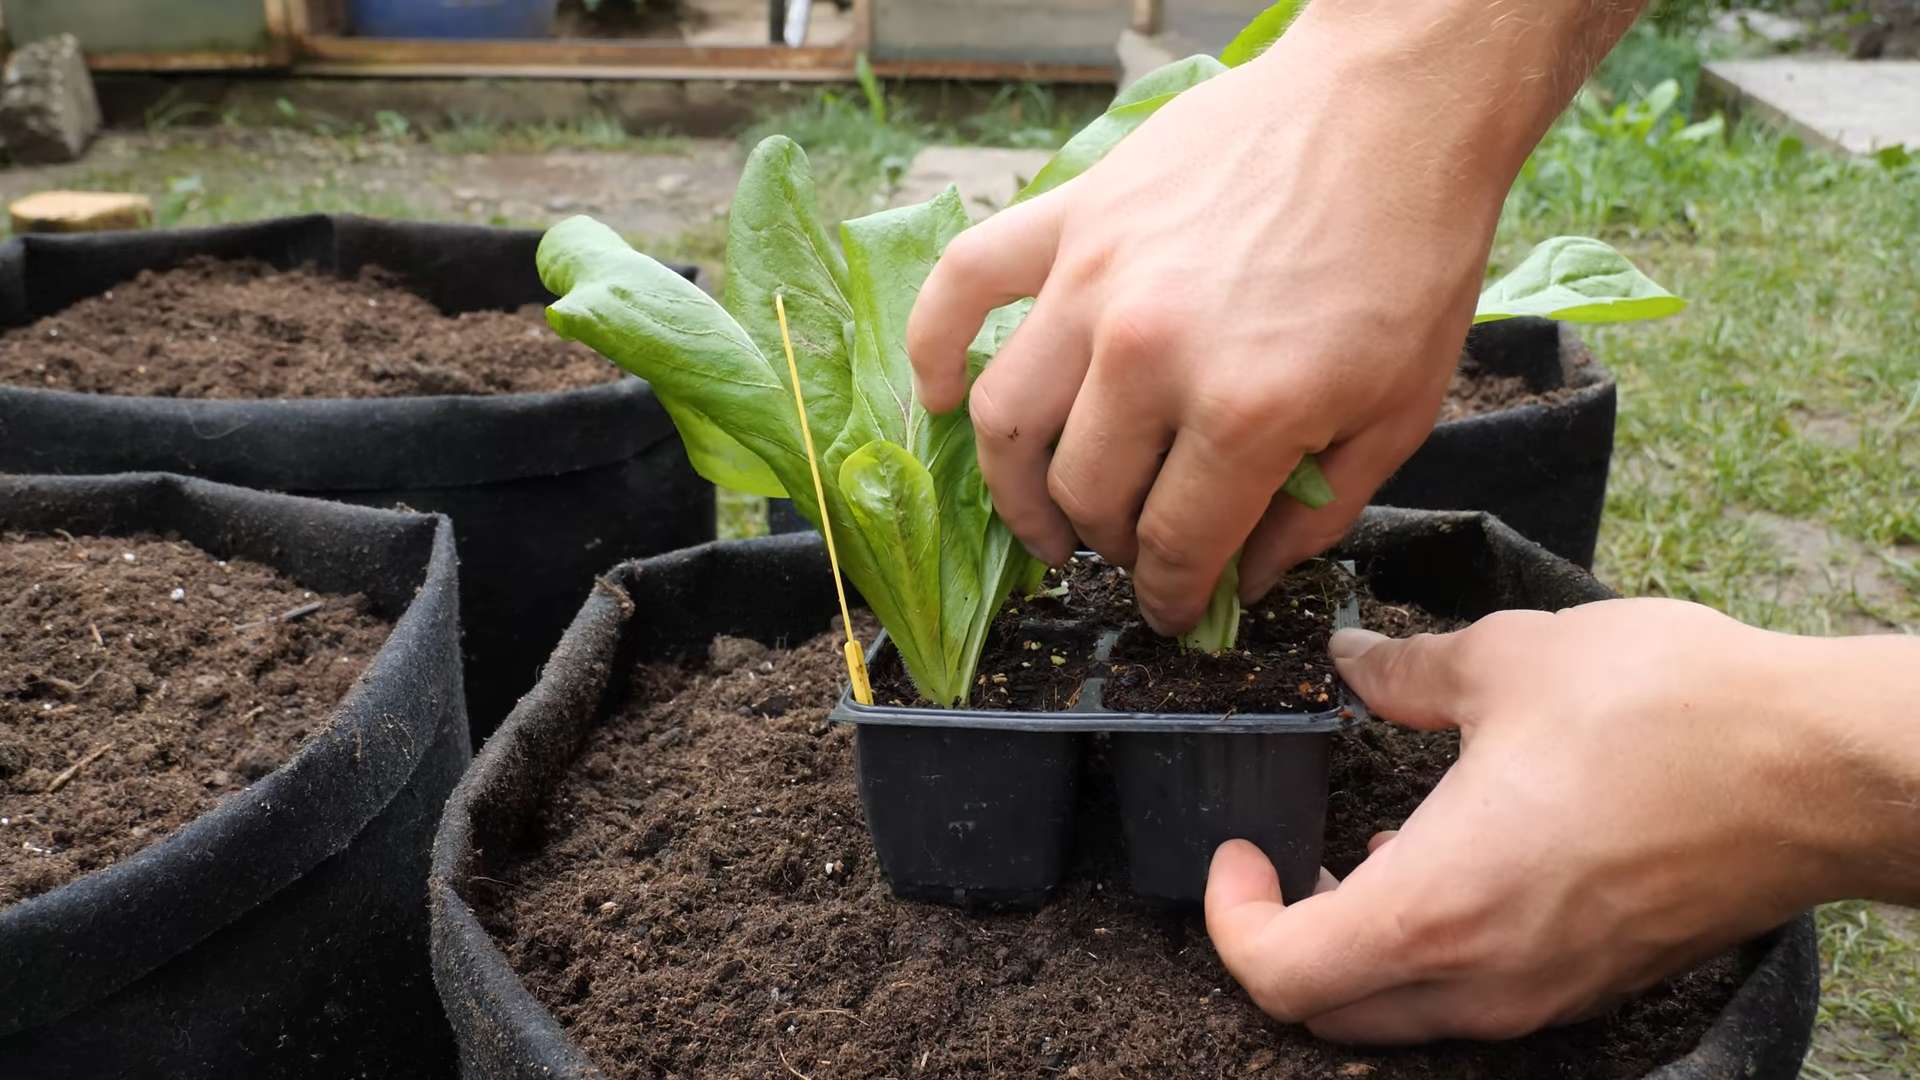
Transplanting Seedlings
Once your seedlings have developed a few sets of true leaves and have been hardened off, they’re ready to be transplanted into the garden.
1. Timing: Transplant seedlings on a cloudy day or in the late afternoon to minimize stress.
2. Spacing: Space seedlings 8-12 inches apart in rows that are 12-18 inches apart.
3. Planting: Dig a hole that’s slightly larger than the root ball. Gently remove the seedling from its container and place it in the hole. Backfill with soil and gently firm around the base of the plant.
4. Watering: Water thoroughly after transplanting.
Caring for Your Radicchio Plants
Radicchio is relatively easy to care for, but here are a few things to keep in mind:
* Watering: Water regularly, especially during dry periods. Aim to keep the soil consistently moist but not soggy.
* Weeding: Keep the garden bed free of weeds, which can compete with radicchio for nutrients and water.
* Fertilizing: Side-dress plants with a balanced organic fertilizer every few weeks.
* Pest Control: Radicchio can be susceptible to pests like aphids, slugs, and flea beetles. Inspect your plants regularly and take action if you see any signs of infestation. I prefer using organic pest control methods, such as insecticidal soap or diatomaceous earth.
* Bolting: Radicchio can bolt (go to seed) in hot weather. To prevent bolting, provide shade during the hottest part of the day or choose bolt-resistant varieties.
My Secret Weapon: I love using a layer of mulch around my radicchio plants. Mulch helps to retain moisture, suppress weeds, and regulate soil temperature. I use straw, shredded leaves, or wood chips.
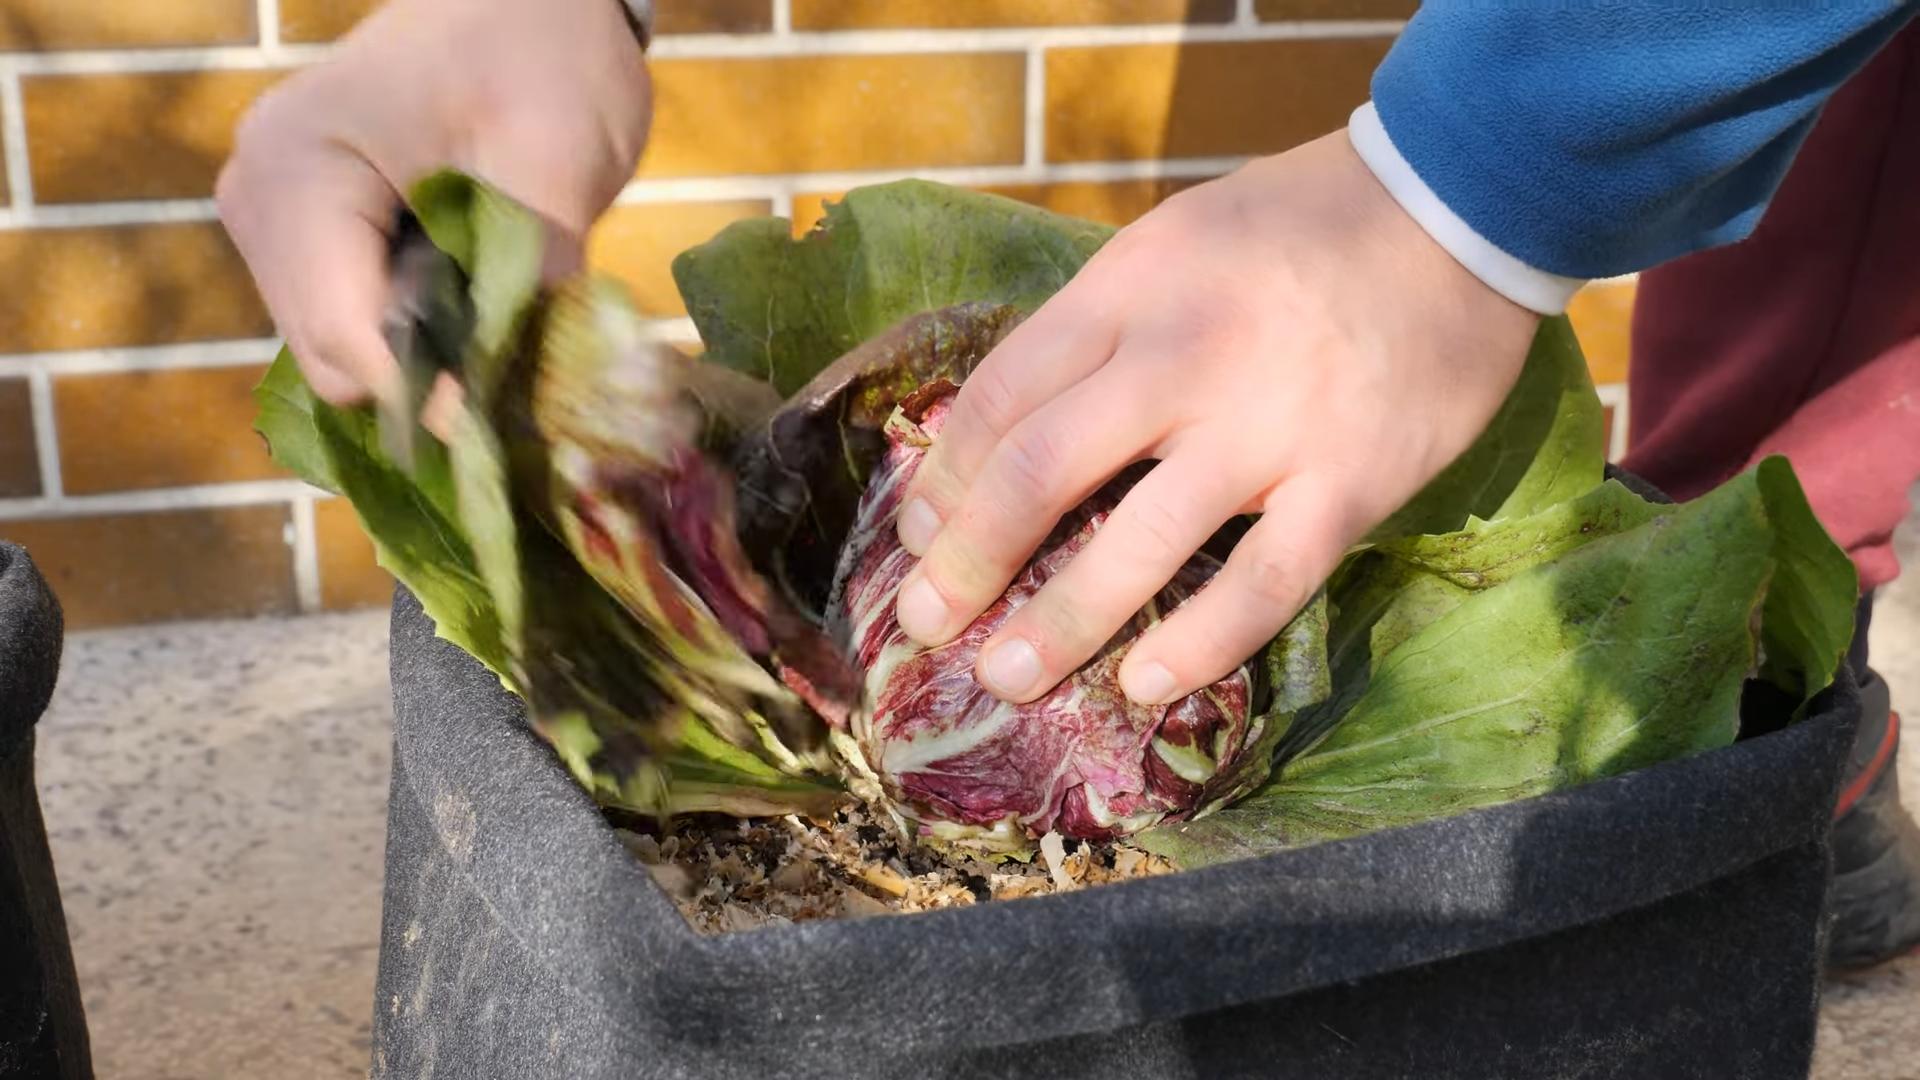
Harvesting Your Radicchio
The time to harvest radicchio depends on the variety and the growing conditions. Generally, you can harvest radicchio when the heads are firm and well-formed.
1. Timing: Harvest in the morning, when the leaves are crisp and cool.
2. Method: Cut the head off at the base with a sharp knife.
3. Storage: Store radicchio in the refrigerator for up to a week.
A Little Trick: Some varieties of radicchio benefit from a light frost before harvesting. The frost can help to mellow out the bitterness of the leaves.
Forcing Radicchio (Especially for Treviso Varieties)
Forcing is a technique used to blanch and sweeten certain radicchio varieties, particularly Late Treviso. It involves depriving the plants of light, which causes them to lose chlorophyll and become milder in flavor.
1. Harvesting: Harvest the radicchio plants when they are nearly mature, but before a hard frost.
2. Trimming: Trim the outer leaves, leaving only the central head.
3. Root Preparation: Carefully dig up the plants, keeping as much of the root system intact as possible.
4. Washing: Gently wash the roots to remove any soil.
5. Forcing Environment: Place the plants in a dark, cool, and humid environment. You can use a bucket or container filled with water or moist sand. The water level should be high enough to cover the roots but not the head of the radicchio.
6. Darkness: Cover the container with a lid or place it in a dark room or cellar.
7. Monitoring: Check the plants regularly and change the water every few days.
8. Harvesting (Forced): After 2-3 weeks, the radicchio heads will have blanched and become milder in flavor. Harvest them as needed.
Troubleshooting Common Problems
Even with the best care, you might encounter some problems while growing radicchio. Here are a few common issues and how to address them:
* Bolting: As mentioned earlier, bolting can be a problem in hot weather. Choose bolt-resistant varieties and provide shade during the hottest part of the day.
* Root Rot: Root rot is caused by overwatering or poorly drained soil. Make sure your soil drains well and avoid overwatering.
* Aphids: Aphids are small, sap-sucking insects that can weaken plants. Spray plants with insecticidal soap or neem oil.
Conclusion
So, there you have it! Mastering the art of growing your own radicchio is not only achievable, but it’s also incredibly rewarding. From the vibrant colors gracing your garden to the delightfully bitter notes enhancing your culinary creations, radicchio offers a unique and satisfying experience. We’ve walked through the essential steps, from selecting the right variety and preparing your soil to nurturing your plants and harvesting your bounty.
Why is this DIY trick a must-try? Because fresh, homegrown radicchio surpasses anything you can find at the grocery store. The flavor is more intense, the texture is crisper, and you have complete control over the growing process, ensuring it’s free from unwanted chemicals and pesticides. Plus, the satisfaction of harvesting something you’ve nurtured from seed to table is simply unmatched.
But don’t stop there! Experiment with different varieties of radicchio to discover your personal favorites. Try the classic Chioggia for its tightly formed heads, the Treviso for its elongated shape and milder flavor, or the Castelfranco for its stunningly variegated leaves. Consider companion planting with herbs like rosemary or sage to deter pests and enhance the flavor of your radicchio. You can even succession plant to ensure a continuous harvest throughout the growing season.
Beyond salads, explore the versatility of radicchio in your cooking. Grill it for a smoky char, braise it for a tender sweetness, or add it to risottos and pasta dishes for a touch of bitterness and color. The possibilities are endless!
We wholeheartedly encourage you to embark on this radicchio-growing adventure. It’s a fantastic way to connect with nature, enhance your culinary skills, and enjoy the freshest, most flavorful radicchio imaginable. Don’t be intimidated by the perceived challenges; with a little patience and attention, you’ll be harvesting your own beautiful heads of radicchio in no time.
And most importantly, we want to hear about your experience! Share your successes, your challenges, and your favorite radicchio recipes with us. Let’s build a community of radicchio enthusiasts and learn from each other. Post photos of your garden, share your tips and tricks, and let us know how you’re enjoying your homegrown radicchio. Your feedback is invaluable and helps us continue to provide the best possible information. So, get your hands dirty, embrace the challenge, and discover the joy of growing your own radicchio! This is truly a rewarding experience that will elevate your garden and your plate.
Frequently Asked Questions (FAQ)
What is the best time of year to plant radicchio?
The ideal time to plant radicchio depends on your climate. In general, radicchio thrives in cooler temperatures. For a fall harvest, sow seeds indoors 6-8 weeks before the first expected frost or direct sow outdoors 2-3 months before the first frost. For a spring harvest, start seeds indoors 8-10 weeks before the last expected frost or direct sow outdoors as soon as the soil can be worked. Avoid planting during the hottest months of summer, as high temperatures can cause bolting (premature flowering).
How much sunlight does radicchio need?
Radicchio prefers full sun, which means at least 6 hours of direct sunlight per day. However, in hotter climates, some afternoon shade can be beneficial to prevent bolting. If you’re growing radicchio indoors, use grow lights to supplement natural sunlight.
What kind of soil is best for growing radicchio?
Radicchio prefers well-drained, fertile soil with a pH between 6.0 and 7.0. Amend your soil with compost or other organic matter to improve drainage and fertility. A soil test can help you determine the pH and nutrient levels of your soil.
How often should I water my radicchio plants?
Water radicchio plants regularly, especially during dry periods. Aim to keep the soil consistently moist but not waterlogged. Water deeply at the base of the plants to avoid wetting the foliage, which can lead to fungal diseases. Mulching around the plants can help retain moisture and suppress weeds.
How do I prevent radicchio from bolting?
Bolting is a common problem with radicchio, especially in hot weather. To prevent bolting, choose bolt-resistant varieties, provide afternoon shade in hot climates, and water regularly to keep the soil cool and moist. Harvesting the heads as soon as they are mature can also help prevent bolting.
What are some common pests and diseases that affect radicchio?
Common pests that affect radicchio include aphids, flea beetles, and slugs. Diseases include downy mildew, powdery mildew, and bottom rot. To prevent pests and diseases, practice good garden hygiene, such as removing weeds and debris, and rotate your crops regularly. Use organic pest control methods, such as insecticidal soap or neem oil, to control pests. Ensure good air circulation to prevent fungal diseases.
How do I harvest radicchio?
Harvest radicchio when the heads are firm and well-formed. Cut the heads at the base of the plant with a sharp knife. You can harvest the entire head at once or harvest individual leaves as needed.
How do I store radicchio after harvesting?
Store radicchio in the refrigerator in a plastic bag or container. It will keep for up to a week. To revive wilted radicchio, soak it in cold water for a few minutes.
Can I grow radicchio in containers?
Yes, radicchio can be grown in containers. Choose a container that is at least 12 inches deep and wide. Use a well-draining potting mix and water regularly. Place the container in a sunny location.
What are some ways to use radicchio in cooking?
Radicchio can be used in a variety of dishes. It can be eaten raw in salads, grilled, braised, or added to soups and stews. Its slightly bitter flavor pairs well with sweet and savory ingredients. Try it in salads with citrus fruits, nuts, and cheese, or grill it and serve it with balsamic glaze.
Is radicchio good for you?
Yes, radicchio is a healthy vegetable. It is a good source of vitamins, minerals, and antioxidants. It is also low in calories and high in fiber.
What are the different varieties of radicchio?
There are several different varieties of radicchio, each with its own unique characteristics. Some popular varieties include Chioggia, Treviso, Castelfranco, and Tardivo. Experiment with different varieties to find your favorites.
Can I save seeds from my radicchio plants?
Yes, you can save seeds from your radicchio plants, but it requires allowing the plant to bolt and flower. Be aware that radicchio can cross-pollinate with other members of the chicory family, so if you are growing multiple varieties, the seeds may not be true to type. Allow the seed heads to dry completely on the plant before harvesting the seeds. Store the seeds in a cool, dry place.
My radicchio is very bitter. Is there anything I can do?
Radicchio is known for its bitter flavor, but there are ways to reduce the bitterness. Soaking the leaves in cold water for 30 minutes before using them can help. Grilling or braising radicchio can also mellow out the bitterness. Pairing radicchio with sweet or creamy ingredients can also help balance the flavor.
How can I encourage better head formation in my radicchio?
Consistent watering and fertilization are key to good head formation. Make sure your plants are getting enough sunlight and that the soil is well-drained. You can also try tying the outer leaves together loosely to encourage the head to form more tightly.
Leave a Comment