
Purple Bok Choy Styrofoam Growing: Sounds a little out there, right? But trust me, this quirky DIY project is about to revolutionize your home garden! Forget those sprawling garden beds and back-breaking weeding sessions. We’re talking about a compact, efficient, and surprisingly beautiful way to cultivate your own vibrant purple bok choy, all thanks to the humble styrofoam container.
For centuries, bok choy has been a staple in Asian cuisine, prized for its delicate flavor and nutritional benefits. From stir-fries to soups, this leafy green adds a delightful crunch and a boost of vitamins. But did you know you can easily grow your own, even if you’re short on space? That’s where our styrofoam growing hack comes in!
In today’s world, where fresh, organic produce can be expensive and hard to come by, learning to grow your own food is more important than ever. And let’s be honest, who wouldn’t want to impress their friends and family with a stunning display of homegrown purple bok choy? This DIY project is not only budget-friendly and eco-conscious (repurposing styrofoam!), but it also offers a rewarding connection to nature. I’m excited to show you how easy it is to get started with purple bok choy styrofoam growing and enjoy the freshest, most flavorful greens right from your own home!
Growing Purple Bok Choy in Styrofoam: A DIY Guide
Hey there, fellow gardening enthusiasts! Ever thought about growing your own vibrant purple bok choy? It’s easier than you think, and using styrofoam containers is a fantastic way to recycle and create a thriving mini-garden. I’m going to walk you through the entire process, from prepping your styrofoam to harvesting your delicious, colorful greens. Let’s get started!
Materials You’ll Need:
* Styrofoam containers (recycled takeout containers, coolers, or packing materials work great!)
* Purple Bok Choy seeds
* Potting mix (a well-draining mix is crucial)
* Drill or sharp object for drainage holes
* Watering can or hose with a gentle spray nozzle
* Optional: Liquid fertilizer (organic is always a good choice!)
* Optional: Seed starting tray or small pots for starting seeds indoors
Preparing Your Styrofoam Containers
This is a crucial step, so let’s make sure we get it right!
1. Clean the Styrofoam: First things first, give your styrofoam containers a good cleaning. Remove any leftover food particles, labels, or tape. I usually use warm soapy water and a scrub brush. Rinse thoroughly to remove any soap residue. This helps prevent mold and bacteria growth that could harm your bok choy.
2. Drill Drainage Holes: Drainage is absolutely essential for healthy bok choy. Without proper drainage, the roots will sit in water and rot. Using a drill or a sharp object (like a screwdriver or even a sturdy skewer), create several drainage holes in the bottom of your styrofoam container. I usually aim for about 4-6 holes, depending on the size of the container. Make sure the holes are large enough to allow water to drain freely, but not so large that the soil will fall out.
3. Consider Liner (Optional): While not strictly necessary, lining the inside of your styrofoam container with plastic sheeting can help retain moisture and prevent the styrofoam from degrading over time. If you choose to do this, make sure to poke holes in the liner to align with the drainage holes you already created.
Starting Your Purple Bok Choy Seeds
You have two options here: direct sowing or starting seeds indoors. I personally prefer starting seeds indoors because it gives me a head start, especially if I’m gardening in a cooler climate.
Option 1: Direct Sowing
1. Fill the Container: Fill your prepared styrofoam container with potting mix, leaving about an inch of space at the top. Gently pat down the soil to create a level surface.
2. Sow the Seeds: Sprinkle the purple bok choy seeds evenly over the surface of the soil. Don’t overcrowd them! I usually aim for about 2-3 seeds per inch.
3. Cover the Seeds: Lightly cover the seeds with a thin layer of potting mix (about ¼ inch).
4. Water Gently: Use a watering can or hose with a gentle spray nozzle to thoroughly moisten the soil. Be careful not to wash away the seeds.
5. Keep Moist: Keep the soil consistently moist, but not soggy, until the seeds germinate. You can cover the container with plastic wrap to help retain moisture, but be sure to remove it once the seedlings emerge.
Option 2: Starting Seeds Indoors
1. Prepare Seed Starting Tray: Fill a seed starting tray or small pots with seed starting mix. This mix is lighter and more sterile than regular potting mix, which is ideal for delicate seedlings.
2. Sow the Seeds: Sow 2-3 seeds per cell or pot, about ¼ inch deep.
3. Water Gently: Water the seeds gently until the soil is moist.
4. Provide Light: Place the seed starting tray or pots in a warm, sunny location or under grow lights. Seedlings need plenty of light to thrive.
5. Keep Moist: Keep the soil consistently moist until the seeds germinate.
6. Thin Seedlings (If Necessary): Once the seedlings have emerged and have a few true leaves, thin them out, leaving only the strongest seedling in each cell or pot.
Transplanting Your Seedlings (If Starting Indoors)
Once your seedlings have developed a few true leaves (usually after about 2-3 weeks), they’re ready to be transplanted into your styrofoam containers.
1. Harden Off Seedlings: Before transplanting, it’s important to “harden off” your seedlings. This means gradually exposing them to outdoor conditions to help them adjust to the temperature, sunlight, and wind. Start by placing the seedlings outdoors for a few hours each day, gradually increasing the amount of time they spend outside over the course of a week.
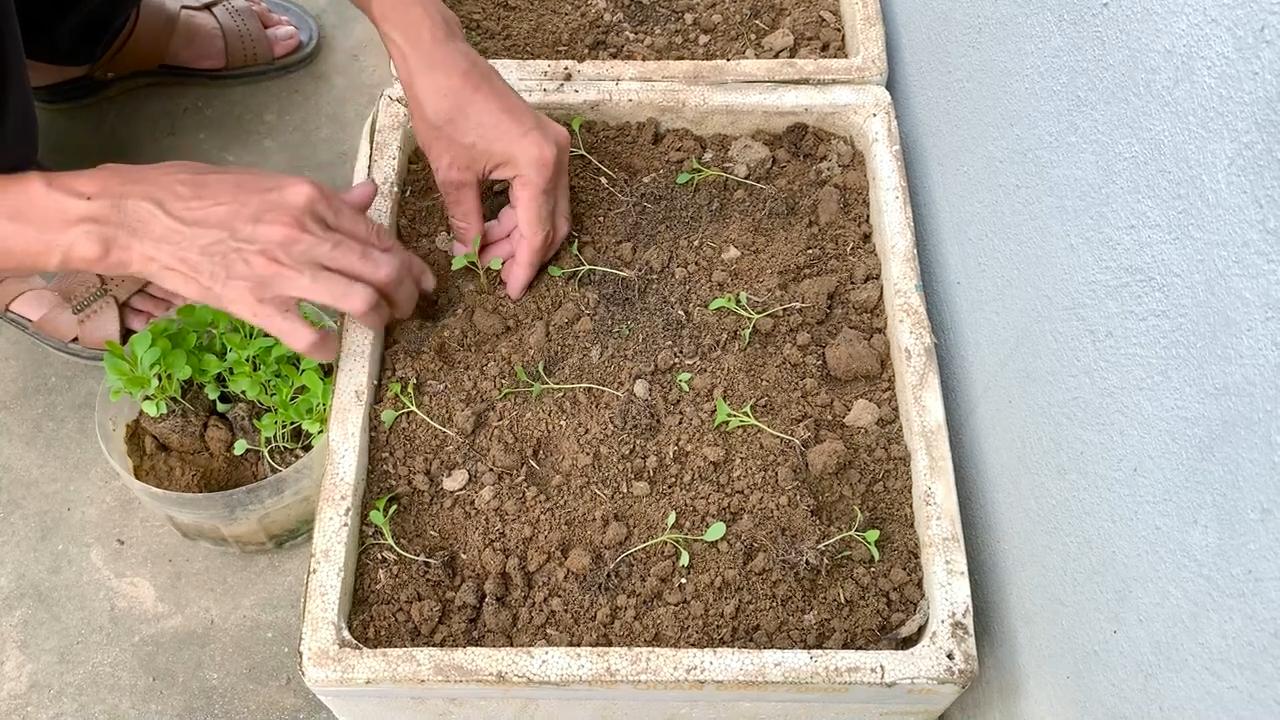
2. Prepare the Planting Hole: Dig a small hole in the potting mix in your styrofoam container, large enough to accommodate the root ball of the seedling.
3. Gently Remove Seedling: Carefully remove the seedling from its cell or pot, being careful not to damage the roots. I find it helpful to gently squeeze the bottom of the cell or pot to loosen the soil.
4. Place Seedling in Hole: Place the seedling in the hole and gently backfill with potting mix. Make sure the top of the root ball is level with the surrounding soil.
5. Water Thoroughly: Water the newly transplanted seedling thoroughly.
Caring for Your Purple Bok Choy
Now comes the fun part – watching your bok choy grow!
1. Sunlight: Purple bok choy needs at least 4-6 hours of sunlight per day. Place your styrofoam containers in a sunny location. If you don’t have a sunny spot, you can supplement with grow lights.
2. Watering: Water your bok choy regularly, especially during hot, dry weather. The soil should be consistently moist, but not soggy. I usually check the soil moisture level by sticking my finger into the soil. If the top inch feels dry, it’s time to water.
3. Fertilizing: Bok choy is a heavy feeder, so it benefits from regular fertilization. I like to use a liquid organic fertilizer diluted according to the package instructions. Fertilize every 2-3 weeks.
4. Weeding: Keep your styrofoam containers free of weeds. Weeds compete with your bok choy for nutrients and water.
5. Pest Control: Keep an eye out for pests, such as aphids, slugs, and cabbage worms. If you spot any pests, you can try hand-picking them off or using an organic insecticide. I’ve found that a strong spray of water can often dislodge aphids.
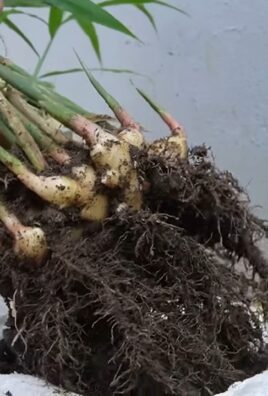
Harvesting Your Purple Bok Choy
You can start harvesting your purple bok choy when the leaves are about 4-6 inches long.
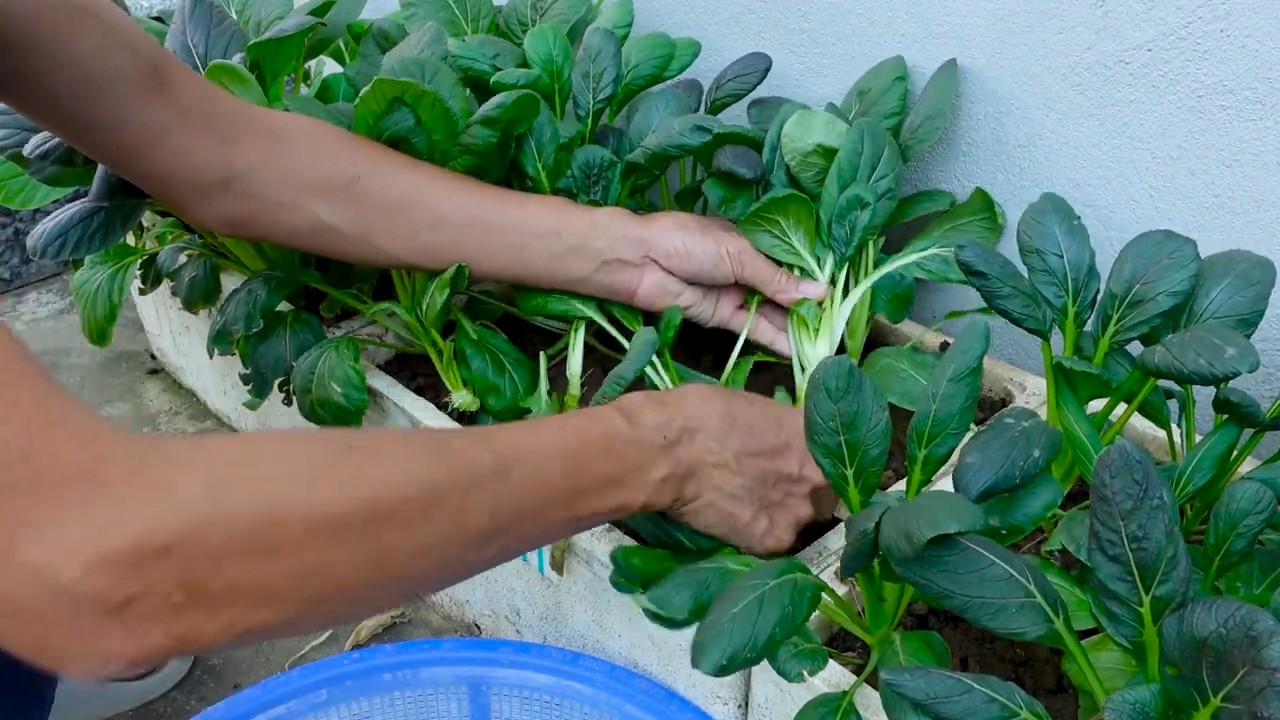
1. Harvest Outer Leaves: You can harvest the outer leaves as needed, allowing the inner leaves to continue to grow. This is known as “cut-and-come-again” harvesting.
2. Harvest Entire Plant: Alternatively, you can harvest the entire plant at once. To do this, simply cut the plant off at the base with a sharp knife.
3. Wash and Enjoy: Wash your harvested bok choy thoroughly and enjoy it in salads, stir-fries, soups, or any other dish you like!
Troubleshooting
* Yellowing Leaves: Yellowing leaves can be a sign of overwatering, underwatering, or nutrient deficiency. Check the soil moisture level and adjust your watering accordingly. If the soil is consistently moist, you may be overwatering. If the soil is dry, you may be underwatering. If you suspect a nutrient deficiency, try fertilizing with a balanced fertilizer.
* Leggy Seedlings: Leggy seedlings (tall and spindly) are usually a sign of insufficient light. Make sure your seedlings are getting enough sunlight or grow light.
* Pests: As mentioned earlier, keep an eye out for pests. Early detection and treatment are key to preventing serious infestations.
Why Styrofoam?
I love using styrofoam for a few reasons:
* Recycling: It’s a great way to reuse materials that would otherwise end up in the landfill.
* Lightweight: Styrofoam containers are lightweight and easy to move around, which is especially helpful if you’re gardening on a balcony or patio.
* Insulation: Styrofoam provides some insulation for the roots, which can be beneficial in both hot and cold weather.
Final Thoughts
Growing purple bok choy in styrofoam is a rewarding and sustainable way to enjoy fresh, homegrown vegetables. With a little bit of care and attention, you can have a thriving mini-garden right at your doorstep. So, grab some styrofoam containers, some seeds, and get ready to grow! Happy gardening!
Conclusion
So, there you have it! Transforming humble styrofoam into a thriving purple bok choy garden is not just a fun project; it’s a sustainable, space-saving, and surprisingly effective way to cultivate your own fresh produce. We’ve walked you through the simple steps, highlighting the ease and accessibility of this DIY method. Forget expensive gardening setups and acres of land – with a little ingenuity and readily available materials, you can enjoy the vibrant colors and delicious flavors of homegrown purple bok choy right on your balcony, patio, or even windowsill.
This method is a must-try for several compelling reasons. First, it’s incredibly budget-friendly. Reusing styrofoam containers reduces waste and eliminates the need for costly pots or raised beds. Second, it’s exceptionally space-efficient, making it ideal for urban gardeners or anyone with limited outdoor space. Third, the styrofoam provides excellent insulation, helping to regulate soil temperature and protect your purple bok choy from extreme weather conditions. Finally, and perhaps most importantly, it’s incredibly rewarding to witness the transformation of discarded material into a flourishing food source.
But the possibilities don’t stop there! Feel free to experiment with different types of styrofoam containers, varying the size and shape to suit your available space and aesthetic preferences. You can also explore different growing mediums, such as coco coir or perlite, to optimize drainage and aeration. Consider adding companion plants like marigolds or basil to deter pests and enhance the overall health of your purple bok choy. For those in colder climates, you might even consider creating a mini-greenhouse around your styrofoam garden to extend the growing season.
We’ve shared our secrets to successful purple bok choy styrofoam growing, but the real magic happens when you put these techniques into practice and adapt them to your own unique circumstances. Don’t be afraid to experiment, learn from your mistakes, and most importantly, have fun!
We wholeheartedly encourage you to give this DIY trick a try. It’s a simple, sustainable, and satisfying way to connect with nature and enjoy the fruits (or rather, vegetables) of your labor. Once you’ve harvested your first batch of vibrant purple bok choy, we’d love to hear about your experience! Share your photos, tips, and challenges in the comments section below. Let’s build a community of styrofoam gardeners and inspire others to embrace this innovative and eco-friendly approach to growing their own food. Happy gardening!
Frequently Asked Questions (FAQ)
What type of styrofoam is best for growing purple bok choy?
Ideally, you should use food-grade styrofoam containers, such as those used for transporting produce or takeout food. These are generally considered safe for growing edible plants. Avoid using styrofoam that has been treated with chemicals or that has been used to store hazardous materials. Make sure to thoroughly clean and sanitize the styrofoam container before planting to remove any potential contaminants. If you are unsure about the safety of a particular styrofoam container, it’s best to err on the side of caution and choose a different one. Remember to always prioritize the health and safety of your plants and yourself.
How do I prepare the styrofoam container for planting?
First, thoroughly clean the styrofoam container with warm, soapy water to remove any dirt, debris, or residue. Rinse it well and allow it to dry completely. Next, you’ll need to create drainage holes in the bottom of the container. Use a drill or a sharp object to make several holes, spaced evenly apart. This will prevent water from accumulating in the container and causing root rot. The number and size of the drainage holes will depend on the size of the container and the type of growing medium you’re using. As a general rule, aim for at least four to six holes that are about ¼ inch in diameter. Finally, consider lining the inside of the container with a layer of landscape fabric or plastic sheeting to help retain moisture and prevent the growing medium from drying out too quickly.
What kind of soil should I use for growing purple bok choy in styrofoam?
A well-draining potting mix is essential for growing healthy purple bok choy in styrofoam containers. Avoid using garden soil, as it tends to be too heavy and compact, which can restrict root growth and lead to drainage problems. Instead, opt for a lightweight potting mix that is specifically formulated for container gardening. You can also amend the potting mix with perlite or vermiculite to improve drainage and aeration. Another option is to create your own custom potting mix by combining equal parts of peat moss, perlite, and compost. This will provide your purple bok choy with the nutrients it needs to thrive.
How often should I water my purple bok choy grown in styrofoam?
The frequency of watering will depend on several factors, including the weather, the size of the container, and the type of growing medium you’re using. As a general rule, you should water your purple bok choy whenever the top inch of soil feels dry to the touch. Avoid overwatering, as this can lead to root rot. When watering, make sure to saturate the soil evenly, allowing the excess water to drain out of the drainage holes. During hot, dry weather, you may need to water your purple bok choy more frequently. Conversely, during cool, wet weather, you may need to water less often.
How much sunlight does purple bok choy need?
Purple bok choy thrives in full sun, which means it needs at least six hours of direct sunlight per day. However, it can also tolerate partial shade, especially during the hottest part of the day. If you’re growing your purple bok choy indoors, place it near a sunny window or use grow lights to supplement the natural light. Insufficient sunlight can result in leggy growth and reduced yields.
How do I fertilize my purple bok choy grown in styrofoam?
Purple bok choy is a relatively heavy feeder, so it’s important to fertilize it regularly to ensure optimal growth and yields. You can use a balanced liquid fertilizer, such as a 10-10-10 or 20-20-20 formula, diluted according to the manufacturer’s instructions. Apply the fertilizer every two to three weeks, starting a few weeks after planting. You can also amend the soil with compost or other organic matter to provide a slow-release source of nutrients. Avoid over-fertilizing, as this can burn the roots and damage the plants.
How do I protect my purple bok choy from pests and diseases?
Purple bok choy is susceptible to a variety of pests and diseases, including aphids, cabbage worms, and fungal infections. To prevent pest and disease problems, start by choosing disease-resistant varieties and providing your plants with optimal growing conditions. Inspect your plants regularly for signs of pests or diseases, and take action promptly if you notice any problems. You can use organic pest control methods, such as insecticidal soap or neem oil, to control aphids and other pests. To prevent fungal infections, avoid overwatering and ensure good air circulation around your plants.
When is the best time to harvest purple bok choy?
Purple bok choy can be harvested at any stage of growth, depending on your preference. For baby bok choy, harvest when the leaves are about 4-6 inches long. For mature bok choy, harvest when the heads are firm and compact, typically about 6-8 weeks after planting. To harvest, simply cut the entire head of bok choy at the base of the plant. You can also harvest individual leaves as needed, allowing the plant to continue producing new leaves.
Can I grow other vegetables in styrofoam containers?
Absolutely! Styrofoam containers can be used to grow a wide variety of vegetables, herbs, and flowers. Some popular choices include lettuce, spinach, kale, tomatoes, peppers, cucumbers, and strawberries. The key is to choose plants that are well-suited to container gardening and to provide them with the appropriate growing conditions.
Is styrofoam gardening environmentally friendly?
Using styrofoam containers for gardening is a great way to repurpose waste material and reduce your environmental impact. By reusing styrofoam, you’re diverting it from landfills and giving it a new lease on life. However, it’s important to note that styrofoam is not biodegradable and can persist in the environment for hundreds of years. Therefore, it’s essential to dispose of styrofoam containers responsibly when they are no longer usable. Consider recycling them if possible, or dispose of them in a designated waste receptacle.
Leave a Comment