
Plastic Bottle Gardening: Unlock a world of green possibilities right at your doorstep, or even on your windowsill! Have you ever looked at a discarded plastic bottle and thought, “There has to be a better use for this?” Well, you’re in luck! This DIY guide is your passport to transforming those everyday throwaways into thriving mini-gardens.
For centuries, humans have sought innovative ways to cultivate plants, even in the most challenging environments. From ancient hanging gardens to modern vertical farms, the desire to nurture life from the earth (or, in this case, repurposed plastic!) is deeply ingrained in our history. But you don’t need to be a horticultural expert to enjoy the benefits of fresh herbs, vibrant flowers, or even homegrown vegetables.
In today’s world, where space is often limited and sustainability is more important than ever, plastic bottle gardening offers a fantastic solution. I know I’ve struggled with limited garden space, and these tricks have been a game-changer! This guide will show you how to create everything from self-watering planters to vertical gardens, all while reducing waste and adding a touch of green to your life. Plus, it’s a fun and rewarding project for the whole family. So, grab those plastic bottles, and let’s get gardening!
Upcycled Wonders: Turning Plastic Bottles into a Thriving Garden!
Hey there, fellow green thumbs! Are you looking for a budget-friendly and eco-conscious way to start a garden? Well, look no further! We’re diving headfirst into the wonderful world of upcycling plastic bottles into planters. Not only is this a fantastic way to reduce waste, but it’s also surprisingly easy and rewarding. Get ready to transform those discarded bottles into a vibrant oasis!
What You’ll Need: Your Gardening Arsenal
Before we get our hands dirty, let’s gather the necessary supplies. Don’t worry, most of these are probably already lying around your house!
* Plastic Bottles: The stars of our show! Any size will do, but 2-liter bottles are a great starting point. Think soda bottles, water bottles, juice containers – the possibilities are endless! Make sure they are clean and dry.
* Scissors or a Craft Knife: For cutting the bottles. Be careful and always cut away from yourself!
* Potting Soil: The lifeblood of your plants. Choose a good quality potting mix for optimal growth.
* Seeds or Seedlings: Decide what you want to grow! Herbs, flowers, vegetables – it’s all up to you.
* Water: For, well, watering!
* Optional:
* Paint and Brushes: To decorate your planters and add a personal touch.
* Markers: For labeling your plants.
* String or Wire: For hanging planters.
* Gravel or Small Stones: For drainage.
* Gloves: To keep your hands clean.
Preparing Your Plastic Bottle Planters
Okay, let’s get down to business! This is where the magic happens. We’ll transform those ordinary bottles into functional and stylish planters.
1. Clean and Dry the Bottles: This is crucial! Rinse out any residue and let the bottles dry completely. This will prevent mold and mildew from forming later on.
2. Decide on Your Cutting Method: There are a few ways to cut your bottles, depending on the type of planter you want to create. Here are a few options:
* Simple Vertical Planter: Cut the bottle in half horizontally. You can use either the top or bottom half as a planter. The bottom half is more stable, but the top half can be inverted and used as a self-watering system (more on that later!).
* Horizontal Planter: Cut a rectangular opening along the side of the bottle. This is great for planting multiple small plants or herbs.
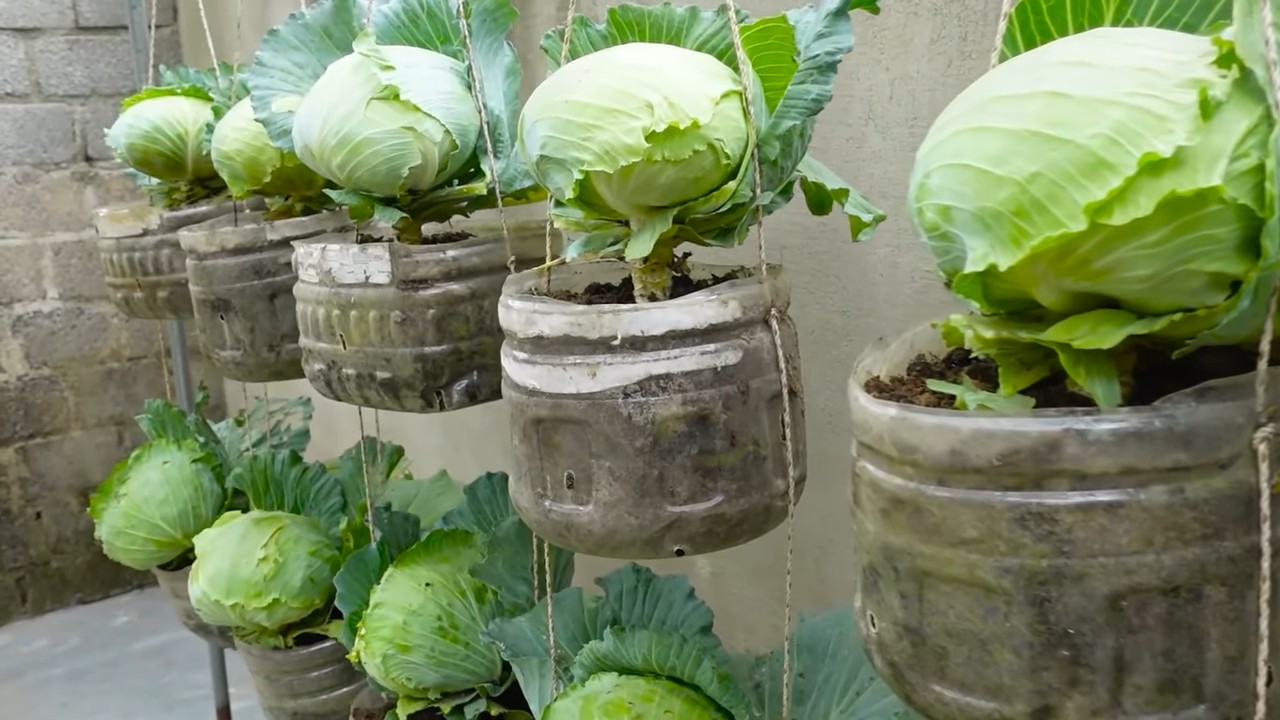
* Hanging Planter: Cut the bottle in half horizontally. Use the bottom half as a planter and create holes near the top edge for hanging.
3. Cut the Bottle Carefully: Using your scissors or craft knife, carefully cut the bottle according to your chosen method. Be extra cautious when using a craft knife, and always cut away from yourself. A sharp blade is safer than a dull one, as you won’t need to apply as much pressure.
4. Smooth the Edges (Optional): If the cut edges are sharp, you can smooth them down with sandpaper or a lighter. If using a lighter, be extremely careful and only melt the edges slightly.
5. Add Drainage Holes: This is essential for healthy plant growth! Drill or poke a few small holes in the bottom of the bottle to allow excess water to drain. If you’re using the top half of the bottle as a self-watering system, you’ll need to poke a hole in the bottle cap as well.
Planting Your Green Goodies
Now for the fun part – planting! This is where you get to bring your garden to life.
1. Add Drainage Material (Optional): If you’re concerned about drainage, you can add a layer of gravel or small stones to the bottom of the planter before adding the soil. This will help prevent the roots from sitting in water.
2. Fill with Potting Soil: Fill the planter with potting soil, leaving about an inch of space at the top.
3. Plant Your Seeds or Seedlings: Follow the instructions on your seed packet or seedling label for proper planting depth and spacing.
4. Water Gently: Water your plants gently until the soil is moist but not soggy.
5. Label Your Plants: Use markers to label your plants so you know what’s what!
Creative Planting Ideas and Techniques
Let’s explore some creative ways to use plastic bottles for gardening!
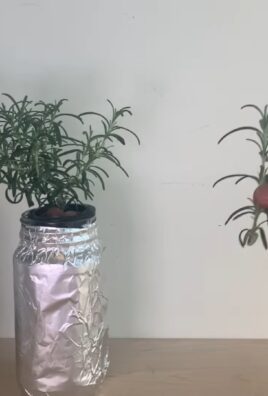
Self-Watering Planters: The Lazy Gardener’s Dream
This is one of my favorite hacks! It’s perfect for busy people or those who tend to forget to water their plants.
1. Cut the Bottle: Cut the bottle in half horizontally.
2. Poke a Hole in the Cap: Poke a small hole in the bottle cap.
3. Invert the Top Half: Invert the top half of the bottle and insert it into the bottom half.
4. Add Soil: Fill the top half with potting soil and plant your seeds or seedlings.
5. Add Water: Fill the bottom half with water. The water will slowly wick up through the hole in the cap and keep the soil moist.
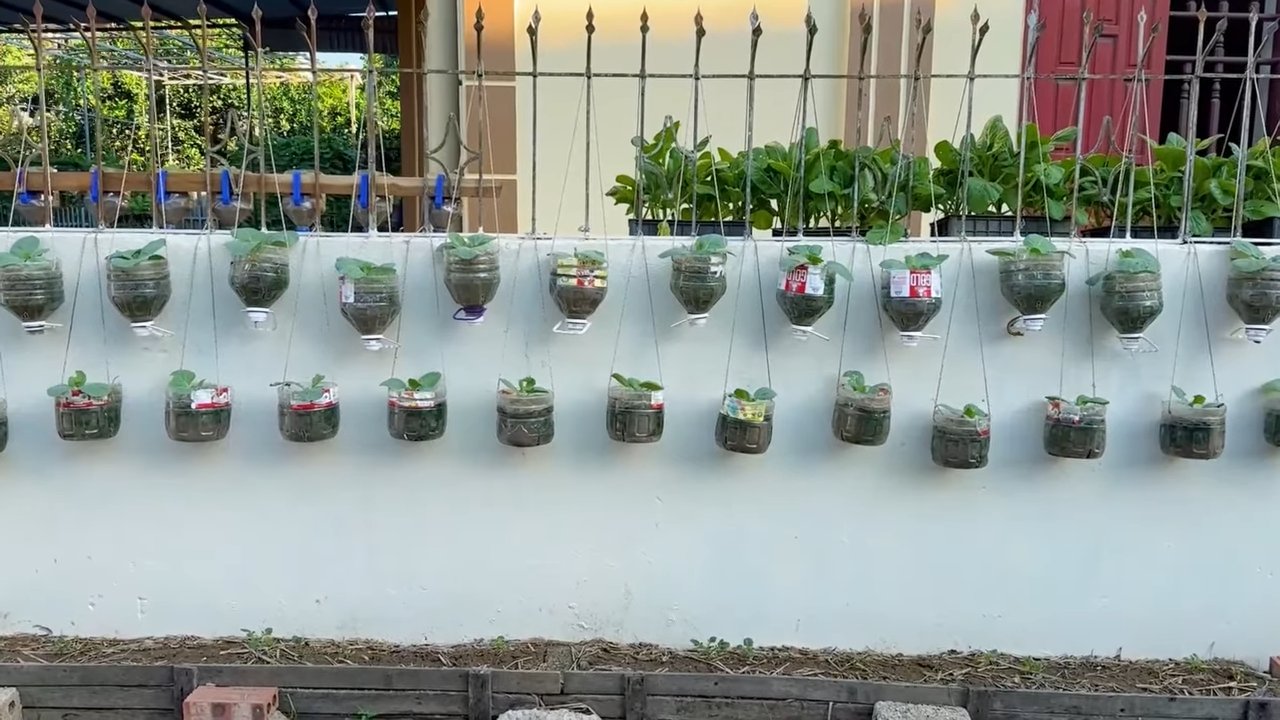
Hanging Gardens: Vertical Greenery
Create a stunning vertical garden by hanging your plastic bottle planters.
1. Cut and Prepare the Bottles: Cut the bottles in half horizontally and add drainage holes.
2. Create Hanging Holes: Poke two holes near the top edge of each planter.
3. Thread String or Wire: Thread string or wire through the holes to create a loop for hanging.
4. Hang Your Planters: Hang your planters from a fence, balcony, or any other suitable location.
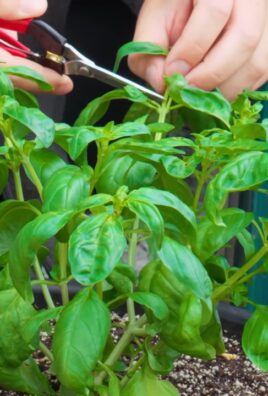
Herb Gardens: Fresh Flavors at Your Fingertips
Plastic bottles are perfect for growing herbs!
1. Choose Your Herbs: Select your favorite herbs, such as basil, mint, rosemary, or thyme.
2. Plant in Individual Bottles: Plant each herb in its own plastic bottle planter.
3. Label Clearly: Label each planter clearly so you know which herb is which.
4. Enjoy Fresh Herbs: Enjoy fresh herbs right from your garden!
Decorating Your Plastic Bottle Planters: Adding a Personal Touch
Let’s get crafty! Decorating your planters is a great way to add a personal touch and make them look even more appealing.
* Paint: Use acrylic paint to paint your planters in any color or design you like. Get creative with patterns, stripes, or even plant-themed artwork.
* Markers: Use permanent markers to draw designs or write plant names on your planters.
* Fabric Scraps: Wrap your planters in fabric scraps and secure them with glue or twine.
* Twine or Rope: Wrap twine or rope around your planters for a rustic look.
* Stickers: Add stickers to your planters for a fun and playful touch.
Troubleshooting and Tips for Success
Even with the best intentions, gardening can sometimes be challenging. Here are a few tips to help you overcome common problems:
* Drainage: Make sure your planters have adequate drainage to prevent root rot.
* Sunlight: Place your plants in a location that receives the appropriate amount of sunlight for their needs.
* Watering: Water your plants regularly, but avoid overwatering.
* Fertilizing: Fertilize your plants regularly with a balanced fertilizer.
* Pests: Keep an eye out for pests and take action to control them if necessary.
Beyond the Basics: Advanced Plastic Bottle Gardening
Feeling adventurous? Here are some more advanced techniques to try:
* Vertical Walls: Create a stunning vertical wall garden using multiple plastic bottles.
* Greenhouses: Build a mini-greenhouse using plastic bottles to protect your plants from the elements.
* Hydroponics: Experiment with hydroponics by growing plants in water instead of soil.
The Environmental Impact: Why Upcycling Matters
Upcycling plastic bottles into planters is not only a fun and rewarding hobby, but it’s also a great way to reduce waste and help the environment. By giving these bottles a new life, we can prevent them from ending up in landfills or polluting our oceans. Every little bit helps!
So there you have it! A comprehensive guide to turning plastic bottles into a thriving garden. I hope you’re inspired to give it a try. Happy gardening!
Conclusion
So, there you have it! Transforming discarded plastic bottles into thriving miniature gardens is not just a fun project; it’s a powerful statement about sustainability and resourcefulness. We’ve explored how simple it is to create these self-watering wonders, offering a cost-effective and eco-friendly alternative to traditional gardening methods. The beauty of this DIY project lies in its accessibility – anyone, regardless of their gardening experience or living space, can participate and reap the rewards.
But why is this plastic bottle gardening trick a must-try? Beyond the obvious environmental benefits of reducing plastic waste, these miniature gardens offer a unique opportunity to connect with nature, even in the most urban environments. Imagine fresh herbs readily available on your windowsill, vibrant flowers brightening up your balcony, or even a small vegetable patch thriving in your kitchen. The possibilities are truly endless.
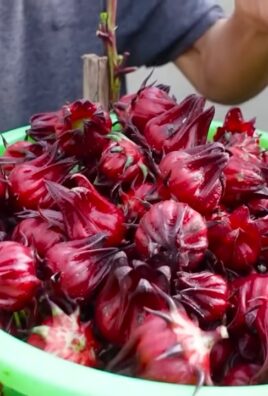
And don’t think you’re limited to just one type of plant! Experiment with different herbs like basil, mint, or chives. Try growing colorful flowers like pansies, petunias, or even dwarf sunflowers. For the more ambitious gardener, consider cultivating small vegetables like lettuce, spinach, or even cherry tomatoes. You can even create a tiered system by stacking multiple bottle gardens on top of each other, maximizing your vertical space and creating a stunning visual display. Consider adding some decorative elements to your bottle gardens, such as painting them with vibrant colors, adding mosaic tiles, or even wrapping them with natural twine for a rustic look.
Furthermore, consider the educational aspect of this project. It’s a fantastic way to teach children about recycling, plant growth, and the importance of environmental stewardship. Involving them in the process, from preparing the bottles to planting the seeds, can foster a lifelong appreciation for nature and sustainable practices.
We encourage you to embrace this simple yet impactful DIY project. Gather your empty plastic bottles, choose your favorite plants, and get ready to create your own miniature oasis. The satisfaction of growing your own food or flowers in a recycled container is truly rewarding.
Don’t be afraid to experiment and adapt the techniques to suit your specific needs and preferences. Try different soil mixtures, watering schedules, and plant combinations to discover what works best for you. The key is to have fun and learn along the way.
We are confident that you’ll be amazed by the results. So, go ahead, give plastic bottle gardening a try! We’re eager to hear about your experiences. Share your photos, tips, and stories with us in the comments section below. Let’s inspire each other to create a more sustainable and beautiful world, one plastic bottle garden at a time. Let us know what plants you chose, what challenges you faced, and what successes you celebrated. Your feedback will help us refine this guide and inspire others to embark on their own plastic bottle gardening adventures. Together, we can make a difference!
Frequently Asked Questions (FAQ)
What types of plastic bottles are best for gardening?
Ideally, you should use PET (Polyethylene Terephthalate) bottles, which are commonly used for water and soda. These are generally considered food-safe and durable enough for gardening. Avoid using bottles that have contained harsh chemicals or cleaning products, as these could contaminate your plants. Make sure to thoroughly clean the bottles before using them for planting. Check the recycling symbol on the bottom of the bottle to identify the type of plastic.
How do I ensure proper drainage in my plastic bottle garden?
Drainage is crucial to prevent root rot. Before adding soil, create drainage holes in the bottom of the bottle. You can use a nail, screwdriver, or drill to make these holes. A layer of gravel or small stones at the bottom of the bottle can also improve drainage. Avoid overwatering your plants, as this can lead to waterlogging and root problems.
What kind of soil should I use for plastic bottle gardening?
A well-draining potting mix is ideal. You can purchase a pre-made potting mix or create your own by combining equal parts of garden soil, compost, and perlite or vermiculite. Avoid using heavy clay soil, as it can compact and restrict root growth. Consider adding some slow-release fertilizer to the soil to provide your plants with essential nutrients.
How often should I water my plastic bottle garden?
The watering frequency depends on the type of plant, the climate, and the size of the bottle. Generally, you should water your plants when the top inch of soil feels dry to the touch. Avoid overwatering, as this can lead to root rot. The self-watering design of some plastic bottle gardens helps to regulate moisture levels, but it’s still important to monitor the soil and water accordingly.
What plants are best suited for plastic bottle gardening?
Many plants thrive in plastic bottle gardens, especially herbs, small vegetables, and flowers. Some popular choices include basil, mint, chives, lettuce, spinach, cherry tomatoes, pansies, petunias, and dwarf sunflowers. Consider the size of the plant and the amount of sunlight it needs when choosing what to grow. Avoid planting large or deep-rooted plants, as they may outgrow the container.
How much sunlight do my plastic bottle gardens need?
The amount of sunlight required depends on the type of plant. Most herbs and vegetables need at least 6 hours of sunlight per day, while some flowers can tolerate partial shade. Place your plastic bottle gardens in a location that receives adequate sunlight. If you don’t have enough natural light, you can supplement with grow lights.
How do I prevent pests and diseases in my plastic bottle garden?
Regularly inspect your plants for signs of pests or diseases. Remove any affected leaves or plants immediately. You can use organic pest control methods, such as neem oil or insecticidal soap, to control pests. Ensure good air circulation around your plants to prevent fungal diseases. Avoid overcrowding your plants, as this can create a favorable environment for pests and diseases.
Can I use plastic bottle gardens indoors?
Yes, plastic bottle gardens are perfect for indoor gardening. They are lightweight, easy to move, and can be placed on windowsills, shelves, or tables. Choose plants that are well-suited for indoor conditions, such as low-light herbs or succulents. Provide adequate lighting and ventilation to ensure healthy plant growth.
How long will my plastic bottle garden last?
The lifespan of your plastic bottle garden depends on the quality of the bottle and the environmental conditions. With proper care, a plastic bottle garden can last for several months or even years. Regularly clean the bottle and replace the soil as needed. Be mindful of the plastic degrading over time, especially if exposed to direct sunlight.
How can I make my plastic bottle garden more aesthetically pleasing?
There are many ways to enhance the appearance of your plastic bottle garden. You can paint the bottles with vibrant colors, add decorative elements such as mosaic tiles or beads, or wrap them with natural twine or fabric. Consider creating a tiered system by stacking multiple bottle gardens on top of each other. You can also use creative labels to identify your plants. The possibilities are endless!
Leave a Comment