
Plant Turnips at Home? Absolutely! And I’m here to tell you it’s easier than you think. Forget those bland, store-bought turnips; imagine biting into a crisp, slightly sweet turnip you’ve nurtured from seed to table. Sounds good, right?
For centuries, turnips have been a staple crop, feeding families and livestock alike. Their resilience and nutritional value have made them a vital part of diets across the globe, from the humble peasant’s stew to more refined culinary creations. But you don’t need acres of farmland to enjoy this root vegetable.
In today’s world, where fresh, locally sourced produce is increasingly valued, learning to plant turnips at home offers a fantastic way to connect with your food, save money, and enjoy the unparalleled flavor of homegrown vegetables. Plus, it’s incredibly rewarding to watch those tiny seeds sprout and grow into something delicious. This DIY guide will provide you with simple, effective tricks and hacks to successfully cultivate turnips, even if you have limited space or gardening experience. So, grab your gardening gloves, and let’s get started! I’m excited to share my tips and tricks with you!

Growing Turnips at Home: A DIY Guide for Bountiful Roots!
Hey there, fellow gardening enthusiasts! I’m so excited to share my tried-and-true method for growing delicious turnips right in your own backyard (or even in containers!). Turnips are surprisingly easy to grow, and nothing beats the taste of fresh, homegrown veggies. This guide will walk you through every step, from seed to harvest, ensuring you have a successful and rewarding experience.
Why Grow Turnips?
Before we dive in, let’s talk about why turnips are such a great addition to any garden.
* Fast Growers: Turnips mature quickly, often ready for harvest in just 50-60 days. This means you can enjoy multiple harvests in a single growing season.
* Edible Greens and Roots: You get two crops in one! The turnip greens are delicious and nutritious, perfect for salads or sauteing. The roots, of course, are the star of the show, adding a peppery bite to soups, stews, and roasted dishes.
* Soil Improvement: Turnips can actually improve your soil! Their deep roots help break up compacted soil, and they can be used as a cover crop to prevent erosion and add organic matter.
* Easy to Grow: Seriously, they are! Even if you’re a beginner gardener, you can successfully grow turnips with a little bit of guidance.
Choosing the Right Turnip Variety
There are many different turnip varieties to choose from, each with its own unique characteristics. Here are a few of my favorites:
* Purple Top White Globe: This is a classic variety, known for its large, round roots with a purple top and white bottom. It’s a reliable and productive choice.
* Tokyo Cross: A fast-maturing variety that produces small, round, white roots. It’s known for its mild flavor and tender texture.
* Golden Ball: This variety produces round, golden-yellow roots with a sweet and mild flavor. It’s a great choice for those who prefer a less peppery turnip.
* Hakurei: This Japanese turnip is incredibly popular for its sweet, crisp, and almost fruity flavor. It’s delicious raw or cooked.
Consider your taste preferences and growing conditions when choosing a variety. Check your local garden center or seed catalog for options that are well-suited to your region.
Preparing Your Garden Bed
Turnips thrive in well-drained soil that is rich in organic matter. Here’s how to prepare your garden bed for planting:
1. Choose a Sunny Location: Turnips need at least 6 hours of sunlight per day. Select a spot in your garden that receives plenty of sunshine.
2. Test Your Soil: A soil test will tell you the pH level and nutrient content of your soil. Turnips prefer a slightly acidic soil pH of 6.0 to 6.5. You can purchase a soil test kit at your local garden center or send a sample to your local extension office.
3. Amend the Soil: Based on your soil test results, amend the soil as needed. If your soil is too acidic, add lime to raise the pH. If it’s too alkaline, add sulfur to lower the pH. Incorporate plenty of compost or other organic matter to improve drainage and fertility. I usually add a generous layer of compost and work it into the top 6-8 inches of soil.
4. Remove Rocks and Debris: Clear the garden bed of any rocks, weeds, or other debris that could interfere with root growth.
5. Create Raised Beds (Optional): Raised beds can improve drainage and soil warming, especially in areas with heavy clay soil. If you choose to create raised beds, make them about 6-8 inches high and 3-4 feet wide.
Planting Turnip Seeds
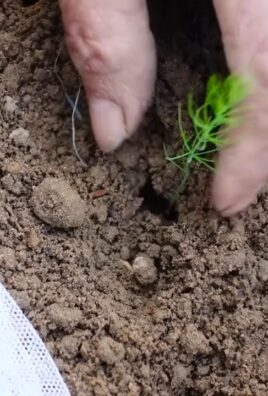
Turnips are best planted directly in the garden, as they don’t transplant well. Here’s how to plant your turnip seeds:
1. Timing is Key: Turnips are a cool-season crop, so plant them in early spring or late summer for a fall harvest. In most regions, you can plant turnips 4-6 weeks before the last expected frost in spring or 6-8 weeks before the first expected frost in fall. Check your local planting calendar for specific dates.
2. Sow the Seeds: Sow the seeds about 1/2 inch deep and 1 inch apart in rows that are 12-18 inches apart. You can use a seed drill or simply sprinkle the seeds into the rows and cover them with soil.
3. Water Gently: Water the garden bed gently after planting to moisten the soil and help the seeds germinate.
4. Thin the Seedlings: Once the seedlings emerge, thin them to 3-4 inches apart. This will give the roots enough room to develop properly. Don’t throw away the thinnings! You can eat them as microgreens.
Caring for Your Turnip Plants
Turnips are relatively low-maintenance plants, but they do require some basic care to thrive.
1. Water Regularly: Keep the soil consistently moist, especially during dry periods. Water deeply and infrequently, rather than shallowly and frequently. Aim for about 1 inch of water per week.
2. Weed Control: Keep the garden bed free of weeds, which can compete with the turnip plants for nutrients and water. Hand-pull weeds regularly or use a hoe to cultivate the soil.
3. Fertilize (Optional): If your soil is poor, you can fertilize your turnip plants with a balanced fertilizer. Follow the instructions on the fertilizer package. I usually side-dress my turnips with compost tea every few weeks.
4. Pest and Disease Control: Turnips are generally resistant to pests and diseases, but they can be susceptible to aphids, flea beetles, and root maggots. Inspect your plants regularly for signs of infestation or disease. If you find any problems, treat them promptly with an appropriate insecticide or fungicide. I prefer to use organic pest control methods whenever possible, such as insecticidal soap or neem oil.
Harvesting Your Turnips
The time to harvest your turnips depends on the variety and your personal preference.
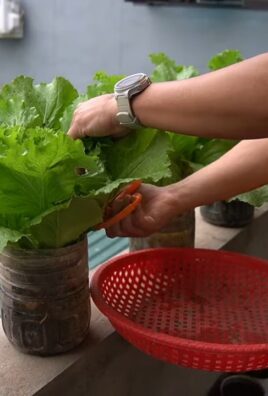
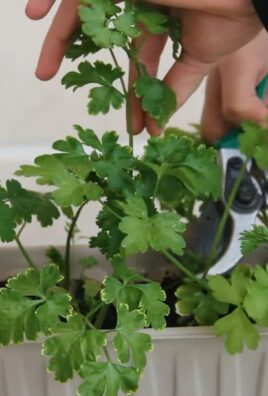
1. Harvesting Greens: You can start harvesting turnip greens as soon as they are large enough to eat. Simply snip off the outer leaves, leaving the inner leaves to continue growing.
2. Harvesting Roots: Turnip roots are typically ready to harvest in 50-60 days. You can harvest them when they are 2-3 inches in diameter. To harvest, gently loosen the soil around the roots and pull them out of the ground.
3. Storage: Store turnip greens in the refrigerator for up to a week. Store turnip roots in a cool, dark place for several months. You can also freeze or can turnip roots for longer storage.
Troubleshooting Common Turnip Problems
Even with the best care, you may encounter some problems when growing turnips. Here are a few common issues and how to address them:
* Small Roots: Small roots can be caused by overcrowding, poor soil, or insufficient watering. Thin the seedlings to 3-4 inches apart, amend the soil with compost, and water regularly.
* Bitter Roots: Bitter roots can be caused by hot weather or insufficient watering. Plant turnips in early spring or late summer to avoid hot weather, and water regularly.
* Cracked Roots: Cracked roots can be caused by inconsistent watering. Water deeply and infrequently, rather than shallowly and frequently.
* Pest Infestations: Aphids, flea beetles, and root maggots can damage turnip plants. Inspect your plants regularly for signs of infestation and treat them promptly with an appropriate insecticide.
Enjoying Your Homegrown Turnips
Now that you’ve harvested your delicious homegrown turnips, it’s time to enjoy them! Here are a few of my favorite ways to prepare turnips:
* Roasted Turnips: Toss turnip roots with olive oil, salt, pepper, and your favorite herbs, and roast them in the oven until tender.
* Mashed Turnips: Boil turnip roots until tender, then mash them with butter, milk, and salt.
* Turnip Soup: Add turnip roots to your favorite soup recipe for a peppery kick.
* Turnip Greens: Saute turnip greens with garlic, olive oil, and a pinch of red pepper flakes.
* Raw Turnips: Thinly slice Hakurei turnips and add them to salads for a crisp and refreshing bite.
Growing turnips at home is a rewarding experience that allows you to enjoy fresh, delicious, and nutritious vegetables right from your own garden. With a little bit of planning and care, you can have a bountiful harvest of turnips to enjoy throughout the season. Happy gardening!
Conclusion
So, there you have it! Mastering the art of planting turnips at home is not just a gardening endeavor; it’s an investment in fresh, flavorful produce right at your fingertips. We’ve walked through the process, demystified the steps, and hopefully, ignited a spark of excitement for you to cultivate your own turnip patch.
Why is this DIY trick a must-try? Because store-bought turnips simply can’t compare to the vibrant taste and crisp texture of homegrown ones. You control the growing environment, ensuring they’re free from unwanted pesticides and herbicides. Plus, there’s an undeniable satisfaction in harvesting something you nurtured from seed to table. Imagine the pride you’ll feel serving a dish featuring turnips you grew yourself!
But the benefits extend beyond just taste and control. Planting turnips at home is also incredibly rewarding for your garden’s ecosystem. Turnips are excellent cover crops, improving soil health and suppressing weeds. They’re also relatively quick to mature, allowing you to squeeze in a harvest between other crops. Think of them as your garden’s unsung heroes!
Ready to experiment? Consider these variations to personalize your turnip-growing experience:
* Explore different varieties: From the classic Purple Top White Globe to the sweeter Golden Ball, each turnip variety offers a unique flavor profile. Experiment to find your favorite!
* Succession planting: Plant a small batch of seeds every few weeks to ensure a continuous harvest throughout the growing season. This is especially useful in regions with mild winters.
* Companion planting: Plant turnips alongside beneficial companions like peas, beans, or radishes. These pairings can deter pests and improve overall growth.
* Turnip greens: Don’t forget about the greens! Turnip greens are a delicious and nutritious addition to salads, stir-fries, and soups. Harvest them while they’re young and tender for the best flavor.
We wholeheartedly encourage you to give this DIY trick a try. It’s easier than you might think, and the rewards are well worth the effort. Whether you have a sprawling garden or a small balcony, there’s a way to incorporate turnips into your growing space.
Most importantly, we want to hear about your experience! Share your tips, tricks, and triumphs in the comments below. Let us know what varieties you tried, what challenges you faced, and what delicious dishes you created with your homegrown turnips. Your insights will not only inspire other readers but also help us refine this guide for future gardeners. Let’s cultivate a community of turnip-loving enthusiasts! So, grab your seeds, get your hands dirty, and embark on your turnip-growing adventure today. Happy planting!
Frequently Asked Questions (FAQ)
What is the best time of year to plant turnips?
The ideal time to plant turnips depends on your climate. Generally, turnips are a cool-season crop, meaning they thrive in cooler temperatures. For a fall harvest, plant turnip seeds in late summer, about 6-8 weeks before the first expected frost. For a spring harvest, plant them in early spring as soon as the soil can be worked. In regions with mild winters, you can even plant turnips in the fall for a winter harvest. Pay attention to your local weather patterns and frost dates to determine the optimal planting time for your area.
How much sunlight do turnips need?
Turnips require at least 6 hours of direct sunlight per day to grow properly. While they can tolerate some partial shade, especially in hotter climates, insufficient sunlight can result in smaller roots and less flavorful greens. Choose a planting location that receives ample sunlight throughout the day. If you’re growing turnips indoors under grow lights, ensure the lights are positioned close enough to the plants and provide sufficient intensity.
What type of soil is best for growing turnips?
Turnips prefer well-drained, loose soil that is rich in organic matter. The ideal soil pH is between 6.0 and 6.8. Before planting, amend the soil with compost or well-rotted manure to improve its fertility and drainage. Avoid heavy clay soils, as they can hinder root development. If you have clay soil, consider adding sand or other amendments to improve its texture. Raised beds are also a good option for growing turnips in areas with poor soil drainage.
How often should I water my turnip plants?
Turnips need consistent moisture to thrive, especially during germination and early growth. Water deeply and regularly, keeping the soil consistently moist but not waterlogged. Avoid letting the soil dry out completely, as this can stress the plants and affect root development. The frequency of watering will depend on the weather conditions and soil type. Check the soil moisture regularly and water when the top inch feels dry to the touch. Mulching around the plants can help retain moisture and suppress weeds.
How do I prevent pests and diseases from affecting my turnip crop?
Several pests and diseases can affect turnip crops, including aphids, flea beetles, root maggots, and fungal diseases. To prevent problems, practice good garden hygiene, such as removing weeds and debris that can harbor pests and diseases. Use row covers to protect young plants from insect pests. Companion planting with herbs like rosemary or thyme can also deter pests. If you notice signs of pests or diseases, treat them promptly with appropriate organic pesticides or fungicides. Crop rotation can also help prevent soilborne diseases from building up.
When and how should I harvest my turnips?
Turnips are typically ready to harvest 50-60 days after planting, depending on the variety. The roots should be about 2-3 inches in diameter. To harvest, gently loosen the soil around the turnip and pull it out of the ground. You can also harvest the greens while the turnips are growing. Harvest young, tender leaves for the best flavor. Store harvested turnips in a cool, dry place for several weeks.
Can I eat both the turnip roots and the greens?
Yes, both the turnip roots and the greens are edible and nutritious. The roots are a good source of fiber, vitamins, and minerals, while the greens are rich in vitamins A and C, as well as calcium and iron. The flavor of the roots can vary depending on the variety and growing conditions, ranging from mild and sweet to slightly peppery. The greens have a slightly bitter, mustard-like flavor. Both the roots and greens can be used in a variety of dishes, such as soups, stews, salads, and stir-fries.
Are there any companion plants that are beneficial for turnips?
Yes, several companion plants can benefit turnips by deterring pests, improving soil health, or providing shade. Some good companion plants for turnips include:
* Peas and beans: These legumes fix nitrogen in the soil, which can benefit turnip growth.
* Radishes: Radishes can help deter flea beetles, a common pest of turnips.
* Garlic and onions: These plants have strong odors that can repel various pests.
* Marigolds: Marigolds attract beneficial insects that prey on pests.
* Nasturtiums: Nasturtiums can act as a trap crop, attracting pests away from turnips.
Can I grow turnips in containers?
Yes, you can grow turnips in containers, especially if you have limited space. Choose a container that is at least 12 inches deep and wide to accommodate root development. Use a well-draining potting mix and ensure the container has drainage holes. Water regularly and fertilize as needed. Container-grown turnips may require more frequent watering and fertilization than those grown in the ground.
How do I store turnips after harvesting?
To store turnips after harvesting, remove the greens, leaving about an inch of stem attached. Gently brush off any excess soil. Store the turnips in a cool, dry place, such as a root cellar or refrigerator. They can be stored in perforated plastic bags or wrapped in damp paper towels to prevent them from drying out. Properly stored turnips can last for several weeks or even months.
Leave a Comment