
Patio Summer Squash Growing might seem daunting if you’re short on space, but trust me, it’s totally achievable and incredibly rewarding! Imagine stepping onto your patio and harvesting fresh, vibrant summer squash right at your doorstep. No sprawling garden needed! For centuries, humans have cultivated food in limited spaces, from ancient rooftop gardens in Babylon to modern-day urban farms. This connection to growing our own food is deeply ingrained in our history, and now, you can participate too, even with just a small patio.
But why bother with patio summer squash growing? Well, store-bought squash simply can’t compare to the flavor and freshness of homegrown. Plus, gardening is a fantastic stress reliever and a great way to connect with nature. This DIY guide is packed with simple tricks and hacks that will help you successfully grow delicious summer squash in containers, even if you’ve never gardened before. We’ll cover everything from choosing the right varieties and containers to watering, fertilizing, and pest control. Get ready to impress your friends and family with your green thumb and enjoy the taste of summer, straight from your patio!

Growing Summer Squash in Containers: A Patio Gardener’s Guide
Hey there, fellow green thumbs! Want to enjoy fresh, homegrown summer squash even if you’re short on space? You’re in the right place! I’m going to walk you through everything you need to know to successfully grow summer squash in containers, right on your patio or balcony. It’s easier than you think, and the reward of delicious, homegrown veggies is totally worth it.
Choosing the Right Squash Variety
Not all summer squash varieties are created equal when it comes to container gardening. You’ll want to opt for bush varieties, which are more compact and manageable than vining types. Here are a few of my favorites:
* ‘Spacemaster’ Zucchini: As the name suggests, this zucchini is bred for smaller spaces. It produces dark green, flavorful zucchini on a compact plant.
* ‘Bush Delicata’: While technically a winter squash, ‘Bush Delicata’ is a great option for containers. It offers sweet, nutty-flavored squash with beautiful cream-colored skin and green stripes.
* ‘Patio Star’ Zucchini: Another excellent zucchini choice, ‘Patio Star’ is known for its high yields and disease resistance.
* ‘Sunburst’ Patty Pan: These adorable, saucer-shaped squash are not only delicious but also add a touch of whimsy to your patio garden. They come in vibrant yellow and are perfect for grilling or sautéing.
* ‘Eight Ball’ Zucchini: If you’re looking for something unique, try ‘Eight Ball’ zucchini. These round, dark green squash are perfect for stuffing.
Gathering Your Supplies
Before we dive into planting, let’s make sure you have everything you need. Here’s a checklist:
* Large Container: This is crucial! Summer squash needs plenty of room for its roots to grow. I recommend a container that’s at least 24 inches in diameter and 12 inches deep. The bigger, the better!
* High-Quality Potting Mix: Don’t skimp on the potting mix! Use a well-draining mix specifically formulated for containers. Avoid using garden soil, as it can become compacted in containers and hinder drainage.
* Summer Squash Seeds or Seedlings: Choose your favorite variety from the list above, or experiment with a few different kinds!
* Slow-Release Fertilizer: This will provide your squash plants with a steady supply of nutrients throughout the growing season.
* Watering Can or Hose: You’ll need a way to water your plants regularly.
* Trowel or Small Shovel: For planting and transplanting.
* Optional: Trellis or Tomato Cage: While not strictly necessary for bush varieties, a small trellis or tomato cage can provide support and prevent the plants from sprawling too much.
* Gardening Gloves: To keep your hands clean and protected.
Planting Your Summer Squash
Now for the fun part! Let’s get those squash seeds or seedlings into their new home.
1. Prepare the Container: Fill your container with the high-quality potting mix, leaving a few inches of space at the top.
2. Sowing Seeds (if starting from seed): If you’re starting from seed, sow 2-3 seeds per container, about 1 inch deep. Space the seeds a few inches apart. Gently water the soil.
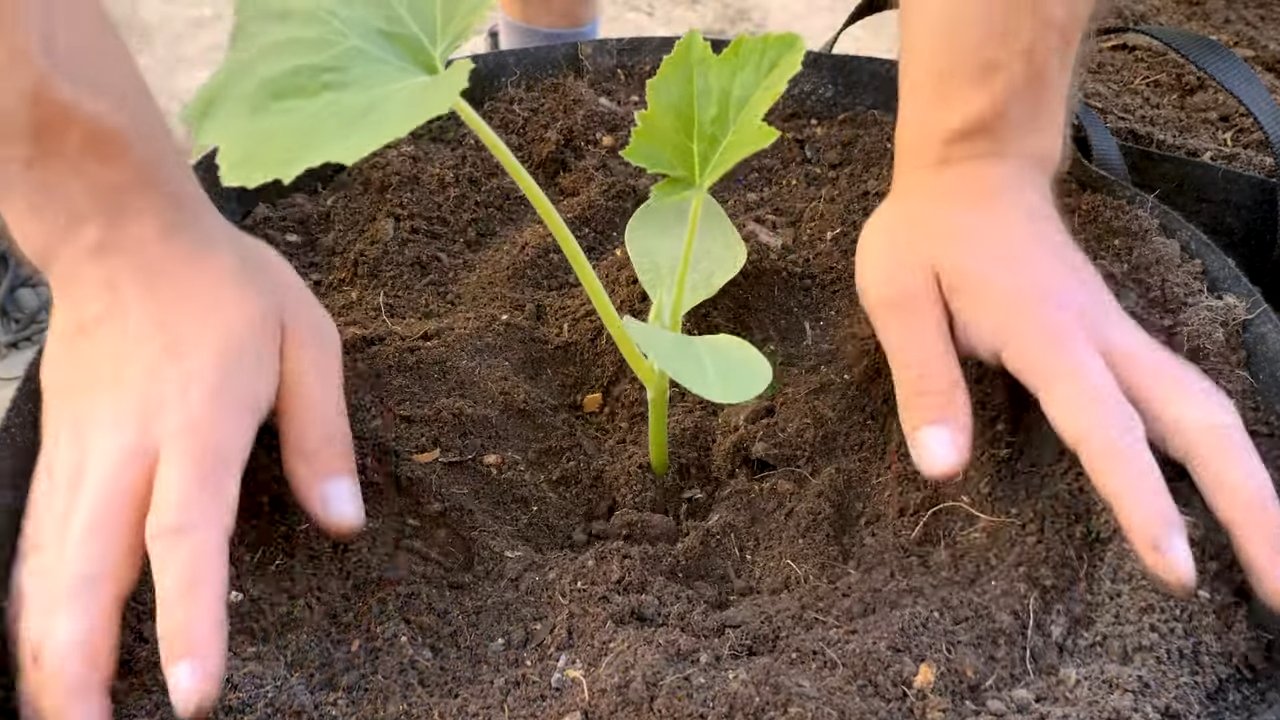
3. Transplanting Seedlings (if using seedlings): If you’re using seedlings, gently remove them from their nursery pots. Loosen the roots slightly before planting. Dig a hole in the potting mix that’s large enough to accommodate the root ball. Place the seedling in the hole and backfill with potting mix. Gently water the soil.
4. Fertilize: Sprinkle a slow-release fertilizer around the base of the plant, following the instructions on the fertilizer package.
5. Water Thoroughly: Water the container thoroughly until water drains out of the bottom. This helps to settle the soil and ensure that the roots are well-hydrated.
6. Choose a Sunny Location: Summer squash needs at least 6-8 hours of sunlight per day. Place your container in a sunny spot on your patio or balcony.
Caring for Your Summer Squash Plants
Once your squash plants are established, it’s important to provide them with the care they need to thrive.
1. Watering: Summer squash needs consistent moisture, especially during hot weather. Water deeply whenever the top inch of soil feels dry to the touch. Avoid overhead watering, as this can lead to fungal diseases. Instead, water at the base of the plant.
2. Fertilizing: Summer squash are heavy feeders, so you’ll need to fertilize them regularly. In addition to the slow-release fertilizer you added at planting time, you can also supplement with a liquid fertilizer every 2-3 weeks. Follow the instructions on the fertilizer package.
3. Pollination: Summer squash plants produce both male and female flowers. The female flowers need to be pollinated in order to produce fruit. If you’re not seeing any fruit developing, you may need to hand-pollinate the flowers. To do this, use a small paintbrush to transfer pollen from the male flowers to the female flowers. You can identify female flowers by the small fruit (the squash) that is already present at the base of the flower. Male flowers have a straight stem.
4. Pest and Disease Control: Keep an eye out for common squash pests, such as squash bugs, squash vine borers, and aphids. You can control these pests with insecticidal soap or neem oil. Also, watch out for fungal diseases, such as powdery mildew. To prevent fungal diseases, avoid overhead watering and ensure good air circulation around the plants. If you notice any signs of disease, treat the plants with a fungicide.
5. Pruning: While not always necessary, you can prune your summer squash plants to improve air circulation and encourage fruit production. Remove any yellowing or damaged leaves. You can also remove some of the larger leaves to allow more sunlight to reach the developing fruit.
6. Support: As your squash plants grow, they may start to sprawl. If you’re using a trellis or tomato cage, gently guide the stems onto the support. This will help to keep the plants upright and prevent the fruit from touching the ground.
Harvesting Your Summer Squash
The best part of growing your own summer squash is, of course, harvesting and enjoying the fruits (or rather, vegetables!) of your labor.
1. Harvest Time: Summer squash is typically ready to harvest about 50-60 days after planting. The exact timing will depend on the variety and growing conditions.
2. Signs of Ripeness: Summer squash is best harvested when it’s young and tender. The skin should be smooth and glossy, and the squash should feel firm to the touch. Avoid harvesting squash that is too large or has a dull, hard skin.
3. Harvesting Technique: Use a sharp knife or pruning shears to cut the squash from the plant. Leave a short stem attached to the squash.
4. Storage: Summer squash is best eaten fresh, but it can be stored in the refrigerator for up to a week.
Troubleshooting Common Problems
Even with the best care, you may encounter some challenges when growing summer squash in containers. Here are a few common problems and how to address them:
* Lack of Fruit Production: This can be caused by a number of factors, including poor pollination, insufficient sunlight, or lack of nutrients. Make sure your plants are getting enough sunlight and fertilizer. If you suspect poor pollination, try hand-pollinating the flowers.
* Yellowing Leaves: Yellowing leaves can be a sign of overwatering, underwatering, or nutrient deficiency. Check the soil moisture and adjust your watering schedule accordingly. If you suspect a nutrient deficiency, fertilize the plants with a balanced fertilizer.
* Powdery Mildew: This fungal disease can cause a white, powdery coating on the leaves. To prevent powdery mildew, avoid overhead watering and ensure good air circulation around the plants. If you notice any signs of powdery mildew, treat the plants with a fungicide.
* Squash Bugs: These pests can suck the sap from the leaves and stems, causing the plants to wilt and die. Handpick the bugs off the plants or spray them with insecticidal soap or neem oil.
* Squash Vine Borers: These pests can bore into the stems of the plants, causing them to wilt and die. To prevent squash vine borers, wrap the base of the stems with aluminum foil or pantyhose. If you notice any signs of squash vine borers, you can try to remove them by slitting the stem open and extracting the larvae.
Enjoying Your Homegrown Summer Squash
Now that you’ve successfully grown your own summer squash, it’s time to enjoy the delicious results! Summer squash is incredibly versatile and can be used in a variety of dishes. Here are a few of my favorite ways to enjoy it:
* Grilled: Slice the squash into rounds and grill
Conclusion
So, there you have it! Transforming your patio into a thriving summer squash haven is not only achievable, but incredibly rewarding. We’ve walked you through the simple steps, highlighting the ease and accessibility of growing your own delicious, fresh summer squash, even with limited space. Forget those bland, store-bought vegetables – imagine stepping outside your door and harvesting vibrant, flavorful squash, ready to be incorporated into your favorite summer dishes.
This DIY approach to patio summer squash growing offers a multitude of benefits. You’re in control of the entire process, from seed to table, ensuring that your squash is free from harmful pesticides and chemicals. You’ll also experience the immense satisfaction of nurturing a plant from a tiny seed into a bountiful producer. Plus, let’s be honest, there’s a certain magic to watching your own food grow!
But the best part? The possibilities are endless! Experiment with different varieties of summer squash. Zucchini, yellow squash, pattypan – the choice is yours! Consider companion planting to maximize your yield and deter pests naturally. Marigolds, basil, and nasturtiums are excellent choices to plant alongside your squash.
Don’t be afraid to get creative with your container gardening. Upcycle old buckets, repurpose wooden crates, or invest in decorative planters to add a touch of personality to your patio garden. The key is to ensure adequate drainage and sufficient space for your squash plants to thrive.
And speaking of thriving, remember that consistent watering and fertilization are crucial for optimal growth. Keep a close eye on your plants, and address any issues promptly. A little bit of attention goes a long way in ensuring a bountiful harvest.
We understand that gardening can sometimes feel daunting, especially for beginners. But trust us, growing patio summer squash is surprisingly easy and incredibly rewarding. It’s a fantastic way to connect with nature, enjoy fresh, healthy food, and add a touch of beauty to your outdoor space.
So, what are you waiting for? Grab some seeds, prepare your containers, and get ready to embark on your own patio summer squash growing adventure! We’re confident that you’ll be amazed by the results.
And most importantly, we want to hear about your experience! Share your photos, tips, and stories with us in the comments below. Let’s create a community of passionate patio gardeners, sharing our knowledge and inspiring others to grow their own food. Happy gardening!
Frequently Asked Questions (FAQ)
Q: What is the best variety of summer squash to grow on a patio?
A: While many summer squash varieties can be grown on a patio, bush varieties are generally the most suitable due to their compact size. Zucchini ‘Bush Baby’, yellow squash ‘Early Crookneck’, and pattypan squash are all excellent choices. These varieties require less space than vining types and are well-suited for container gardening. Consider the size of your container when selecting a variety. Larger containers can accommodate slightly larger bush varieties.
Q: What size container do I need for growing summer squash?
A: A minimum of 15-20 gallons is recommended for each summer squash plant. The larger the container, the better, as it provides more room for the roots to grow and access nutrients. Ensure the container has adequate drainage holes to prevent waterlogging. Fabric pots are also a great option as they allow for better aeration and drainage.
Q: How often should I water my patio summer squash plants?
A: Summer squash plants require consistent watering, especially during hot weather. Water deeply whenever the top inch of soil feels dry to the touch. Avoid overhead watering, as this can lead to fungal diseases. Instead, water at the base of the plant. Mulching around the base of the plant can help retain moisture and suppress weeds.
Q: What kind of fertilizer should I use for my summer squash plants?
A: Summer squash plants are heavy feeders and benefit from regular fertilization. Use a balanced fertilizer (e.g., 10-10-10) at planting time, and then side-dress with a nitrogen-rich fertilizer every few weeks during the growing season. You can also use organic fertilizers such as compost tea or fish emulsion. Follow the instructions on the fertilizer packaging for proper application rates.
Q: How do I prevent pests and diseases from affecting my summer squash plants?
A: Several pests and diseases can affect summer squash plants, including squash bugs, squash vine borers, and powdery mildew. Regularly inspect your plants for signs of infestation or disease. Handpick pests whenever possible. Use row covers to protect young plants from pests. Ensure good air circulation around your plants to prevent fungal diseases. If necessary, use organic pesticides or fungicides to control pests and diseases. Companion planting with marigolds, basil, or nasturtiums can also help deter pests.
Q: When is the best time to harvest summer squash?
A: Summer squash is typically ready to harvest about 50-60 days after planting. Harvest when the squash is young and tender, typically when it is 6-8 inches long. Overripe squash can become tough and seedy. Use a sharp knife to cut the squash from the plant, leaving a short stem attached. Regular harvesting encourages the plant to produce more fruit.
Q: Can I grow summer squash in partial shade?
A: Summer squash plants require at least 6-8 hours of direct sunlight per day to thrive. While they can tolerate some partial shade, they will not produce as much fruit. Choose a sunny location for your patio garden to ensure optimal growth and yield.
Q: My summer squash plant is producing flowers, but no fruit. What could be the problem?
A: Several factors can contribute to a lack of fruit production in summer squash plants. One common issue is a lack of pollination. Summer squash plants have separate male and female flowers, and pollination is required for fruit to develop. If there are not enough pollinators in your area, you may need to hand-pollinate the flowers. Another possible cause is nutrient deficiency. Ensure your plants are receiving adequate fertilization. Stress from heat, drought, or pests can also affect fruit production.
Q: How can I hand-pollinate my summer squash flowers?
A: Hand-pollinating summer squash flowers is a simple process. Identify the male and female flowers. The male flowers have a long, thin stem, while the female flowers have a small fruit-like structure at the base of the flower. Use a small paintbrush or cotton swab to collect pollen from the male flower and transfer it to the stigma of the female flower. Hand-pollinate in the morning, when the flowers are open.
Q: Can I save seeds from my summer squash to plant next year?
A: Saving seeds from hybrid summer squash varieties is not recommended, as the resulting plants may not be true to type. If you want to save seeds, choose open-pollinated varieties. Allow the squash to mature fully on the plant before harvesting the seeds. Clean and dry the seeds thoroughly before storing them in a cool, dry place.

Leave a Comment