
Melon Growing Success is within your reach, even if you think you don’t have a green thumb! Have you ever dreamt of biting into a juicy, homegrown melon, bursting with flavor that store-bought ones just can’t match? I know I have! For centuries, cultures around the globe, from ancient Egypt to the Far East, have cultivated melons, prized for their sweetness and refreshing qualities. They were even depicted in ancient art, showcasing their importance as a food source and symbol of prosperity.
But let’s be honest, achieving melon growing success can feel a little daunting. Maybe you’ve tried before and ended up with small, bland fruits, or perhaps you’re intimidated by the thought of dealing with pests and diseases. That’s where these DIY tricks and hacks come in! I’m going to share some simple, yet effective, techniques that will help you transform your garden into a melon paradise. These aren’t complicated, expensive solutions; they’re clever ways to maximize your yield, improve the flavor of your melons, and protect them from common problems. So, get ready to unlock the secrets to a bountiful melon harvest – you’ll be amazed at what you can achieve!
Unlock Melon Growing Success: A DIY Guide to Sweet, Juicy Harvests
Hey there, fellow gardeners! I’m so excited to share my tried-and-true methods for growing the most delicious melons you’ve ever tasted. Forget those bland supermarket melons – with a little planning and some DIY ingenuity, you can be enjoying homegrown sweetness all summer long. This guide is packed with tips and tricks I’ve learned over the years, and I’m confident you’ll be amazed at the results.
Choosing the Right Melon Variety
Before we even think about planting, let’s talk about variety. Not all melons are created equal, and some are better suited for certain climates and growing conditions than others.
* Consider your climate: Watermelons generally need a long, hot growing season. Cantaloupes are a bit more forgiving and can thrive in slightly cooler climates. Honeydew melons are somewhere in between.
* Think about space: Some melon varieties are vining and spread out significantly, while others are more compact. If you have limited space, look for bush or dwarf varieties.
* Read seed descriptions carefully: Pay attention to days to maturity, disease resistance, and any specific growing requirements.
Some of my personal favorites include:
* Sugar Baby Watermelon: A classic, compact watermelon that’s perfect for smaller gardens.
* Hales Best Cantaloupe: A reliable and flavorful cantaloupe that’s easy to grow.
* Honey Globe Honeydew: A sweet and juicy honeydew with a smooth, pale green rind.
Preparing Your Melon Patch: Soil is Key!
Melons are heavy feeders, meaning they need nutrient-rich soil to thrive. Proper soil preparation is absolutely crucial for a successful harvest.
* Sunlight is essential: Melons need at least 6-8 hours of direct sunlight per day. Choose a location that gets plenty of sun throughout the growing season.
* Well-draining soil is a must: Melons hate soggy feet! Make sure your soil drains well to prevent root rot.
* Amend your soil with organic matter: Compost, aged manure, and other organic materials will improve soil drainage, fertility, and water retention.
Here’s my step-by-step guide to preparing your melon patch:
1. Clear the area: Remove any weeds, grass, rocks, or other debris from the planting area.
2. Till or dig the soil: Loosen the soil to a depth of at least 12 inches. This will make it easier for melon roots to penetrate the soil.
3. Amend with organic matter: Spread a 2-3 inch layer of compost or aged manure over the soil surface.
4. Incorporate the amendments: Use a tiller or garden fork to mix the organic matter into the soil.
5. Create raised beds (optional): Raised beds can improve drainage and warm the soil more quickly in the spring. If you live in an area with heavy clay soil, raised beds are highly recommended.
6. Test your soil pH: Melons prefer a soil pH between 6.0 and 6.8. You can purchase a soil testing kit at most garden centers. If your soil pH is too high or too low, you can amend it with lime (to raise pH) or sulfur (to lower pH).
Starting Melon Seeds Indoors (Optional but Recommended)
Starting melon seeds indoors gives you a head start on the growing season, especially if you live in a cooler climate.
* Choose the right containers: Use peat pots or biodegradable containers to minimize root disturbance when transplanting.
* Use a seed-starting mix: This type of mix is sterile and provides the ideal environment for seed germination.
* Provide warmth and light: Melon seeds need warmth to germinate. Use a heat mat to keep the soil temperature between 80-85°F. Once the seeds germinate, provide plenty of light with a grow light or a sunny windowsill.
Here’s how I start my melon seeds indoors:
1. Fill the containers with seed-starting mix: Moisten the mix before filling the containers.
2. Sow the seeds: Plant 2-3 seeds per container, about ½ inch deep.
3. Water gently: Use a spray bottle to water the seeds gently.
4. Cover the containers: Cover the containers with a plastic dome or plastic wrap to create a humid environment.
5. Place the containers on a heat mat: Keep the soil temperature between 80-85°F.
6. Monitor germination: The seeds should germinate in 5-10 days.
7. Remove the cover: Once the seeds germinate, remove the cover and place the containers under a grow light or in a sunny windowsill.
8. Thin the seedlings: Once the seedlings have their first true leaves, thin them to one plant per container.
9. Harden off the seedlings: Before transplanting the seedlings outdoors, you need to harden them off. This means gradually exposing them to outdoor conditions over a period of 7-10 days. Start by placing the seedlings outdoors in a sheltered location for a few hours each day, gradually increasing the amount of time they spend outdoors.
Transplanting Melon Seedlings Outdoors
Once the danger of frost has passed and the soil has warmed up, it’s time to transplant your melon seedlings outdoors.
* Choose a sunny location: As mentioned earlier, melons need at least 6-8 hours of direct sunlight per day.
* Space the plants properly: Watermelons need more space than cantaloupes or honeydews. Check the seed packet for specific spacing recommendations.
* Handle the seedlings carefully: Melon seedlings are delicate, so handle them with care to avoid damaging the roots.
Here’s my transplanting process:
1. Prepare the planting holes: Dig holes that are slightly larger than the root balls of the seedlings.
2. Add compost to the planting holes: This will provide the seedlings with a boost of nutrients.
3. Remove the seedlings from their containers: Gently squeeze the sides of the containers to loosen the root balls.
4. Place the seedlings in the planting holes: Make sure the top of the root ball is level with the surrounding soil.
5. Fill in the holes with soil: Gently firm the soil around the seedlings.
6. Water thoroughly: Water the seedlings well to help them establish their roots.
7. Mulch around the plants: Mulch will help retain moisture, suppress weeds, and regulate soil temperature. I like to use straw or shredded leaves.
Caring for Your Melon Plants: Watering, Fertilizing, and Pest Control
Once your melon plants are in the ground, it’s important to provide them with proper care to ensure a bountiful harvest.
* Water deeply and regularly: Melons need consistent moisture, especially during hot, dry weather. Water deeply at the base of the plants, avoiding wetting the foliage.
* Fertilize regularly: Melons are heavy feeders and need regular fertilization. Use a balanced fertilizer or a fertilizer specifically formulated for melons.
* Control pests and diseases: Melons are susceptible to a variety of pests and diseases. Monitor your plants regularly and take action if you see any signs of problems.
Here are some specific tips for caring for your melon plants:
* Watering: Water deeply and regularly, especially during hot, dry weather. Aim for about 1-2 inches of water per week. Use a soaker hose or drip irrigation to water at the base of the plants.
* Fertilizing: Fertilize every 2-3 weeks with a balanced fertilizer or a fertilizer specifically formulated for melons. Follow the instructions on the fertilizer label.
* Pest control: Common melon pests include aphids, squash bugs, and cucumber beetles. You can control these pests with insecticidal soap, neem oil, or other organic pesticides.
* Disease control: Common melon diseases include powdery mildew and fusarium wilt. You can prevent these diseases by providing good air circulation, avoiding overhead watering, and using disease-resistant varieties.
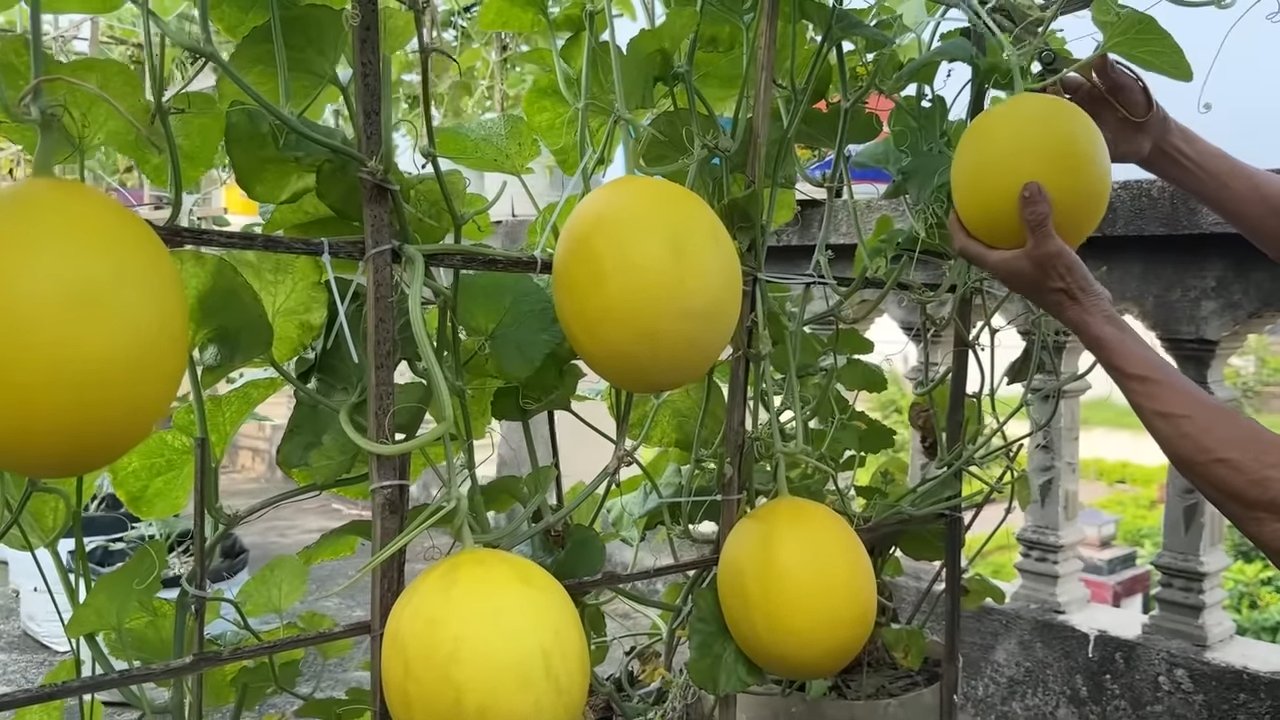
* Support the vines (optional): If you’re growing vining melon varieties, you may want to provide support for the vines. You can use a trellis, fence, or other structure. This will help keep the melons off the ground and prevent them from rotting.
Hand Pollination: A Secret Weapon for Melon Success
Melons rely on bees and other pollinators to transfer pollen from the male flowers to the female flowers. If you’re not seeing a lot of bee activity in your garden, you may need to hand-pollinate your melon flowers.
* Identify male and female flowers: Male flowers have a long, thin stem, while female flowers have a small, immature melon at the base of the flower.
* Pollinate in the morning: The best time to hand-pollinate is in the morning, when the flowers are open and the pollen is fresh.
Conclusion
So, there you have it! Mastering the art of melon growing doesn’t have to be a daunting task. By implementing this simple yet effective DIY trick, you’re setting yourself up for a season of sweet, juicy, and incredibly satisfying harvests. We’ve walked you through the process, highlighting the benefits and offering insights into why this method can truly revolutionize your melon patch.
Think about it: no more battling inconsistent watering, no more worrying about nutrient deficiencies, and no more watching your precious melons struggle to reach their full potential. This DIY approach empowers you to take control of your melon growing environment, creating the optimal conditions for robust growth and exceptional flavor. It’s about working smarter, not harder, and reaping the rewards of your efforts in the form of delicious, homegrown melons.
But the beauty of this method lies not only in its effectiveness but also in its adaptability. Feel free to experiment with different materials for your DIY system. Perhaps you’ll find that using recycled plastic containers works just as well, or maybe you’ll discover a unique way to integrate this technique into your existing gardening setup. The possibilities are endless!
Consider these variations to further personalize your melon growing experience:
* Vertical Melon Growing: Adapt the DIY system for vertical gardening by using trellises or supports. This is especially useful for smaller melon varieties like cantaloupes or personal watermelons, maximizing space and improving air circulation.
* Companion Planting: Strategically plant companion plants around your melons to deter pests and attract beneficial insects. Marigolds, basil, and nasturtiums are excellent choices.
* Soil Amendments: Incorporate organic matter like compost or well-rotted manure into the soil to enhance its fertility and drainage. This will provide your melons with the nutrients they need to thrive.
* Watering Schedule: While the DIY system helps regulate moisture, monitor the soil moisture levels regularly, especially during hot and dry periods. Adjust the watering frequency as needed to ensure consistent hydration.
Ultimately, the goal is to create a thriving ecosystem where your melons can flourish. This DIY trick is a powerful tool in your arsenal, but it’s just one piece of the puzzle. By combining it with other best practices, you’ll be well on your way to becoming a melon growing master.
We wholeheartedly encourage you to give this DIY trick a try. It’s a game-changer for melon growing, and we’re confident that you’ll be amazed by the results. Don’t just take our word for it – experience the difference for yourself!
And once you’ve had a chance to put this method into practice, we’d love to hear about your experience. Share your tips, tricks, and successes in the comments below. Let’s build a community of melon enthusiasts and learn from each other’s journeys. Together, we can unlock the secrets to growing the most delicious melons imaginable! Happy gardening!
Frequently Asked Questions (FAQ)
What types of melons are best suited for this DIY growing trick?
This DIY trick is incredibly versatile and can be used for a wide variety of melon types. Watermelons, cantaloupes, honeydew melons, and even smaller varieties like Galia melons will all benefit from the consistent watering and nutrient delivery that this system provides. However, keep in mind the size and growth habits of each melon variety when designing your system. Larger watermelons may require more robust support structures, while smaller melons may thrive in a vertical gardening setup. The key is to adapt the system to meet the specific needs of your chosen melon.
How often should I refill the water reservoir in the DIY system?
The frequency of refilling the water reservoir will depend on several factors, including the size of the reservoir, the type of melon you’re growing, the weather conditions, and the stage of growth. During hot and dry periods, you may need to refill the reservoir daily, while during cooler or wetter periods, you may only need to refill it every few days. The best way to determine when to refill is to regularly check the soil moisture levels around the melon plants. If the soil feels dry to the touch, it’s time to refill the reservoir. Also, observe your plants for signs of stress, such as wilting leaves, which can indicate a lack of water.
Can I use fertilizer in the water reservoir? If so, what kind and how much?
Yes, you can absolutely use fertilizer in the water reservoir to provide your melons with essential nutrients. However, it’s crucial to use a water-soluble fertilizer specifically formulated for fruits and vegetables. Follow the instructions on the fertilizer package carefully, and start with a diluted solution to avoid over-fertilizing. Organic options like compost tea or liquid seaweed extract can also be used. Avoid using granular fertilizers, as they may not dissolve properly and can clog the system. Monitor your plants for signs of nutrient deficiencies, such as yellowing leaves or stunted growth, and adjust the fertilizer concentration accordingly. Remember, less is often more when it comes to fertilizing melons.
What if I don’t have access to the materials mentioned in the DIY guide? Are there alternative options?
Absolutely! The beauty of this DIY trick is its adaptability. If you don’t have access to the specific materials mentioned, don’t worry – there are plenty of alternative options. For example, instead of using PVC pipes, you could use bamboo stakes or even sturdy branches from your yard. Instead of using plastic containers, you could use recycled buckets or even old tires. The key is to be creative and resourceful. Look around your home and garden for materials that can be repurposed and adapted to create a similar system. The most important thing is to ensure that the system provides consistent watering and nutrient delivery to your melon plants.
How do I protect my melons from pests and diseases while using this DIY system?
While this DIY system helps create a healthy growing environment, it’s still important to take steps to protect your melons from pests and diseases. Regularly inspect your plants for signs of infestation or disease, such as aphids, squash bugs, or powdery mildew. Use organic pest control methods, such as insecticidal soap or neem oil, to control pests. Ensure good air circulation around your plants by spacing them properly and pruning any overcrowded foliage. Practice crop rotation to prevent soilborne diseases from building up. You can also use row covers to protect your plants from pests early in the season. By taking these preventative measures, you can minimize the risk of pest and disease problems and ensure a healthy and productive melon harvest.
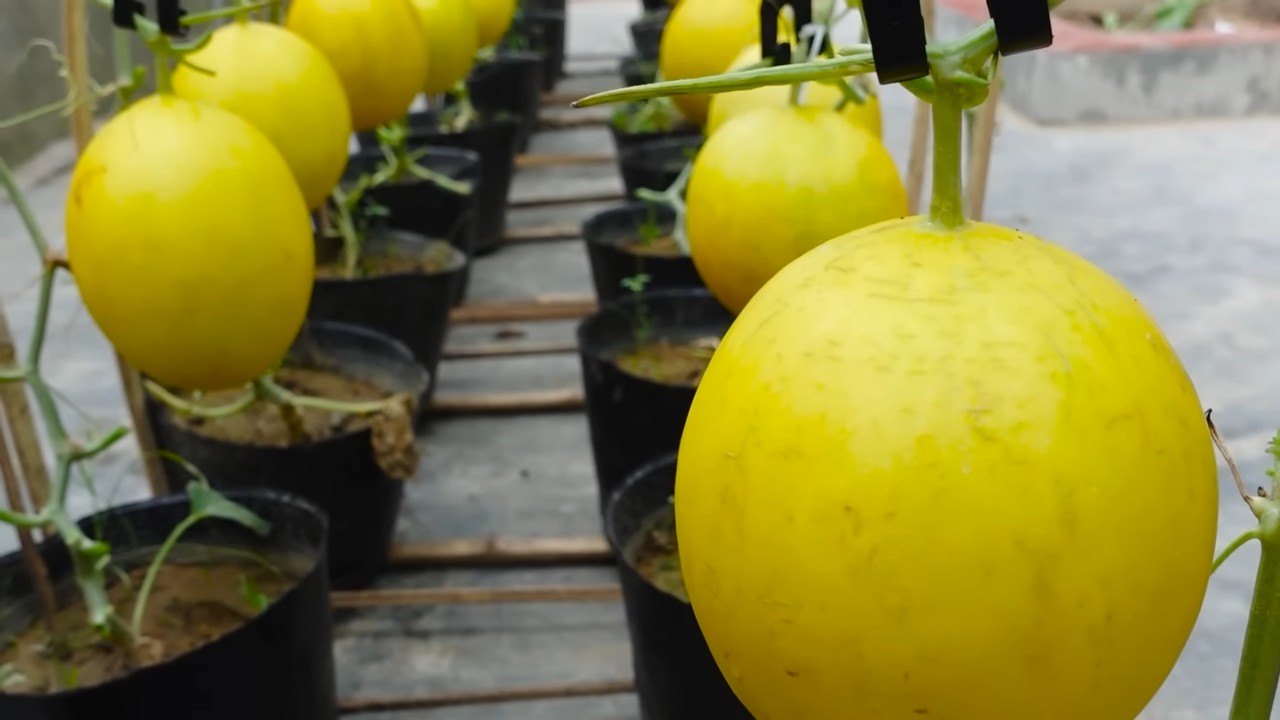
Is this DIY system suitable for growing melons in containers?
Yes, this DIY system is perfectly suitable for growing melons in containers! In fact, it can be especially beneficial for container gardening, as it helps regulate moisture levels and prevent the soil from drying out too quickly. When growing melons in containers, choose a large container with good drainage holes. Use a high-quality potting mix that is well-draining and rich in organic matter. Adapt the DIY system to fit the size and shape of your container. You may need to use smaller containers for the water reservoir and adjust the length of the wicks accordingly. Remember to provide your container-grown melons with adequate sunlight and support, as they may become top-heavy as they grow.
How long does it take to see results after implementing this DIY trick?
You should start to see positive results within a few weeks of implementing this DIY trick. You’ll likely notice that your melon plants are growing more vigorously, with healthier leaves and stronger stems. The fruits themselves may also develop more quickly and be larger and more flavorful. However, the exact timeline will depend on several factors, including the type of melon you’re growing, the weather conditions, and the overall health of your plants. Be patient and consistent with your care, and you’ll be rewarded with a bountiful harvest of delicious melons.
What are some common mistakes to avoid when using this DIY melon growing system?
Several common mistakes can hinder your success with this DIY melon growing system. Overwatering is a frequent issue; ensure the soil isn’t constantly saturated, as this can lead to root rot. Using the wrong type of fertilizer or applying it in excessive amounts can also harm your plants. Neglecting to monitor for pests and diseases can allow problems to escalate quickly. Finally, failing to provide adequate support for the growing melons can result in broken vines and lost fruit. By being mindful of these potential pitfalls, you can avoid common mistakes and maximize your chances of a successful melon harvest.

Leave a Comment