
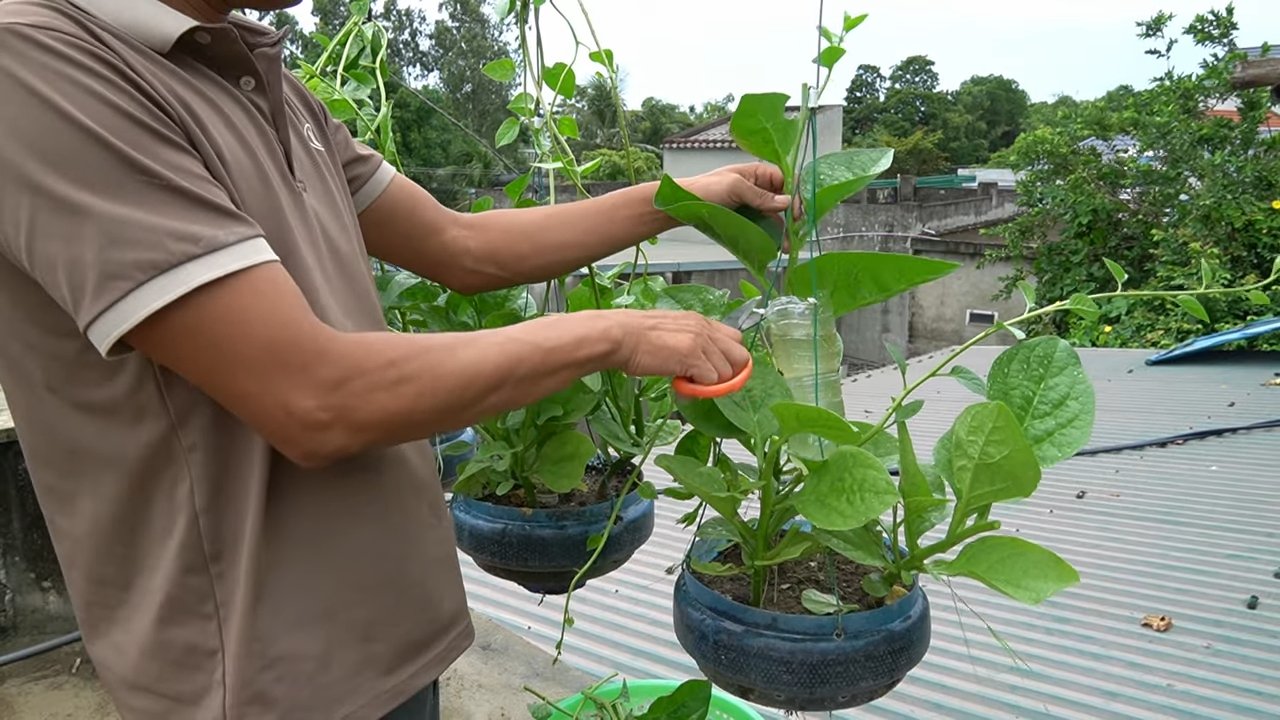
Harvesting Malabar Spinach can feel like unlocking a secret level in your home gardening journey! Have you ever grown something so vibrant and prolific that you felt overwhelmed by its abundance? That’s exactly how I felt the first time my Malabar spinach took off. I was drowning in gorgeous, glossy leaves and had no idea where to begin.
Malabar spinach, also known as Ceylon spinach or vine spinach, isn’t actually a true spinach. It’s a heat-loving vine that thrives in warm climates, making it a popular alternative to traditional spinach in tropical and subtropical regions. Its use dates back centuries in Asian cuisine, where it’s prized for its nutritional value and slightly peppery flavor. Think of it as a delicious and versatile leafy green with a fascinating history!
But let’s be honest, knowing its history doesn’t automatically make harvesting Malabar spinach any easier. That’s why I’m sharing my tried-and-true DIY tricks and hacks to help you maximize your yield and enjoy this incredible plant to its fullest. Many people struggle with knowing when and how to harvest properly, leading to either wasted leaves or a plant that stops producing. Don’t let that happen to you! This guide will walk you through everything you need to know, from identifying the perfect leaves to ensuring continuous growth throughout the season. Get ready to transform your Malabar spinach harvest from a daunting task into a delightful and rewarding experience!
Malabar Spinat Ernten: Dein DIY-Leitfaden für eine reiche Ernte
Hallo Gartenfreunde! Ich liebe es, frisches Gemüse aus meinem eigenen Garten zu ernten, und Malabar Spinat ist da keine Ausnahme. Dieser Kletterspinat ist nicht nur super lecker, sondern auch unglaublich einfach anzubauen und zu ernten. In diesem Artikel zeige ich dir, wie du Malabar Spinat richtig erntest, um eine kontinuierliche und reiche Ernte zu gewährleisten. Los geht’s!
Was du über Malabar Spinat wissen solltest
Bevor wir mit dem Ernten beginnen, lass uns kurz über Malabar Spinat sprechen. Er ist kein echter Spinat, sondern gehört zur Familie der Basellgewächse. Er ist hitzebeständig und wächst am besten in warmen Klimazonen. Die Blätter sind dickfleischig und haben einen leicht zitronigen Geschmack. Du kannst sie roh in Salaten essen oder wie Spinat zubereiten.
Wann ist der richtige Zeitpunkt zum Ernten?
Der beste Zeitpunkt zum Ernten von Malabar Spinat ist, wenn die Pflanze gut etabliert ist und ausreichend Blätter gebildet hat. Das ist normalerweise etwa 60-70 Tage nach dem Pflanzen der Fall.
Hier sind einige Anzeichen, dass dein Malabar Spinat erntereif ist:
* Die Pflanze hat eine Höhe von mindestens 30 cm erreicht.
* Die Blätter sind groß genug, um sie bequem zu pflücken (etwa 5-10 cm lang).
* Die Pflanze hat viele neue Triebe und Blätter gebildet.
Die richtige Erntetechnik: So machst du es richtig
Das Ernten von Malabar Spinat ist wirklich einfach, aber es gibt ein paar Dinge, die du beachten solltest, um die Pflanze nicht zu beschädigen und eine kontinuierliche Ernte zu fördern.
Hier ist eine Schritt-für-Schritt-Anleitung:
1. Wähle die richtigen Blätter aus: Suche nach den größten und reifsten Blättern. Diese befinden sich meistens an den unteren Teilen der Pflanze. Vermeide es, zu kleine oder zu junge Blätter zu ernten, da diese noch Zeit zum Wachsen brauchen.
2. Verwende eine Schere oder Gartenschere: Anstatt die Blätter abzureißen, verwende eine saubere Schere oder Gartenschere, um sie abzuschneiden. Das verhindert, dass du die Pflanze beschädigst und reduziert das Risiko von Krankheiten.
3. Schneide die Blätter am Stiel ab: Schneide die Blätter etwa 2-3 cm vom Hauptstamm entfernt ab. Achte darauf, dass du den Hauptstamm nicht beschädigst.
4. Ernte regelmäßig: Malabar Spinat profitiert von regelmäßiger Ernte. Je öfter du erntest, desto mehr neue Blätter wird die Pflanze produzieren. Versuche, alle 1-2 Wochen zu ernten, um eine kontinuierliche Ernte zu gewährleisten.
5. Lass genügend Blätter an der Pflanze: Ernte nicht alle Blätter auf einmal. Lass genügend Blätter an der Pflanze, damit sie weiterhin Photosynthese betreiben und wachsen kann. Als Faustregel gilt: Ernte nicht mehr als ein Drittel der Blätter auf einmal.
Malabar Spinat ernten: Eine detaillierte Anleitung
Jetzt gehen wir die einzelnen Schritte noch einmal detaillierter durch, damit du wirklich alles richtig machst.
Schritt 1: Vorbereitung
Bevor du mit dem Ernten beginnst, solltest du sicherstellen, dass du alles hast, was du brauchst.
* Eine saubere Schere oder Gartenschere: Eine scharfe Schere ist wichtig, um saubere Schnitte zu machen und die Pflanze nicht zu beschädigen.
* Einen Korb oder eine Schüssel: Um die geernteten Blätter aufzubewahren.
* Gartenhandschuhe (optional): Um deine Hände sauber zu halten.
Schritt 2: Die richtigen Blätter auswählen
Gehe zu deiner Malabar Spinat Pflanze und schaue sie dir genau an. Suche nach den größten und reifsten Blättern. Diese sind in der Regel dunkelgrün und fühlen sich fest an. Vermeide es, Blätter zu ernten, die gelb, braun oder beschädigt sind.
Achte auf folgende Merkmale:
* Größe: Wähle Blätter, die mindestens 5-10 cm lang sind.
* Farbe: Die Blätter sollten dunkelgrün und gesund aussehen.
* Festigkeit: Die Blätter sollten sich fest anfühlen und nicht welk sein.
Schritt 3: Die Blätter abschneiden
Nimm deine Schere oder Gartenschere und schneide die Blätter vorsichtig ab. Schneide sie etwa 2-3 cm vom Hauptstamm entfernt ab. Achte darauf, dass du den Hauptstamm nicht beschädigst.
Hier sind ein paar Tipps:
* Mache saubere Schnitte: Saubere Schnitte helfen der Pflanze, schneller zu heilen und reduzieren das Risiko von Krankheiten.
* Schneide nicht zu tief: Schneide nicht zu tief in den Hauptstamm, da dies die Pflanze beschädigen kann.
* Sei vorsichtig: Sei vorsichtig, wenn du die Blätter abschneidest, um die umliegenden Blätter und Triebe nicht zu beschädigen.
Schritt 4: Regelmäßig ernten
Malabar Spinat profitiert von regelmäßiger Ernte. Je öfter du erntest, desto mehr neue Blätter wird die Pflanze produzieren. Versuche, alle 1-2 Wochen zu ernten, um eine kontinuierliche Ernte zu gewährleisten.
Warum regelmäßige Ernte wichtig ist:
* Fördert das Wachstum: Regelmäßige Ernte regt die Pflanze an, neue Blätter und Triebe zu produzieren.
* Verhindert die Blütenbildung: Wenn du die Blätter regelmäßig erntest, verhinderst du, dass die Pflanze blüht. Die Blütenbildung kann die Blattproduktion reduzieren.
* Hält die Pflanze gesund: Regelmäßige Ernte hilft, die Pflanze gesund und produktiv zu halten.
Schritt 5: Genügend Blätter an der Pflanze lassen
Ernte nicht alle Blätter auf einmal. Lass genügend Blätter an der Pflanze, damit sie weiterhin Photosynthese betreiben und wachsen kann. Als Faustregel gilt: Ernte nicht mehr als ein Drittel der Blätter auf einmal.
Warum es wichtig ist, genügend Blätter an der Pflanze zu lassen:
* Photosynthese: Die Blätter sind für die Photosynthese verantwortlich, den Prozess, bei dem die Pflanze Sonnenlicht in Energie umwandelt.
* Wachstum: Genügend Blätter sorgen dafür, dass die Pflanze weiterhin wachsen und neue Blätter produzieren kann.
* Gesundheit: Eine Pflanze mit genügend Blättern ist gesünder und widerstandsfähiger gegen Krankheiten und Schädlinge.
Nach der Ernte: Was du mit deinem Malabar Spinat machen kannst
Nachdem du deinen Malabar Spinat geerntet hast, gibt es viele Möglichkeiten, ihn zu verwenden.
* Roh in Salaten: Die jungen Blätter können roh in Salaten gegessen werden. Sie haben einen leicht zitronigen Geschmack.
* Gekocht wie Spinat: Die Blätter können wie Spinat gekocht werden. Sie eignen sich gut für Suppen, Eintöpfe und Pfannengerichte.
* Gefroren: Du kannst Malabar Spinat auch einfrieren, um ihn länger haltbar zu machen. Blanchiere die Blätter kurz in kochendem Wasser und friere sie dann ein.
Tipps für eine reiche Ernte
Hier sind noch ein paar zusätzliche Tipps, die dir helfen, eine reiche Ernte von Malabar Spinat zu erzielen:
* Sorge für ausreichend Sonnenlicht: Malabar Spinat benötigt mindestens 6 Stunden Sonnenlicht pro Tag.
* Gieße regelmäßig: Halte den Boden feucht, aber nicht durchnässt.
* Dünge regelmäßig: Dünge die Pflanze alle paar Wochen mit einem organischen Dünger.
* Schütze die Pflanze vor Schädlingen: Überprüfe die Pflanze regelmäßig auf Schädlinge und behandle sie bei Bedarf.
Häufige Fehler beim Ernten von Malabar Spinat
Hier sind einige häufige Fehler, die du vermeiden solltest:
* Zu früh ernten: Warte, bis die Pflanze gut etabliert ist und ausreichend Blätter gebildet hat, bevor du mit dem Ernten

Conclusion
So, there you have it! Harvesting Malabar Spinach doesn’t have to be a chore; it can be a rewarding experience that yields a continuous supply of fresh, nutritious greens right from your own garden. This simple DIY trick, focusing on strategic and regular harvesting, is a game-changer for anyone growing this vibrant vine. It not only maximizes your yield but also encourages bushier growth, leading to an even more abundant harvest in the long run.
Why is this a must-try? Because it’s efficient, sustainable, and ultimately, it gives you the freshest possible Malabar Spinach for your culinary creations. Forget about wilted, store-bought greens that have lost their flavor and nutritional value. With this method, you’re in control, ensuring that every leaf you harvest is at its peak of freshness and packed with vitamins and minerals.
But don’t just take our word for it! Experiment with different harvesting techniques to find what works best for your specific growing conditions and personal preferences. For example, if you’re aiming for larger, more mature leaves for stir-fries or soups, allow some of the leaves to grow a bit bigger before harvesting. Conversely, if you prefer the tender, delicate flavor of young leaves for salads, focus on harvesting them more frequently.
Consider these variations to enhance your Malabar Spinach experience:
* Succession Planting: Plant new seeds every few weeks to ensure a continuous supply of Malabar Spinach throughout the growing season.
* Vertical Gardening: Train your Malabar Spinach to grow vertically on a trellis or fence to save space and improve air circulation.
* Companion Planting: Plant Malabar Spinach alongside beneficial companion plants like basil or marigolds to deter pests and attract pollinators.
* Seed Saving: Allow some of your Malabar Spinach plants to flower and produce seeds, so you can save them for future planting seasons. This ensures you always have access to this wonderful vegetable.
We wholeheartedly encourage you to try this DIY trick for harvesting Malabar Spinach. It’s a simple yet effective way to get the most out of your plants and enjoy a continuous supply of fresh, healthy greens. Once you’ve given it a try, we’d love to hear about your experience! Share your tips, tricks, and delicious Malabar Spinach recipes in the comments below. Let’s build a community of Malabar Spinach enthusiasts and learn from each other’s successes! Happy harvesting!
Frequently Asked Questions (FAQ)
What is the best time of day to harvest Malabar Spinach?
The ideal time to harvest Malabar Spinach is in the morning, after the dew has dried but before the heat of the day sets in. Harvesting in the morning ensures that the leaves are at their freshest and most hydrated, resulting in better flavor and texture. Avoid harvesting during the hottest part of the day, as the leaves may be wilted and less flavorful.
How often should I harvest Malabar Spinach?
Regular harvesting is key to maximizing your yield and encouraging bushier growth. Aim to harvest your Malabar Spinach every one to two weeks, depending on how quickly it’s growing. The more you harvest, the more the plant will produce new leaves. Don’t be afraid to harvest generously; Malabar Spinach is a vigorous grower and can handle frequent harvesting.
What is the best way to store harvested Malabar Spinach?
To keep your harvested Malabar Spinach fresh for as long as possible, store it in the refrigerator. Gently wash the leaves and pat them dry with a paper towel. Then, wrap them loosely in a damp paper towel and place them in a plastic bag or container. Store in the crisper drawer of your refrigerator. This will help to maintain humidity and prevent the leaves from drying out. Properly stored Malabar Spinach can last for up to a week in the refrigerator.
Can I eat the stems of Malabar Spinach?
Yes, the stems of Malabar Spinach are also edible, although they may be slightly tougher than the leaves. Young, tender stems can be eaten raw in salads or added to stir-fries. Older, more mature stems may benefit from being cooked for a longer period of time to soften them. You can chop the stems into smaller pieces and add them to soups, stews, or stir-fries.
How do I know when Malabar Spinach is ready to harvest?
Malabar Spinach is ready to harvest when the leaves are about 4-6 inches long and have a deep green color. The leaves should be firm and plump, not wilted or yellowed. You can also harvest smaller, younger leaves for a more delicate flavor. The key is to harvest regularly to encourage continuous growth and prevent the plant from becoming leggy.
What if my Malabar Spinach plant is not producing many leaves?
If your Malabar Spinach plant is not producing many leaves, there could be several reasons why. First, make sure that the plant is getting enough sunlight. Malabar Spinach needs at least 6 hours of direct sunlight per day to thrive. Second, check the soil to make sure it is well-draining and rich in nutrients. You may need to amend the soil with compost or other organic matter. Third, make sure that you are watering the plant regularly, especially during hot, dry weather. Finally, remember that regular harvesting encourages more growth, so don’t be afraid to harvest frequently.
Can I grow Malabar Spinach in a container?
Yes, Malabar Spinach can be successfully grown in a container, as long as you provide it with enough space and support. Choose a large container that is at least 12 inches in diameter and depth. Fill the container with a well-draining potting mix that is rich in nutrients. Provide a trellis or other support for the plant to climb on. Water the plant regularly and fertilize it every few weeks with a balanced fertilizer. Place the container in a sunny location that receives at least 6 hours of direct sunlight per day.
Is Malabar Spinach susceptible to any pests or diseases?
Malabar Spinach is generally resistant to pests and diseases, but it can occasionally be affected by aphids, spider mites, or fungal diseases. To prevent pest and disease problems, make sure to provide good air circulation around the plant and avoid overwatering. If you notice any pests or diseases, treat them promptly with an appropriate organic insecticide or fungicide.
Can I save seeds from my Malabar Spinach plant?
Yes, you can save seeds from your Malabar Spinach plant to grow new plants in the future. Allow some of the flowers to mature and produce seeds. The seeds will be ready to harvest when the seed pods turn brown and dry. Collect the seed pods and allow them to dry completely. Then, remove the seeds from the pods and store them in an airtight container in a cool, dry place.
What are some delicious ways to use harvested Malabar Spinach?
Malabar Spinach is a versatile vegetable that can be used in a variety of dishes. It can be eaten raw in salads, added to stir-fries, soups, stews, and curries. It can also be steamed, sautéed, or boiled. Malabar Spinach has a mild, slightly citrusy flavor that pairs well with a variety of ingredients. Try adding it to your favorite recipes for a healthy and delicious boost.
Does Harvesting Malabar Spinach affect the taste?
Yes, the frequency and method of harvesting can subtly influence the taste of Malabar Spinach. More frequent harvesting tends to yield more tender and mildly flavored leaves, ideal for salads. Less frequent harvesting, allowing the leaves to mature, can result in a slightly stronger, earthier flavor, suitable for cooking. Experimenting with different harvesting intervals will help you discover your preferred taste profile.
Leave a Comment