
Harvest Thyme Indoors: Imagine the aroma of fresh thyme filling your kitchen, ready to elevate your next culinary masterpiece. No more last-minute dashes to the grocery store or settling for dried herbs that lack that vibrant, fresh flavor! In this article, I’m going to show you how to bring the garden indoors and enjoy a continuous supply of this versatile herb, regardless of the season.
Thyme, with its rich history dating back to ancient Egypt and Greece, was not only used for culinary purposes but also for medicinal and embalming practices. The Greeks even believed thyme symbolized courage. Today, while we might not be embalming anyone, we can certainly appreciate its culinary and aromatic benefits. But what if you don’t have a sprawling garden or live in an area with harsh winters? That’s where the magic of indoor gardening comes in!
Many people struggle with keeping their herbs alive indoors, often due to lack of sunlight, improper watering, or simply not knowing the right techniques. That’s why I’ve put together this guide packed with easy-to-follow DIY tricks and hacks to help you successfully harvest thyme indoors. From choosing the right pot and soil to providing adequate light and proper care, I’ll walk you through every step of the process. Get ready to enjoy the delightful taste and fragrance of freshly harvested thyme all year round!
Harvesting Thyme Indoors: A Beginner’s Guide
Hey there, fellow herb enthusiasts! So, you’ve got a thriving thyme plant indoors and you’re itching to use those fragrant leaves in your cooking, right? Well, you’ve come to the right place! I’m going to walk you through everything you need to know about harvesting thyme indoors, ensuring you get the most flavor and keep your plant happy and healthy. Let’s get started!
Understanding Your Thyme Plant
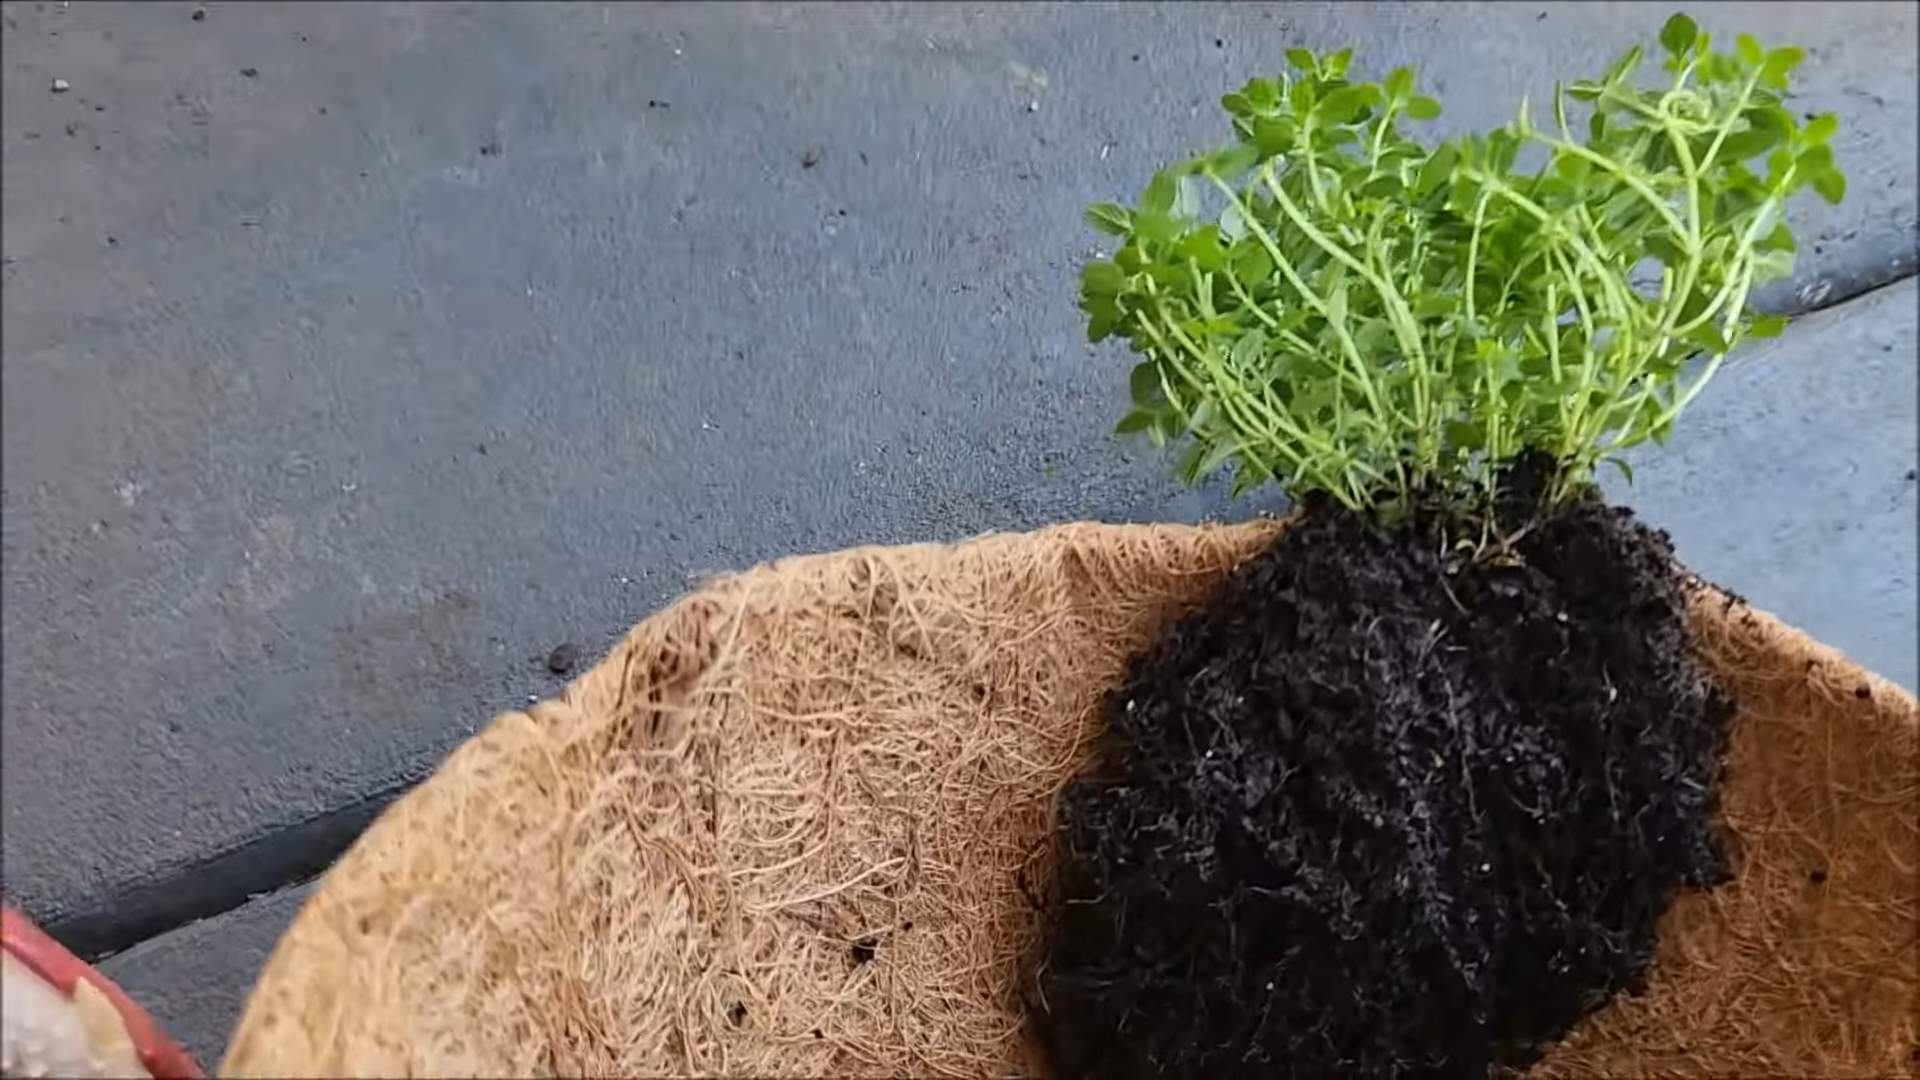
Before we dive into the harvesting process, let’s quickly touch base on what makes thyme so special. Thyme is a perennial herb, meaning it can live for several years if properly cared for. It loves sunlight and well-draining soil, and it’s relatively low-maintenance, making it a perfect choice for indoor gardening.
Key things to remember about your thyme plant:
* Sunlight: Thyme needs at least 6 hours of sunlight per day. If you don’t have a sunny windowsill, consider using a grow light.
* Watering: Water thoroughly when the top inch of soil feels dry. Avoid overwatering, as this can lead to root rot.
* Soil: Use well-draining potting mix. A mix specifically designed for herbs is ideal.
* Pruning: Regular pruning encourages bushier growth and prevents the plant from becoming leggy.
When to Harvest Thyme
Knowing when to harvest is crucial for getting the best flavor and ensuring your plant continues to thrive. Here’s what I’ve learned over the years:
* Maturity: Wait until your thyme plant is at least 4-6 inches tall before you start harvesting. This gives the plant enough time to establish itself.
* Timing: The best time to harvest thyme is in the morning, after the dew has dried but before the sun gets too hot. This is when the essential oils are most concentrated, resulting in the most flavorful leaves.
* Frequency: You can harvest thyme regularly throughout the growing season, but avoid taking more than one-third of the plant at any one time. This allows the plant to recover and continue growing.
* Flowering: Thyme flowers are edible and have a milder flavor than the leaves. You can harvest them along with the leaves, or let them bloom to attract pollinators.
Tools You’ll Need
Gathering your tools beforehand will make the harvesting process much smoother. Here’s what I recommend:
* Sharp Scissors or Pruning Shears: A clean, sharp cutting tool is essential for making precise cuts and preventing damage to the plant.
* Basket or Bowl: To collect your freshly harvested thyme.
* Gloves (Optional): If you have sensitive skin, gloves can protect your hands from the oils in the thyme.
Step-by-Step Guide to Harvesting Thyme Indoors
Alright, let’s get down to the nitty-gritty! Here’s a detailed step-by-step guide to harvesting thyme indoors:
1. Prepare Your Tools and Workspace
Before you start, make sure your scissors or pruning shears are clean and sharp. You can wipe them down with rubbing alcohol to sterilize them. Place your basket or bowl nearby so you can easily collect the harvested thyme.
2. Identify the Stems to Harvest
Look for healthy, mature stems that are at least 4-6 inches long. Avoid harvesting from the woody base of the plant, as these stems are less flavorful. Focus on the newer, greener growth.
3. Make the Cut
Using your sharp scissors or pruning shears, cut the stems just above a set of leaves. This encourages the plant to branch out and become bushier. Aim to remove no more than one-third of the plant at any one time.
Important Tip: Don’t just snip off the tips of the stems. Cut further down the stem to encourage new growth from the nodes (the points where leaves grow).
4. Collect the Harvested Thyme
Place the harvested thyme stems in your basket or bowl. Be gentle to avoid bruising the leaves.
5. Repeat the Process
Continue harvesting from different parts of the plant, making sure to distribute the cuts evenly. This will help maintain the plant’s shape and encourage balanced growth.
6. Post-Harvest Care
After harvesting, give your thyme plant a little extra TLC. Water it thoroughly and make sure it’s getting plenty of sunlight. You can also add a diluted liquid fertilizer to help it recover.
Drying and Storing Your Harvested Thyme
Now that you’ve harvested your thyme, you’ll want to preserve it so you can enjoy its flavor for months to come. Here are a few methods for drying and storing thyme:
1. Air Drying
Air drying is the simplest and most traditional method.
Steps:
1. Gather the harvested thyme stems into small bundles.
2. Tie the bundles together with twine or rubber bands.
3. Hang the bundles upside down in a cool, dry, and well-ventilated place. A pantry or closet works well.
4. Allow the thyme to dry for 1-3 weeks, or until the leaves are brittle and easily crumble.
5. Once dry, remove the leaves from the stems and store them in an airtight container.
2. Oven Drying
Oven drying is a faster method, but it can also reduce the flavor of the thyme if you’re not careful.
Steps:
1. Preheat your oven to the lowest possible setting (ideally below 170°F or 77°C).
2. Spread the harvested thyme stems in a single layer on a baking sheet lined with parchment paper.
3. Place the baking sheet in the oven and leave the door slightly ajar to allow moisture to escape.
4. Dry the thyme for 2-4 hours, or until the leaves are brittle and easily crumble. Check frequently to prevent burning.
5. Once dry, remove the leaves from the stems and store them in an airtight container.
3. Dehydrator Drying
A food dehydrator is a great option for drying herbs quickly and efficiently.
Steps:
1. Arrange the harvested thyme stems in a single layer on the dehydrator trays.
2. Set the dehydrator to the herb setting (usually around 95°F or 35°C).
3. Dry the thyme for 4-8 hours, or until the leaves are brittle and easily crumble.
4. Once dry, remove the leaves from the stems and store them in an airtight container.
4. Storing Dried Thyme
Once your thyme is completely dry, store it in an airtight container in a cool, dark, and dry place. Glass jars or resealable plastic bags work well. Properly stored dried thyme can last for up to a year.
Pro Tip: Label your containers with the date you harvested and dried the thyme so you can keep track of its freshness.
Using Your Freshly Harvested Thyme
Now for the fun part – using your freshly harvested thyme! Thyme is a versatile herb that can be used in a wide variety of dishes. Here are a few ideas to get you started:
* Soups and Stews: Add thyme to soups and stews for a warm, earthy flavor.
* Roasted Vegetables: Toss vegetables with olive oil, thyme, and salt before roasting.
* Meat Dishes: Use thyme to season chicken, pork, lamb, or beef.
* Egg Dishes: Add thyme to omelets, frittatas, or scrambled eggs.
* Herbal Teas: Steep fresh or dried thyme in hot water for a soothing herbal tea.
* Infused Oils and Vinegars: Infuse olive oil or vinegar with thyme for a flavorful condiment.
Troubleshooting Common Issues
Even with the best care, you might encounter a few challenges when growing and harvesting thyme indoors. Here are some common issues and how to address them:
* Leggy Growth: If your thyme plant is becoming leggy (long stems with few leaves), it’s likely not getting enough sunlight. Move it to a sunnier location or use a grow light. Regular pruning can also help encourage bushier growth.
* Yellowing Leaves: Yellowing leaves can be a sign of overwatering or nutrient deficiency. Make sure you’re not watering too frequently and consider adding a diluted liquid fertilizer.
* Pests: Thyme is relatively pest-resistant, but it can occasionally be affected by aphids or spider mites. If you notice pests, try spraying the plant with insecticidal soap or neem oil.
* Mold or Mildew: Mold or mildew can develop if the plant is not getting enough air circulation. Make sure the plant is in a well-ventilated area and avoid overcrowding.
Final Thoughts
Harvesting thyme indoors is a rewarding experience that allows you to enjoy fresh, flavorful herbs year-round. By following these tips and techniques, you can keep your thyme plant healthy and productive, and add a touch of homegrown goodness to your cooking. Happy harvesting!
Conclusion
So, there you have it! Bringing the fresh, aromatic essence of thyme indoors is not just a culinary convenience; it’s a small act of self-sufficiency and a connection to the natural world, right in your own kitchen. We’ve walked through the simple steps to successfully harvest thyme indoors, ensuring you have a constant supply of this versatile herb, regardless of the season.
Why is this DIY trick a must-try? Because it empowers you to elevate your cooking with the freshest possible ingredients. Imagine the difference between dried, store-bought thyme and the vibrant, fragrant sprigs you’ve nurtured yourself. The flavor is simply unmatched. Plus, it’s incredibly rewarding to watch your little thyme garden thrive, knowing you’re playing an active role in bringing that growth to fruition.
But the benefits extend beyond just flavor. Growing your own thyme is also a sustainable choice, reducing your reliance on commercially produced herbs that often travel long distances. It’s a small step towards a more eco-conscious lifestyle. And let’s not forget the aesthetic appeal! A pot of lush, green thyme adds a touch of natural beauty to any windowsill or countertop.
Now, let’s talk variations. While we’ve focused on the basic method, there’s plenty of room for experimentation. Consider trying different varieties of thyme, such as lemon thyme for a citrusy twist or creeping thyme for a more groundcover-like appearance. You can also experiment with different types of containers, from terracotta pots to repurposed jars, to find what works best for your space and aesthetic.
Another variation to consider is companion planting. Thyme is known to be a good companion for other herbs and vegetables, so you might want to try planting it alongside rosemary, sage, or even tomatoes. This can help to improve the overall health and productivity of your indoor garden.
Don’t be afraid to get creative with how you use your freshly harvested thyme. Sprinkle it on roasted vegetables, add it to soups and stews, use it to flavor marinades and sauces, or even steep it in hot water for a soothing herbal tea. The possibilities are endless!
Ultimately, the success of your indoor thyme harvest depends on your willingness to experiment and adapt. Pay attention to your plants’ needs, adjust your watering and lighting accordingly, and don’t be discouraged if you encounter a few challenges along the way. Gardening is a learning process, and every mistake is an opportunity to grow (pun intended!).
We are confident that with a little care and attention, you can successfully harvest thyme indoors and enjoy the many benefits of having fresh herbs at your fingertips. So, go ahead and give it a try! We encourage you to share your experiences with us in the comments below. Let us know what varieties of thyme you’re growing, what challenges you’ve faced, and what tips you’ve learned along the way. We’re all in this together, and we can learn so much from each other’s experiences. Happy growing!
Frequently Asked Questions (FAQ)
1. What is the best type of thyme to grow indoors?
The best type of thyme to grow indoors depends on your personal preferences and the space you have available. Common thyme (Thymus vulgaris) is a popular choice due to its versatility and ease of growth. Lemon thyme (Thymus citriodorus) is another great option, offering a delightful citrusy aroma and flavor. Creeping thyme (Thymus serpyllum) is a low-growing variety that can be used as a ground cover or in hanging baskets. Ultimately, the best way to find out which type of thyme you prefer is to experiment with different varieties and see which ones thrive in your indoor environment.
2. How much sunlight does indoor thyme need?
Thyme thrives in bright, sunny conditions. Ideally, your indoor thyme plant should receive at least six hours of direct sunlight per day. If you don’t have a south-facing window that provides enough sunlight, you may need to supplement with a grow light. Position the grow light about 6-12 inches above the plant and leave it on for 12-14 hours per day. Insufficient sunlight can lead to leggy growth and reduced flavor.
3. How often should I water my indoor thyme plant?
Thyme prefers well-draining soil and doesn’t like to be overwatered. Water your thyme plant only when the top inch of soil feels dry to the touch. When you do water, water thoroughly until the water drains out of the bottom of the pot. Be sure to empty any excess water from the saucer to prevent root rot. Overwatering is a common mistake that can lead to fungal diseases and other problems.
4. What kind of soil is best for growing thyme indoors?
Thyme prefers well-draining, slightly alkaline soil. A good potting mix for thyme should consist of equal parts potting soil, perlite, and sand. This combination will provide good drainage and aeration, which are essential for healthy thyme growth. Avoid using heavy, clay-based soils, as they can retain too much moisture and lead to root rot.
5. How do I harvest thyme indoors?
To harvest thyme indoors, simply snip off the stems with a pair of clean scissors or pruning shears. Avoid cutting more than one-third of the plant at a time, as this can stress the plant and slow down its growth. The best time to harvest thyme is in the morning, after the dew has dried. This is when the essential oils are most concentrated, resulting in the best flavor.
6. How do I dry thyme after harvesting?
There are several ways to dry thyme after harvesting. One method is to tie the stems together in small bundles and hang them upside down in a cool, dry, and well-ventilated place. Another method is to spread the stems out on a baking sheet and dry them in a low oven (170°F) for several hours. You can also use a dehydrator to dry thyme. Once the thyme is completely dry, store it in an airtight container in a cool, dark place.
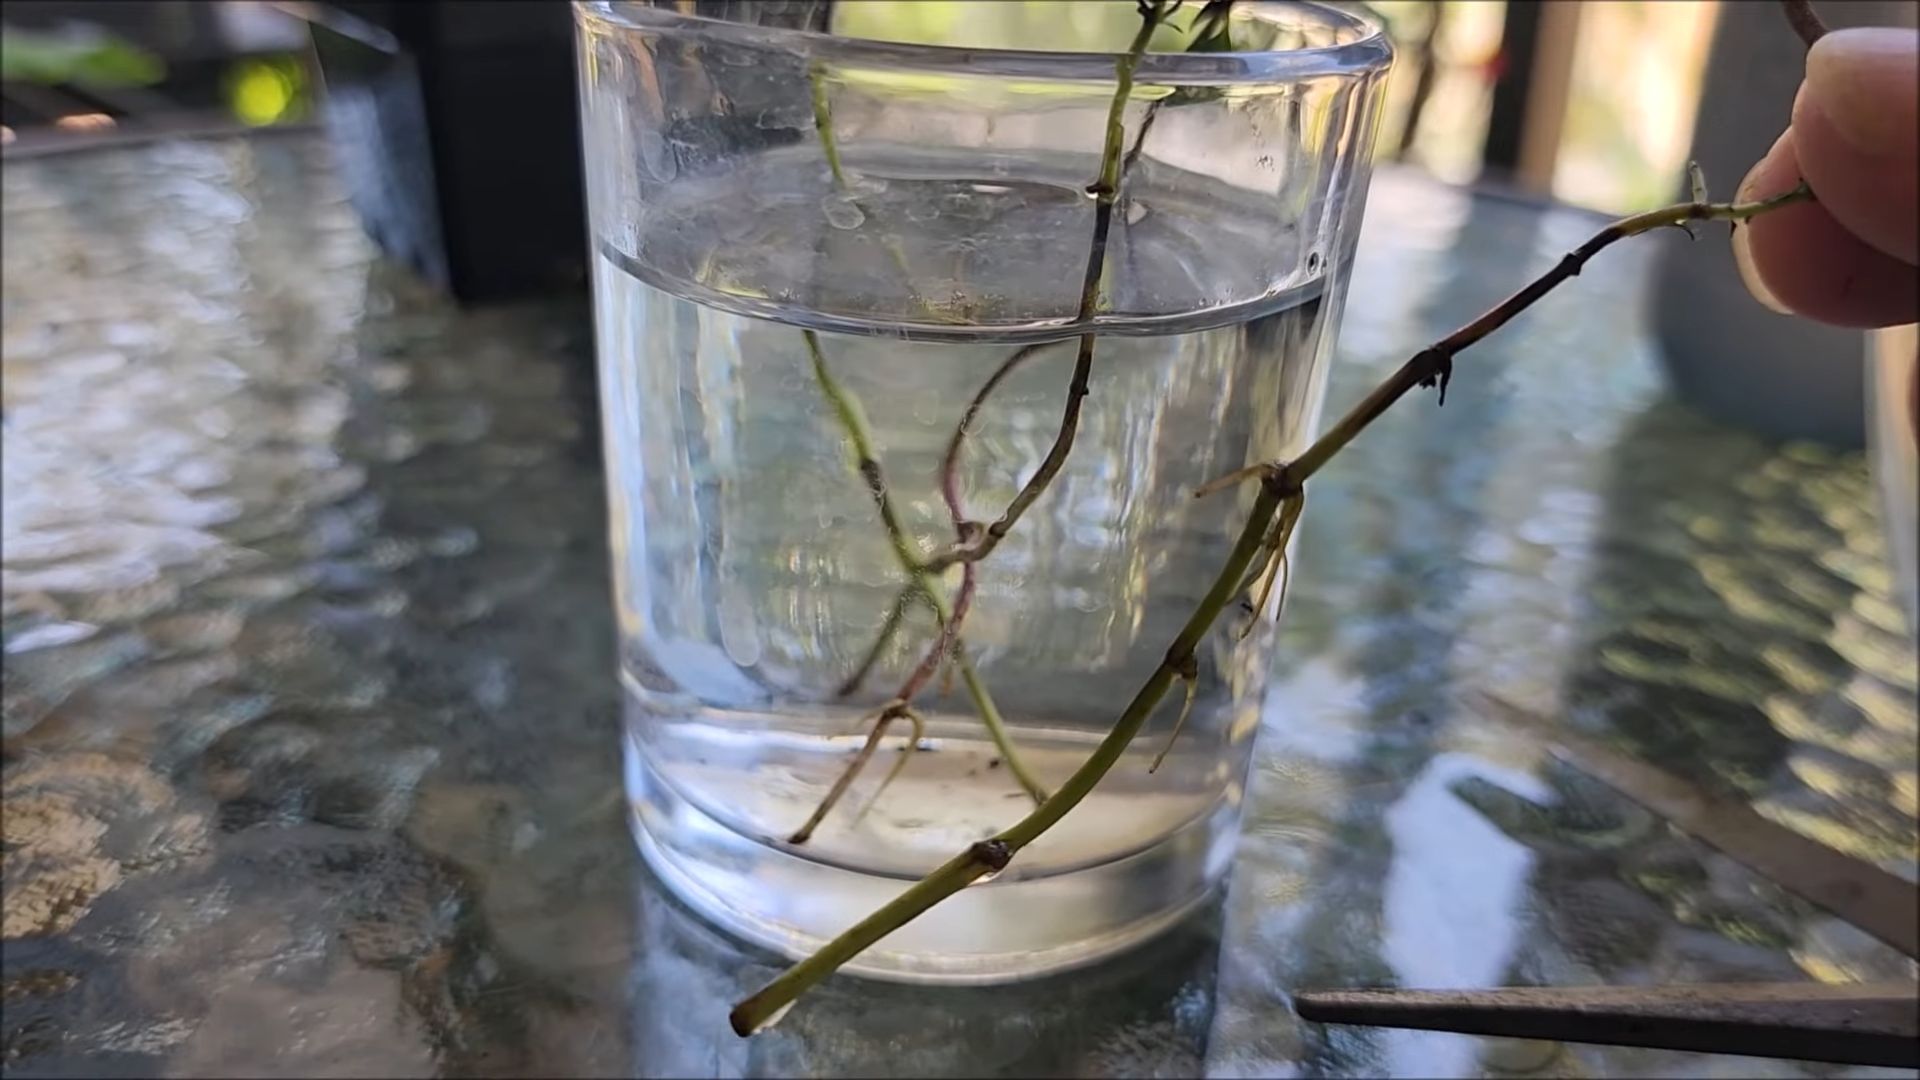
7. How do I propagate thyme indoors?
Thyme can be easily propagated from stem cuttings. To propagate thyme, take a 4-6 inch stem cutting from a healthy plant. Remove the lower leaves from the cutting and dip the cut end in rooting hormone. Plant the cutting in a pot filled with well-draining potting mix. Water the cutting thoroughly and cover it with a plastic bag to create a humid environment. Place the pot in a warm, sunny location and keep the soil moist. After a few weeks, the cutting should develop roots and begin to grow.
8. What are some common problems with growing thyme indoors?
Some common problems with growing thyme indoors include overwatering, underwatering, insufficient sunlight, and pests. Overwatering can lead to root rot, while underwatering can cause the plant to wilt and dry out. Insufficient sunlight can result in leggy growth and reduced flavor. Pests such as aphids and spider mites can also attack thyme plants. To prevent these problems, be sure to water your thyme plant properly, provide it with plenty of sunlight, and inspect it regularly for pests.
9. Can I grow thyme indoors year-round?
Yes, you can grow thyme indoors year-round, provided you provide it with the right conditions. Thyme needs plenty of sunlight, well-draining soil, and proper watering to thrive. With a little care and attention, you can enjoy fresh thyme from your indoor garden all year long.
10. Is growing thyme indoors worth it?
Absolutely! Growing thyme indoors is a rewarding and practical way to have fresh herbs readily available for your culinary creations. The flavor of homegrown thyme is far superior to that of dried, store-bought thyme. Plus, growing your own thyme is a sustainable and eco-friendly choice. So, if you’re looking for a way to add fresh flavor to your cooking and connect with nature, growing thyme indoors is definitely worth it.

Leave a Comment