
Growing Watermelons DIY: Ever dreamt of biting into a juicy, homegrown watermelon on a hot summer day? I know I have! There’s something incredibly satisfying about nurturing a tiny seed into a sprawling vine that yields such a delicious reward. But let’s be honest, the thought of growing these giants can be a little intimidating. That’s where this DIY guide comes in – I’m here to demystify the process and show you that growing watermelons at home is totally achievable, even if you’re a beginner gardener!
Watermelons have a rich history, dating back thousands of years to Africa. They were even found in King Tut’s tomb! Over time, different varieties have been cultivated around the world, each with its unique flavor and appearance. But regardless of the variety, the joy of harvesting your own watermelon remains the same.
Why do you need this DIY trick, you ask? Well, growing watermelons successfully requires a bit of know-how. From choosing the right variety for your climate to providing the proper nutrients and space, there are a few key factors that can make or break your watermelon dreams. This guide will provide you with simple, step-by-step instructions and clever hacks to ensure a bountiful harvest. I’ll share my favorite tips and tricks for growing watermelons DIY style, so you can enjoy the sweet taste of success all summer long. Let’s get started!
Growing Watermelons: From Seed to Sweetness – A DIY Guide
Hey there, fellow gardening enthusiasts! I’m so excited to share my watermelon-growing secrets with you. There’s nothing quite like biting into a juicy, homegrown watermelon on a hot summer day. It’s a labor of love, but trust me, the reward is absolutely worth it. This guide will walk you through every step, from starting seeds indoors to harvesting your prize-winning melons. Let’s get started!
Choosing the Right Watermelon Variety
Before you even think about planting, you need to pick the right watermelon variety for your climate and space. Some varieties are better suited for shorter growing seasons, while others need plenty of room to sprawl. Here are a few of my favorites:
* Sugar Baby: A classic, compact variety that’s perfect for smaller gardens. It matures quickly and produces sweet, personal-sized melons.
* Crimson Sweet: A popular, reliable variety with a vibrant red flesh and excellent flavor. It’s a bit larger than Sugar Baby, but still manageable.
* Jubilee: A large, oblong watermelon with a thick rind, making it great for shipping and storage. It has a sweet, slightly tangy flavor.
* Yellow Doll: If you’re looking for something different, try Yellow Doll. It has a bright yellow flesh that’s incredibly sweet and refreshing.
* Bush Sugar Baby: If space is a real constraint, this bush variety is your best bet. It produces smaller watermelons on compact vines.
Consider your local climate and the amount of space you have available when making your choice. Check the seed packet for specific growing instructions and days to maturity.
Starting Watermelon Seeds Indoors (Optional, but Recommended)
Starting your watermelon seeds indoors gives them a head start, especially if you live in a region with a shorter growing season. I highly recommend this method for the best results.
Materials You’ll Need:
* Watermelon seeds
* Seed starting mix
* Seed starting trays or small pots (peat pots are great!)
* Heat mat (optional, but helpful)
* Grow lights (optional, but recommended)
* Spray bottle
Step-by-Step Instructions:
1. Prepare Your Seed Starting Trays: Fill your seed starting trays or pots with seed starting mix. Gently moisten the mix with a spray bottle. You want it damp, not soaking wet.
2. Plant the Seeds: Plant 2-3 watermelon seeds per cell or pot, about 1 inch deep. Cover the seeds with soil and gently pat down.
3. Provide Warmth: Watermelon seeds need warmth to germinate. Place your seed starting trays on a heat mat, if you have one. This will help maintain a consistent soil temperature of around 80-85°F (27-29°C).
4. Provide Light: If you don’t have a sunny windowsill, use grow lights. Position the lights a few inches above the seed starting trays and keep them on for 14-16 hours per day.
5. Keep the Soil Moist: Check the soil moisture daily and water as needed with a spray bottle. Avoid overwatering, as this can lead to damping off.
6. Thin Seedlings: Once the seedlings emerge (usually within 7-10 days), thin them to one strong seedling per cell or pot. Snip off the weaker seedlings at the soil line with scissors.
7. Harden Off Seedlings: About a week before you plan to transplant your seedlings outdoors, start hardening them off. This means gradually exposing them to outdoor conditions. Start by placing them outside for an hour or two each day, gradually increasing the amount of time they spend outdoors. Protect them from direct sunlight and strong winds.
Preparing Your Garden Bed
Watermelons are heavy feeders, so it’s crucial to prepare your garden bed properly. They need well-drained soil that’s rich in organic matter.
Materials You’ll Need:
* Garden fork or tiller
* Compost or well-rotted manure
* Fertilizer (10-10-10 or similar)
* pH testing kit (optional)
Step-by-Step Instructions:
1. Choose a Sunny Location: Watermelons need at least 6-8 hours of direct sunlight per day. Choose a location in your garden that gets plenty of sun.
2. Prepare the Soil: Use a garden fork or tiller to loosen the soil to a depth of at least 12 inches. Remove any rocks, weeds, or debris.
3. Amend the Soil: Amend the soil with plenty of compost or well-rotted manure. This will improve drainage, add nutrients, and help retain moisture. I usually add a few inches of compost to my watermelon bed.
4. Fertilize the Soil: Watermelons benefit from a balanced fertilizer. Apply a 10-10-10 fertilizer or similar according to the package directions. Work the fertilizer into the soil.
5. Check the pH (Optional): Watermelons prefer a soil pH of 6.0-6.8. Use a pH testing kit to check the soil pH and adjust as needed. You can add lime to raise the pH or sulfur to lower it.
6. Create Mounds or Rows: Watermelons grow best on slightly raised mounds or rows. This helps improve drainage and warms the soil. Create mounds or rows that are about 12 inches high and 3-4 feet apart.
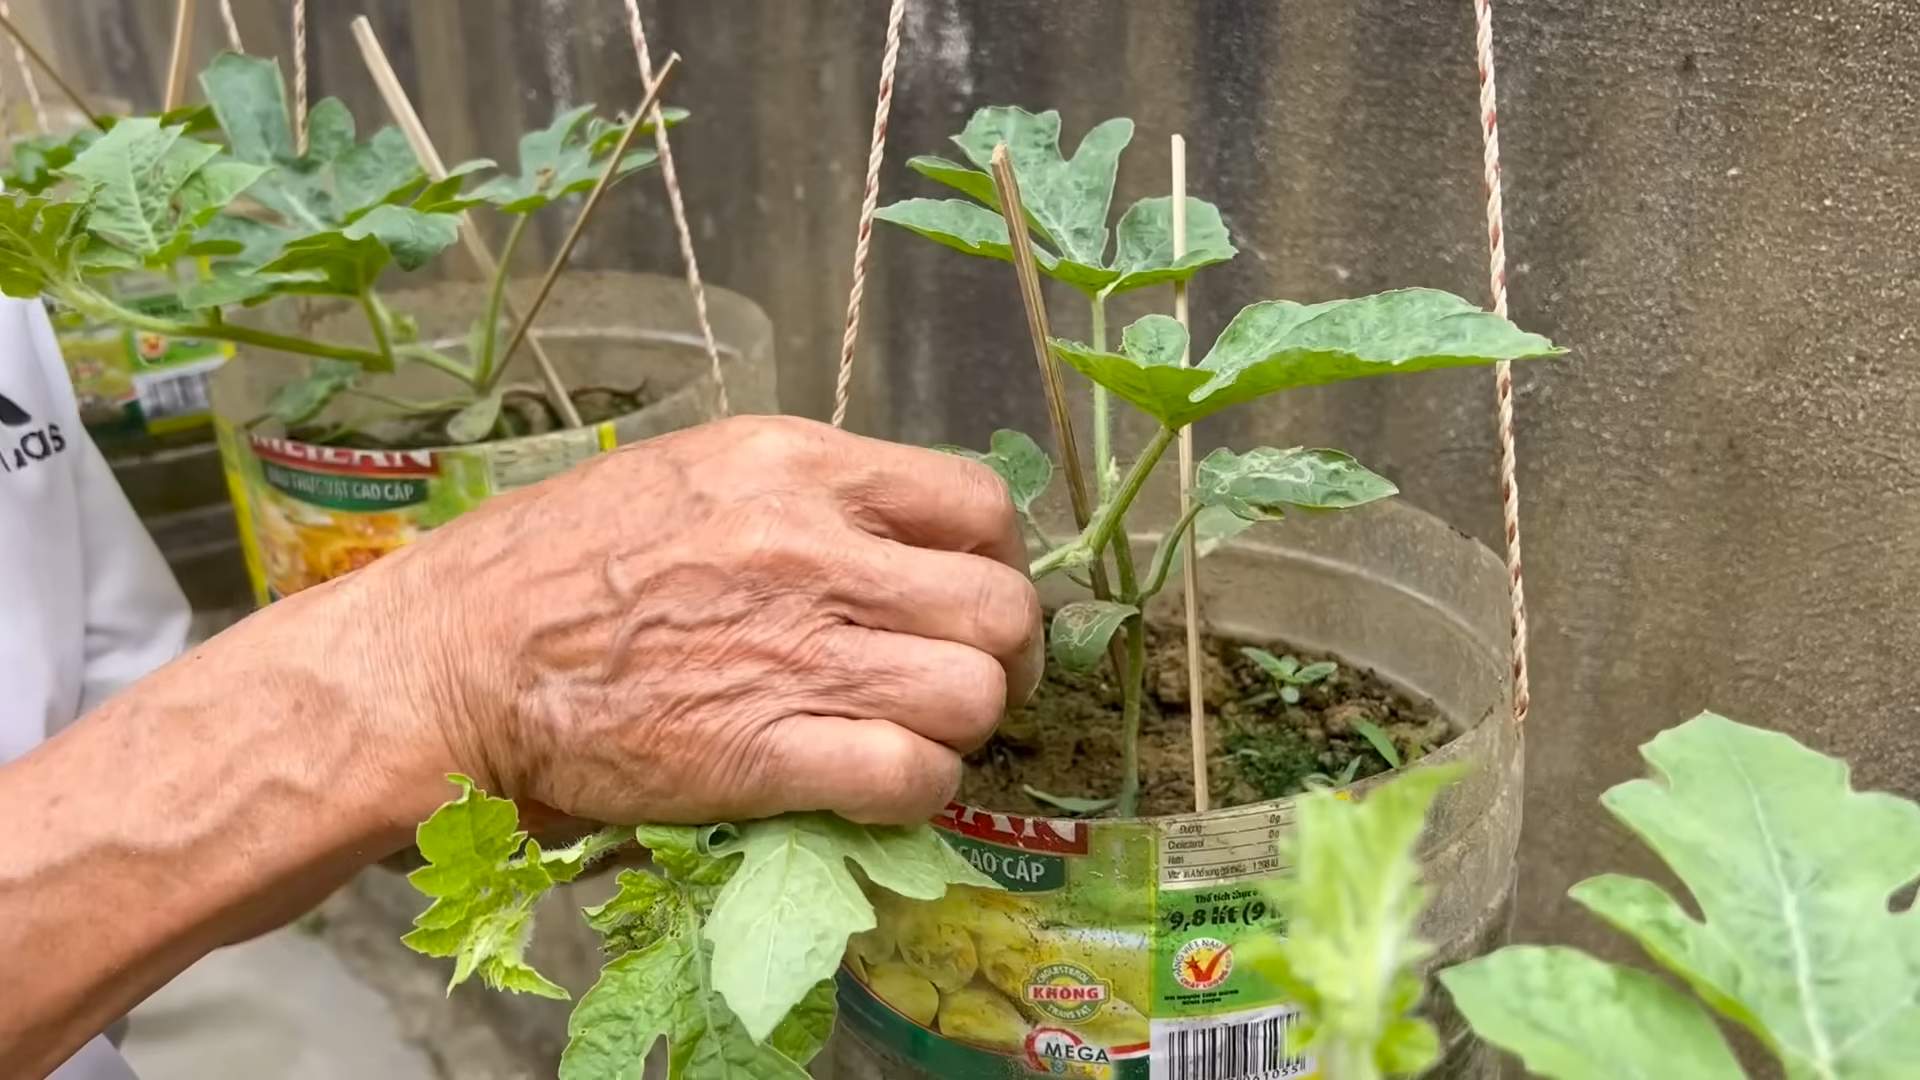
Transplanting Watermelon Seedlings Outdoors
Once your seedlings have been hardened off and the danger of frost has passed, it’s time to transplant them outdoors.
Step-by-Step Instructions:
1. Choose a Cloudy Day: Transplanting on a cloudy day will help reduce stress on the seedlings.
2. Dig Holes: Dig holes in your prepared mounds or rows that are slightly larger than the root balls of your seedlings. Space the holes 2-3 feet apart.
3. Remove Seedlings from Pots: Gently remove the seedlings from their pots. If you used peat pots, you can plant the entire pot. Otherwise, carefully loosen the roots and remove the seedling from the pot.
4. Plant the Seedlings: Place the seedlings in the holes and backfill with soil. Gently pat down the soil around the seedlings.
5. Water Thoroughly: Water the seedlings thoroughly after planting.
6. Mulch Around Plants: Mulch around the plants with straw or hay to help retain moisture, suppress weeds, and keep the soil cool.
7. Protect from Pests: If you’re concerned about pests, you can cover the seedlings with row covers.
Caring for Your Watermelon Plants
Watermelons need consistent care to thrive. Here’s what you need to do:
* Watering: Watermelons need plenty of water, especially during hot, dry weather. Water deeply and regularly, aiming for about 1-2 inches of water per week. Avoid overhead watering, as this can lead to fungal diseases. Drip irrigation is ideal.
* Fertilizing: Side-dress your watermelon plants with a balanced fertilizer every 2-3 weeks. You can also use a liquid fertilizer, such as fish emulsion or seaweed extract.
* Weeding: Keep the garden bed free of weeds. Weeds compete with watermelons for nutrients and water.
* Pruning (Optional): Some gardeners prune their watermelon vines to encourage larger fruit. If you choose to prune, remove any suckers (small shoots that grow from the base of the plant) and any dead or diseased leaves.
* Pollination: Watermelons need to be pollinated to produce fruit. If you’re not seeing any fruit set, you may need to hand-pollinate the flowers. To hand-pollinate, use a small paintbrush to transfer pollen from the male flowers to the female flowers. Female flowers have a small fruit at the base of the flower.
* Pest and Disease Control: Keep an eye out for pests and diseases. Common watermelon pests include aphids, squash bugs, and cucumber beetles. Common diseases include powdery mildew and fusarium wilt. Treat pests and diseases promptly with appropriate insecticides or fungicides.
Harvesting Your Watermelons
Harvesting watermelons at the right time is crucial for getting the best flavor. Here are a few signs that your watermelons are ready to harvest:
* The tendril closest to the fruit turns brown and dry.
* The spot where the watermelon rests on the ground turns from white to yellow.
* The watermelon sounds hollow when you thump it.
* The rind becomes dull and loses its shine.
To harvest a watermelon, use a sharp knife to cut the stem close to the fruit. Handle the watermelon carefully to avoid bruising it.
Enjoying Your Homegrown Watermelons
Congratulations! You’ve successfully grown your own watermelons. Now it’s
Conclusion
So, there you have it! Growing watermelons at home might seem daunting, but with this simple DIY trick, you’re well on your way to enjoying juicy, homegrown goodness. We’ve demystified the process, offering a practical and accessible method for even the most novice gardeners to cultivate these summer favorites. The beauty of this approach lies in its adaptability. Whether you’re working with limited space, battling unpredictable weather, or simply seeking a more efficient way to nurture your watermelon vines, this technique offers a tangible advantage.
Think of the satisfaction of biting into a perfectly ripe watermelon that you nurtured from seed to fruit. Imagine the bragging rights you’ll have at your next barbecue, serving up slices of your own homegrown masterpiece. This isn’t just about growing watermelons; it’s about connecting with nature, learning new skills, and enjoying the fruits (literally!) of your labor.
Beyond the core method, feel free to experiment! Try different varieties of watermelons to discover your personal favorite. Perhaps you’ll find success with a smaller, personal-sized watermelon like a Sugar Baby, or maybe you’ll be ambitious and aim for a larger heirloom variety. Consider companion planting to further enhance your garden’s ecosystem. Marigolds can deter pests, while basil can improve the flavor of your watermelons. The possibilities are endless!
Don’t be afraid to tweak the technique to suit your specific environment and resources. If you live in a particularly hot climate, you might need to provide extra shade during the hottest part of the day. If your soil is naturally poor, consider amending it with compost or other organic matter. The key is to observe your plants, learn from your experiences, and adapt your approach accordingly.
We firmly believe that anyone can successfully grow watermelons with a little patience, dedication, and the right guidance. This DIY trick is designed to empower you, providing a solid foundation for your watermelon-growing journey. So, grab your seeds, prepare your soil, and get ready to embark on a rewarding gardening adventure.
We’re incredibly excited to hear about your experiences! Did this DIY trick work for you? What challenges did you encounter, and how did you overcome them? What variations did you try, and what were the results? Share your stories, tips, and photos in the comments below. Let’s create a community of watermelon enthusiasts, learning from each other and celebrating our successes together. Your insights could inspire and help other gardeners achieve their watermelon-growing dreams. Let’s all get growing watermelons!
Frequently Asked Questions (FAQ)
What is the best time to start growing watermelons using this DIY trick?
The ideal time to start growing watermelons depends on your local climate and the specific variety you’re planting. Generally, watermelons require a long growing season of at least 70-90 days of warm weather. Therefore, you should start your seeds indoors about 4-6 weeks before the last expected frost. Once the soil has warmed up to at least 70°F (21°C) and the danger of frost has passed, you can transplant your seedlings outdoors. If you live in a warmer climate with a longer growing season, you can direct sow the seeds directly into the ground after the last frost. Check your local planting calendar for specific dates relevant to your region.
What kind of soil is best for growing watermelons?
Watermelons thrive in well-drained, sandy loam soil that is rich in organic matter. The soil should have a pH level between 6.0 and 6.8. Before planting, amend your soil with compost, aged manure, or other organic materials to improve its fertility and drainage. Avoid heavy clay soils, as they can retain too much moisture and lead to root rot. If you have clay soil, consider growing your watermelons in raised beds or containers filled with a suitable potting mix.
How much sunlight do watermelons need?
Watermelons are sun-loving plants and require at least 6-8 hours of direct sunlight per day to thrive. Choose a planting location that receives full sun throughout the day. If you live in a particularly hot climate, you may need to provide some afternoon shade to prevent the fruits from scorching.
How often should I water my watermelon plants?
Watermelons need consistent moisture, especially during fruit development. Water deeply and regularly, aiming to keep the soil consistently moist but not waterlogged. Water at the base of the plants to avoid wetting the foliage, which can increase the risk of fungal diseases. During hot, dry weather, you may need to water daily. Reduce watering as the fruits ripen to prevent them from splitting. A good rule of thumb is to water when the top inch of soil feels dry to the touch.
What are some common pests and diseases that affect watermelons, and how can I prevent them?
Common pests that affect watermelons include aphids, squash bugs, cucumber beetles, and vine borers. Diseases include powdery mildew, fusarium wilt, and anthracnose. To prevent these problems, practice good garden hygiene, such as removing weeds and debris, and rotating your crops each year. Use insecticidal soap or neem oil to control pests. Choose disease-resistant watermelon varieties. Ensure good air circulation around your plants. Consider using row covers to protect your plants from pests early in the season.
How do I know when my watermelons are ripe?
Determining when a watermelon is ripe can be tricky, but there are several indicators to look for. First, check the tendril closest to the fruit stem. When this tendril turns brown and dries out, it’s a good sign that the watermelon is ripe. Second, look at the spot where the watermelon rests on the ground. This spot, called the ground spot, should turn from white to a creamy yellow color. Finally, thump the watermelon with your knuckles. A ripe watermelon will sound hollow and deep.
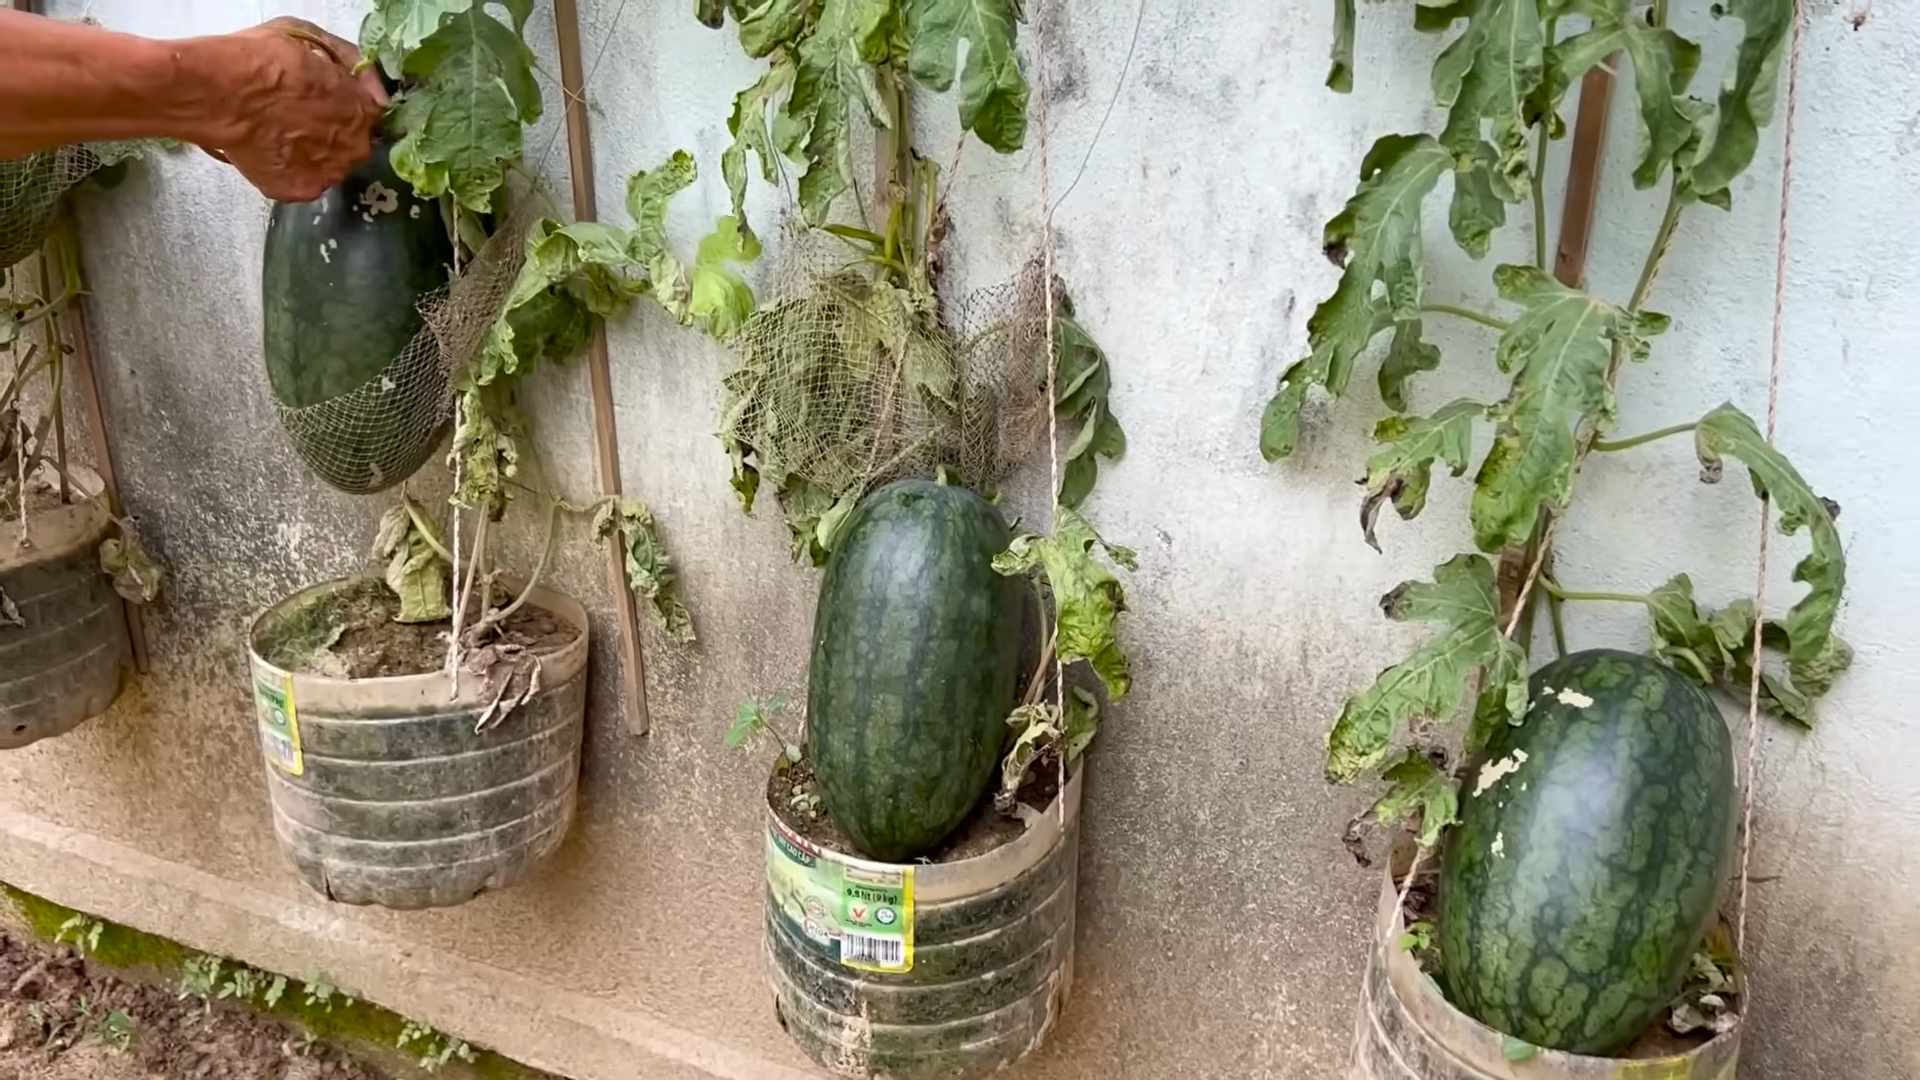
Can I grow watermelons in containers?
Yes, you can grow watermelons in containers, but you’ll need to choose a large container (at least 20 gallons) and a compact watermelon variety, such as Sugar Baby or Bush Sugar Baby. Use a high-quality potting mix and provide adequate support for the vines. Water container-grown watermelons more frequently than those grown in the ground, as the soil in containers tends to dry out faster. Fertilize regularly with a balanced fertilizer.
How can I improve the sweetness of my watermelons?
To improve the sweetness of your watermelons, ensure they receive plenty of sunlight and water during fruit development. Avoid over-watering as the fruits ripen, as this can dilute the sugars. Fertilize with a fertilizer that is high in potassium, which promotes fruit development and sweetness. You can also try pinching off some of the side shoots to direct more energy to the developing fruits.
What are some good companion plants for watermelons?
Good companion plants for watermelons include marigolds, which deter pests; basil, which improves flavor; nasturtiums, which attract beneficial insects; and radishes, which repel squash vine borers. Avoid planting watermelons near potatoes or tomatoes, as they can compete for nutrients.
How do I store harvested watermelons?
Store harvested watermelons in a cool, dry place. Whole watermelons can be stored at room temperature for up to two weeks. Cut watermelons should be wrapped tightly in plastic wrap and stored in the refrigerator for up to five days.

Leave a Comment