
Growing Tomatoes at Home can feel like a daunting task, conjuring images of sprawling farms and expert gardeners. But what if I told you that juicy, sun-ripened tomatoes are within your reach, even if you only have a small balcony or a sunny windowsill? Forget those bland, store-bought imitations – imagine biting into a tomato bursting with flavor, a flavor you nurtured yourself!
For centuries, tomatoes have been a symbol of abundance and vitality, gracing tables from the Mediterranean to the Americas. Their journey from the Andes Mountains to global culinary staple is a testament to their adaptability and deliciousness. But somewhere along the way, the art of truly savoring a tomato, a tomato grown with love and care, has been somewhat lost.
That’s where this DIY guide comes in! We’re diving deep into simple yet effective tricks and hacks that will empower you to successfully growing tomatoes at home, regardless of your experience level. Whether you’re battling limited space, pesky pests, or simply unsure where to begin, I’m here to guide you through every step. I’ll share my favorite tips and techniques, from choosing the right variety to maximizing your yield. Get ready to transform your space into a mini-tomato paradise and enjoy the unparalleled satisfaction of harvesting your own homegrown goodness!
Growing Tomatoes in Your Own Garden: Your Comprehensive DIY Guide
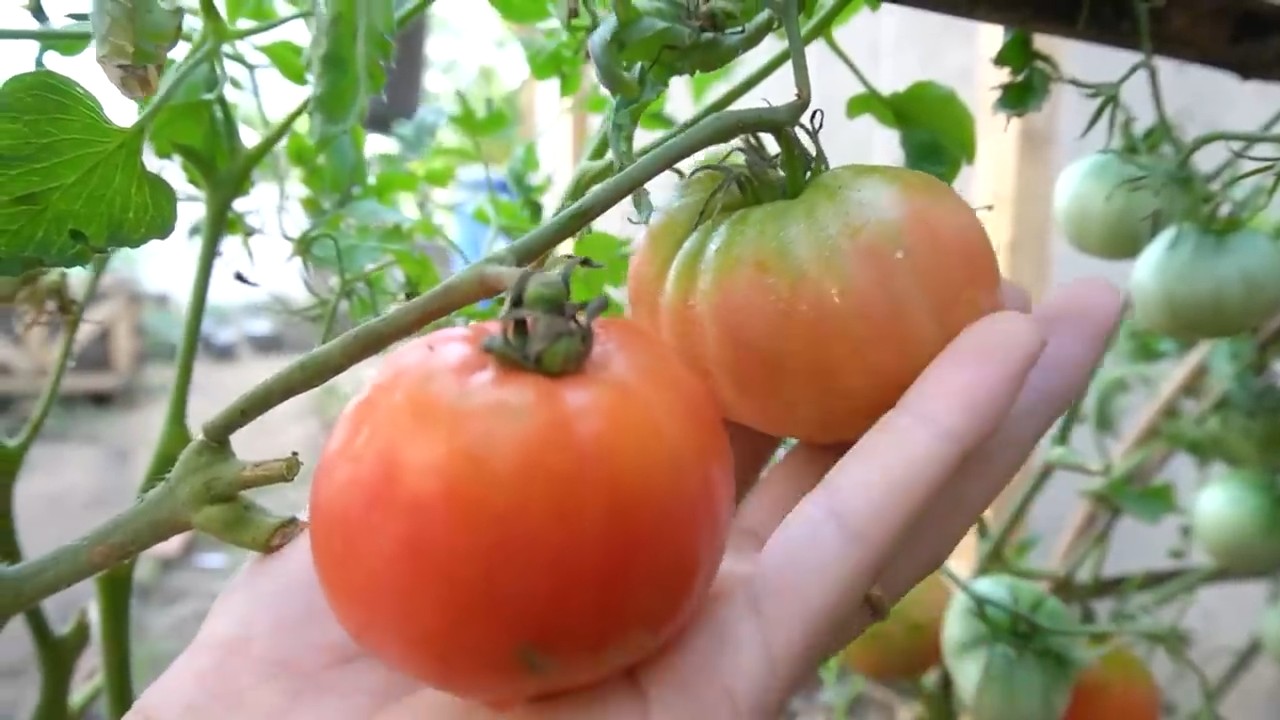
Hello, dear garden friends! I’m so excited to introduce you to the wonderful world of growing tomatoes today. There is almost nothing more satisfying than harvesting a juicy, sun-ripened tomato from your own garden. And believe me, it’s easier than you might think! This guide is packed with everything you need to know to successfully grow tomatoes, whether you have a large garden or just a small balcony. Let’s get started!
The Basics: What Tomatoes Need to Grow
Before we dive into the details, it’s important to understand the basic needs of tomato plants. They are little divas when it comes to their preferences!
- Sun: Tomatoes love the sun! They need at least 6-8 hours of direct sunlight per day. The more sun, the better.
- Soil: A well-draining, nutrient-rich soil is crucial. Tomatoes are heavy feeders and need a lot of nutrients to grow well and produce a lot of fruit.
- Water: Regular watering is important, especially during fruit formation. Make sure to keep the soil evenly moist, but avoid waterlogging.
- Warmth: Tomatoes are heat-loving and cannot tolerate frost. The soil temperature should be at least 15°C (60°F) before you plant them out.
- Support: Most tomato varieties need support, such as a tomato stake or a trellis, to bear the weight of the fruit.
Step-by-Step Guide: From Seed to Harvest
Here is a detailed guide that will walk you through the entire process, from sowing the seeds to harvesting the ripe tomatoes.
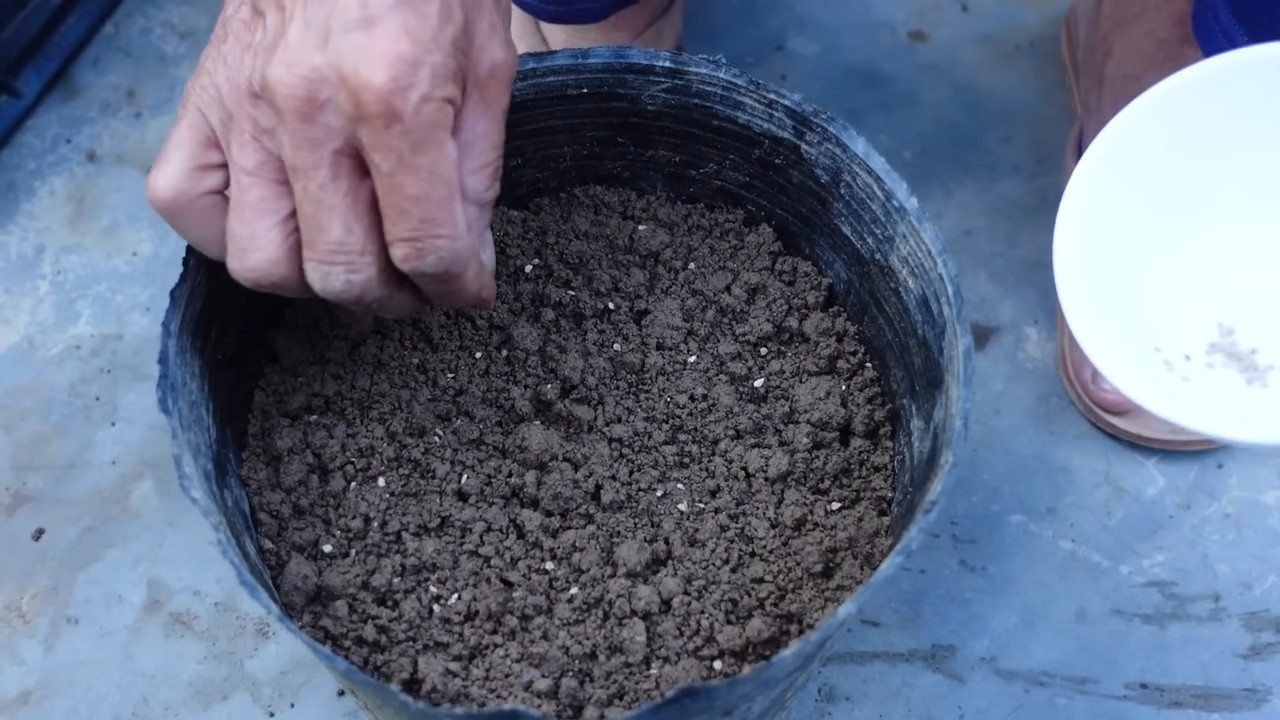
1. Sowing: The Start of a Tomato-Rich Life
- When to sow? Start sowing tomato seeds about 6-8 weeks before the last expected frost. In Central Europe, this is usually in March or April.
- What you’ll need:
- Tomato seeds (choose your favorite varieties!)
- Seed-starting mix
- Starter pots or trays
- A mini-greenhouse or clear plastic wrap
- A spray bottle
- Here’s how:
- Fill the starter pots or trays with seed-starting mix.
- Lightly moisten the soil with a spray bottle.
- Place 2-3 seeds per pot or cell on the soil.
- Cover the seeds with a thin layer of soil (about 0.5 cm / 0.2 inches).
- Moisten the soil again with the spray bottle.
- Place the pots or trays in a mini-greenhouse or cover them with plastic wrap to increase humidity.
- Place the greenhouse or trays in a warm, bright place (e.g., on a windowsill).
- Keep the soil moist, but not wet.
- The seeds should germinate after about 7-14 days.
- Once the seedlings have developed their first true leaves (besides the initial seed leaves), you can prick them out.
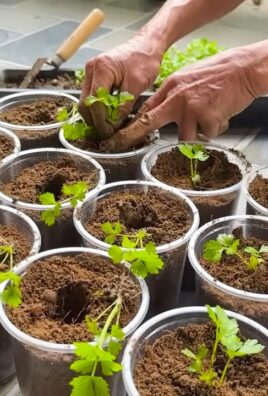
2. Pricking Out: Giving the Little Seedlings More Space
- What is pricking out? Pricking out means transplanting the small seedlings into larger pots so they have more space to grow.
- When to prick out? You should prick them out as soon as the seedlings have developed their first true leaves.
- What you’ll need:
- Larger pots (approx. 8-10 cm / 3-4 inches in diameter)
- A dibber or a spoon
- Potting soil
- Here’s how:
- Fill the larger pots with potting soil.
- Lightly moisten the soil.
- Carefully loosen the seedlings from the starter pots with a dibber or spoon. Be careful not to damage the roots.
- Place each seedling in its own pot and fill the pot with soil.
- Press the soil down lightly.
- Water the seedlings gently.
- Place the pots in a bright spot, but avoid direct sunlight for the first few days.
3. Preparing for Planting Out: Hardening Off the Young Plants
- What does hardening off mean? Hardening off means slowly acclimating the young plants to outdoor conditions before you plant them out.
- Why harden off? Hardening off helps the plants survive the shock of transplanting and adapt more quickly to the new conditions.
- How to harden off:
- Start about 1-2 weeks before the planned planting date.
- Place the pots outdoors for a few hours during the day in a sheltered spot.
- Increase the time they spend outdoors by a few hours each day.
- Protect the plants from strong wind and direct sunlight initially.
- Bring the plants back inside at night.
4. Planting Out: Finally, Out into Freedom!
- When to plant out? You should only plant out when there is no more danger of frost and the soil temperature is at least 15°C (60°F). In Central Europe, this is usually mid-May after the last frost date.
- Where to plant out? Choose a sunny location with well-draining soil.
- What you’ll need:
- Tomato plants
- A garden trowel
- Compost or organic fertilizer
- Tomato stakes or a trellis
- A watering can
- Here’s how:
- Prepare the soil by working in compost or organic fertilizer.
- Dig holes that are slightly larger than the pots of the tomato plants.
- Carefully remove the plants from the pots.
- Place the plants in the holes and fill the holes with soil.
- Press the soil down lightly.
- Water the plants thoroughly.
- Place tomato stakes or a trellis next to the plants and tie the plants to them.
- Ensure a spacing of at least 50-60 cm (20-24 inches) between plants.
5. Care: Keeping the Tomatoes Happy
Mulching: Mulching means covering the soil around the plants with organic material (e.g., straw, grass clippings, or wood chips). Mulching helps to keep the soil moist, suppress weeds, and regulate soil…
Watering: Water the tomatoes regularly, especially during fruit formation. Make sure to keep the soil evenly moist, but avoid waterlogging. It’s best to water in the morning so the leaves can dry during the day.
Fertilizing: Tomatoes are heavy feeders and need regular fertilization. Use a special tomato fertilizer or an organic fertilizer. Fertilize every 2-3 weeks.
Removing suckers: Removing suckers means removing the side shoots that form in the leaf axils. This promotes the growth of the main stems and ensures better air circulation for the plants. Not all varieties need to have their suckers removed. Find out if your variety requires it.
Conclusion
So, there you have it! Growing tomatoes at home, especially with these simple DIY tricks, is not just a rewarding experience; it’s a gateway to fresher, tastier, and more vibrant meals. Forget those bland, store-bought tomatoes that lack the sun-ripened sweetness we all crave. With a little effort and these easy-to-implement strategies, you can cultivate a thriving tomato garden right in your backyard, balcony, or even on a sunny windowsill.
The beauty of this approach lies in its simplicity and adaptability. We’ve shown you how to create nutrient-rich soil amendments using readily available materials, construct effective and inexpensive supports for your growing plants, and even brew up natural pest control solutions to keep your precious tomatoes safe from unwanted visitors. These methods are not only cost-effective but also environmentally friendly, allowing you to enjoy the fruits (or vegetables!) of your labor with a clear conscience.
But don’t just take our word for it. The real magic happens when you get your hands dirty and experience the joy of nurturing a tomato plant from seedling to harvest. Imagine the satisfaction of plucking a perfectly ripe, juicy tomato from your own garden and using it to create a delicious Caprese salad, a flavorful pasta sauce, or a simple yet satisfying tomato sandwich. The possibilities are endless!
And the best part? You can customize these techniques to suit your specific needs and preferences. Experiment with different varieties of tomatoes, from the classic beefsteak to the sweet cherry tomato, to discover your favorites. Try adding different organic materials to your soil mix to see how they affect the growth and flavor of your tomatoes. Explore various companion planting options to deter pests and attract beneficial insects.
For example, consider adding crushed eggshells to your soil for an extra boost of calcium, which can help prevent blossom-end rot. Or, try interplanting basil with your tomatoes, as basil is known to repel certain pests and enhance the flavor of the tomatoes. You could even experiment with different types of homemade fertilizers, such as compost tea or fish emulsion, to provide your plants with the nutrients they need to thrive.
Don’t be afraid to get creative and adapt these techniques to your unique growing environment. Whether you have a sprawling garden or a small balcony, there’s a way to make these DIY tricks work for you. The key is to be patient, observant, and willing to learn from your experiences.
We encourage you to embark on this exciting journey of growing tomatoes at home. It’s a rewarding experience that will not only provide you with delicious, homegrown tomatoes but also connect you with nature and teach you valuable skills.
So, grab your gardening gloves, gather your supplies, and get ready to transform your space into a tomato-growing paradise. And most importantly, don’t forget to share your experiences with us! We’d love to hear about your successes, your challenges, and any tips or tricks you’ve discovered along the way. Share your photos, your stories, and your questions in the comments section below. Let’s create a community of tomato-growing enthusiasts who can learn from each other and celebrate the joys of homegrown goodness. Happy gardening!
Frequently Asked Questions (FAQ)
What are the best tomato varieties to grow at home?
The best tomato varieties to grow at home depend on your climate, growing space, and personal preferences. For beginners, determinate varieties like Roma or Celebrity are a good choice because they are compact and produce a concentrated harvest. Indeterminate varieties like Beefsteak, Cherry, or Heirloom tomatoes offer a longer harvest period but require more space and support. Consider your local climate and choose varieties that are known to thrive in your region. Also, think about how you plan to use your tomatoes. If you want to make sauce, Roma tomatoes are a great option. If you prefer snacking tomatoes, cherry or grape tomatoes are a good choice. Don’t be afraid to experiment with different varieties to find your favorites!
How often should I water my tomato plants?
Watering frequency depends on several factors, including the weather, soil type, and the size of your plants. Generally, tomato plants need about 1-2 inches of water per week. Water deeply and less frequently, rather than shallowly and often. This encourages deep root growth, which makes the plants more drought-tolerant. Check the soil moisture by sticking your finger about an inch into the soil. If it feels dry, it’s time to water. Avoid watering the foliage, as this can promote fungal diseases. Water at the base of the plant, preferably in the morning. During hot, dry weather, you may need to water more frequently.
How do I prevent blossom-end rot on my tomatoes?
Blossom-end rot is a common problem caused by a calcium deficiency in the developing fruit. It appears as a dark, leathery spot on the bottom of the tomato. To prevent blossom-end rot, ensure your soil is rich in calcium. You can add crushed eggshells or bone meal to the soil before planting. Maintain consistent watering to help the plants absorb calcium from the soil. Avoid over-fertilizing with nitrogen, as this can interfere with calcium uptake. You can also use a calcium foliar spray to provide a quick boost of calcium to the plants.
What are some common pests and diseases that affect tomato plants, and how can I control them naturally?
Common pests include aphids, whiteflies, tomato hornworms, and spider mites. Common diseases include early blight, late blight, and powdery mildew. To control pests naturally, you can use insecticidal soap, neem oil, or introduce beneficial insects like ladybugs. To prevent diseases, ensure good air circulation around your plants, avoid overhead watering, and remove any infected leaves promptly. You can also use copper fungicide or baking soda spray to control fungal diseases. Companion planting with basil or marigolds can also help deter pests. Regularly inspect your plants for signs of pests or diseases and take action promptly.
How do I prune my tomato plants?
Pruning tomato plants can improve air circulation, promote fruit production, and prevent diseases. For determinate varieties, minimal pruning is required. Simply remove any suckers (small shoots that grow between the main stem and the branches) below the first flower cluster. For indeterminate varieties, prune regularly to remove suckers and maintain a single or double main stem. This will help the plant focus its energy on fruit production. Also, remove any yellowing or diseased leaves to improve air circulation and prevent the spread of diseases.
When is the best time to harvest my tomatoes?
Tomatoes are ready to harvest when they are fully colored, slightly soft to the touch, and easily detach from the vine. The color will vary depending on the variety. Gently twist the tomato until it comes off the vine. Avoid pulling the tomato, as this can damage the plant. The best time to harvest tomatoes is in the morning, after the dew has dried. Store harvested tomatoes at room temperature, away from direct sunlight. Avoid refrigerating tomatoes, as this can affect their flavor and texture.
Can I grow tomatoes in containers?
Yes, you can definitely grow tomatoes in containers! Choose a large container (at least 20 gallons) with drainage holes. Use a high-quality potting mix that is well-draining. Choose determinate varieties for smaller containers, or indeterminate varieties for larger containers with adequate support. Water regularly and fertilize every 2-3 weeks with a balanced fertilizer. Place the container in a sunny location that receives at least 6-8 hours of sunlight per day.
How can I improve the flavor of my homegrown tomatoes?
The flavor of your homegrown tomatoes depends on several factors, including the variety, soil quality, sunlight, and watering practices. Choose varieties that are known for their flavor. Ensure your soil is rich in organic matter and nutrients. Provide your plants with plenty of sunlight (at least 6-8 hours per day). Water deeply and less frequently to encourage deep root growth. Avoid over-fertilizing with nitrogen, as this can affect the flavor of the tomatoes. Allow the tomatoes to ripen fully on the vine before harvesting.
Leave a Comment