
Growing Sweet Potatoes Anywhere might sound like a gardener’s pipe dream, especially if you’re short on space or live in a less-than-ideal climate. But trust me, it’s totally achievable! For centuries, sweet potatoes have been a staple crop in many cultures, from South America where they originated, to Asia and beyond, providing essential nutrients and a delicious, versatile food source. Think about it – these vibrant tubers have fueled civilizations!
Now, you might be thinking, “I don’t have a sprawling farm!” That’s perfectly okay! That’s where these clever DIY tricks come in. I’m going to show you how to cultivate these nutritional powerhouses, even if you only have a balcony, a small patio, or even just a sunny windowsill.
Why is this so important? Well, beyond the satisfaction of growing your own food, growing sweet potatoes anywhere offers a sustainable and cost-effective way to enjoy fresh, healthy produce. Plus, store-bought sweet potatoes can sometimes lack the vibrant flavor of homegrown ones. Imagine harvesting your own sweet potatoes, knowing exactly where they came from and how they were grown. No pesticides, no long-distance transportation – just pure, delicious goodness. So, let’s dive into these simple yet effective DIY hacks that will transform you into a sweet potato pro, no matter where you live!
Growing Sweet Potatoes Anywhere: A DIY Guide
Hey there, fellow gardening enthusiasts! I’m so excited to share my tried-and-true method for growing sweet potatoes, even if you don’t have a sprawling garden. Forget the traditional in-ground planting – we’re going container crazy! This guide will walk you through everything you need to know to harvest a bountiful crop of these delicious and nutritious tubers, no matter where you live.
What You’ll Need
Before we dive in, let’s gather our supplies. This is crucial for a smooth and successful sweet potato growing journey.
* Sweet Potato “Slip” Starter: You can buy these online, at your local nursery, or even sprout your own from a store-bought sweet potato (more on that later!).
* Large Container(s): Think big! Each sweet potato plant needs at least a 10-gallon container. I’ve had great success with 15-20 gallon containers. Fabric pots are fantastic because they allow for good drainage and air pruning of the roots.
* High-Quality Potting Mix: Don’t skimp on this! Use a well-draining potting mix specifically formulated for containers. Avoid using garden soil, as it can compact and hinder root growth.
* Compost: This is your secret weapon for nutrient-rich soil. Mix it in with your potting mix for an extra boost.
* Watering Can or Hose: Essential for keeping your sweet potatoes hydrated.
* Fertilizer (Optional): A balanced, slow-release fertilizer can help your plants thrive, but it’s not strictly necessary if you have good soil.
* Trowel or Small Shovel: For planting your slips.
* Mulch (Optional): Helps retain moisture and suppress weeds. Straw, wood chips, or even dried leaves work well.
Starting Your Sweet Potato Slips (If You’re Not Buying Them)
Okay, so you want to start your own slips from a sweet potato you bought at the grocery store? Awesome! It’s a fun and rewarding process. Here’s how I do it:
1. Choose a Healthy Sweet Potato: Look for one that’s firm, free from blemishes, and preferably organic (to avoid any growth inhibitors).
2. Prepare the Potato: Wash the sweet potato thoroughly. You can cut it in half or leave it whole, depending on the size of your container.
3. Submerge the Bottom Half in Water: Use toothpicks to suspend the sweet potato over a jar or glass filled with water, ensuring that the bottom half is submerged.
4. Place in a Warm, Sunny Location: A windowsill or sunny countertop is ideal.
5. Change the Water Regularly: Every few days, replace the water to prevent mold and bacteria growth.
6. Wait for Slips to Sprout: In a few weeks, you should start to see small sprouts (slips) emerging from the sweet potato.
7. Separate the Slips: Once the slips are about 6-8 inches long, gently twist them off the sweet potato.
8. Root the Slips in Water: Place the slips in a glass of water, making sure the bottom inch or two is submerged.
9. Wait for Roots to Develop: In a few days to a week, roots will start to grow.
10. Plant the Rooted Slips: Once the roots are about an inch long, they’re ready to be planted in your container.
Planting Your Sweet Potato Slips
Now for the fun part – getting those slips into their new home!
1. Prepare Your Container: Fill your container with the potting mix and compost mixture, leaving a few inches of space at the top.
2. Create Planting Holes: Dig small holes in the soil, spaced about 12-18 inches apart.
3. Plant the Slips: Gently place the rooted slips into the holes, burying the roots and the bottom part of the stem. Leave the leaves above the soil.
4. Water Thoroughly: Water the newly planted slips well to help them settle in.
5. Mulch (Optional): Add a layer of mulch around the plants to help retain moisture and suppress weeds.
Caring for Your Sweet Potato Plants
Sweet potatoes are relatively low-maintenance, but they do need some attention to thrive.
1. Watering: Keep the soil consistently moist, but not waterlogged. Water deeply when the top inch of soil feels dry. Sweet potatoes need more water during hot weather.
2. Sunlight: Sweet potatoes need at least 6-8 hours of sunlight per day. Place your containers in a sunny location.
3. Fertilizing (Optional): If you’re using fertilizer, follow the instructions on the package. A balanced, slow-release fertilizer applied every few weeks can help boost growth. I personally like to use a fertilizer higher in potassium and phosphorus to encourage tuber development.
4. Weeding: Keep the container free of weeds, as they can compete with your sweet potato plants for nutrients and water.
5. Pest Control: Sweet potatoes are generally pest-resistant, but keep an eye out for common garden pests like aphids or spider mites. Treat any infestations promptly with insecticidal soap or neem oil.
6. Vine Management: Sweet potato vines can get quite long and sprawling. You can let them trail over the sides of the container or provide a trellis or support for them to climb. I usually let them trail, but make sure they don’t root into the ground if you’re growing in containers on a patio or deck.
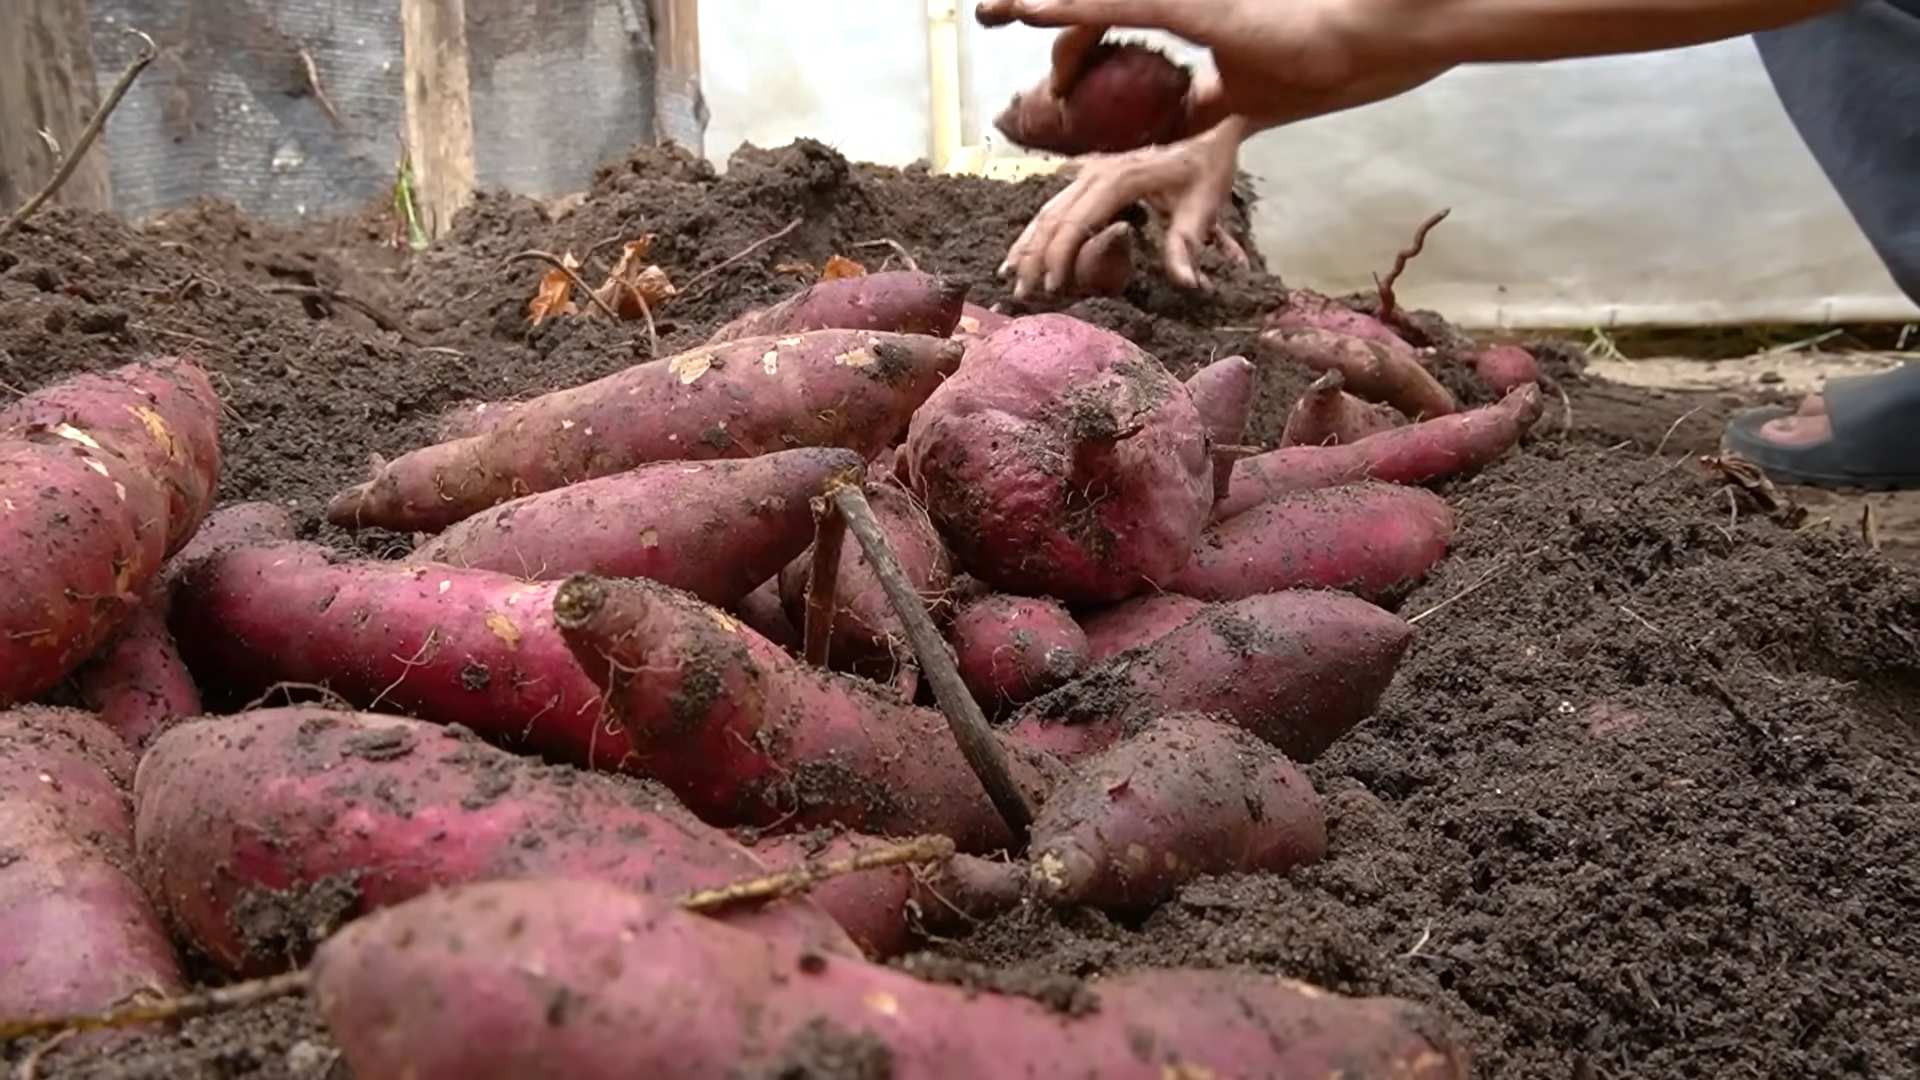
Harvesting Your Sweet Potatoes
This is the moment we’ve all been waiting for! Harvesting sweet potatoes is a rewarding experience.
1. Timing: Sweet potatoes typically take 90-120 days to mature. The best time to harvest is usually in the fall, before the first frost. The leaves will start to turn yellow and die back, indicating that the tubers are ready.
2. Prepare to Harvest: Stop watering your sweet potato plants a week or two before harvest to help the tubers cure.
3. Gently Dig Around the Container: Carefully loosen the soil around the edges of the container.
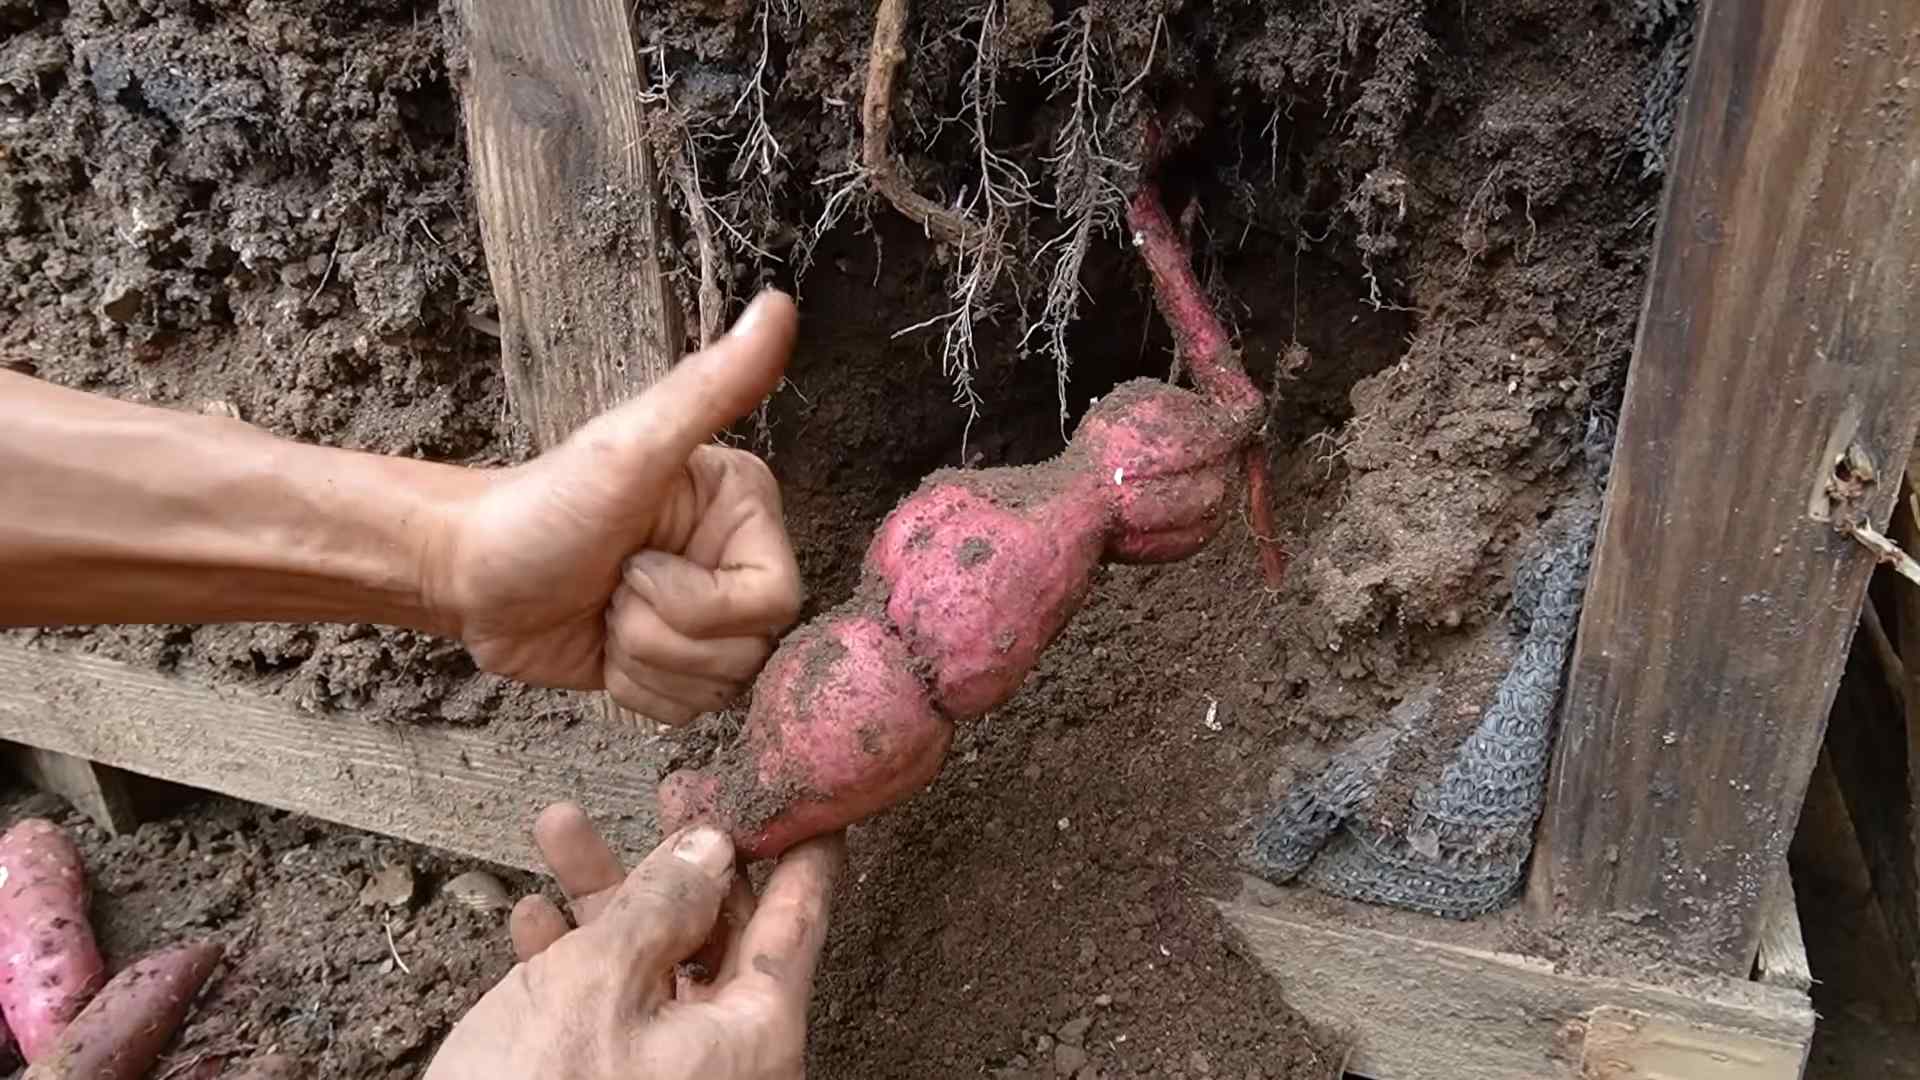
4. Lift the Plant: Gently lift the entire plant out of the container, being careful not to damage the sweet potatoes.
5. Remove the Sweet Potatoes: Brush off any excess soil from the sweet potatoes.
6. Curing: Curing is essential for developing the sweet flavor and improving the storage life of your sweet potatoes. Place the harvested sweet potatoes in a warm, humid place (80-85°F and 85-90% humidity) for about a week to ten days. A greenhouse or a warm, sunny room with a humidifier works well.
7. Storing: After curing, store your sweet potatoes in a cool, dry, and dark place (55-60°F). They should last for several months.
Troubleshooting
Even with the best planning, things can sometimes go wrong. Here are a few common problems and how to fix them:
* Yellowing Leaves: This could be a sign of nutrient deficiency, overwatering, or underwatering. Check the soil moisture and consider adding fertilizer.
* Slow Growth: Make sure your plants are getting enough sunlight and water. Also, check the soil pH. Sweet potatoes prefer slightly acidic soil (pH 6.0-6.5).
* Pests: Treat any pest infestations promptly with insecticidal soap or neem oil.
* Rotting Sweet Potatoes: This is usually caused by overwatering or poor drainage. Make sure your container has drainage holes and avoid overwatering. Also, handle the sweet potatoes carefully during harvest to avoid bruising them.
Tips and Tricks for Sweet Potato Success
Here are a few extra tips to help you grow the best sweet potatoes ever:
* Choose the Right Variety: Some sweet potato varieties are better suited for container growing than others. Beauregard, Georgia Jet, and Centennial are all good choices.
* Rotate Your Crops: Avoid planting sweet potatoes in the same container year after year. This can help prevent soilborne diseases.
* Add Mycorrhizae: Mycorrhizae are beneficial fungi that can help your sweet potato plants absorb nutrients and water more efficiently. Add mycorrhizae to the soil when you plant your slips.
* Don’t Overcrowd: Give your sweet potato plants plenty of space to grow. Overcrowding can lead to smaller tubers and increased disease risk.
* Experiment: Don’t be afraid to experiment with different techniques and varieties to find what works best for you. Gardening is all about learning and having fun!
Enjoy Your Homegrown Sweet Potatoes!
There you have it! A comprehensive guide to growing sweet potatoes in containers. With a little bit of care and attention, you can enjoy a bountiful harvest of these delicious and nutritious tubers,
Conclusion
So, there you have it! Growing sweet potatoes, even if you don’t have acres of farmland, is entirely within your reach. This DIY trick transforms the often-intimidating process into an accessible and rewarding experience for gardeners of all levels. We’ve shown you how to bypass the traditional, space-intensive methods and cultivate these nutritious and delicious tubers in containers, raised beds, or even repurposed materials.
Why is this a must-try? Because it democratizes access to fresh, homegrown produce. Imagine the satisfaction of harvesting your own sweet potatoes, knowing exactly where they came from and how they were grown. Think of the vibrant orange flesh, packed with vitamins and antioxidants, gracing your dinner table. This isn’t just about growing food; it’s about connecting with nature, fostering self-sufficiency, and enjoying the unparalleled flavor of freshly harvested vegetables.
But the beauty of this DIY approach lies in its adaptability. Feel free to experiment with different container sizes and materials. While we’ve suggested specific dimensions, don’t be afraid to get creative. Upcycle old buckets, laundry baskets, or even tires (with proper drainage, of course!). The key is to provide ample space for the roots to develop.
Consider exploring different sweet potato varieties as well. Beauregard is a classic choice, known for its vibrant color and sweet flavor. But there are many other options to discover, each with its unique characteristics. Jewel sweet potatoes offer a slightly drier texture, while Japanese sweet potatoes boast a creamy, almost chestnut-like flavor. Don’t limit yourself! Explore the possibilities and find the varieties that best suit your taste and growing conditions.
Furthermore, think about companion planting. Marigolds can help deter pests, while basil can improve the overall health of your sweet potato plants. Experiment with different combinations to create a thriving and balanced ecosystem in your container garden.
This DIY method for growing sweet potatoes is more than just a gardening technique; it’s an invitation to embrace a more sustainable and fulfilling lifestyle. It’s a chance to reconnect with the earth, learn new skills, and enjoy the fruits (or rather, the tubers) of your labor.
We wholeheartedly encourage you to give this a try. Don’t be intimidated by the prospect of growing your own food. This method is designed to be simple, straightforward, and accessible to everyone. Start small, learn as you go, and don’t be afraid to make mistakes. Gardening is a journey, not a destination.
And most importantly, we want to hear about your experience! Share your successes, your challenges, and your creative adaptations in the comments below. Let’s build a community of sweet potato enthusiasts, sharing tips and tricks to help each other grow the best possible crop. Together, we can transform our backyards, balconies, and patios into thriving gardens, one sweet potato at a time. So, grab your slips, prepare your containers, and get ready to embark on a rewarding gardening adventure!
Frequently Asked Questions (FAQ)
What kind of soil should I use for growing sweet potatoes in containers?
The ideal soil for growing sweet potatoes in containers is a well-draining, loamy mix that is rich in organic matter. Avoid heavy clay soils, as they can become waterlogged and hinder root development. A good starting point is a mix of equal parts potting soil, compost, and perlite or vermiculite. The potting soil provides a base, the compost adds nutrients and improves drainage, and the perlite or vermiculite enhances aeration and prevents compaction. You can also amend the soil with a slow-release fertilizer to provide a steady supply of nutrients throughout the growing season. Ensure the pH of the soil is slightly acidic, ideally between 6.0 and 6.5, for optimal sweet potato growth.
How often should I water my sweet potato plants in containers?
Watering frequency depends on several factors, including the size of the container, the weather conditions, and the type of soil you’re using. As a general rule, water your sweet potato plants deeply whenever the top inch of soil feels dry to the touch. During hot, dry weather, you may need to water daily, while during cooler, wetter periods, you can reduce the frequency. Avoid overwatering, as this can lead to root rot. Ensure that your containers have adequate drainage holes to prevent water from accumulating at the bottom. A good way to check if your plants need water is to insert your finger into the soil. If the soil feels dry an inch or two below the surface, it’s time to water.
How much sunlight do sweet potato plants need?
Sweet potato plants thrive in full sun, requiring at least 6-8 hours of direct sunlight per day. Insufficient sunlight can result in stunted growth, reduced yields, and pale, leggy plants. Choose a location for your containers that receives ample sunlight throughout the day. If you live in a particularly hot climate, you may need to provide some afternoon shade to prevent the plants from overheating. However, avoid placing them in completely shaded areas, as this will significantly impact their growth and productivity. If you’re growing sweet potatoes indoors, use grow lights to supplement natural sunlight and ensure they receive adequate illumination.
When is the best time to harvest my sweet potatoes?
Sweet potatoes are typically ready to harvest about 90-120 days after planting slips, depending on the variety and growing conditions. A good indicator of maturity is when the foliage starts to turn yellow and die back. However, don’t wait too long to harvest, as the tubers can become susceptible to pests and diseases if left in the ground for an extended period. To harvest, carefully dig around the plant, being mindful not to damage the tubers. Use a garden fork or spade to gently lift the plant from the soil, and then carefully remove the sweet potatoes. Cure the harvested sweet potatoes in a warm, humid place for about a week to allow the skins to harden and the sugars to develop.
Can I grow sweet potatoes from store-bought sweet potatoes?
Yes, you can grow sweet potato slips from store-bought sweet potatoes, but it’s important to choose organic sweet potatoes that haven’t been treated with sprout inhibitors. To sprout a sweet potato, suspend it in a jar of water, with the bottom half submerged. Use toothpicks to hold the sweet potato in place. Place the jar in a warm, sunny location, and wait for sprouts to emerge. Once the sprouts are several inches long, gently twist them off and place them in a glass of water to root. Once the roots are well-developed, you can transplant the slips into your containers. Keep in mind that store-bought sweet potatoes may not always produce the same variety as the parent plant, but it’s still a fun and rewarding way to propagate your own sweet potato plants.
What are some common pests and diseases that affect sweet potato plants, and how can I prevent them?
Sweet potato plants can be susceptible to various pests and diseases, including sweet potato weevils, flea beetles, and fungal diseases like fusarium wilt and black rot. To prevent pest and disease problems, start with healthy, disease-free slips. Practice crop rotation to avoid building up pests and diseases in the soil. Keep your garden clean and free of weeds, which can harbor pests and diseases. Use organic pest control methods, such as insecticidal soap or neem oil, to control pests. Ensure that your plants have good air circulation to prevent fungal diseases. Avoid overwatering, as this can create a favorable environment for fungal growth. If you notice any signs of pests or diseases, take action promptly to prevent them from spreading.
How do I cure sweet potatoes after harvesting?
Curing sweet potatoes is essential for improving their flavor and storage life. After harvesting, gently brush off any excess soil from the tubers, being careful not to damage the skins. Place the sweet potatoes in a warm, humid location with good air circulation. The ideal curing conditions are a temperature of 80-85°F (27-29°C) and a humidity level of 85-90%. You can achieve these conditions by placing the sweet potatoes in a well-ventilated room with a humidifier or by covering them with a damp cloth. Cure the sweet potatoes for about a week to allow the skins to harden and the sugars to develop. After curing, store the sweet potatoes in a cool, dry, and dark place with good ventilation. Properly cured and stored sweet potatoes can last for several months.
Can I grow sweet potatoes indoors?
Yes, you can grow sweet potatoes indoors, but it requires providing them with adequate light and warmth. Choose a sunny location near a south-facing window or use grow lights to supplement natural sunlight. Sweet potato plants need at least 6-8 hours of direct light per day. Maintain a consistent temperature of 70-80°F (21-27°C). Use a large container with well-draining soil and water regularly. Be aware that indoor-grown sweet potatoes may not produce as large of a yield as those grown outdoors, but it’s still a rewarding way to enjoy fresh, homegrown produce year-round.
Leave a Comment