
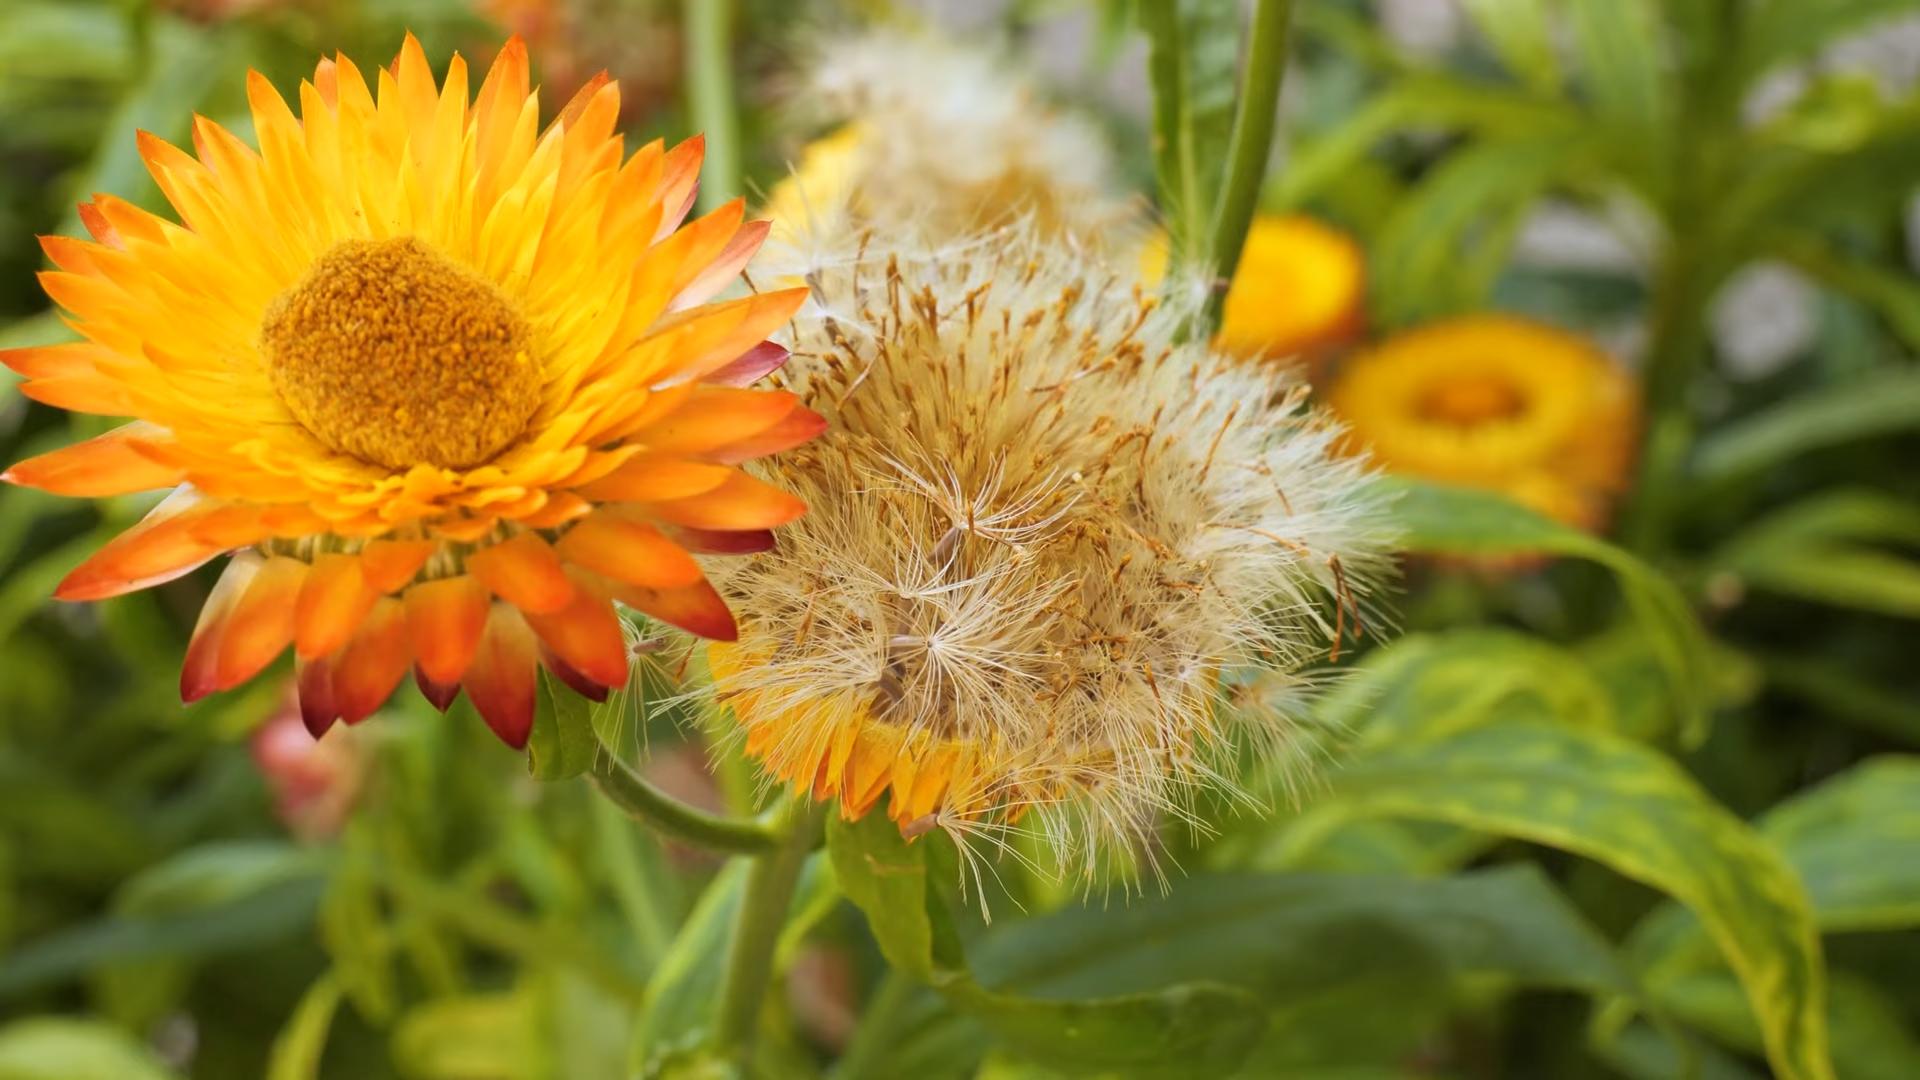
Growing Strawflowers from Seed might seem daunting, but trust me, it’s a rewarding journey that will fill your garden with vibrant, everlasting blooms! Have you ever dreamt of having a constant supply of cheerful, papery flowers to brighten your home, even in the dead of winter? Well, strawflowers are your answer! These beauties, with their unique texture and long-lasting color, have been cherished for centuries, often used in dried flower arrangements and crafts, adding a touch of rustic charm to any space.
Historically, strawflowers, also known as everlasting flowers, have symbolized lasting affection and remembrance, making them a thoughtful addition to bouquets and gifts. But beyond their sentimental value, they’re incredibly easy to grow, even for beginner gardeners like myself! I remember feeling intimidated at first, but with a few simple tricks, I was soon harvesting armfuls of these delightful blooms.
In this DIY guide, I’m going to share my secrets for successfully growing strawflowers from seed, from preparing your soil to harvesting your bounty. Why do you need these tricks? Because store-bought dried flowers can be expensive, and nothing beats the satisfaction of creating something beautiful with your own two hands. Plus, you’ll have a unique and personalized touch to your home décor. So, grab your gardening gloves, and let’s get started on this exciting adventure!
Growing Strawflowers from Seed: A DIY Guide to Everlasting Blooms
Hey there, fellow flower enthusiasts! I’m so excited to share my experience with growing strawflowers from seed. These beauties, also known as everlasting flowers, are not only stunning in the garden but also dry incredibly well, making them perfect for crafts, bouquets, and adding a touch of sunshine to your home all year round. Trust me, even if you’re a beginner gardener, you can totally nail this!
Getting Started: What You’ll Need
Before we dive into the nitty-gritty, let’s gather our supplies. Here’s what you’ll need to successfully grow strawflowers from seed:
* Strawflower Seeds: Obviously! Choose a variety you love. I personally adore the ‘Monstrosum’ mix for its vibrant colors and large flower heads.
* Seed Starting Trays or Small Pots: These will be our nurseries for the baby strawflowers.
* Seed Starting Mix: This is crucial! Regular potting soil is often too heavy for delicate seedlings. Seed starting mix is light and airy, providing the perfect environment for germination.
* Spray Bottle: For gently watering the seeds and seedlings.
* Grow Lights (Optional but Recommended): If you’re starting seeds indoors early in the season, grow lights will provide the necessary light for healthy growth.
* Heat Mat (Optional): Strawflowers prefer warmer temperatures for germination. A heat mat can speed up the process.
* Plant Labels: Trust me, you’ll want to label your seedlings! It’s easy to forget which variety is which.
* Small Trowel or Spoon: For transplanting seedlings.
* Well-Draining Garden Soil: For planting the seedlings outdoors.
* Gardening Gloves: To keep your hands clean and protected.
* Watering Can or Hose: For watering the established plants.
* Fertilizer (Optional): A balanced fertilizer can help boost growth and flowering.
Phase 1: Sowing the Seeds Indoors (Recommended for Early Blooms)
Starting strawflower seeds indoors gives you a head start on the growing season, especially if you live in a cooler climate. I usually start mine about 6-8 weeks before the last expected frost.
1. Prepare Your Seed Starting Trays or Pots: Fill your chosen containers with seed starting mix. Gently tap the containers to settle the mix, but don’t pack it down too tightly.
2. Sow the Seeds: Strawflower seeds are tiny, so handle them with care. Sprinkle a few seeds (2-3) on the surface of the soil in each cell or pot. Don’t bury them too deep; they need light to germinate. A light dusting of seed starting mix is sufficient.
3. Water Gently: Use your spray bottle to mist the soil thoroughly. You want the soil to be moist but not soggy.
4. Provide Warmth and Light: Place the trays or pots on a heat mat (if using) and under grow lights. If you don’t have grow lights, a sunny windowsill can work, but be sure to rotate the trays regularly to prevent the seedlings from leaning towards the light.
5. Maintain Moisture: Keep the soil consistently moist by misting it regularly. Check the soil daily and water as needed.
6. Wait for Germination: Strawflower seeds typically germinate in 7-14 days. Be patient!
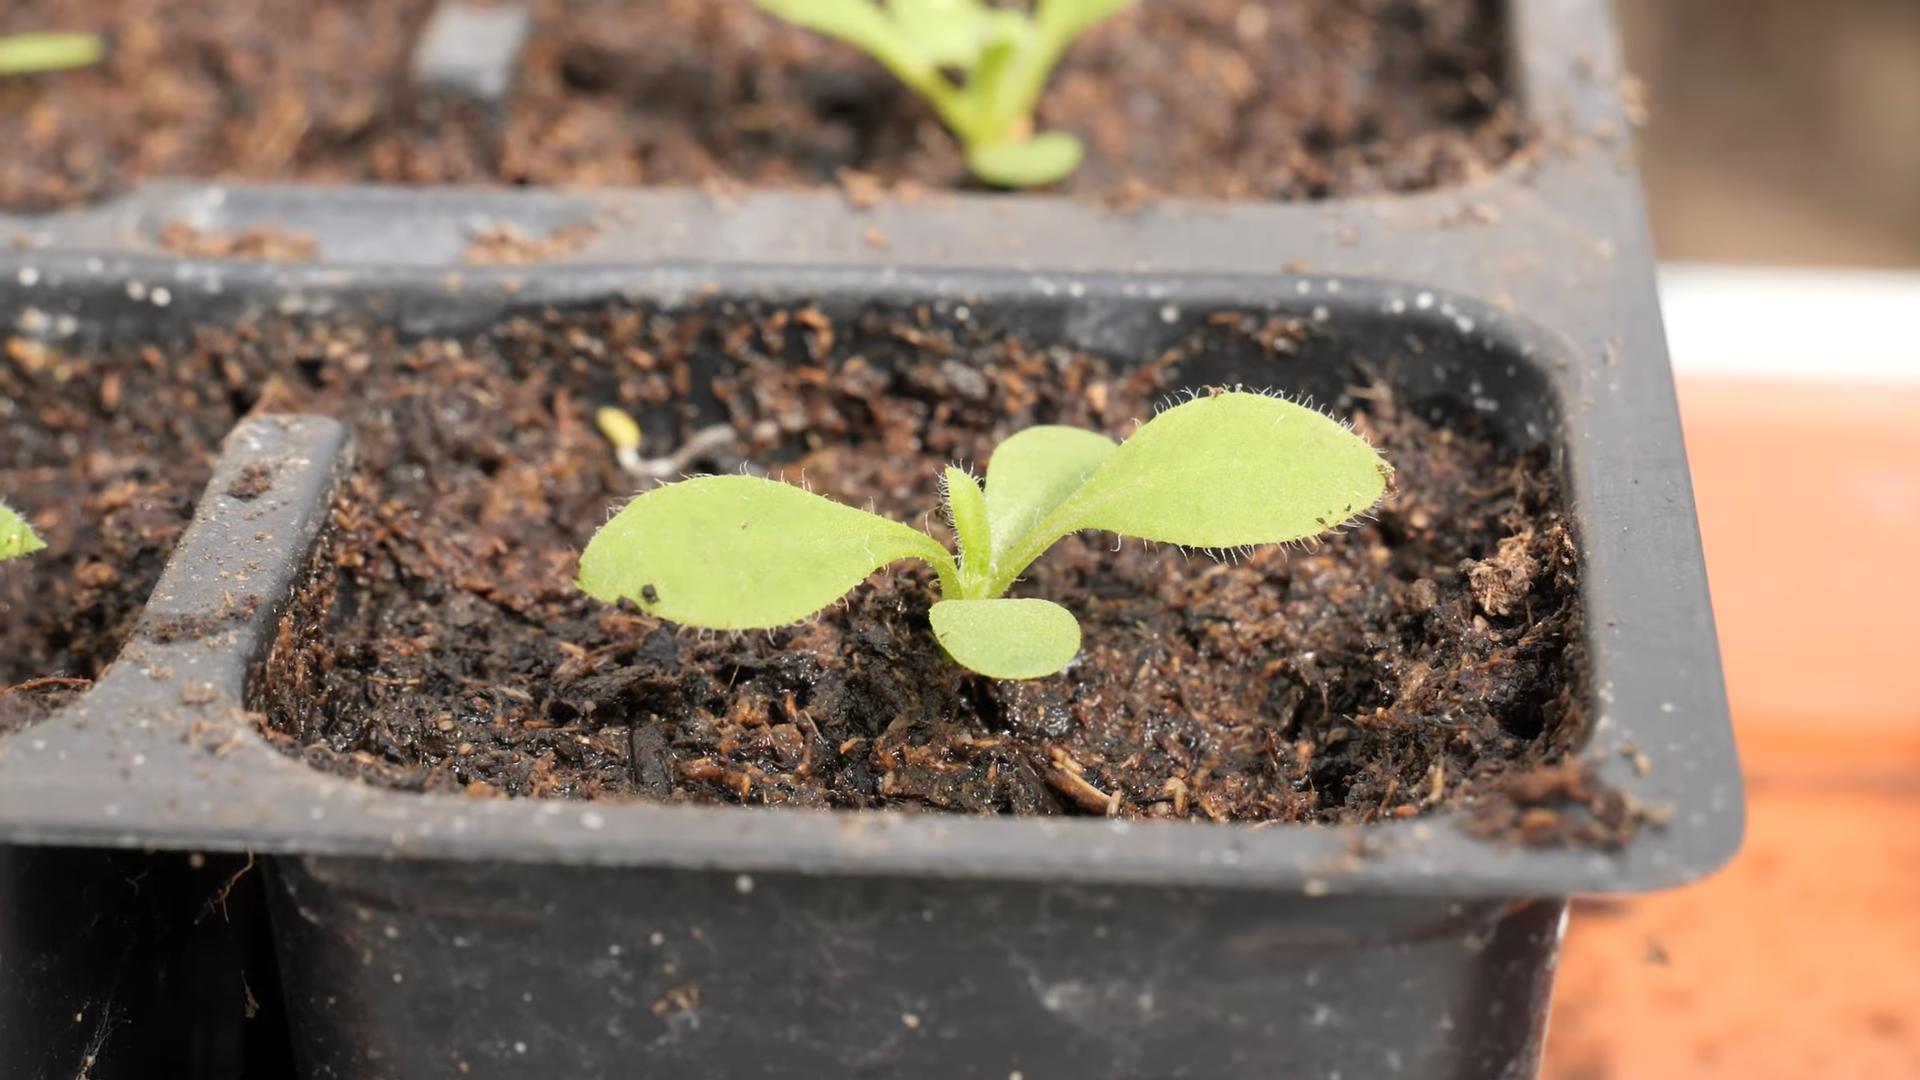
7. Thin the Seedlings: Once the seedlings have emerged and have a couple of true leaves (the second set of leaves that appear after the initial seed leaves), thin them to one seedling per cell or pot. Use small scissors to snip off the weaker seedlings at the soil line. This will give the remaining seedling room to grow.
Phase 2: Sowing the Seeds Directly Outdoors (Suitable for Warmer Climates)
If you live in a warmer climate with a longer growing season, you can sow strawflower seeds directly outdoors after the last frost.
1. Prepare the Soil: Choose a sunny location with well-draining soil. Amend the soil with compost or other organic matter to improve its fertility and drainage.
2. Sow the Seeds: Sprinkle the seeds thinly over the prepared soil. Lightly rake the soil to cover the seeds with a thin layer of soil.
3. Water Gently: Use a watering can or hose with a gentle spray nozzle to water the seeds thoroughly.
4. Keep the Soil Moist: Keep the soil consistently moist until the seedlings emerge.
5. Thin the Seedlings: Once the seedlings have emerged and have a couple of true leaves, thin them to the desired spacing. Strawflowers typically need about 12-18 inches of space between plants.
Phase 3: Transplanting Seedlings Outdoors
Whether you started your seeds indoors or purchased seedlings from a nursery, transplanting them outdoors is a crucial step.
1. Harden Off the Seedlings: Before transplanting, you need to “harden off” the seedlings. This means gradually acclimating them to outdoor conditions. Start by placing the seedlings outdoors in a sheltered location for a few hours each day, gradually increasing the amount of time they spend outdoors over the course of a week. This will help them adjust to the sun, wind, and temperature changes.
2. Choose a Sunny Location: Strawflowers thrive in full sun, so choose a location that receives at least 6 hours of direct sunlight per day.
3. Prepare the Planting Holes: Dig holes that are slightly larger than the root balls of the seedlings. Space the holes 12-18 inches apart.
4. Gently Remove the Seedlings: Carefully remove the seedlings from their containers, being careful not to damage the roots.
5. Plant the Seedlings: Place the seedlings in the holes and backfill with soil. Gently firm the soil around the base of the plants.
6. Water Thoroughly: Water the newly transplanted seedlings thoroughly.
7. Mulch (Optional): Apply a layer of mulch around the plants to help retain moisture, suppress weeds, and regulate soil temperature.
Phase 4: Caring for Your Strawflowers
Once your strawflowers are established, they’re relatively low-maintenance. Here’s what you need to do to keep them happy and healthy:
1. Water Regularly: Water the plants regularly, especially during dry periods. Strawflowers prefer consistently moist soil, but avoid overwatering, which can lead to root rot.
2. Fertilize (Optional): If you want to boost growth and flowering, you can fertilize the plants every few weeks with a balanced fertilizer. Follow the instructions on the fertilizer label.
3. Deadhead Regularly: Deadheading, or removing spent flowers, encourages the plants to produce more blooms. Simply snip off the faded flowers just below the flower head.
4. Provide Support (Optional): Taller varieties of strawflowers may need support to prevent them from flopping over. You can use stakes or cages to provide support.
5. Watch for Pests and Diseases: Strawflowers are generally pest- and disease-resistant, but keep an eye out for common garden pests like aphids and spider mites. If you notice any problems, treat them promptly with an appropriate insecticide or fungicide.
Phase 5: Harvesting and Drying Strawflowers
The best part! Harvesting and drying strawflowers is super easy and rewarding.
1. Harvest at the Right Time: Harvest the flowers when they are about half to three-quarters open. The petals should be firm and papery.
2. Cut the Stems: Use sharp scissors or pruning shears to cut the stems as long as possible.
3. Remove the Leaves: Remove the leaves from the stems, as they will not dry well.
4. Bundle the Flowers: Gather the flowers into small bundles of 5-10 stems.
5. Hang Upside Down to Dry: Tie the bundles together with twine or rubber bands and hang them upside down in a cool, dark, and well-ventilated place. A closet or attic works well.
6. Allow to Dry Completely: The flowers will take about 2-4 weeks to dry completely. They are dry when the petals are crisp and papery and the stems are brittle.
7. Store Properly: Once the flowers are dry, you can store them in a cool, dry place in an airtight container or bag.
Troubleshooting Tips
* Seeds Not Germinating: Make sure the soil is consistently moist and the temperature is warm enough. If you’re using old seeds, they may have a lower germination rate.
* Seedlings Leggy: Leggy seedlings are usually caused by insufficient light. Provide more light by using grow lights or moving the seedlings to a sunnier location.
* Plants Not Flowering: Make sure the plants are getting enough sunlight and water. You can also try fertilizing them with a fertilizer that is high in phosphorus.
* Flowers Rotting: This
Conclusion
So, there you have it! Growing strawflowers from seed might seem a little daunting at first, but with a little patience and these simple steps, you’ll be rewarded with a vibrant and long-lasting display of these unique blooms. Forget expensive bouquets that wilt within days; imagine filling your home with the everlasting beauty of strawflowers, all grown with your own two hands.
This DIY project isn’t just about saving money; it’s about connecting with nature, learning a new skill, and experiencing the satisfaction of nurturing something beautiful from a tiny seed. The sheer variety of colors and forms available in strawflowers makes them an incredibly versatile addition to any garden or floral arrangement.
Why is this a must-try? Because strawflowers are incredibly rewarding to grow. They are relatively low-maintenance once established, drought-tolerant, and attract pollinators to your garden. Plus, their papery texture and vibrant colors make them a standout feature in any setting. And let’s not forget the joy of crafting with your own home-grown materials!
Looking for variations? Consider experimenting with different strawflower varieties. ‘Monstrosum’ offers large, showy blooms, while ‘Bright Mix’ provides a rainbow of colors. You can also try succession planting to extend your harvest throughout the growing season. For a truly unique touch, try drying your strawflowers upside down in a dark, well-ventilated space to preserve their color and shape perfectly. You can even add a light coat of hairspray to help them retain their form even longer. Think about incorporating dried lavender or other fragrant herbs into your dried strawflower arrangements for an added sensory experience.
Don’t be afraid to get creative! Use your strawflowers in wreaths, potpourri, or even as embellishments for gift wrapping. The possibilities are endless.
We truly believe that growing strawflowers from seed is an experience that every gardener should try. It’s a simple, affordable, and incredibly rewarding way to add beauty and joy to your life.
So, grab some seeds, follow our guide, and get ready to be amazed by the magic of strawflowers. We can’t wait to see what you create!
Now, we want to hear from you! Have you tried growing strawflowers from seed before? What are your favorite tips and tricks? Share your experiences and photos in the comments below. Let’s build a community of strawflower enthusiasts and inspire others to embark on this rewarding journey. Happy gardening!
FAQ
Frequently Asked Questions About Growing Strawflowers from Seed
We understand you might have some questions before diving into growing strawflowers from seed. Here are some of the most common queries we receive, along with detailed answers to help you succeed:
Q: When is the best time to start strawflower seeds?
A: The ideal time to start strawflower seeds depends on your climate. In colder regions with short growing seasons, start seeds indoors 6-8 weeks before the last expected frost. In warmer climates, you can direct sow seeds outdoors after the last frost, once the soil has warmed up to at least 60°F (15°C). Starting indoors gives you a head start and allows the plants to mature earlier, resulting in a longer blooming season.
Q: What kind of soil is best for strawflowers?
A: Strawflowers are relatively adaptable but thrive in well-draining soil. They prefer soil that is moderately fertile and slightly acidic to neutral (pH 6.0-7.0). Avoid heavy clay soils that retain too much moisture, as this can lead to root rot. Amend heavy soils with compost or other organic matter to improve drainage. When starting seeds indoors, use a good quality seed-starting mix.
Q: How much sunlight do strawflowers need?
A: Strawflowers need at least 6-8 hours of direct sunlight per day to thrive. Insufficient sunlight can result in leggy growth, fewer blooms, and duller colors. Choose a sunny location in your garden where your strawflowers will receive ample sunlight throughout the day.
Q: How often should I water strawflowers?
A: Water strawflowers regularly, especially during dry periods. Keep the soil consistently moist but not waterlogged. Once established, strawflowers are relatively drought-tolerant, but they will still benefit from occasional watering. Water deeply at the base of the plant to avoid wetting the foliage, which can increase the risk of fungal diseases. Reduce watering frequency during cooler, cloudier weather.
Q: Do strawflowers need fertilizer?
A: Strawflowers are not heavy feeders, but they will benefit from occasional fertilization. Apply a balanced fertilizer (e.g., 10-10-10) diluted to half strength every 4-6 weeks during the growing season. Avoid over-fertilizing, as this can lead to excessive foliage growth at the expense of blooms. You can also amend the soil with compost or other organic matter to provide a slow-release source of nutrients.
Q: How do I harvest strawflowers for drying?
A: The best time to harvest strawflowers for drying is when the outer petals have opened, but the center is still closed. Cut the stems long, leaving at least 6-8 inches for handling. Remove the leaves from the stems and tie them in small bundles. Hang the bundles upside down in a dark, dry, and well-ventilated place for 2-4 weeks, or until they are completely dry and papery. Avoid drying them in direct sunlight, as this can fade the colors.
Q: Are strawflowers susceptible to any pests or diseases?
A: Strawflowers are generally resistant to pests and diseases, but they can occasionally be affected by aphids, spider mites, or fungal diseases such as powdery mildew. Inspect your plants regularly for signs of infestation or disease and take appropriate action if necessary. Aphids and spider mites can be controlled with insecticidal soap or neem oil. Powdery mildew can be prevented by ensuring good air circulation and avoiding overhead watering. Remove any infected leaves or plants promptly to prevent the spread of disease.
Q: Can I save strawflower seeds for next year?
A: Yes, you can easily save strawflower seeds for next year. Allow the flower heads to dry completely on the plant. Once dry, gently rub the flower heads between your fingers to release the seeds. Collect the seeds and store them in a cool, dry, and dark place in an airtight container. Label the container with the date and variety of the seeds. Strawflower seeds typically remain viable for 2-3 years.
Q: My strawflower seedlings are leggy. What should I do?
A: Leggy seedlings are usually a sign of insufficient light. If you’re starting seeds indoors, make sure they are receiving adequate light from a grow light or a sunny window. You can also try moving the seedlings closer to the light source. Pinching back the tops of the seedlings can also encourage bushier growth.
Q: Can I grow strawflowers in containers?
A: Yes, strawflowers can be successfully grown in containers. Choose a container that is at least 12 inches in diameter and has good drainage holes. Use a well-draining potting mix and water regularly. Container-grown strawflowers may need more frequent fertilization than those grown in the ground. Make sure the container receives at least 6-8 hours of direct sunlight per day.
Leave a Comment