
Growing Strawberries at Home can feel like a distant dream if you’ve only ever bought them from the grocery store. But what if I told you that plump, juicy, sun-ripened strawberries are within your reach, even if you don’t have acres of land?
For centuries, strawberries have been cherished not only for their delicious taste but also for their vibrant color and symbolism. From ancient Roman gardens to medieval tapestries, strawberries have represented love, purity, and abundance. Now, you can bring that same sense of joy and prosperity to your own backyard (or balcony!).
Let’s face it, store-bought strawberries often lack the intense flavor and sweetness of homegrown varieties. Plus, knowing exactly where your food comes from and how it’s grown is incredibly rewarding. That’s why I’m so excited to share these simple yet effective DIY tricks and hacks that will transform you into a strawberry-growing pro. Whether you’re a seasoned gardener or a complete beginner, these tips will help you maximize your yield and enjoy a bountiful harvest of delicious, homegrown strawberries. Get ready to discover the secrets to growing strawberries at home that are bursting with flavor and free from harmful chemicals!
Erdbeeren zu Hause anbauen: Dein DIY-Guide für eine reiche Ernte
Hallo liebe Gartenfreunde! Habt ihr euch jemals vorgestellt, frische, saftige Erdbeeren direkt aus eurem eigenen Garten zu pflücken? Ich kann euch sagen, es ist ein unglaublich befriedigendes Gefühl! Und das Beste daran: Es ist gar nicht so schwer, wie man vielleicht denkt. In diesem Artikel zeige ich euch Schritt für Schritt, wie ihr eure eigenen Erdbeeren zu Hause anbauen könnt – egal ob im Garten, auf dem Balkon oder sogar auf der Fensterbank. Los geht’s!
Die Grundlagen: Was Erdbeeren lieben
Bevor wir loslegen, ist es wichtig zu verstehen, was Erdbeeren zum Wachsen und Gedeihen brauchen. Hier eine kurze Übersicht:
* Sonne: Erdbeeren lieben die Sonne! Mindestens 6-8 Stunden direkte Sonneneinstrahlung pro Tag sind ideal.
* Boden: Ein gut durchlässiger, leicht saurer Boden (pH-Wert zwischen 5,5 und 6,5) ist perfekt.
* Wasser: Regelmäßige Bewässerung ist wichtig, besonders während der Fruchtbildung. Aber Achtung: Staunässe vermeiden!
* Nährstoffe: Erdbeeren sind hungrig! Regelmäßige Düngung mit einem speziellen Erdbeerdünger sorgt für eine reiche Ernte.
* Platz: Erdbeerpflanzen brauchen Platz zum Wachsen. Plant sie nicht zu eng nebeneinander.
Schritt-für-Schritt-Anleitung: Erdbeeren pflanzen und pflegen
Jetzt geht’s ans Eingemachte! Hier ist eine detaillierte Anleitung, wie ihr eure eigenen Erdbeeren pflanzt und pflegt:
1. Die richtige Sorte auswählen
Es gibt unzählige Erdbeersorten, und die Wahl der richtigen Sorte ist entscheidend für euren Erfolg. Hier sind einige beliebte Optionen:
* Einmaltragende Sorten: Diese Sorten tragen einmal im Jahr, meist im Juni. Sie sind ideal für alle, die eine große Ernte auf einmal möchten. Beliebte Sorten sind ‘Elsanta’ und ‘Senga Sengana’.
* Immergrüne Sorten: Diese Sorten tragen mehrmals im Jahr, von Frühling bis Herbst. Sie sind perfekt für alle, die über einen längeren Zeitraum frische Erdbeeren genießen möchten. Beliebte Sorten sind ‘Hummi Praline’ und ‘Ostara’.
* Klettererdbeeren: Diese Sorten können an Rankhilfen hochgeleitet werden und sind ideal für kleine Gärten oder Balkone.
Ich empfehle, mit einer Sorte zu beginnen, die in eurer Region gut gedeiht. Fragt am besten in einer Gärtnerei in eurer Nähe nach.
2. Den perfekten Standort finden
Wie bereits erwähnt, lieben Erdbeeren die Sonne. Sucht einen Standort in eurem Garten oder auf eurem Balkon, der mindestens 6-8 Stunden direkte Sonneneinstrahlung pro Tag erhält. Achtet auch darauf, dass der Standort windgeschützt ist, um die Pflanzen vor Beschädigungen zu schützen.
3. Den Boden vorbereiten
Ein gut vorbereiteter Boden ist das A und O für gesunde Erdbeerpflanzen. Hier sind die Schritte zur Bodenvorbereitung:
1. Boden lockern: Lockert den Boden gründlich auf, um die Drainage zu verbessern. Entfernt Steine, Wurzeln und Unkraut.
2. Kompost einarbeiten: Mischt reichlich Kompost in den Boden, um ihn mit Nährstoffen anzureichern und die Bodenstruktur zu verbessern.
3. pH-Wert prüfen: Überprüft den pH-Wert des Bodens mit einem Bodentestkit. Erdbeeren bevorzugen einen leicht sauren Boden (pH-Wert zwischen 5,5 und 6,5). Falls der pH-Wert zu hoch ist, könnt ihr ihn mit Schwefel senken.
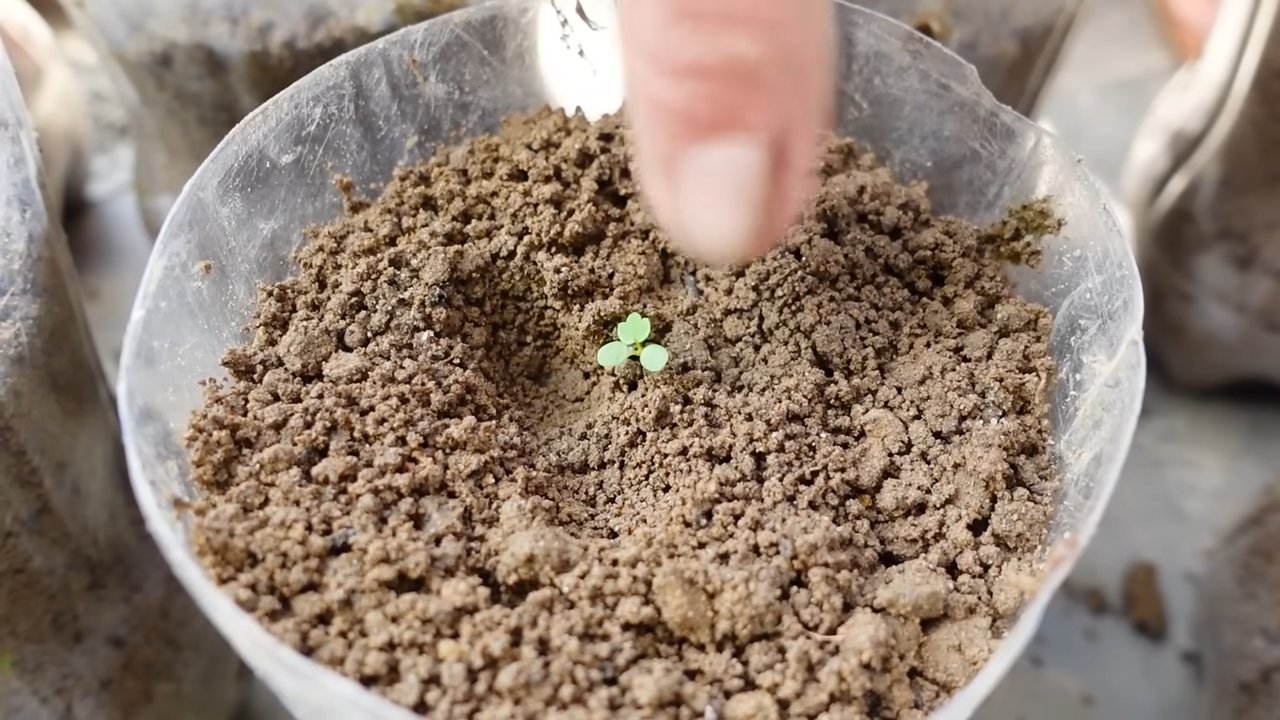
4. Erdbeerpflanzen setzen
Jetzt kommt der spannende Teil: das Pflanzen der Erdbeeren!
1. Pflanzen vorbereiten: Taucht die Wurzeln der Erdbeerpflanzen vor dem Pflanzen in Wasser, um sie zu hydratisieren.
2. Pflanzlöcher graben: Grabt Pflanzlöcher, die groß genug sind, um die Wurzeln der Pflanzen aufzunehmen. Der Abstand zwischen den Pflanzen sollte etwa 25-30 cm betragen.
3. Pflanzen einsetzen: Setzt die Erdbeerpflanzen in die Pflanzlöcher und achtet darauf, dass das Herz der Pflanze (der Punkt, an dem die Blätter aus der Wurzel kommen) knapp über der Bodenoberfläche liegt.
4. Boden andrücken: Drückt den Boden um die Pflanzen herum vorsichtig an.
5. Gießen: Gießt die Pflanzen gründlich an.
5. Erdbeeren pflegen: Gießen, Düngen, Mulchen
Nach dem Pflanzen ist die richtige Pflege entscheidend für eine reiche Ernte.
Gießen
Erdbeeren brauchen regelmäßige Bewässerung, besonders während der Fruchtbildung. Gießt die Pflanzen am besten früh morgens, damit die Blätter tagsüber abtrocknen können. Vermeidet Staunässe, da dies zu Wurzelfäule führen kann.
Düngen
Erdbeeren sind hungrig und brauchen regelmäßige Düngung, um optimal zu wachsen und zu fruchten. Verwendet einen speziellen Erdbeerdünger und befolgt die Anweisungen auf der Verpackung. Düngt die Pflanzen im Frühjahr vor der Blüte und nach der Ernte.
Mulchen
Mulchen ist eine tolle Möglichkeit, um den Boden feucht zu halten, Unkraut zu unterdrücken und die Erdbeeren vor Schmutz zu schützen. Verwendet Stroh, Holzhackschnitzel oder spezielle Mulchfolie.
Schutz vor Schädlingen und Krankheiten
Erdbeeren können von verschiedenen Schädlingen und Krankheiten befallen werden. Hier sind einige häufige Probleme und wie ihr sie bekämpfen könnt:
* Schnecken: Schnecken lieben Erdbeeren! Sammelt sie regelmäßig ab oder verwendet Schneckenkorn.
* Vögel: Vögel können eure Erdbeeren wegfressen. Schützt die Pflanzen mit einem Netz.
* Grauschimmel: Grauschimmel ist eine Pilzkrankheit, die zu faulen Früchten führen kann. Entfernt befallene Früchte sofort und sorgt für eine gute Belüftung der Pflanzen.
6. Die Ernte: Der Lohn der Mühe
Endlich ist es soweit: Die Erdbeeren sind reif und können geerntet werden!
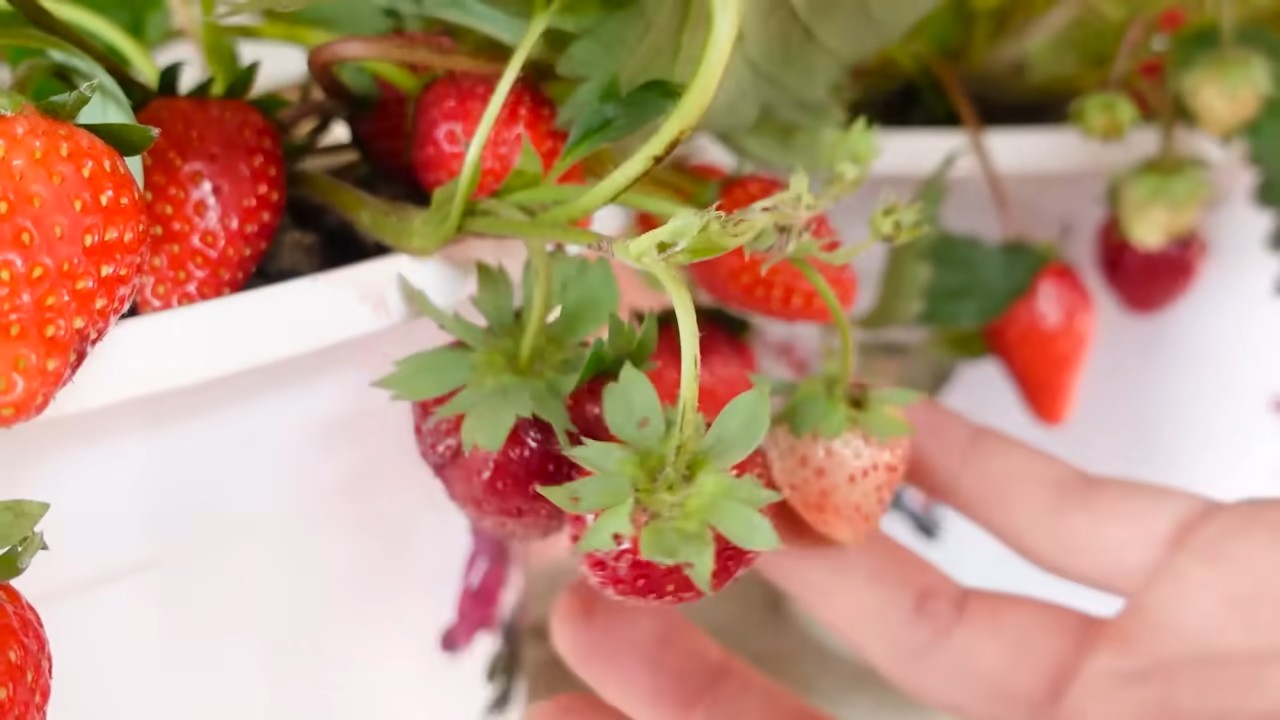
* Reife erkennen: Reife Erdbeeren sind leuchtend rot und lassen sich leicht vom Stiel lösen.
* Ernten: Pflückt die Erdbeeren vorsichtig, um die Pflanzen nicht zu beschädigen.
* Genießen: Genießt eure frischen Erdbeeren pur, im Kuchen, im Joghurt oder wie auch immer ihr sie am liebsten mögt!
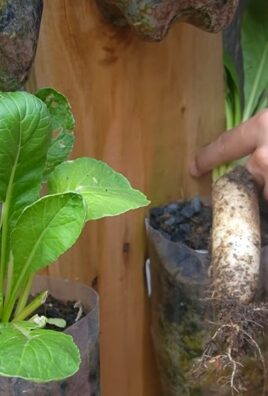
Erdbeeren im Topf anbauen: So geht’s
Kein Garten? Kein Problem! Erdbeeren lassen sich auch wunderbar im Topf auf dem Balkon oder der Fensterbank anbauen. Hier sind einige Tipps:
* Topfgröße: Wählt einen Topf mit einem Durchmesser von mindestens 20 cm.
* Erde: Verwendet spezielle Erdbeererde oder mischt Blumenerde mit Kompost.
* Drainage: Sorgt für eine gute Drainage, indem ihr eine Schicht Kies oder Blähton auf den Boden des Topfes legt.
* Standort: Stellt den Topf an einen sonnigen Standort.
* Pflege: Gießt und düngt die Erdbeeren im Topf regelmäßig.
Überwinterung: Erdbeeren für das nächste Jahr vorbereiten
Damit ihr auch im nächsten Jahr wieder frische Erdbeeren ernten könnt, ist es wichtig, die Pflanzen richtig zu überwintern.
* Zurückschneiden: Schneidet die Blätter der Erdbeerpflanzen im Herbst zurück.
* Abdecken: Deckt die Pflanzen mit Stroh oder Reisig ab, um sie vor Frost zu schützen.
* Gießen: Gießt die Pflanzen auch im Winter gelegentlich, besonders an frostfreien Tagen.
Ich hoffe, dieser Guide hat euch geholfen und inspiriert, eure eigenen Erdbeeren zu Hause anzubauen. Es ist ein lohnendes Projekt, das euch mit frischen, köstlichen Früchten belohnt. Viel Spaß beim Gärtnern!
Conclusion
So, there you have it! Growing strawberries at home, especially using our simple DIY trick, is not just a gardening project; it’s an investment in fresh, flavorful, and healthy eating. Forget those bland, store-bought berries that lack the vibrant taste of summer. With a little effort and our easy-to-follow guide, you can cultivate a thriving strawberry patch right in your backyard, balcony, or even on your windowsill.
Why is this DIY method a must-try? Because it simplifies the process, making it accessible to even the most novice gardeners. We’ve eliminated the intimidation factor, breaking down the steps into manageable tasks that anyone can accomplish. Plus, it’s incredibly rewarding to harvest your own sweet, juicy strawberries, knowing you nurtured them from tiny plants to bountiful producers.
But the benefits extend beyond just the taste. Growing your own strawberries is a sustainable practice, reducing your reliance on commercially grown produce and minimizing your carbon footprint. You’ll also have complete control over the growing process, ensuring your berries are free from harmful pesticides and chemicals. It’s a win-win for your health and the environment.
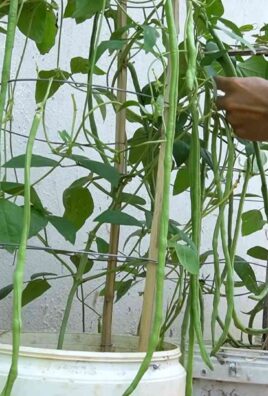
Looking for variations? Absolutely! Consider experimenting with different strawberry varieties to find your favorites. Some are sweeter, some are larger, and some are more disease-resistant. Try alpine strawberries for a delicate, wild flavor, or everbearing varieties for a continuous harvest throughout the season. You can also adapt our DIY trick to different container sizes and growing spaces. Vertical strawberry towers are a fantastic option for small balconies, while raised beds can provide ample space for a larger patch.
Don’t be afraid to get creative with your strawberry growing setup. Use recycled materials to build your containers, or add companion plants like basil or marigolds to deter pests and attract pollinators. The possibilities are endless!
We wholeheartedly encourage you to give this DIY strawberry growing trick a try. It’s a fun, educational, and delicious experience that the whole family can enjoy. Imagine the joy of picking fresh strawberries with your children, or serving a homemade strawberry pie made with berries you grew yourself. These are the moments that make life truly special.
And most importantly, we want to hear about your experience! Share your photos, tips, and stories with us in the comments below. Let us know what worked well for you, what challenges you faced, and any creative adaptations you made to our DIY method. Together, we can build a community of passionate strawberry growers and inspire others to embrace the joys of homegrown goodness. So go ahead, get your hands dirty, and start growing your own delicious strawberries today! You won’t regret it.
Frequently Asked Questions (FAQ)
What is the best time of year to plant strawberries?
The ideal time to plant strawberries depends on your climate and the type of strawberry you’re growing. Generally, early spring or late fall are the best times. In warmer climates, fall planting allows the plants to establish roots over the winter for a strong start in the spring. In colder climates, spring planting gives the plants enough time to establish before the first frost. For June-bearing strawberries, planting in early spring is recommended. Everbearing and day-neutral varieties can be planted in either spring or fall. Always check the specific recommendations for the variety you choose.
What kind of soil is best for growing strawberries?
Strawberries thrive in well-drained, slightly acidic soil with a pH between 5.5 and 6.5. The soil should be rich in organic matter to provide essential nutrients and retain moisture. Before planting, amend the soil with compost, aged manure, or other organic amendments to improve its fertility and drainage. Avoid heavy clay soils that can become waterlogged, as this can lead to root rot. If you have heavy clay soil, consider growing your strawberries in raised beds or containers with a well-draining potting mix.
How often should I water my strawberry plants?
Strawberries need consistent moisture, especially during fruit development. Water deeply and regularly, aiming to keep the soil consistently moist but not waterlogged. The frequency of watering will depend on the weather, soil type, and drainage. In hot, dry weather, you may need to water daily, while in cooler, wetter weather, you can water less frequently. Check the soil moisture regularly by sticking your finger into the soil. If the top inch feels dry, it’s time to water. Avoid overhead watering, as this can promote fungal diseases. Instead, use a soaker hose or drip irrigation to water at the base of the plants.
How much sunlight do strawberries need?
Strawberries need at least six to eight hours of direct sunlight per day to produce abundant fruit. Choose a planting location that receives full sun for optimal growth and yield. If you live in a hot climate, some afternoon shade can be beneficial to prevent the plants from overheating. Insufficient sunlight can result in smaller berries and reduced fruit production.
How do I fertilize my strawberry plants?
Strawberries benefit from regular fertilization to support healthy growth and fruit production. Use a balanced fertilizer specifically formulated for berries, following the instructions on the package. Apply fertilizer in early spring before the plants begin to actively grow, and again after the first harvest. Avoid over-fertilizing, as this can lead to excessive foliage growth at the expense of fruit production. Organic fertilizers, such as compost tea or fish emulsion, are also excellent options for feeding your strawberry plants.
How do I protect my strawberries from pests and diseases?
Strawberries are susceptible to various pests and diseases, including slugs, snails, aphids, spider mites, and fungal diseases like gray mold and powdery mildew. To protect your plants, practice good garden hygiene by removing dead leaves and debris regularly. Use organic pest control methods, such as handpicking pests, using insecticidal soap, or introducing beneficial insects like ladybugs. To prevent fungal diseases, ensure good air circulation around the plants and avoid overhead watering. Consider using a fungicide specifically formulated for strawberries if necessary. Netting can also be used to protect your berries from birds.
How do I propagate strawberry plants?
Strawberries can be easily propagated through runners, which are horizontal stems that grow from the mother plant and develop roots. To propagate strawberries, simply allow the runners to root in the soil or in small pots filled with potting mix. Once the runners have developed a strong root system, you can cut them from the mother plant and transplant them to a new location. This is a simple and effective way to expand your strawberry patch.
What are the different types of strawberries?
There are three main types of strawberries: June-bearing, everbearing, and day-neutral. June-bearing strawberries produce a large crop of fruit in a short period, typically in June. Everbearing strawberries produce two or three smaller crops of fruit throughout the season. Day-neutral strawberries produce fruit continuously throughout the growing season, regardless of day length. Choose the type of strawberry that best suits your climate and growing preferences.
How do I overwinter my strawberry plants?
In colder climates, strawberry plants need protection during the winter to survive. After the first frost, mulch the plants with a thick layer of straw or pine needles to insulate the roots and protect them from freezing temperatures. In very cold areas, you may also need to cover the plants with a row cover or tarp. Remove the mulch in early spring when the weather begins to warm up. In warmer climates, overwintering may not be necessary.
How long does it take for strawberry plants to produce fruit?
The time it takes for strawberry plants to produce fruit depends on the type of strawberry and the growing conditions. June-bearing strawberries typically produce fruit in their second year. Everbearing and day-neutral strawberries may produce a small crop in their first year, but will produce more abundantly in subsequent years. With proper care and attention, you can enjoy a bountiful harvest of fresh strawberries from your own garden.

Leave a Comment