
Growing Sage at Home doesn’t have to be a daunting task reserved for seasoned gardeners! Have you ever dreamed of snipping fresh, fragrant sage leaves right from your own backyard to elevate your culinary creations? Imagine the aroma filling your kitchen as you prepare a delicious sage-infused butter or a comforting sage and butternut squash soup, all thanks to your own green thumb. This DIY guide will unlock the secrets to successfully cultivating this versatile herb, even if you’re a complete beginner.
Sage, with its velvety leaves and earthy aroma, boasts a rich history. For centuries, it has been revered not only for its culinary uses but also for its medicinal properties. Ancient Romans considered sage a sacred herb, believing it could grant immortality. Its name, derived from the Latin “salvere,” meaning “to heal,” speaks volumes about its historical significance. Today, we may not be seeking immortality, but we can certainly appreciate the health benefits and delightful flavor that growing sage at home provides.
Why should you embark on this DIY adventure? Well, store-bought herbs can be expensive and often lack the vibrant flavor of freshly grown ones. Plus, there’s an undeniable satisfaction in nurturing a plant from seed to harvest. This guide will provide you with simple, effective tricks and hacks to ensure your sage thrives, regardless of your gardening experience or space limitations. I’m excited to share my knowledge and help you create your own thriving sage patch!
Growing Sage at Home: Your Comprehensive DIY Guide
Hello garden friends! I love using fresh herbs directly from my garden, and sage is no exception. Its aromatic scent and versatile taste make it a must-have in my kitchen. And the best part? Sage is super easy to grow at home! In this article, I’ll show you step-by-step how to create your own sage garden, whether you have a large yard or just a small balcony.
Why Grow Sage Yourself?
Before we get started, let me briefly tell you why I’m so enthusiastic about growing my own sage:
- Freshness and Flavor: Nothing beats the taste of freshly harvested sage. It is much more intense and aromatic than dried sage from the supermarket.
- Cost-Effectiveness: Buying sage at the store can be expensive, especially if you use it regularly. With your own sage garden, you’ll save money in the long run.
- Sustainability: you reduce your ecological footprint by avoiding the transport of herbs from distant countries.
- Therapeutic Effects: Sage has many health benefits. It has anti-inflammatory and antibacterial properties and can help with sore throats.
- Simplicity: Sage is a robust plant that requires little care. Even beginners can grow it without any problems.
Choosing the Right Sage Variety
There are many different sage varieties, but the most common and easiest to grow is Common Sage (Salvia officinalis). It has gray-green leaves and a strong, savory flavor. However, there are other interesting varieties, such as:
- Purple Sage (Salvia officinalis ‘Purpurascens’): With its purple leaves, it is not only delicious but also a real eye-catcher.
- Golden Sage (Salvia officinalis ‘Aurea’): This variety has golden-yellow leaves and a milder taste.
- Pineapple Sage (Salvia elegans): It has a fruity pineapple scent and flavor and is excellent for desserts and teas.
Choose the variety that you like best and that suits your culinary preferences.
Growing Sage: A Step-by-Step Guide
Here is a detailed guide on how to create your own sage garden:
1. Location Selection and Preparation
- Sunshine: Sage loves the sun! Choose a location that gets at least 6 hours of sunlight per day.
- Soil: Sage prefers well-draining soil. It does not tolerate waterlogging well. If your soil is very clay-heavy, you can improve it with sand or compost.
- Preparation: Dig over the soil and remove weeds and stones. Loosen the soil well so that the roots can spread easily.
2. Sowing or Planting Sage
You have two options for growing sage: from seed or from young plants.
- Sowing:
- Timing: Sowing can be done indoors in the spring (March/April) or directly outdoors from May.
- Sowing containers: Use seed trays or small pots.
- Seed-starting mix: Fill the containers with seed-starting mix.
- Sowing: Sow the seeds thinly and cover them lightly with soil.
- Watering: Moisten the soil gently with a spray bottle.
- Location: Place the containers in a bright and warm place.
- Germination: Germination usually takes 1-3 weeks.
- Pricking out: As soon as the seedlings are large enough (approx. 5 cm / 2 inches), you can transplant them into larger pots.
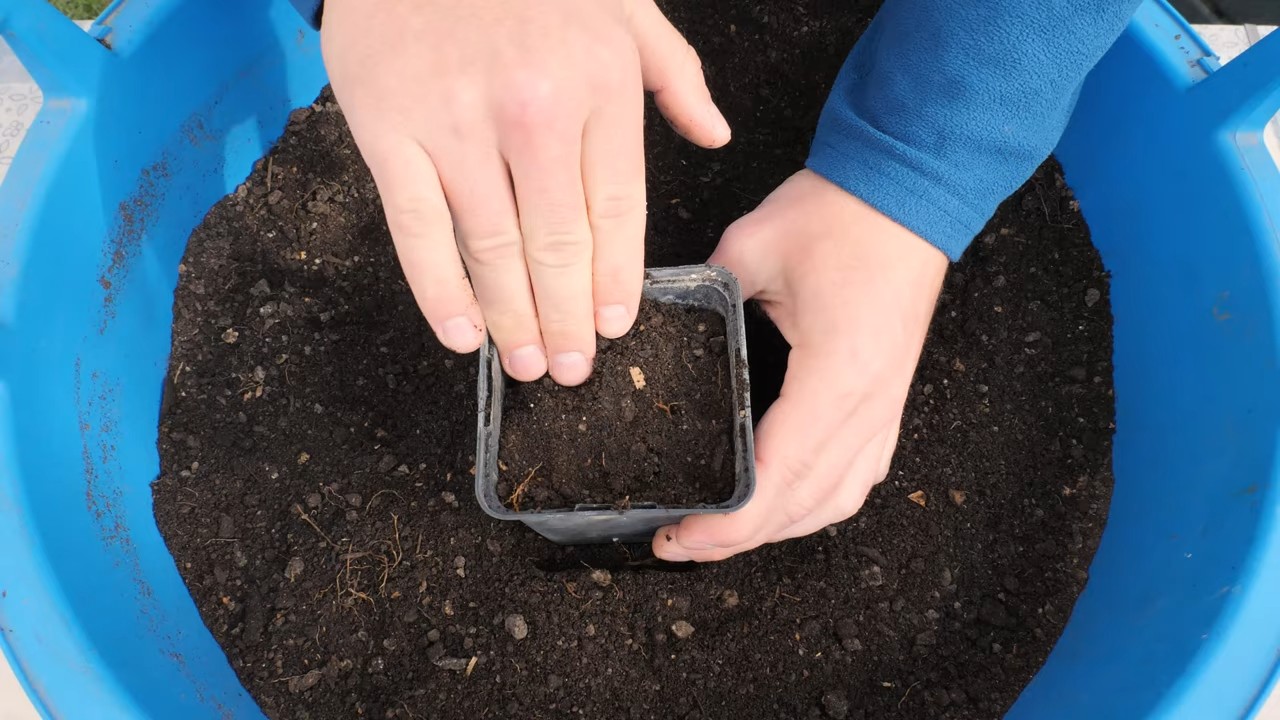
- Planting Young Plants:
- Timing: The best time to plant young plants is in the spring or fall.
- Planting hole: Dig a hole that is twice the size of the plant’s root ball.
- Planting: Place the plant in the hole and fill it with soil.
- Watering: Water the plant thoroughly.
- Spacing: Ensure a distance of about 30-40 cm (12-16 inches) between plants.
3. Caring for the Sage Garden
- Watering: Water the sage regularly, but avoid waterlogging. Let the soil dry out slightly between waterings.
- Fertilizing: Sage does not need much fertilizer. A light feeding in the spring with compost or organic fertilizer is sufficient.
- Pruning: Prune the sage regularly to keep it bushy and to encourage flowering. Also, remove dead or diseased leaves.
- Overwintering: Sage is hardy, but in cold regions, it can be a good idea to cover it with brushwood or leaves. Plants kept in pots should be overwintered in a frost-free location.
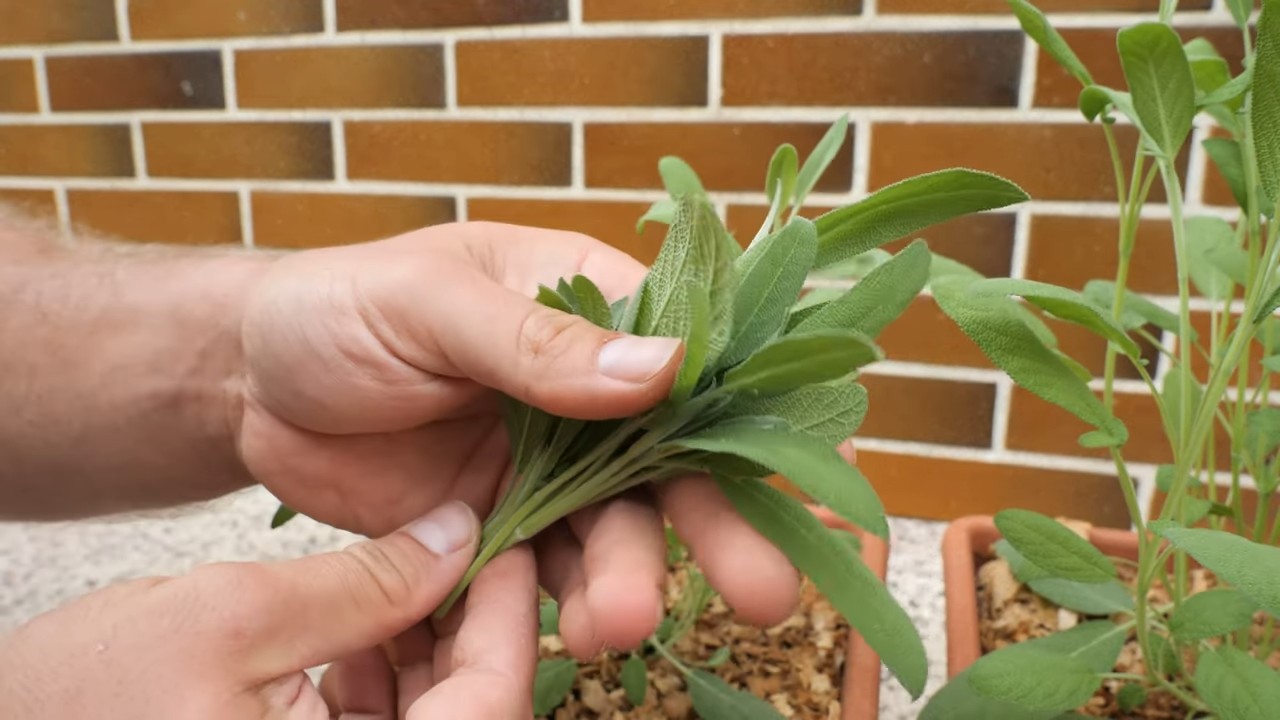
4. Harvesting the Sage
- Timing: You can harvest sage all year round, but the best time is just before flowering.
- Harvesting technique: Cut the leaves with scissors or a knife. You can harvest individual leaves or entire sprigs.
- Use: Use the sage fresh or dry it for later use.
Growing Sage in a Pot
If you don’t have a garden, you can also easily grow sage in a pot.
- Pot size: Choose a pot with a diameter of at least 20 cm (8 inches).
- Soil: Use a high-quality herb soil.
- Drainage: Make sure the pot has drainage holes so water can run off.
- Location: Place the pot in a sunny location.
- Care: Water the sage regularly and fertilize it occasionally.
Common Problems and Solutions
Even when growing sage, problems can occur. Here are some common problems and how you can solve them:
- Yellow leaves: Yellow leaves can be a sign of overwatering or a nutrient deficiency. Check your watering and fertilize the sage if necessary.
- Powdery mildew: Powdery mildew is a fungal disease that appears as a white coating on the leaves. Remove affected leaves and ensure good ventilation.
- Pests: Sage is rarely attacked by pests. If you do find pests, you can combat them with natural methods.
Drying and Preserving Sage
To preserve sage for the winter, you can dry it.
- Drying: Tie the sage sprigs into small bundles and hang them upside down in a dry, dark, and well-ventilated place. Drying usually takes 1-2 weeks.
- Storage: Store the dried sage in an airtight container in a dark and cool place.
Sage in the Kitchen
Sage is a versatile herb that can be used in many dishes.
Soups and stews: Sage adds a savory note to soups and stews.
Meat dishes: Sage pairs excellently with meat dishes, especially poultry, pork, and lamb.
Pasta: Sage is a classic in Italian cuisine and is often tossed in butter and served over pasta.
Conclusion
So, there you have it! Growing sage at home isn’t just a whimsical gardening project; it’s a practical, aromatic, and deeply rewarding endeavor. We’ve walked through the simple steps, from selecting the right variety to harvesting your fragrant bounty. But why is this DIY trick a must-try?
Firstly, consider the unparalleled freshness. Store-bought sage, while convenient, simply can’t compete with the vibrant flavor and potent aroma of freshly picked leaves. Imagine the difference in your culinary creations – the depth of flavor infused into your roasted chicken, the herbaceous notes elevating your pasta dishes, or the comforting warmth added to your winter soups. This isn’t just about having sage; it’s about having *the best* sage, readily available at your fingertips.
Secondly, think about the cost savings. Over time, those small packets of dried sage from the grocery store add up. By investing a little time and effort upfront, you can establish a thriving sage plant that will provide you with a continuous supply of this versatile herb for years to come. It’s a sustainable and economical choice that benefits both your wallet and the environment.
Thirdly, growing sage at home connects you to nature in a tangible way. It’s a mindful activity that allows you to slow down, appreciate the simple beauty of the natural world, and nurture something from seed (or cutting) to harvest. In our increasingly fast-paced and digital world, this connection is more important than ever.
But the benefits don’t stop there! Feel free to experiment with different varieties of sage. Try growing purple sage for its ornamental value and slightly milder flavor, or perhaps pineapple sage for its unique fruity aroma and edible flowers. You can also explore different methods of propagation, such as taking cuttings from existing plants to expand your sage collection. Consider companion planting sage with rosemary and thyme for a Mediterranean herb garden.
Don’t be afraid to get creative with your harvest, too. Beyond culinary uses, sage can be dried and used in potpourri, infused into oils and vinegars, or even used to create homemade cleaning products. The possibilities are endless!
We wholeheartedly encourage you to give growing sage at home a try. It’s a simple, satisfying, and incredibly rewarding experience that will transform your kitchen, your garden, and your connection to the natural world. Once you’ve experienced the joy of harvesting your own fresh sage, you’ll never go back to store-bought again.
So, grab your seeds or cuttings, find a sunny spot, and get ready to embark on your sage-growing adventure. And most importantly, don’t forget to share your experiences with us! We’d love to hear about your successes, your challenges, and your favorite ways to use your homegrown sage. Share your photos and stories on social media using [Your Hashtag Here] and let’s inspire others to discover the joys of growing their own herbs. Happy gardening!
Frequently Asked Questions (FAQ)
What is the best time of year to plant sage?
The best time to plant sage depends on how you are starting it. If you are starting from seeds indoors, begin 6-8 weeks before the last expected frost. This allows the seedlings to develop a strong root system before being transplanted outdoors. If you are purchasing established plants or taking cuttings, you can plant them outdoors in the spring after the last frost has passed, or in the early fall to allow them to establish before winter. Spring planting is generally preferred, as it gives the plants the longest growing season.
How much sunlight does sage need?
Sage thrives in full sun, requiring at least 6-8 hours of direct sunlight per day. Insufficient sunlight can lead to leggy growth, reduced flavor intensity, and increased susceptibility to diseases. If you are growing sage indoors, place it near a south-facing window or use grow lights to supplement natural sunlight.
What kind of soil is best for growing sage?
Sage prefers well-draining soil with a slightly alkaline pH (around 6.5-7.0). Heavy clay soils can retain too much moisture, leading to root rot. Amend clay soils with compost, perlite, or sand to improve drainage. A good potting mix for containers should also be well-draining and contain organic matter.
How often should I water my sage plant?
Water sage deeply but infrequently, allowing the soil to dry out slightly between waterings. Overwatering is a common mistake that can lead to root rot. Check the soil moisture by sticking your finger about an inch deep. If the soil feels dry, it’s time to water. During hot, dry weather, you may need to water more frequently. Reduce watering during the winter months when the plant is dormant.
How do I harvest sage?
You can begin harvesting sage leaves once the plant is established, typically after a few months of growth. Harvest leaves in the morning after the dew has dried, as this is when the essential oils are most concentrated. Use sharp scissors or pruning shears to cut the stems just above a leaf node. Avoid removing more than one-third of the plant at a time, as this can stress the plant and reduce its productivity. Regular harvesting encourages bushier growth.
How do I dry sage?
There are several ways to dry sage. One common method is to tie small bundles of stems together and hang them upside down in a cool, dry, and well-ventilated place. Another method is to spread the leaves in a single layer on a screen or baking sheet and allow them to air dry. You can also use a dehydrator set to a low temperature. Once the leaves are completely dry and brittle, store them in an airtight container in a cool, dark place.
What are some common pests and diseases that affect sage?
Sage is generally resistant to pests and diseases, but it can be susceptible to aphids, spider mites, and powdery mildew. Aphids and spider mites can be controlled with insecticidal soap or neem oil. Powdery mildew is a fungal disease that can be prevented by ensuring good air circulation and avoiding overwatering. If powdery mildew does occur, treat it with a fungicide.
Can I grow sage in a container?
Yes, sage grows well in containers. Choose a pot that is at least 12 inches in diameter to allow for adequate root growth. Use a well-draining potting mix and ensure that the container has drainage holes. Place the container in a sunny location and water regularly. Container-grown sage may need to be fertilized more frequently than plants grown in the ground.
How do I propagate sage?
Sage can be propagated from seeds, cuttings, or layering. Taking cuttings is the easiest and most common method. In the spring or summer, take 4-6 inch cuttings from new growth. Remove the lower leaves and dip the cut end in rooting hormone. Plant the cuttings in a well-draining potting mix and keep them moist until they root, which usually takes a few weeks.
Is sage a perennial?
Yes, sage is a perennial herb, meaning it will live for several years. However, it may not be hardy in all climates. In colder regions, sage may need to be protected from frost or grown in a container that can be brought indoors during the winter. Prune sage in the spring to remove any dead or damaged growth and to encourage new growth.
Leave a Comment