
Growing Plums in your kitchen garden might seem like a far-fetched dream, especially if you’re new to home gardening. But trust me, with a few clever tricks and a little DIY spirit, you can be harvesting juicy, homegrown plums sooner than you think! Forget those bland, store-bought plums – imagine biting into a sun-ripened plum, bursting with flavor, straight from your own backyard.
Plums have a rich history, cultivated for centuries across various cultures. From ancient Rome, where they were a prized delicacy, to traditional Chinese medicine, where they were valued for their health benefits, plums have always held a special place. Today, the joy of growing your own food, including plums, is experiencing a resurgence. More and more people are turning to home gardening, not just for the fresh produce, but also for the therapeutic benefits and the satisfaction of nurturing something from seed to fruit.
Why do you need these DIY tricks for growing plums in your kitchen garden? Well, let’s face it, plums can be a bit finicky. They require specific conditions and care to thrive. This article is your guide to overcoming those challenges. I’ll share simple, effective DIY hacks to help you choose the right plum variety, prepare the soil, protect your trees from pests and diseases, and ultimately, enjoy a bountiful harvest. So, grab your gardening gloves, and let’s get started on this exciting journey of growing your own delicious plums!
Growing Plums in Your Own Garden: A DIY Guide
Hello garden friends! Have you ever dreamed of picking juicy, sweet plums directly from your own tree? I can tell you, it’s an incredibly satisfying feeling! And the best part: it’s not as difficult as you might think. In this article, I’ll show you how to grow your own plums in the garden, from choosing the right variety to harvesting the delicious fruits. Let’s get started!
Choosing the Right Plum Variety
Before we begin, it’s important to choose the right plum variety for your garden. Here are some important points you should consider:
- Climate: Not all plum varieties are suitable for every climate. Find out which varieties thrive in your region. Some varieties are more winter-hardy than others.
- Self-fertility: Some plum varieties are self-fertile, meaning they do not need a second tree for pollination. Other varieties are not self-fertile and require a suitable pollinator tree nearby. If you only have space for one tree, be sure to choose a self-fertile variety.
- Taste: Plums come in many different flavors, from sweet to tart. Think about what kind of plums you like to eat the most.
- Size: Plum trees can get quite large. Make sure to choose a variety that is suitable for the size of your garden. There are also dwarf varieties that are well-suited for smaller gardens.
- Disease Resistance: Some plum varieties are more resistant to certain diseases than others. Find out which diseases are common in your region and choose a resistant variety.
Some popular plum varieties are:
- ‘Hauszwetsche’ (German Prune): A robust, self-fertile variety with sweet-tart fruits.
- ‘Mirabelle de Nancy’: A small, yellow plum with a very sweet taste. Not self-fertile, requires a pollinator.
- ‘Reine Claude d’Oullins’ (Green Gage): A self-fertile variety with yellow-green fruits and a honey-sweet taste.
- ‘Valor’: A large, blue plum with good flavor. Self-fertile.
The Right Location and Soil Preparation
The location is crucial for the success of your plum trees. Here are some tips:
- Sun: Plum trees need at least 6 hours of sun per day. Choose a location that gets sun all day long.
- Soil: Plum trees prefer well-draining, fertile soil. Avoid heavy, clay soils that are prone to waterlogging.
- Wind Protection: Plum trees can be damaged by strong winds. Choose a location that is somewhat sheltered from the wind, e.g., near a hedge or a fence.
- Space: Plum trees need enough space to grow. Make sure the tree has enough room to spread out without hindering other plants.
Preparing the soil:
- Test the soil: Before you plant, you should test the soil to determine the pH and nutrient content. Plum trees prefer a pH between 6.0 and 7.0.
- Improve the soil: If the soil is too heavy or too sandy, you should improve it with compost or other organic material. This improves drainage and nutrient content.
- Dig a hole: Dig a hole that is twice as wide and as deep as the tree’s root ball.
- Loosen the soil: Loosen the soil at the bottom of the hole to make it easier for the roots to establish.
Planting a Plum Tree: Step-by-Step Guide
Now for the exciting part: planting the plum tree! Here is a detailed guide:
- Prepare the tree: Carefully remove the tree from the pot or container. If the roots are heavily root-bound, gently loosen them.
- Place the tree: Set the tree in the hole so that the top of the root ball is level with the surrounding soil.
- Fill the hole: Fill the hole with the excavated soil. Press the soil down lightly to avoid air pockets.
- Water: Water the tree thoroughly to moisten the soil.
- Mulch: Apply a layer of mulch around the tree to retain moisture and suppress weeds. Make sure the mulch is not directly touching the trunk.
- Stake: Young plum trees can be damaged by wind. Support the tree with a stake until it is strong enough to stand on its own.
Caring for a Plum Tree: Watering, Fertilizing, Pruning
After planting, your plum tree needs regular care to grow healthy and bear fruit.
Watering
- Water regularly: Water the tree regularly, especially during dry periods. Make sure the soil is moist, but not wet.
- Water deeply: Water the tree deeply so that the water reaches the roots.
Fertilizing
- Fertilize in spring: Fertilize the tree in the spring with a balanced fertilizer.
- Organic fertilizer: You can also use organic fertilizer such as compost or manure.
Pruning
Pruning is an important part of caring for plum trees. It helps to maintain the shape of the tree, promote fruit production, and prevent diseases.
- Winter pruning: The best time to prune is in late winter or early spring before the buds break.
- Remove dead and diseased branches: First, remove all dead, diseased, or damaged branches.
- Light and air: Prune branches that cross or grow inward to allow light and air into the canopy.
- Promote fruiting branches: Prune the branches to encourage good branching and the formation of many fruiting branches.
- Shape young trees: Shape young trees by selecting the main branches and guiding them in the desired direction.
Protection from Pests and Diseases
Plum trees can be affected by various pests and diseases. Here are some common problems and how to combat them:
Scab: Scab is a fungal disease that causes spots on the leaves and fruits. Treat the tree with a fungicide.
Plum fruit moth: The larvae of the plum fruit moth burrow into the fruit, causing wormy plums. You can use pheromone traps to attract and catch the males, or use insecticides.
Aphids: Aphids suck the sap from the leaves and can lead to growth problems. You can spray them off with a jet of water or use insecticides.
Brown rot (Monilia): Monilia is a fungal disease that can lead to fruit rot and twig dieback. Remove affected fruits and twigs and treat the tree with a fungicide.
Conclusion
So, there you have it! Transforming your kitchen scraps into a thriving plum tree is not just a fun experiment; it’s a rewarding journey towards sustainable gardening and, eventually, delicious, homegrown plums. This DIY trick, while requiring patience and care, offers a unique opportunity to connect with nature and witness the miracle of life unfold right in your own backyard. Forget the expensive nursery saplings – with a little effort and our guide, you can cultivate your very own plum tree from a simple pit.
The beauty of this method lies in its simplicity and accessibility. You don’t need specialized equipment or a green thumb of expert proportions. Just a few basic supplies, a sunny spot, and a willingness to nurture your little seedling. Imagine the satisfaction of harvesting your first plump, juicy plum, knowing that it all started with a pit you were about to discard. That’s the magic of this DIY project.
But don’t stop there! Experiment with different varieties of plums. Try different soil compositions to see what works best in your climate. Consider grafting your seedling onto a more established rootstock for faster fruit production. The possibilities are endless! This is your chance to become a plum-growing pioneer in your own garden.
We understand that growing plums from pits can seem daunting at first. There will be challenges, setbacks, and moments of doubt. But remember, every gardener learns through trial and error. Don’t be afraid to make mistakes. Embrace the learning process and celebrate every small victory along the way.
This DIY trick is more than just a way to grow plums; it’s a way to reduce waste, connect with nature, and cultivate a deeper appreciation for the food we eat. It’s a testament to the power of resourcefulness and the potential that lies hidden within the simplest of things.
We urge you to give this DIY plum-growing method a try. Start with a few pits, follow our instructions carefully, and watch the magic happen. And most importantly, share your experience with us! We’d love to hear your stories, see your photos, and learn from your successes and challenges. Let’s build a community of DIY plum growers and spread the joy of homegrown fruit far and wide. Share your journey on social media using #DIYPlumTree and inspire others to embark on this rewarding adventure. Let’s all enjoy the fruits (literally!) of our labor.
Frequently Asked Questions (FAQ)
Q: How long does it take to grow a plum tree from a pit?
A: Growing a plum tree from a pit is a long-term project. It can take anywhere from 3 to 5 years, or even longer, for the tree to mature and produce fruit. The exact timeframe depends on several factors, including the plum variety, climate, soil conditions, and the care you provide. Be patient and consistent with your efforts, and you’ll eventually be rewarded with delicious, homegrown plums. Remember that grafting onto an established rootstock can significantly reduce this timeframe.
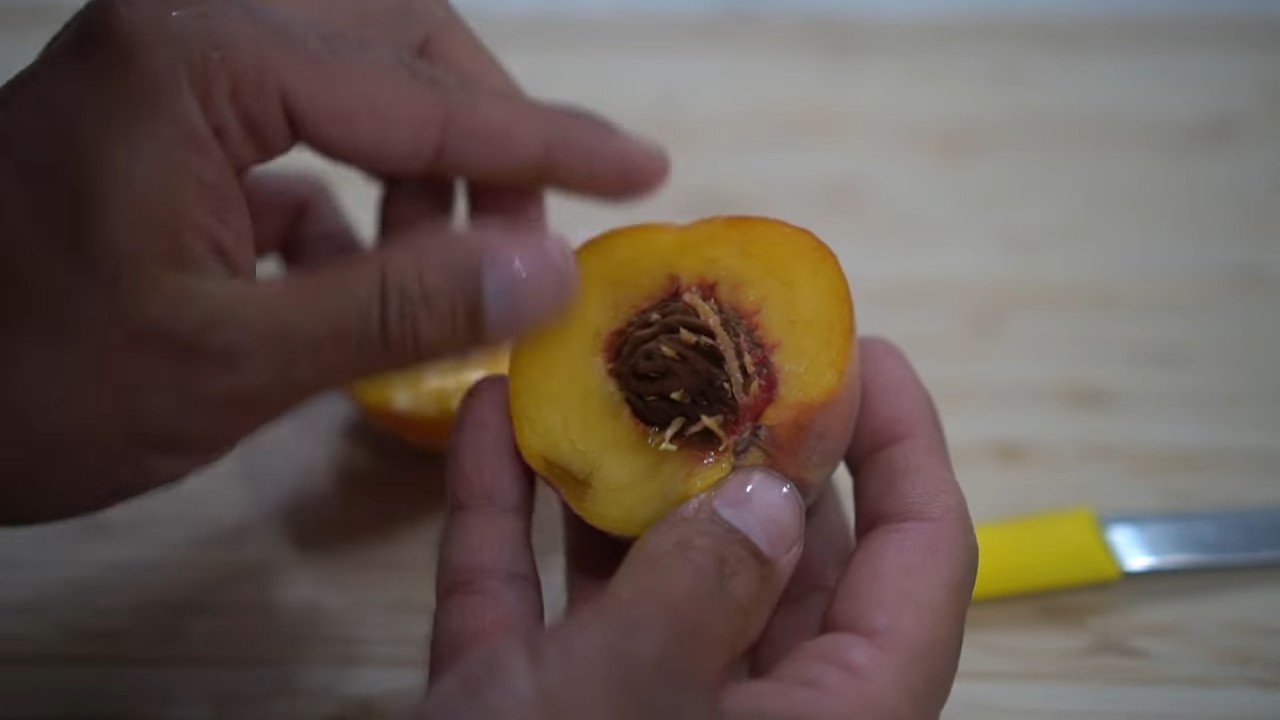
Q: What kind of plum pit should I use?
A: Ideally, you should use pits from plums that are locally grown and well-suited to your climate. This increases the chances of the resulting tree being able to thrive in your area. Choose pits from ripe, healthy plums. Avoid using pits from plums that show signs of disease or damage. If you’re unsure about the variety of plum, ask your local farmers market or nursery for recommendations.
Q: How do I stratify the plum pits?
A: Stratification is a crucial step in the process. It involves exposing the plum pits to cold, moist conditions to break their dormancy. To stratify, clean the pits thoroughly and place them in a container filled with moist (not wet) peat moss, vermiculite, or sand. Seal the container in a plastic bag and store it in the refrigerator (not the freezer) for at least 60-90 days. Check the moisture level regularly and add water if needed.
Q: What kind of soil should I use for planting the plum seedling?
A: Plum trees thrive in well-draining soil that is rich in organic matter. A good soil mix would include equal parts of garden soil, compost, and sand or perlite. This combination provides good drainage, aeration, and nutrient retention. Avoid using heavy clay soil, as it can become waterlogged and suffocate the roots.
Q: How much sunlight does a plum tree need?
A: Plum trees need at least 6-8 hours of direct sunlight per day to thrive. Choose a planting location that receives plenty of sunlight throughout the day. If you’re growing the seedling indoors, place it near a sunny window or use a grow light.
Q: How often should I water the plum seedling?
A: Water the plum seedling regularly, especially during dry periods. Keep the soil consistently moist, but not waterlogged. Water deeply and less frequently, rather than shallowly and more often. Check the soil moisture level regularly and adjust your watering schedule accordingly.
Q: Do I need to fertilize the plum tree?
A: Yes, plum trees benefit from regular fertilization. Use a balanced fertilizer that is specifically formulated for fruit trees. Follow the instructions on the fertilizer package carefully. Fertilize in the spring, before the tree begins to bloom. Avoid over-fertilizing, as this can damage the tree.
Q: How do I protect the plum tree from pests and diseases?
A: Plum trees are susceptible to various pests and diseases. Monitor your tree regularly for signs of infestation or disease. Use organic pest control methods, such as insecticidal soap or neem oil, to control pests. Prune the tree regularly to improve air circulation and prevent fungal diseases. If you suspect a serious disease, consult with a local arborist or agricultural extension agent.
Q: Can I grow a plum tree in a container?
A: Yes, you can grow a plum tree in a container, but you’ll need to choose a dwarf variety that is specifically bred for container growing. Use a large container with good drainage and a well-draining potting mix. Water and fertilize regularly, and prune the tree to maintain its shape and size. Container-grown plum trees may require more frequent watering and fertilization than those grown in the ground.
Q: My plum tree is not producing fruit. What could be the reason?
A: There are several reasons why your plum tree might not be producing fruit. It could be too young, not receiving enough sunlight, not being properly pollinated, or suffering from a nutrient deficiency. Ensure that your tree is at least 3-5 years old, receiving at least 6-8 hours of direct sunlight per day, and is properly pollinated (either by another plum tree or by hand). Fertilize the tree regularly with a balanced fertilizer. If you’re still having problems, consult with a local arborist or agricultural extension agent.
Leave a Comment