
Growing Peppers at Home can seem daunting, especially if you’re new to gardening. But trust me, there’s nothing quite as satisfying as biting into a juicy, homegrown pepper, bursting with flavor you just can’t find in the grocery store! For centuries, peppers have been cultivated across the globe, from their origins in South America, where they were prized by ancient civilizations like the Incas and Aztecs, to becoming a staple in cuisines worldwide.
Have you ever wondered how to get those vibrant, plump peppers you see in magazines? Or maybe you’ve tried growing them before, only to be met with disappointment – small yields, bland taste, or even plant diseases. I’ve been there! That’s why I’m so excited to share my favorite DIY tricks and hacks that will transform your pepper-growing game.
This isn’t just about having a pretty garden; it’s about having access to fresh, healthy food right outside your door. Plus, growing peppers at home is a fantastic way to reduce your carbon footprint and connect with nature. In this article, I’ll walk you through everything you need to know, from choosing the right varieties to troubleshooting common problems. Get ready to unleash your inner gardener and enjoy a bountiful harvest of delicious peppers!
Growing Peppers at Home: From Seed to Salsa!
Hey there, fellow gardening enthusiasts! I’m so excited to share my tried-and-true method for growing peppers at home. Whether you’re dreaming of spicy jalapeños, sweet bell peppers, or something a little more exotic, this guide will walk you through every step, from starting seeds indoors to harvesting a bountiful crop. Let’s get our hands dirty!
What You’ll Need
Before we dive in, let’s gather our supplies. This will make the whole process smoother and more enjoyable.
* **Pepper Seeds:** Choose your favorite varieties! Consider your climate and how much space you have.
* **Seed Starting Trays or Pots:** These should have drainage holes.
* **Seed Starting Mix:** This is a light, sterile mix that’s perfect for delicate seedlings.
* **Grow Lights (Optional but Recommended):** These provide consistent light, especially important if you don’t have a sunny windowsill.
* **Heat Mat (Optional but Recommended):** Peppers love warmth, and a heat mat will speed up germination.
* **Small Watering Can or Spray Bottle:** For gentle watering.
* **Plant Labels and a Permanent Marker:** To keep track of your pepper varieties.
* **Potting Soil:** A good quality potting mix for transplanting.
* **Larger Pots or Garden Space:** Depending on where you plan to grow your peppers.
* **Fertilizer:** A balanced fertilizer or one specifically formulated for peppers.
* **Gardening Gloves:** To protect your hands.
* **Trowel or Small Shovel:** For transplanting.
* **Stakes or Cages (Optional):** To support taller pepper plants.
* **Insecticidal Soap or Neem Oil (Optional):** For pest control.
Starting Your Pepper Seeds Indoors
This is where the magic begins! Starting your pepper seeds indoors gives them a head start, especially if you live in a cooler climate.
1. **Prepare Your Seed Starting Trays or Pots:** Fill your trays or pots with seed starting mix. Gently tap them to settle the mix, but don’t pack it down too tightly.
2. **Sow the Seeds:** Make a small indentation (about 1/4 inch deep) in the center of each cell or pot. Place 2-3 pepper seeds in each indentation. This increases the chances of at least one seed germinating.
3. Cover the Seeds: Lightly cover the seeds with more seed starting mix.
4. **Water Gently:** Use a watering can or spray bottle to gently moisten the soil. Avoid overwatering, which can lead to damping off (a fungal disease that kills seedlings).
5. **Provide Warmth:** Place your seed starting trays or pots on a heat mat, if using. Peppers germinate best at temperatures between 75-85°F (24-29°C).
6. **Provide Light:** Place your trays or pots under grow lights, or in a very sunny windowsill. If using grow lights, keep them a few inches above the soil surface and adjust as the seedlings grow. Aim for 14-16 hours of light per day.
7. **Maintain Moisture:** Keep the soil consistently moist, but not soggy. Check the moisture level daily and water as needed.
8. **Be Patient:** Pepper seeds can take anywhere from 7 to 21 days to germinate, depending on the variety and temperature.
9. **Thin Seedlings (If Necessary):** Once the seedlings have emerged and have a couple of sets of true leaves (the leaves that look like miniature pepper leaves), thin them out by snipping off the weaker seedlings at the soil line with scissors. Leave only the strongest seedling in each cell or pot.
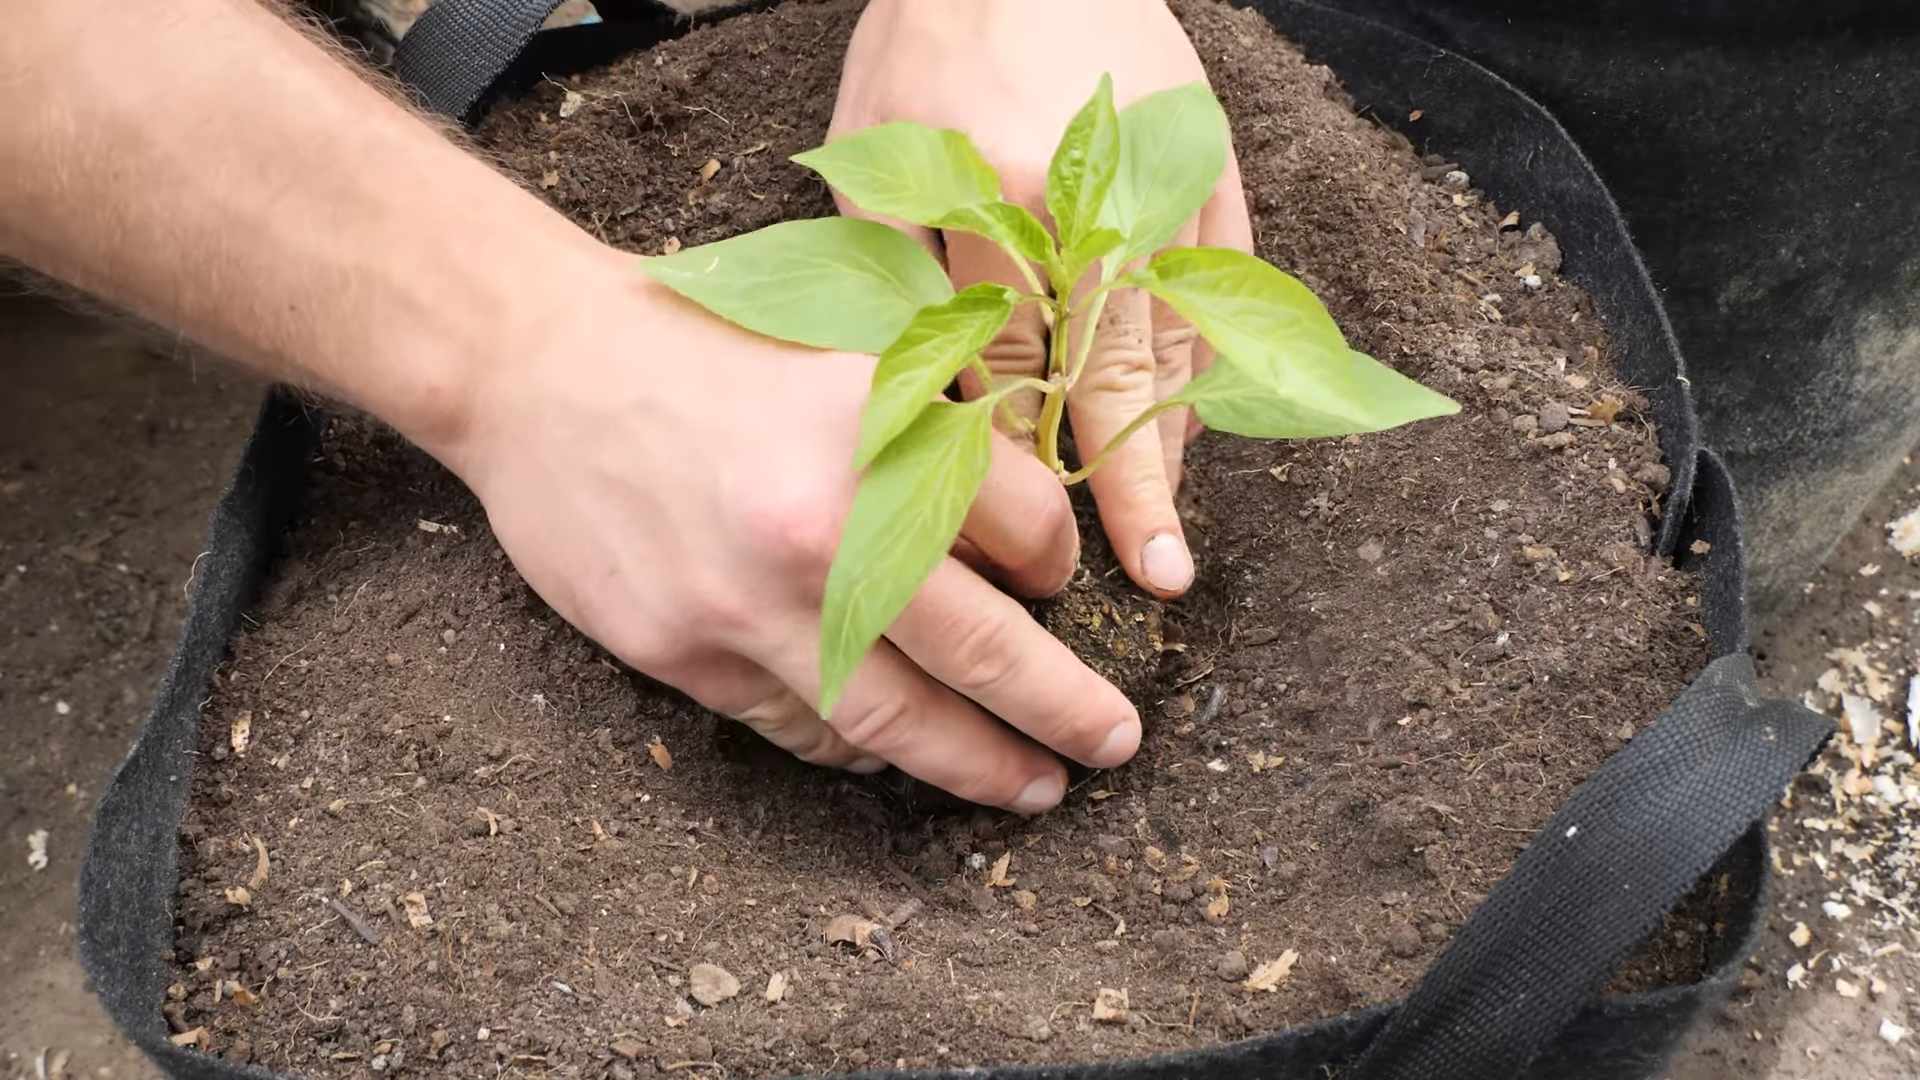
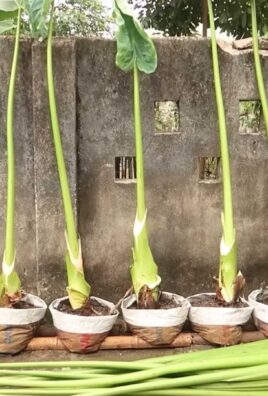
Transplanting Your Pepper Seedlings
Once your seedlings are strong enough, it’s time to transplant them into larger pots or directly into your garden.
1. **Harden Off Your Seedlings:** This is a crucial step to acclimate your seedlings to outdoor conditions. About a week before you plan to transplant them, start taking them outside for a few hours each day. Gradually increase the amount of time they spend outdoors, and protect them from direct sunlight and strong winds.
2. **Choose a Sunny Location:** Peppers need at least 6-8 hours of sunlight per day.
3. **Prepare the Soil:** If you’re planting in pots, fill them with a good quality potting mix. If you’re planting in the garden, amend the soil with compost or other organic matter to improve drainage and fertility.
4. **Dig Holes:** Dig holes that are slightly larger than the root balls of your seedlings. Space the holes about 18-24 inches apart, depending on the variety of pepper.
5. **Carefully Remove Seedlings:** Gently remove the seedlings from their trays or pots, being careful not to damage the roots.
6. **Plant the Seedlings:** Place the seedlings in the holes and backfill with soil. Gently firm the soil around the base of the plants.
7. **Water Thoroughly:** Water the newly transplanted seedlings thoroughly.
8. **Add Support (Optional):** If you’re growing taller pepper varieties, consider adding stakes or cages to support the plants as they grow.
Caring for Your Pepper Plants
Now that your pepper plants are in their final location, it’s time to provide them with the care they need to thrive.
1. **Water Regularly:** Peppers need consistent moisture, especially during hot weather. Water deeply whenever the top inch of soil feels dry. Avoid overwatering, which can lead to root rot.
2. **Fertilize Regularly:** Feed your pepper plants with a balanced fertilizer or one specifically formulated for peppers every 2-3 weeks. Follow the instructions on the fertilizer package.
3. **Mulch:** Apply a layer of mulch around the base of the plants to help retain moisture, suppress weeds, and regulate soil temperature.
4. **Prune (Optional):** Pruning can help improve air circulation and encourage bushier growth. Remove any suckers (small shoots that grow from the base of the plant) and any yellowing or diseased leaves.
5. **Pest Control:** Keep an eye out for pests such as aphids, whiteflies, and spider mites. If you notice any pests, treat them with insecticidal soap or neem oil.
6. **Support Heavy Fruit:** As your pepper plants start to produce fruit, they may need additional support. Use stakes or cages to prevent the branches from breaking under the weight of the peppers.
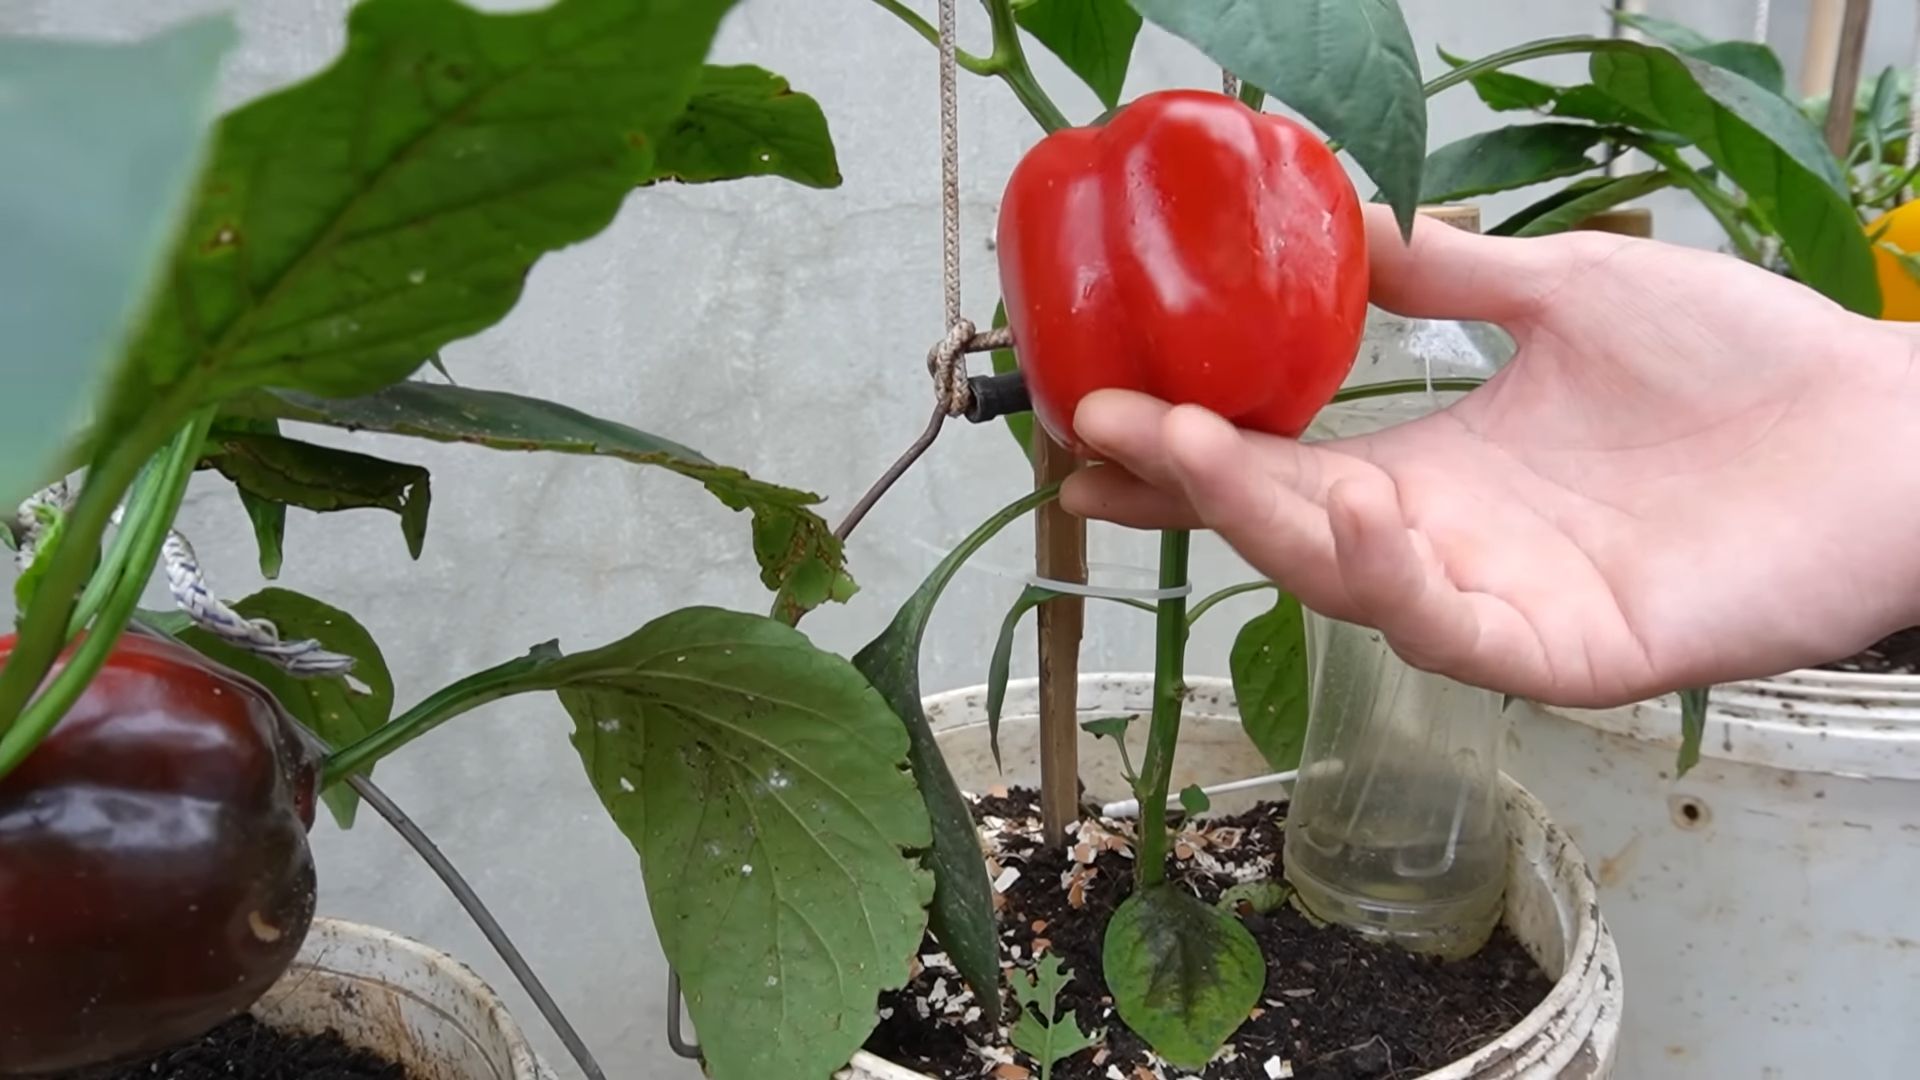
Harvesting Your Peppers
The moment we’ve all been waiting for! Harvesting your peppers is the most rewarding part of the process.
1. **Know When to Harvest:** The timing of the harvest depends on the variety of pepper and your personal preference. Bell peppers are typically harvested when they are fully colored and firm. Jalapeños are typically harvested when they are green and about 3-4 inches long. Hotter peppers can be harvested when they are fully colored and slightly soft to the touch.
2. **Use Pruning Shears or a Knife:** Use pruning shears or a sharp knife to cut the peppers from the plant. Leave a small stem attached to the pepper.
3. **Handle with Care:** Be careful not to damage the pepper plants when harvesting.
4. **Enjoy Your Harvest:** Use your freshly harvested peppers in your favorite recipes, or preserve them for later use.
Troubleshooting
Even with the best care, you may encounter some challenges when growing peppers. Here are some common problems and how to address them:
* **Blossom End Rot:** This is caused by a calcium deficiency. To prevent blossom end rot, make sure your soil is well-drained and that you’re providing your plants with adequate calcium. You can also add calcium to the soil by using bone meal or eggshells.
* **Sunscald:** This is caused by excessive exposure to sunlight. To prevent sunscald, provide your plants with some shade during the hottest part of the day.
* **Pest Infestations:** As mentioned earlier, keep an eye out for pests and treat them with insecticidal soap or neem oil.
* **Disease:** Peppers can be susceptible to various diseases, such as fungal diseases and viruses. To prevent disease, choose disease-resistant varieties, provide good air circulation, and avoid overwatering.
Tips for Success
Here are a few extra tips to help you grow the best peppers possible:
* Choose the Right Variety: Consider your climate, space, and taste preferences when choosing pepper varieties.
* Start Early: Starting your seeds indoors gives your peppers a head start and allows you to harvest them earlier in the season.
* Provide Plenty of Sunlight: Peppers need at least 6-8 hours of sunlight per day.
* Water Regularly: Peppers need consistent moisture, especially during hot weather.
* Fertilize Regularly: Feed your pepper plants with a balanced fertilizer or one specifically formulated for peppers.
* Protect from Pests and Diseases: Keep an eye out for pests and diseases and treat them promptly.
* Be Patient: Growing peppers takes time and patience. Don’t get
Conclusion
So, there you have it! Mastering the art of growing peppers at home is not only achievable but also incredibly rewarding. From the vibrant colors adorning your plants to the fiery flavors enhancing your dishes, the benefits are undeniable. This DIY trick, focusing on [specific trick mentioned throughout the article, e.g., “creating a DIY self-watering system for your pepper plants”], is a game-changer, especially for those with limited space or busy schedules. It simplifies the watering process, ensures consistent moisture levels, and ultimately leads to healthier, more productive pepper plants.
Why is this a must-try? Because it eliminates the guesswork and reduces the risk of over or under-watering, two common pitfalls for novice pepper growers. Imagine consistently plump, juicy peppers bursting with flavor, all thanks to a simple, cost-effective solution you built yourself. Plus, the satisfaction of nurturing your plants from seed to harvest is an experience unlike any other.
But the fun doesn’t stop there! Feel free to experiment with different variations of this DIY trick. For instance, if you’re growing larger pepper varieties like bell peppers or poblano peppers, consider using larger containers and adjusting the size of your self-watering reservoir accordingly. You can also incorporate organic fertilizers into the water reservoir to provide your plants with an extra boost of nutrients. Another variation involves using different materials for the wicking system. While cotton rope is a popular choice, you could also try using strips of felt or even old t-shirts. The key is to find a material that effectively draws water from the reservoir to the soil.
For those growing peppers indoors, consider adding a grow light to supplement natural sunlight. This will ensure your plants receive adequate light, especially during the shorter days of winter. You can also experiment with different types of grow lights to see which ones work best for your pepper varieties.
Don’t be afraid to get creative and tailor this DIY trick to your specific needs and preferences. The beauty of gardening is that there’s always room for experimentation and innovation.
We wholeheartedly encourage you to give this DIY trick a try. It’s a simple, effective, and rewarding way to grow peppers at home, regardless of your experience level. Once you’ve experienced the joy of harvesting your own homegrown peppers, you’ll never want to go back to store-bought ones.
And most importantly, we want to hear about your experience! Share your photos, tips, and stories in the comments section below. Let us know what worked well for you, what challenges you faced, and any variations you tried. Together, we can create a community of passionate pepper growers and learn from each other’s successes and failures. So, grab your seeds, gather your materials, and get ready to embark on a pepper-growing adventure! Happy gardening!
Frequently Asked Questions (FAQ)
What types of peppers are best suited for this DIY self-watering system?
This DIY self-watering system is versatile and works well for a wide variety of pepper types, from small chili peppers like Thai peppers and habaneros to larger varieties like bell peppers and jalapeños. The key is to adjust the size of the container and the water reservoir based on the specific needs of the pepper variety you’re growing. For smaller peppers, a smaller container and reservoir will suffice, while larger peppers will require more space and water. Consider the mature size of the pepper plant when selecting your container.
How often do I need to refill the water reservoir?
The frequency with which you need to refill the water reservoir will depend on several factors, including the size of the reservoir, the size of the pepper plant, the temperature, and the humidity. In general, you should check the water level in the reservoir every few days and refill it as needed. During hot, dry weather, you may need to refill it more frequently. A good rule of thumb is to refill the reservoir when it’s about halfway empty. Observe your plants closely. If they start to droop or show signs of water stress, it’s a sign that they need more water.
Can I use tap water for my pepper plants?
While tap water is generally safe for pepper plants, it’s best to let it sit out for 24 hours before using it. This allows chlorine and other chemicals to evaporate, which can be harmful to plants. If your tap water is particularly hard or contains high levels of minerals, you may want to consider using filtered water or rainwater instead. Rainwater is naturally soft and contains beneficial nutrients for plants.
What type of soil should I use for growing peppers in containers?
Use a well-draining potting mix specifically formulated for containers. Avoid using garden soil, as it can become compacted and prevent proper drainage. A good potting mix will contain a blend of peat moss, perlite, and vermiculite, which provide good aeration and drainage. You can also add compost to the potting mix to provide your plants with extra nutrients.
How much sunlight do pepper plants need?
Pepper plants need at least 6-8 hours of direct sunlight per day to thrive. If you’re growing peppers indoors, you’ll need to supplement natural sunlight with a grow light. Place your pepper plants in a sunny location, such as a south-facing window. If you don’t have a sunny window, you can use a grow light to provide your plants with the light they need.
What are some common pests and diseases that affect pepper plants?
Common pests that affect pepper plants include aphids, spider mites, and whiteflies. Common diseases include blossom end rot, fungal diseases, and viral diseases. To prevent pests and diseases, keep your plants healthy and well-watered. Inspect your plants regularly for signs of pests or diseases. If you find any pests or diseases, treat them promptly with an appropriate insecticide or fungicide. Blossom end rot is often caused by calcium deficiency, so make sure your plants are getting enough calcium.
How long does it take for peppers to mature?
The time it takes for peppers to mature depends on the variety. Some peppers, like chili peppers, mature in as little as 60 days, while others, like bell peppers, can take up to 90 days or more. Check the seed packet or plant label for specific information on the maturity time for your pepper variety.
Can I grow peppers in the same container year after year?
It’s generally not recommended to grow peppers in the same container year after year, as the soil can become depleted of nutrients and harbor pests and diseases. It’s best to replace the soil in your containers each year with fresh potting mix. You can also sterilize your containers with a bleach solution to kill any remaining pests or diseases.
What are some signs that my pepper plants are not doing well?
Some signs that your pepper plants are not doing well include yellowing leaves, stunted growth, drooping leaves, and blossom drop. These symptoms can be caused by a variety of factors, including over or under-watering, nutrient deficiencies, pests, and diseases. If you notice any of these symptoms, try to identify the cause and take corrective action.
How do I know when my peppers are ripe?
The color of the pepper is the best indicator of ripeness. Most peppers will turn from green to red, yellow, orange, or purple when they are ripe. The pepper should also feel firm and slightly heavy for its size. You can also taste a small piece of the pepper to see if it’s ripe. Ripe peppers will have a sweeter, more intense flavor than unripe peppers.
Leave a Comment