
Growing Peanuts Step by Step: Ever dreamt of harvesting your own crunchy, delicious peanuts right from your backyard? It’s easier than you think! Forget the store-bought variety for a moment and imagine the satisfaction of popping open a homegrown peanut, knowing you nurtured it from seed to snack. This isn’t just about gardening; it’s about connecting with the earth and experiencing the magic of nature firsthand.
Peanuts, believe it or not, have a fascinating history, dating back thousands of years to South America. They weren’t always a ballpark staple! Indigenous cultures revered them, using them for both sustenance and ceremonial purposes. Now, you can carry on that tradition, albeit in a slightly more modern way, by growing peanuts step by step in your own garden.
Why should you try this DIY project? Well, for starters, homegrown peanuts taste incredible – fresher and more flavorful than anything you’ll find on a shelf. Plus, it’s a fantastic way to teach kids about where their food comes from. But more importantly, in a world where we’re increasingly disconnected from nature, gardening offers a therapeutic escape. It’s a chance to slow down, get your hands dirty, and witness the miracle of life unfolding before your eyes. So, let’s dive in and discover the secrets to a bountiful peanut harvest!
Growing Peanuts: From Seed to Snack in Your Own Backyard!
Hey there, fellow gardening enthusiasts! Ever thought about growing your own peanuts? It’s surprisingly easy and incredibly rewarding. Trust me, there’s nothing quite like the taste of freshly dug, homegrown peanuts. Plus, it’s a fantastic conversation starter! This guide will walk you through every step, from choosing the right variety to harvesting your nutty bounty. Let’s get started!
Choosing Your Peanut Variety
Before you even think about planting, you need to pick the right peanut variety for your climate and preferences. Here’s a quick rundown of some popular options:
* Virginia Peanuts: These are the large, often roasted peanuts you see in ballparks. They need a long growing season (120-130 days) and are best suited for warmer climates.
* Spanish Peanuts: Smaller and rounder than Virginia peanuts, Spanish peanuts have a reddish-brown skin and a slightly nutty flavor. They mature a bit faster (110-120 days) and are more tolerant of cooler temperatures.
* Runner Peanuts: These are the most commonly grown peanuts in the US, often used for peanut butter. They have a uniform size and shape and mature in about 120-130 days.
* Valencia Peanuts: These peanuts typically have three or four kernels per shell and are known for their sweet flavor. They mature relatively quickly (90-110 days) and are a good choice for shorter growing seasons.
My Recommendation: If you’re a beginner, I’d suggest starting with Spanish or Valencia peanuts. They’re more forgiving and mature faster, giving you a quicker sense of accomplishment!
Preparing Your Peanut Patch
Peanuts need well-drained, sandy loam soil to thrive. They also need plenty of sunlight – at least 6-8 hours a day. Here’s how to get your garden ready:
* Soil Testing: Before you do anything, test your soil’s pH. Peanuts prefer a slightly acidic soil with a pH between 6.0 and 6.5. You can buy a soil testing kit at most garden centers.
* Soil Amendment: If your soil is heavy clay or compacted, amend it with plenty of organic matter like compost, well-rotted manure, or peat moss. This will improve drainage and aeration.
* Fertilizing: Peanuts are legumes, which means they can fix nitrogen from the air. However, they still benefit from a balanced fertilizer. Look for a fertilizer with a low nitrogen content (e.g., 5-10-10). Avoid over-fertilizing with nitrogen, as this can lead to excessive foliage growth at the expense of peanut production.
* Weed Control: Peanuts don’t compete well with weeds, so it’s important to start with a weed-free garden bed. You can use a pre-emergent herbicide or simply hand-pull any weeds that pop up.
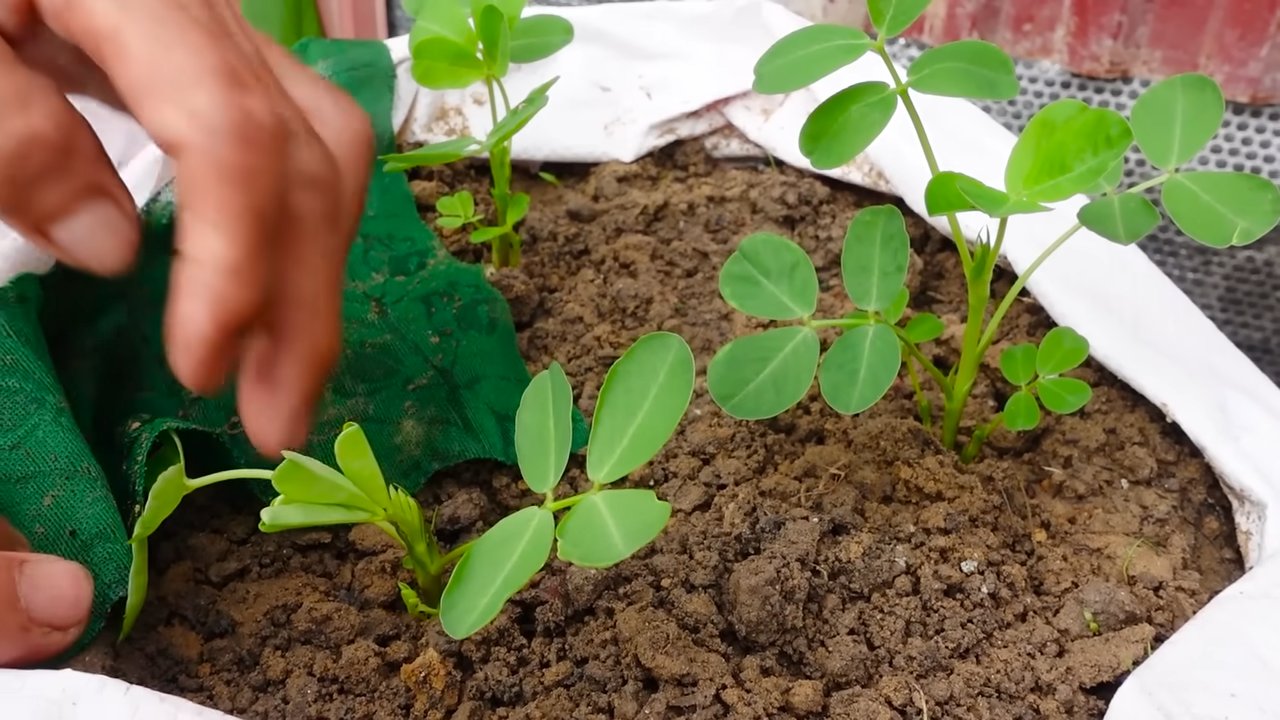
Planting Your Peanut Seeds
Now for the fun part – planting! Here’s how to get your peanut seeds in the ground:
1. Timing is Key: Wait until the soil temperature reaches at least 65°F (18°C) before planting. This is usually a couple of weeks after the last frost.
2. Seed Preparation: You can plant peanuts directly from the shell, but I’ve found that shelling them first can speed up germination. Be careful not to damage the kernels when shelling.
3. Spacing: Plant the seeds about 1-2 inches deep and 6-8 inches apart in rows that are 2-3 feet apart.
4. Watering: Water the seeds thoroughly after planting. Keep the soil consistently moist until the seedlings emerge.
5. Marking: Clearly mark your rows so you know where you planted your peanuts. This will help you avoid accidentally weeding them out!
Caring for Your Peanut Plants
Once your peanut plants are up and growing, here’s how to keep them happy and healthy:
* Watering: Peanuts need consistent moisture, especially during flowering and pod development. Water deeply and regularly, but avoid overwatering, which can lead to fungal diseases.
* Weeding: Continue to weed your peanut patch regularly. Hand-pulling is the best option to avoid damaging the plants.
* Hilling: As the peanut plants grow, they will produce “pegs” that grow downwards into the soil. These pegs are what develop into the peanut pods. To encourage pod development, hill the soil around the base of the plants, similar to how you would hill potatoes.
* Pest Control: Peanuts are relatively pest-resistant, but they can be susceptible to aphids, spider mites, and leafhoppers. Inspect your plants regularly and treat any infestations promptly with insecticidal soap or neem oil.
* Disease Prevention: Fungal diseases like leaf spot and rust can be a problem in humid climates. To prevent these diseases, ensure good air circulation around your plants and avoid overhead watering. You can also apply a fungicide if necessary.
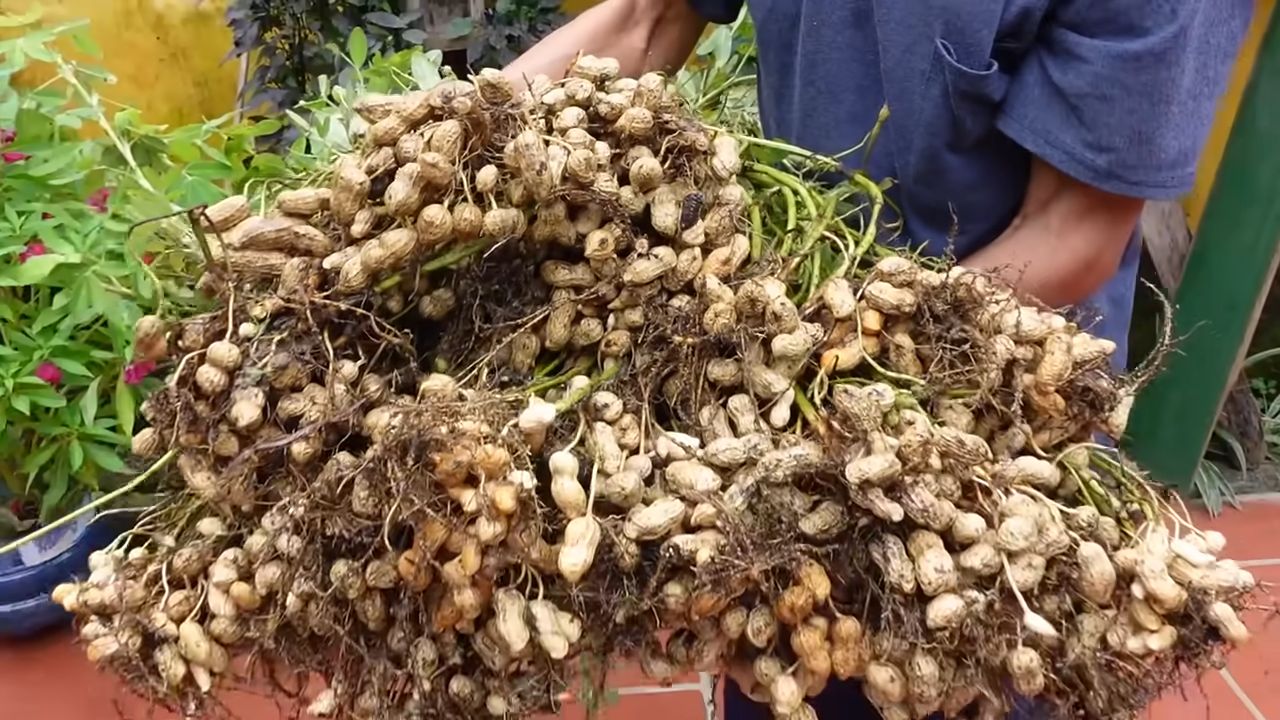
Harvesting Your Peanut Crop
Harvesting is the most exciting part! Here’s how to know when your peanuts are ready and how to dig them up:
1. Timing: Peanuts are typically ready to harvest about 120-150 days after planting, depending on the variety. A good indicator is when the leaves start to turn yellow and the plants begin to die back.
2. Test Dig: Before you harvest the entire crop, dig up a few plants to check the peanuts. The pods should be plump and the kernels should be fully developed. The inside of the shell should have visible veins and a darkened color.
3. Digging: Use a garden fork or shovel to carefully dig up the peanut plants. Be gentle to avoid damaging the pods.
4. Shaking: Shake off as much soil as possible from the plants.
5. Curing: Hang the peanut plants upside down in a well-ventilated area for 2-4 weeks to cure. This will allow the peanuts to dry properly and develop their flavor. You can hang them in a garage, shed, or even a covered porch. Make sure they are protected from rain and direct sunlight.
Curing and Storing Your Peanuts
Proper curing and storage are essential for preserving the quality of your homegrown peanuts.
1. Drying: After curing, the peanut plants should be dry and brittle. The peanuts should easily snap off the plants.
2. Shelling: Shell the peanuts by hand. This can be a bit time-consuming, but it’s a great way to relax and enjoy the fruits (or nuts!) of your labor.
3. Storage: Store the shelled peanuts in an airtight container in a cool, dry place. They can be stored at room temperature for a few months or in the refrigerator for up to a year. You can also freeze them for longer storage.
Roasting Your Homegrown Peanuts
Now for the best part – roasting and enjoying your homegrown peanuts!
1. Preheat: Preheat your oven to 350°F (175°C).
2. Preparation: Spread the shelled peanuts in a single layer on a baking sheet.
3. Roasting: Roast the peanuts for 15-20 minutes, or until they are golden brown and fragrant. Stir them occasionally to ensure even roasting.
4. Cooling: Let the peanuts cool completely before eating. They will continue to crisp up as they cool.
5. Seasoning: You can season the roasted peanuts with salt, pepper, or any other spices you like. I personally love them with a sprinkle of sea salt.
Troubleshooting Common Peanut Problems
Even with the best care, you might encounter some problems while growing peanuts. Here are a few common issues and how to address them:
* Poor Germination: If your peanut seeds aren’t germinating, it could be due to cold soil, poor seed quality, or overwatering. Make sure the soil temperature is warm enough before planting, use fresh seeds, and avoid overwatering.
* Yellowing Leaves: Yellowing leaves can be a sign of nutrient deficiency, especially nitrogen. Apply a balanced fertilizer or side-dress with compost.
* Small Pods: Small pods can be caused by insufficient watering, poor soil, or a short growing season. Ensure consistent watering, amend the soil with organic matter, and choose a variety that is suited to your climate.
* Pest Infestations: Regularly inspect your plants for pests and treat any infestations promptly with insecticidal soap or neem oil.
* Fungal Diseases: Prevent fungal diseases by ensuring good air circulation around your plants and avoiding overhead watering. You can also apply a fungicide if necessary.
Extra Tips for Peanut Growing Success
Here are a few extra tips to help you grow the best peanuts possible:
* Rotate Crops: Avoid planting peanuts in the same spot year after year. Crop rotation can help prevent soil
Conclusion
So, there you have it! Growing peanuts at home, while perhaps seeming daunting at first, is a surprisingly rewarding and accessible endeavor. We’ve walked through each step, from selecting the right peanut variety to harvesting your homegrown bounty. But why should you dedicate your time and effort to this particular gardening project? The answer lies in the unparalleled freshness and flavor you simply can’t replicate with store-bought peanuts. Imagine the satisfaction of snacking on peanuts you nurtured from seed to harvest, knowing exactly where they came from and how they were grown.
Beyond the superior taste, growing your own peanuts offers a unique connection to nature. It’s a hands-on learning experience that deepens your understanding of plant life cycles and the intricate processes that bring food to our tables. Plus, peanut plants are surprisingly attractive, adding a touch of whimsy to your garden with their bright green foliage and delicate yellow flowers.
But the benefits don’t stop there. Growing peanuts can also be a sustainable practice. By avoiding the transportation and processing involved in commercial peanut production, you’re reducing your environmental footprint. And if you choose to grow organically, you’re contributing to a healthier ecosystem for yourself and your community.
Ready to take your peanut growing to the next level? Consider these variations and suggestions:
* Experiment with different peanut varieties: Explore the diverse world of peanuts beyond the standard Virginia or Spanish types. Try Valencia peanuts for their sweet flavor or Runner peanuts for their high yield.
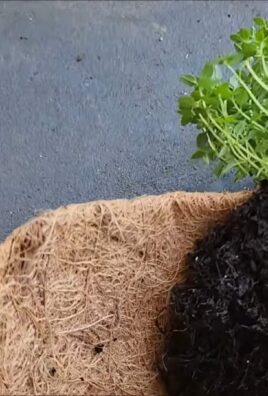
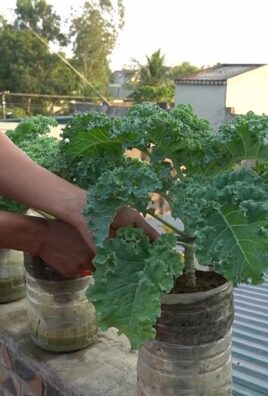
* Create a peanut patch in containers: If you have limited space, don’t despair! Peanuts thrive in large containers, making them ideal for patios, balconies, or even indoor gardening with sufficient sunlight.
* Enhance your soil with organic amendments: Incorporate compost, aged manure, or other organic materials to improve soil fertility and drainage, promoting healthy peanut growth.
* Companion planting: Plant peanuts alongside beneficial companion plants like marigolds (to deter nematodes) or herbs like rosemary and thyme (to repel pests).
* Roast your own peanuts: Once you’ve harvested your peanuts, try roasting them at home for a truly unforgettable snack. Experiment with different seasonings and roasting times to find your perfect flavor profile.
Ultimately, growing peanuts is more than just a gardening project; it’s an opportunity to connect with nature, learn new skills, and enjoy the unparalleled taste of homegrown goodness. We encourage you to give this DIY trick a try and experience the joy of harvesting your own peanuts. Don’t be afraid to get your hands dirty and embrace the challenges along the way.
And most importantly, we want to hear about your experience! Share your peanut-growing journey with us in the comments below. Tell us about your successes, your challenges, and any tips or tricks you’ve discovered along the way. Let’s create a community of peanut enthusiasts and learn from each other’s experiences. Happy growing!
Frequently Asked Questions (FAQ)
1. What is the best time to plant peanuts?
The ideal time to plant peanuts is after the last frost, when the soil temperature has consistently reached at least 65 degrees Fahrenheit (around 18 degrees Celsius). This typically falls in late spring or early summer, depending on your geographic location. Planting too early in cold soil can hinder germination and stunt growth. Check your local weather forecasts and planting guides for specific recommendations for your region.
2. What kind of soil is best for growing peanuts?
Peanuts thrive in well-drained, sandy loam soil. This type of soil allows for good aeration and drainage, which is crucial for peanut development. Heavy clay soils can become compacted and restrict root growth, leading to poor yields. If you have clay soil, amend it with organic matter like compost or aged manure to improve drainage and aeration. A slightly acidic to neutral soil pH (around 6.0 to 7.0) is also ideal.
3. How much sunlight do peanut plants need?
Peanut plants require at least 6-8 hours of direct sunlight per day to thrive. Insufficient sunlight can result in weak, leggy plants with reduced yields. Choose a planting location that receives ample sunlight throughout the day. If you’re growing peanuts in containers, ensure they are placed in a sunny spot.
4. How often should I water my peanut plants?
Peanut plants need consistent moisture, especially during flowering and pod development. Water deeply and regularly, aiming to keep the soil consistently moist but not waterlogged. Avoid overhead watering, as this can increase the risk of fungal diseases. A good rule of thumb is to water when the top inch of soil feels dry to the touch. Mulching around the plants can help retain moisture and suppress weeds.
5. How long does it take for peanuts to mature?
Peanuts typically take 120-150 days to mature, depending on the variety and growing conditions. The exact time will vary based on your climate and the specific peanut variety you’re growing. You’ll know your peanuts are ready to harvest when the foliage begins to yellow and the pods inside the soil are mature and plump.
6. What are common pests and diseases that affect peanut plants?
Some common pests that can affect peanut plants include aphids, spider mites, and nematodes. Diseases like leaf spot and white mold can also be problematic. Monitor your plants regularly for signs of pests or diseases and take appropriate action if necessary. Organic pest control methods, such as introducing beneficial insects or using insecticidal soap, can be effective. Proper watering and good air circulation can help prevent fungal diseases.
7. How do I harvest peanuts?
Harvesting peanuts involves digging up the entire plant, including the roots and pods. Gently loosen the soil around the plant with a garden fork or shovel and carefully lift the plant out of the ground. Shake off any excess soil and allow the plants to dry in the sun for a few days. Once the plants are dry, you can remove the peanuts from the roots.
8. How do I store peanuts after harvesting?
After harvesting and drying your peanuts, store them in a cool, dry place in airtight containers. Properly stored peanuts can last for several months. You can also freeze peanuts for longer-term storage.
9. Can I grow peanuts indoors?
Yes, you can grow peanuts indoors, but it requires providing them with the right conditions. Use a large container with well-draining soil and ensure the plants receive at least 6-8 hours of direct sunlight per day. You may need to supplement with artificial lighting if natural sunlight is insufficient. Indoor peanut plants may not produce as many peanuts as those grown outdoors, but it’s still a fun and rewarding experience.
10. Are there any specific fertilizer requirements for peanut plants?
Peanut plants are legumes, which means they can fix nitrogen from the air, reducing the need for nitrogen-rich fertilizers. However, they do benefit from phosphorus and potassium. Amend the soil with a fertilizer that is low in nitrogen and higher in phosphorus and potassium before planting. Avoid over-fertilizing, as this can lead to excessive foliage growth and reduced peanut production. A soil test can help determine the specific nutrient needs of your soil.
Leave a Comment