
Growing Malabar Spinach can seem intimidating, but trust me, it’s easier than you think! Have you ever dreamed of stepping into your backyard and harvesting vibrant, leafy greens for a delicious and nutritious meal? Imagine the satisfaction of knowing exactly where your food comes from and that it’s free from harmful chemicals. That’s the magic of home gardening, and Malabar Spinach is a fantastic place to start.
While not a true spinach, this climbing vine has been cultivated for centuries in Asia and Africa, prized for its heat tolerance and mild, earthy flavor. It’s a staple in many cuisines, adding a healthy boost to soups, stir-fries, and salads. But beyond its culinary uses, growing Malabar Spinach connects us to a rich agricultural heritage, a tradition of self-sufficiency and appreciation for the bounty of nature.
In today’s world, where we’re increasingly conscious of food miles and the impact of our choices on the environment, growing your own food is more relevant than ever. Plus, let’s be honest, who wouldn’t want to save a few bucks at the grocery store? This DIY guide will provide you with simple, step-by-step instructions and clever hacks to successfully cultivate this amazing plant, even if you have limited space or gardening experience. Get ready to unleash your inner gardener and enjoy the delicious rewards of your labor!
Growing Malabar Spinach: A Beginner’s Guide to This Climbing Green
Hey there, fellow gardening enthusiasts! Today, I’m super excited to share my experience with growing Malabar spinach, also known as Ceylon spinach or vine spinach. This isn’t your typical spinach; it’s a heat-loving, climbing vine that thrives in warm weather, making it a fantastic alternative to regular spinach during the summer months. Plus, it’s incredibly easy to grow, even if you’re a complete beginner like I was!
Why Grow Malabar Spinach?
Before we dive into the how-to, let’s talk about why you should consider adding Malabar spinach to your garden.
* Heat Tolerant: Unlike regular spinach, Malabar spinach loves the heat and doesn’t bolt (go to seed) in hot weather.
* Nutritious: It’s packed with vitamins A and C, iron, and calcium.
* Versatile: You can use it in salads, stir-fries, soups, and stews.
* Beautiful: The vines are attractive and can be grown on trellises or fences, adding a touch of greenery to your garden.
* Easy to Grow: Seriously, it’s one of the easiest plants I’ve ever grown!
Getting Started: What You’ll Need
To get started, you’ll need a few basic supplies:
* Malabar Spinach Seeds or Seedlings: You can find these online or at your local garden center. Seeds can be a bit slow to germinate, so seedlings might give you a head start.
* Potting Soil (if starting indoors): A well-draining potting mix is essential.
* Garden Soil: Rich, well-draining soil is ideal for growing Malabar spinach. Amend your soil with compost or aged manure for best results.
* Trellis or Support Structure: Since it’s a climbing vine, you’ll need something for it to climb on. A trellis, fence, or even a sturdy tomato cage will work.
* Watering Can or Hose: Regular watering is crucial, especially during hot weather.
* Gardening Gloves: To protect your hands.
* Optional: Seed starting tray, heat mat (for faster germination).
Starting from Seeds: A Little Patience Required
Starting Malabar spinach from seeds requires a bit of patience, as they can be slow to germinate. But don’t worry, I’ll walk you through it!
1. Scarify the Seeds (Optional but Recommended): Malabar spinach seeds have a hard outer coating, which can make germination slow. To speed things up, you can scarify the seeds by gently rubbing them with sandpaper or nicking them with a knife. Be careful not to damage the inside of the seed!
2. Soak the Seeds: Soak the scarified seeds in warm water for 24-48 hours. This helps to soften the seed coat and encourages germination.
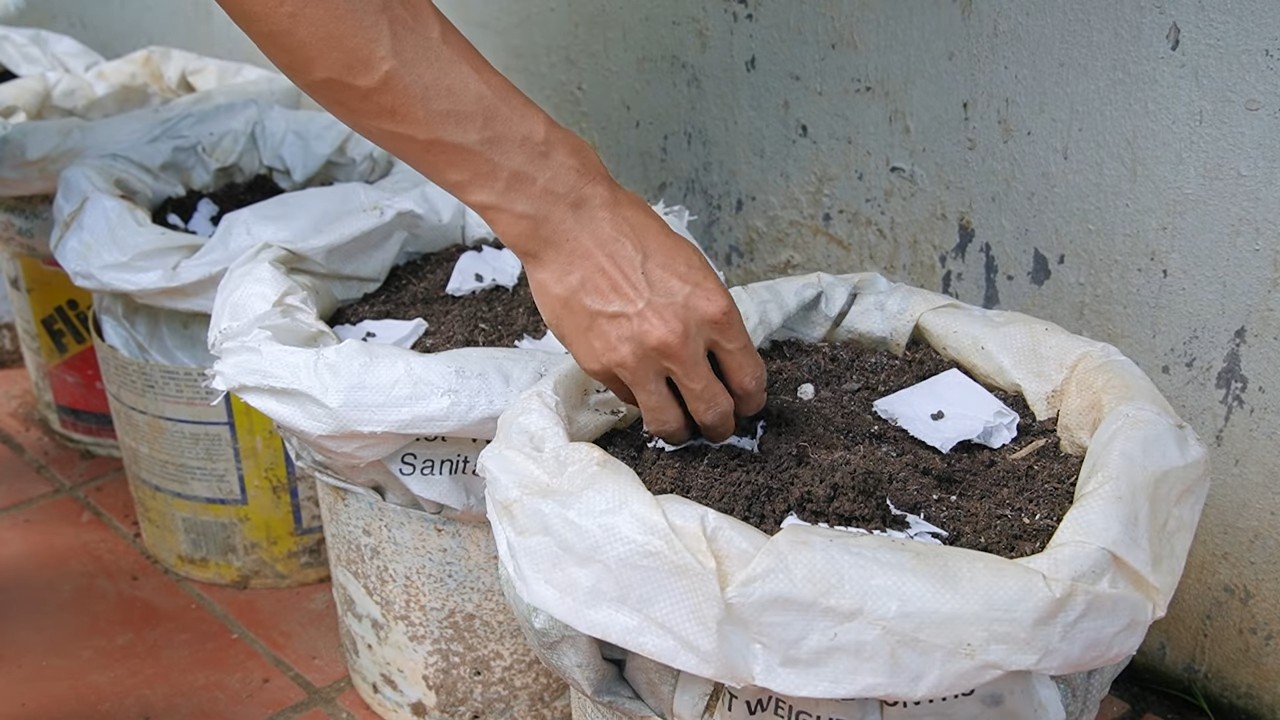
3. Prepare Your Seed Starting Tray: Fill your seed starting tray with a well-draining potting mix. Moisten the soil thoroughly.
4. Sow the Seeds: Plant the seeds about 1/2 inch deep in the soil. Space them about 1-2 inches apart.
5. Provide Warmth: Malabar spinach seeds germinate best in warm temperatures (70-80°F). You can use a heat mat to provide consistent warmth.
6. Keep the Soil Moist: Water the seeds regularly to keep the soil moist but not soggy.
7. Wait Patiently: Germination can take anywhere from 1-3 weeks, so be patient!
8. Transplant Seedlings: Once the seedlings have developed a few sets of true leaves (usually after 4-6 weeks), they’re ready to be transplanted into your garden.
Transplanting Seedlings: Giving Them a Good Start
Whether you started your own seedlings or bought them from a garden center, transplanting them properly is key to their success.
1. Choose a Sunny Location: Malabar spinach needs at least 6 hours of sunlight per day.
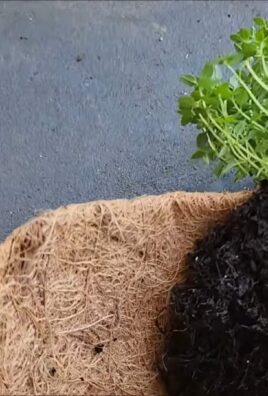
2. Prepare the Soil: Dig a hole that’s slightly larger than the root ball of the seedling. Amend the soil with compost or aged manure to improve drainage and fertility.
3. Gently Remove the Seedling: Carefully remove the seedling from its container, being careful not to damage the roots.
4. Place the Seedling in the Hole: Position the seedling in the hole so that the top of the root ball is level with the surrounding soil.
5. Fill the Hole: Fill the hole with soil and gently pat it down.
6. Water Thoroughly: Water the seedling thoroughly to help it settle in.
7. Add a Trellis or Support: Install a trellis or other support structure near the seedling so it has something to climb on.
Caring for Your Malabar Spinach: Keeping It Happy and Healthy
Once your Malabar spinach is established, it’s relatively low-maintenance. Here’s what you need to do to keep it thriving:
1. Water Regularly: Malabar spinach needs consistent moisture, especially during hot weather. Water deeply whenever the top inch of soil feels dry.
2. Fertilize Occasionally: Feed your Malabar spinach with a balanced fertilizer every few weeks to promote healthy growth. I like to use a liquid fertilizer diluted to half strength.
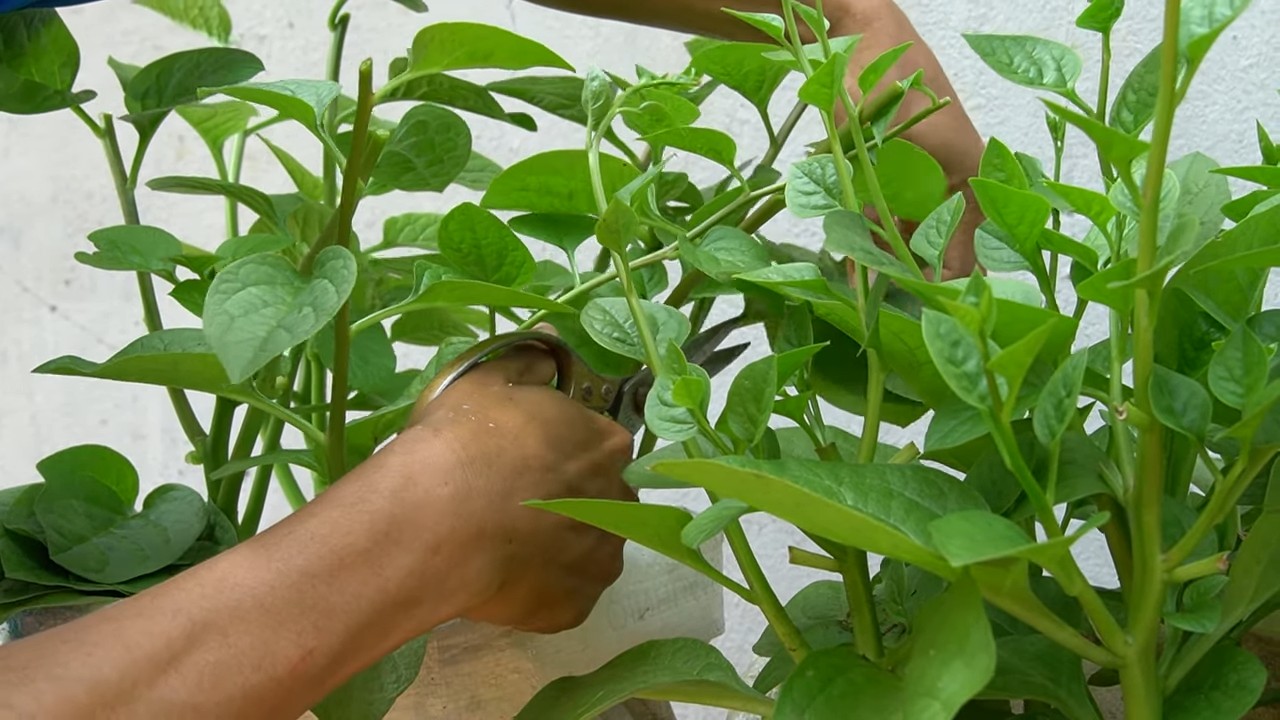
3. Prune Regularly: Pruning encourages bushier growth and prevents the vines from becoming too leggy. Simply pinch off the tips of the vines to encourage side shoots.
4. Provide Support: Make sure your Malabar spinach has adequate support to climb on. As the vines grow, you may need to help them attach to the trellis or fence.
5. Watch for Pests and Diseases: Malabar spinach is generally pest-resistant, but keep an eye out for aphids, spider mites, and snails. Treat any infestations promptly with insecticidal soap or neem oil.
Harvesting Your Malabar Spinach: Enjoying the Fruits (or Leaves!) of Your Labor
Harvesting Malabar spinach is easy and rewarding! You can start harvesting the leaves as soon as the plant is established and has plenty of foliage.
1. Harvest Regularly: The more you harvest, the more the plant will produce.
2. Pick the Leaves: Simply pinch off the leaves with your fingers or use scissors. You can harvest individual leaves or entire stems.
3. Harvest the Young Shoots: The young shoots are also edible and can be used in stir-fries or soups.
4. Wash the Leaves: Wash the leaves thoroughly before using them.
5. Store the Leaves: Malabar spinach leaves can be stored in the refrigerator for several days. Wrap them in a damp paper towel and place them in a plastic bag.
Troubleshooting: Common Problems and Solutions
Even with the easiest plants, sometimes things can go wrong. Here are a few common problems you might encounter with Malabar spinach and how to fix them:
* Slow Germination: If your seeds are slow to germinate, try scarifying them and soaking them in warm water before planting. Make sure the soil is warm enough (70-80°F).
* Yellowing Leaves: Yellowing leaves can be a sign of overwatering, underwatering, or nutrient deficiency. Check the soil moisture and adjust your watering accordingly. Fertilize the plant with a balanced fertilizer.
* Pest Infestations: If you notice aphids, spider mites, or snails, treat them with insecticidal soap or neem oil.
* Lack of Growth: If your Malabar spinach isn’t growing well, make sure it’s getting enough sunlight, water, and nutrients. Check the soil pH and amend it if necessary.
Recipes and Uses: Getting Creative in the Kitchen
Malabar spinach is a versatile ingredient that can be used in a variety of dishes. Here are a few ideas to get you started:
* Salads: Add fresh Malabar spinach leaves to your salads for a slightly peppery flavor.
* Stir-fries: Use Malabar spinach in stir-fries with other vegetables and protein.
* Soups and Stews: Add Malabar spinach to soups and stews for a nutritious boost.
* Smoothies: Blend Malabar spinach into your smoothies for a healthy dose of vitamins and minerals.
* Sauteed: Saute Malabar spinach with garlic and olive oil for a simple and delicious side dish.
Overwintering: Keeping Your Plant Alive for Next Year
Malabar spinach is a perennial in tropical climates, but it’s typically grown as an annual in cooler regions. However, you can try to overwinter your plant indoors if you want to keep it alive for next year.
1. Cut Back the Vines: Before the first frost, cut back the vines to about 6 inches.
2. Dig Up the Plant:
Conclusion
So, there you have it! Growing Malabar Spinach at home is not just a gardening project; it’s an investment in fresh, nutritious, and delicious meals right from your backyard. We’ve walked you through the simple steps, from selecting the right seeds or cuttings to nurturing your plants and harvesting their vibrant leaves.
Why is this DIY trick a must-try? Because it empowers you to control the quality of your food, reduce your reliance on grocery stores, and connect with nature in a tangible way. Imagine stepping outside your door and picking fresh, succulent Malabar Spinach leaves for your salads, stir-fries, or soups. The taste is undeniably superior to anything you can buy, and the satisfaction of growing your own food is immeasurable.
But the benefits don’t stop there. Malabar Spinach is incredibly versatile. You can experiment with different trellising methods to create a stunning vertical garden. Try growing it in containers on your balcony or patio if you have limited space. And don’t be afraid to get creative in the kitchen! Use the leaves in smoothies, add them to omelets, or even blanch them and serve them as a side dish with a drizzle of olive oil and a sprinkle of sea salt.
Consider these variations to personalize your Malabar Spinach growing experience:
* Companion Planting: Plant basil, tomatoes, or peppers near your Malabar Spinach to deter pests and improve growth.
* Microgreens: Sprout Malabar Spinach seeds for nutrient-packed microgreens that can be added to salads and sandwiches.
* Seed Saving: Allow some of your plants to flower and produce seeds, so you can save them for future plantings and share them with friends.
We are confident that once you try growing Malabar Spinach, you’ll be hooked. It’s a rewarding and sustainable way to add fresh, healthy greens to your diet.
Now, it’s your turn! We encourage you to take the plunge and start your own Malabar Spinach garden. Don’t be afraid to experiment, learn from your mistakes, and most importantly, have fun!
We’d love to hear about your experiences. Share your photos, tips, and recipes with us in the comments below. Let’s create a community of Malabar Spinach enthusiasts and inspire others to embrace the joy of growing their own food. Happy gardening!
Frequently Asked Questions (FAQ)
What are the ideal growing conditions for Malabar Spinach?
Malabar Spinach thrives in warm, humid climates with plenty of sunlight. Aim for at least 6-8 hours of direct sunlight per day. The ideal temperature range is between 70°F and 90°F (21°C and 32°C). The soil should be well-draining and rich in organic matter. Amend your soil with compost or aged manure before planting to provide essential nutrients. Consistent moisture is crucial, so water regularly, especially during hot, dry periods. Mulching around the plants can help retain moisture and suppress weeds.
How often should I water my Malabar Spinach plants?
Water your Malabar Spinach plants deeply and regularly, especially during hot weather. The soil should be consistently moist but not waterlogged. Check the soil moisture by sticking your finger about an inch deep into the soil. If it feels dry, it’s time to water. In general, you may need to water every day or every other day during the peak growing season. Reduce watering frequency during cooler periods or when rainfall is abundant. Using a soaker hose or drip irrigation can help deliver water directly to the roots and minimize water loss through evaporation.
What kind of fertilizer should I use for Malabar Spinach?
Malabar Spinach benefits from regular fertilization to support its rapid growth. Use a balanced, water-soluble fertilizer (e.g., 20-20-20) diluted to half strength every 2-3 weeks. Alternatively, you can use an organic fertilizer such as compost tea or fish emulsion. Avoid over-fertilizing, as this can lead to excessive foliage growth at the expense of flavor. Side-dressing with compost or aged manure every few weeks can also provide a slow-release source of nutrients. Monitor your plants for signs of nutrient deficiencies, such as yellowing leaves, and adjust your fertilization schedule accordingly.
Are there any common pests or diseases that affect Malabar Spinach?
Malabar Spinach is generally resistant to pests and diseases, but it can occasionally be affected by aphids, spider mites, or leaf miners. Inspect your plants regularly for signs of infestation, such as small insects on the leaves or webbing. Treat infestations promptly with insecticidal soap or neem oil. Ensure good air circulation around the plants to prevent fungal diseases. Avoid overhead watering, which can create a humid environment that promotes disease development. If you notice any signs of disease, such as leaf spots or wilting, remove the affected leaves immediately.
How do I harvest Malabar Spinach?
You can start harvesting Malabar Spinach leaves about 60-70 days after planting. Harvest the leaves regularly to encourage continued growth. Simply snip off the leaves with scissors or pruning shears, leaving about an inch of stem attached. You can harvest individual leaves or entire stems. The younger leaves are more tender and flavorful than the older ones. Avoid harvesting more than one-third of the plant at a time to prevent stressing it. Regular harvesting will also help prevent the plants from flowering, which can reduce leaf production.
Can I grow Malabar Spinach in containers?
Yes, Malabar Spinach grows well in containers, making it a great option for gardeners with limited space. Choose a large container (at least 12 inches in diameter) with drainage holes. Fill the container with a well-draining potting mix that is rich in organic matter. Provide a trellis or other support structure for the vines to climb. Water regularly and fertilize every 2-3 weeks. Place the container in a sunny location that receives at least 6-8 hours of direct sunlight per day.
How do I save seeds from Malabar Spinach?
To save seeds from Malabar Spinach, allow some of your plants to flower and produce seeds. The seeds will develop inside small, dark berries. Once the berries are fully ripe and dry, harvest them and remove the seeds. Spread the seeds out on a tray to dry completely for a few days. Store the dried seeds in an airtight container in a cool, dark, and dry place. Properly stored seeds can remain viable for several years.
Is Malabar Spinach the same as regular spinach?
No, Malabar Spinach (Basella alba) is not the same as regular spinach (Spinacia oleracea). While both are leafy green vegetables, they belong to different plant families and have different characteristics. Malabar Spinach is a heat-tolerant vine that thrives in warm climates, while regular spinach prefers cooler temperatures. Malabar Spinach has thicker, more succulent leaves and a slightly mucilaginous texture when cooked. The flavor is also different, with Malabar Spinach having a milder, slightly peppery taste compared to regular spinach.
Can I eat Malabar Spinach raw?
Yes, you can eat Malabar Spinach raw, especially the young, tender leaves. Raw Malabar Spinach has a mild, slightly peppery flavor that is delicious in salads. However, some people may find the mucilaginous texture of raw Malabar Spinach to be unappealing. Cooking Malabar Spinach reduces the mucilaginous texture and enhances its flavor.
How can I use Malabar Spinach in cooking?
Malabar Spinach is a versatile ingredient that can be used in a variety of dishes. It can be used in salads, stir-fries, soups, stews, and omelets. It can also be blanched and served as a side dish. Malabar Spinach pairs well with garlic, ginger, soy sauce, and other Asian flavors. It can also be used as a substitute for regular spinach in many recipes. When cooking Malabar Spinach, be careful not to overcook it, as it can become slimy.

Leave a Comment