
Growing Grapes at Home might seem like a task reserved for sprawling vineyards in Napa Valley, but I’m here to tell you it’s entirely achievable, even in your own backyard! Forget the image of endless rows of vines; with a few clever tricks and a little DIY spirit, you can be harvesting your own juicy grapes before you know it.
For centuries, grapes have held a special place in human culture, from ancient Roman feasts to the vineyards of France. The art of viticulture, or grape cultivation, is steeped in tradition, but that doesn’t mean it’s inaccessible to the modern home gardener. In fact, the desire to connect with nature and enjoy fresh, homegrown produce is driving a resurgence in home gardening, and growing grapes at home is becoming increasingly popular.
Why should you try it? Well, imagine plucking sun-ripened grapes straight from the vine, knowing exactly where they came from and how they were grown. Beyond the satisfaction of nurturing your own food, growing grapes can be a rewarding and cost-effective way to enjoy this delicious fruit. Plus, it’s a fantastic conversation starter! This DIY guide will equip you with the knowledge and simple hacks you need to successfully cultivate grapes, regardless of your space or experience level. Let’s get started!

Growing Grapevines in Your Own Garden: Your Comprehensive DIY Guide
Hello wine lovers! Have you ever dreamed of growing your own grapes in the garden and maybe even making your own wine? It might sound complicated, but with a little patience and the right steps, you can make this dream a reality. I’ll show you how to successfully plant and care for grapevines in your garden.
The Basics: What You Need to Know Before Planting
Before we get started, let’s clarify the most important basics. Choosing the right grape variety, the location, and preparing the soil are crucial for success.
- Grape Variety Selection: Not every grape variety is suitable for every climate. Find out which varieties thrive in your region. Pay attention to frost hardiness, resistance to diseases, and of course, your personal taste. Some popular varieties for home gardens are Regent (red), Solaris (white), and Muscat Bleu (blue).
- Location: Grapevines love the sun! Choose a location that receives at least 6-8 hours of direct sunlight per day. The location should also be sheltered from the wind to protect the vines from strong storms.
- Soil: The soil should be well-draining to avoid waterlogging. Grapevines prefer slightly acidic to neutral soils (pH value between 6.0 and 7.0).
Step-by-Step Guide: Planting Grapevines
Now let’s get down to business! Here is a detailed guide on how to plant your grapevines:
1. Prepare the soil:
- Remove all weeds and grass from the planting area.
- Loosen the soil thoroughly, ideally to a depth of 60 cm.
- Improve the soil with compost or well-rotted manure. This ensures good drainage and provides important nutrients. I also like to mix in some sand if the soil is very clayey.
2. Dig the planting hole: - Dig a planting hole that is twice as wide and deep as the root ball of the vine.
3. Prepare the vine: - Carefully remove the vine from its pot.
- Gently loosen the root ball to encourage root growth.
- Cut off any damaged or dead roots.
4. Plant the vine: - Place the vine in the planting hole. The graft union (the thickened part of the stem) should be about 5-10 cm above the soil surface. This is important so that the vine does not sprout from the rootstock.
- Fill the planting hole with soil and press it down lightly.
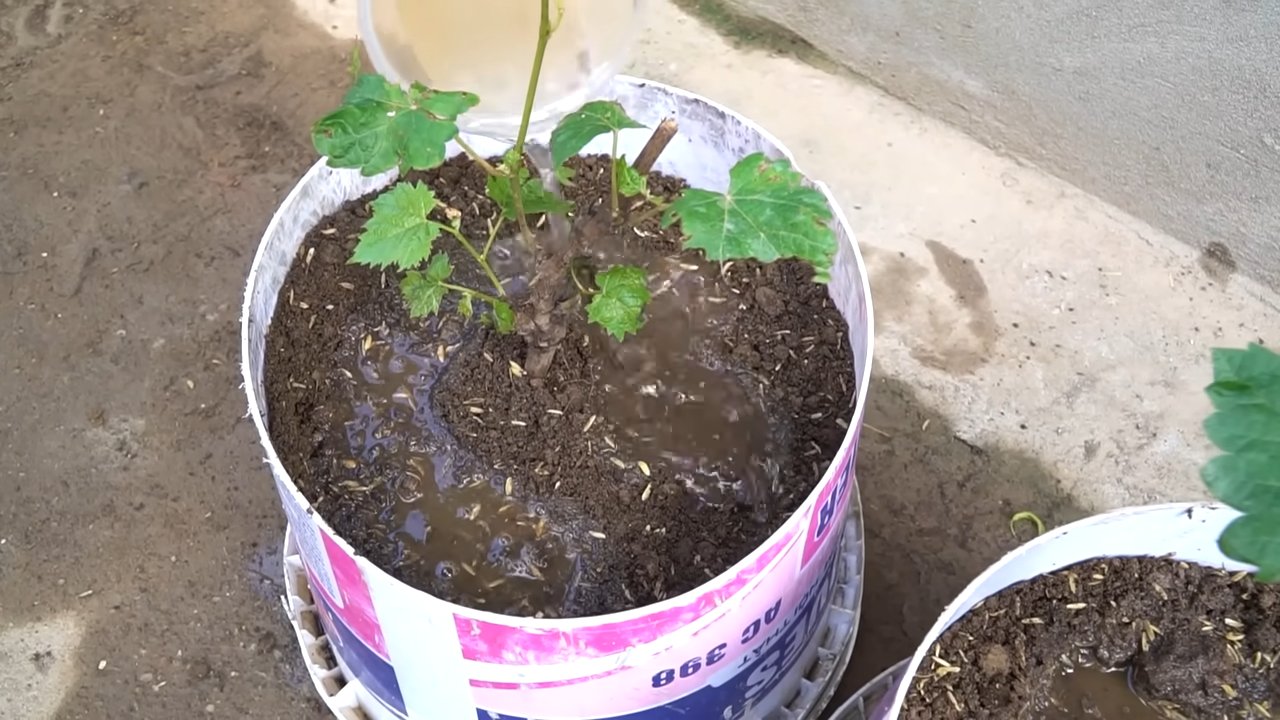
5. Water in: - Water the vine thoroughly. This helps to settle the soil around the roots.
6. Mulch: - Apply a layer of mulch (e.g., straw or bark mulch) around the vine. This keeps the soil moist, suppresses weeds, and protects the roots from extreme temperatures.
7. Place a support stake: - Place a support stake next to the vine. You can tie the vine to it to give it support.
The First Years: Care and Training
The first few years are crucial for the development of your grapevine. Here are some important care measures:
- Watering: Water the vine regularly, especially during dry periods. Make sure the soil does not dry out, but avoid waterlogging.
- Fertilizing: Fertilize the vine in the spring with an organic fertilizer or a special grapevine fertilizer. Follow the instructions on the packaging.
- Pruning: Pruning is an important part of grapevine care. It affects the yield and the quality of the grapes. In the first year, you should reduce the vine to one shoot and tie it to the support stake. In the following years, you can prune the vine according to different training systems, e.g., on a trellis or as a cordon. Inform yourself about the different pruning techniques and choose the one that is suitable for your grape variety and location. I recommend watching videos or taking a course to learn how to prune correctly.
- Diseases and Pests: Watch for signs of diseases and pests. Powdery mildew, phylloxera, and grape berry moths can cause problems. There are various biological and chemical control methods. However, prevention is always better than cure. Ensure good ventilation for the vines and remove any affected leaves or fruits.
- Winter Protection: In cold regions, winter protection may be necessary. Protect the graft union from frost with soil or straw.
Training Systems: How to Shape Your Vines
There are various training systems for grapevines. The choice of the right system depends on the grape variety, the location, and your personal preferences. Here are some common systems:
- Trellis: The trellis is a popular system for the home garden. The vines are trained along a wire framework. This allows for good ventilation and sun exposure.
- Cordon: With the cordon system, the vines are trained along a horizontal wire. The fruit-bearing shoots then grow upwards or downwards.
- Pergola: A pergola is a decorative way to train grapevines. The vines grow over the pergola and provide shade.
The Harvest: The Reward for Your Work
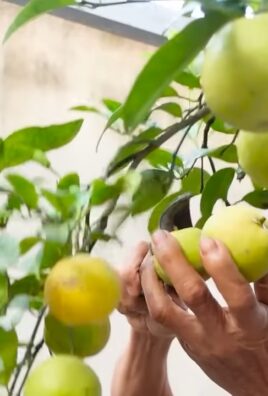
After all the work and patience, the time has finally come: the grapes are ripe! The time of harvest depends on the grape variety, the climate, and the desired level of ripeness. Look for the following signs:
- Color: The grapes have reached their typical color.
- Taste: The grapes taste sweet and aromatic.
- Sugar content: The sugar content of the grapes can be measured with a refractometer.
Carefully cut the grape clusters with scissors and place them in a basket. Enjoy your homegrown grapes!
Common Mistakes and How to Avoid Them
Even if you follow all the steps, mistakes can happen. Here are some common mistakes and how to avoid them:
- Wrong grape variety: Choose a grape variety that is suitable for your climate.
- Poor location: Ensure enough sun and wind protection.
- Incorrect pruning: Inform yourself about the correct pruning technique.
- Lack of care: Water, fertilize, and protect the vines regularly.
- Ignoring diseases and pests: Watch for signs and act in a timely manner.
Additional Tips for Success
Here are a few more tips that can help you successfully grow grapevines:
- Soil analysis: Have a soil analysis done to determine the pH and nutrient content of the soil.
- Irrigation system: Install an irrigation system to water the vines evenly.
- Nets: Protect the grapes from birds and wasps with nets.
- Patience: Grapevines need time to grow and bear fruit. Be patient and don’t give up!
I hope this guide has helped you to grow your own grapevines in the garden. With a little effort and patience, you can soon be harvesting your own grapes and maybe even making your own wine. Good luck
Conclusion
So, there you have it! Growing grapes at home might seem daunting at first, but with the right knowledge and a little dedication, you can transform your backyard into a personal vineyard. The satisfaction of harvesting your own juicy, sun-ripened grapes is an experience unlike any other. Forget those bland, store-bought grapes; imagine the burst of flavor from grapes you nurtured yourself, knowing exactly where they came from and how they were grown.
This DIY approach to grape cultivation isn’t just about saving money; it’s about connecting with nature, learning a new skill, and enjoying the fruits (literally!) of your labor. It’s about embracing a more sustainable lifestyle and reducing your reliance on commercially produced food. Plus, think of the bragging rights!
But the benefits don’t stop there. Growing your own grapes opens up a world of possibilities. Experiment with different varieties to find your perfect flavor profile. Perhaps you’re a fan of the sweet, table-ready Thompson Seedless, or maybe you’re drawn to the robust flavors of Concord grapes, perfect for making homemade juice and jelly. You could even venture into the world of winemaking, crafting your own unique blends right in your own home.
Consider these variations to personalize your grape-growing journey:
* Vertical Gardening: If space is limited, explore vertical gardening techniques. Train your grapevines to climb a trellis or pergola, creating a stunning visual display while maximizing your yield.
* Container Gardening: For those without a traditional garden, container gardening is a fantastic option. Choose a large, well-draining pot and select a grape variety that is well-suited for container growing.
* Organic Practices: Embrace organic gardening practices by using natural fertilizers, pest control methods, and soil amendments. This will ensure that your grapes are not only delicious but also free from harmful chemicals.
* Grafting: Learn the art of grafting to combine the desirable traits of different grape varieties. This allows you to create unique combinations of flavor, disease resistance, and growth habits.
Don’t be afraid to experiment and adapt these techniques to suit your specific climate, soil conditions, and personal preferences. The key is to start small, learn as you go, and most importantly, have fun!
We strongly encourage you to give this DIY trick a try. The rewards are well worth the effort. Imagine sharing your homegrown grapes with friends and family, knowing that you played a vital role in bringing that deliciousness to their table.
So, grab your gardening gloves, choose your grape variety, and get ready to embark on an exciting adventure. We’re confident that you’ll be amazed by what you can achieve.
And now, we want to hear from you! Share your experiences, tips, and tricks in the comments below. Let’s create a community of home grape growers and learn from each other. What challenges did you face? What successes did you celebrate? What are your favorite grape varieties to grow? Your insights will be invaluable to other aspiring grape growers. Let’s unlock the secrets to successfully growing grapes at home together!
Frequently Asked Questions (FAQ)
What is the best time of year to plant grapevines?
The best time to plant grapevines depends on your climate. In general, early spring (after the last frost) or late fall (before the ground freezes) are ideal. This allows the vines to establish their root systems before the heat of summer or the cold of winter sets in. If you live in a region with mild winters, you can often plant grapevines throughout the dormant season. Bare-root grapevines are typically planted during the dormant season, while potted grapevines can be planted at any time, provided the ground is not frozen.
How much space do grapevines need?
Grapevines need ample space to grow and thrive. The exact spacing will depend on the variety of grape and the training system you use. As a general guideline, allow at least 8-10 feet between vines in a row and 10-12 feet between rows. For smaller varieties or those grown on a trellis, you may be able to reduce the spacing slightly. Consider the mature size of the vine when determining spacing. Insufficient spacing can lead to overcrowding, reduced airflow, and increased disease risk.
What type of soil is best for growing grapes?
Grapes prefer well-drained soil that is slightly acidic to neutral (pH 6.0-7.0). The soil should be rich in organic matter and have good drainage to prevent root rot. Avoid heavy clay soils that retain too much water. Before planting, it’s a good idea to conduct a soil test to determine the pH and nutrient levels. Amend the soil as needed with compost, manure, or other organic matter to improve drainage and fertility.
How often should I water my grapevines?
Watering frequency depends on the climate, soil type, and age of the vine. Young grapevines need more frequent watering than established vines. In general, water deeply and infrequently, allowing the soil to dry out slightly between waterings. During hot, dry periods, you may need to water more frequently. Avoid overwatering, as this can lead to root rot. Drip irrigation is an excellent way to provide consistent moisture to grapevines.
How do I prune grapevines?
Pruning is essential for maintaining the health and productivity of grapevines. The best time to prune is during the dormant season (late winter or early spring). The goal of pruning is to remove dead, damaged, or diseased wood, and to shape the vine for optimal fruit production. There are several different pruning methods, depending on the variety of grape and the training system. Research the specific pruning requirements for your grape variety and follow a consistent pruning schedule.
What are some common pests and diseases that affect grapevines?
Grapevines are susceptible to a variety of pests and diseases, including aphids, spider mites, Japanese beetles, powdery mildew, downy mildew, and black rot. Monitor your vines regularly for signs of pests or diseases. Use organic pest control methods, such as insecticidal soap or neem oil, to control pests. Preventative measures, such as good air circulation and proper pruning, can help to reduce the risk of disease. If you suspect a disease, consult with a local agricultural extension agent for diagnosis and treatment recommendations.
How long does it take for grapevines to produce fruit?
Grapevines typically take 2-3 years to begin producing fruit. The first year is focused on establishing the root system and developing the vine structure. In the second year, you may see some small clusters of grapes, but the yield will be limited. By the third year, the vine should be producing a more substantial crop. The exact time to harvest will depend on the variety of grape and the climate.
Can I grow grapes in containers?
Yes, you can grow grapes in containers, but you’ll need to choose a large container (at least 20 gallons) and select a grape variety that is well-suited for container growing. Dwarf or compact varieties are often the best choice. Use a well-draining potting mix and provide regular watering and fertilization. Container-grown grapevines may need to be pruned more frequently to control their size.
What kind of fertilizer should I use for grapevines?
Grapevines benefit from regular fertilization, especially during the growing season. Use a balanced fertilizer that is specifically formulated for fruit trees or grapevines. Apply fertilizer in the spring, just before the vines begin to grow. Avoid over-fertilizing, as this can lead to excessive vegetative growth and reduced fruit production. Organic fertilizers, such as compost or manure, are also excellent options.
How do I protect my grapevines from birds?
Birds can be a major problem for grape growers, as they love to feast on ripe grapes. There are several ways to protect your grapevines from birds, including netting, bird scare devices, and visual deterrents. Netting is the most effective method, but it can be time-consuming to install. Bird scare devices, such as ultrasonic devices or reflective tape, can help to deter birds. Visual deterrents, such as scarecrows or plastic owls, can also be effective.


Leave a Comment