Growing Garlic Beginners Hack: Unlock the secrets to a thriving garlic patch, even if you’ve never touched a trowel before! Have you ever dreamed of pulling plump, flavorful garlic bulbs straight from your own backyard? Imagine the satisfaction of using your homegrown garlic to elevate your favorite dishes, knowing exactly where it came from and how it was grown. This isn’t just a dream; it’s an achievable reality with the right know-how.
Garlic, a culinary staple with roots stretching back thousands of years, has been revered for its medicinal properties and distinctive flavor across cultures. From ancient Egypt, where it fueled the pyramid builders, to modern kitchens worldwide, garlic has consistently held a place of honor. But you don’t need to be an expert gardener to enjoy the fruits (or rather, bulbs!) of your labor.
Many beginners are intimidated by the prospect of growing their own garlic, fearing it’s too complicated or time-consuming. But I’m here to tell you it doesn’t have to be! This growing garlic beginners hack is designed to simplify the process, providing you with easy-to-follow steps and insider tips that will guarantee a successful harvest. Why spend money on store-bought garlic when you can cultivate your own superior crop, bursting with flavor and freshness? Let’s dive in and transform your garden into a garlic haven!

Growing Garlic: A Beginner-Friendly DIY Hack for a Bountiful Harvest
Okay, garlic lovers, listen up! I’m going to walk you through a super easy DIY hack for growing your own garlic. Forget complicated gardening techniques – this method is perfect for beginners and guarantees a fantastic harvest. Trust me, there’s nothing quite like cooking with garlic you’ve grown yourself!
Choosing Your Garlic
Before we dive into the planting process, let’s talk about selecting the right garlic. This is crucial for success!
* Hardneck vs. Softneck: These are the two main types of garlic. Hardneck varieties are more cold-hardy and produce a flower stalk called a scape (which is delicious, by the way!). Softneck varieties are better suited for warmer climates and are what you typically see braided. For beginners, I recommend starting with a hardneck variety, especially if you live in a colder region.
* Source Matters: Don’t just grab a bulb from the grocery store! Grocery store garlic is often treated to prevent sprouting, which means it won’t grow. Instead, buy your garlic from a local farmer’s market, garden center, or reputable online seed supplier. Look for certified disease-free bulbs.
* Choosing the Best Bulbs: Select large, firm bulbs with no signs of mold, bruising, or sprouting. The bigger the clove, the bigger the bulb it will produce!
Preparing for Planting
Now that you’ve got your garlic, let’s get ready to plant!
* Timing is Key: Garlic needs a period of cold dormancy to develop properly. The best time to plant garlic is in the fall, about 4-6 weeks before the ground freezes. This allows the cloves to establish roots before winter sets in. In most regions, this is typically October or November.
* Location, Location, Location: Garlic needs at least 6 hours of sunlight per day. Choose a spot in your garden that gets plenty of sun.
* Soil Preparation: Garlic loves well-drained, fertile soil. Amend your soil with plenty of compost or well-rotted manure before planting. This will provide the nutrients your garlic needs to thrive. I like to add a little bone meal as well, as it’s a great source of phosphorus, which promotes root growth.
* Testing Your Soil: If you’re unsure about your soil’s pH, consider doing a soil test. Garlic prefers a slightly acidic to neutral pH (around 6.0-7.0). You can purchase a soil testing kit at most garden centers.
Planting Your Garlic: The Step-by-Step Guide
Alright, let’s get our hands dirty! Here’s the step-by-step guide to planting your garlic:
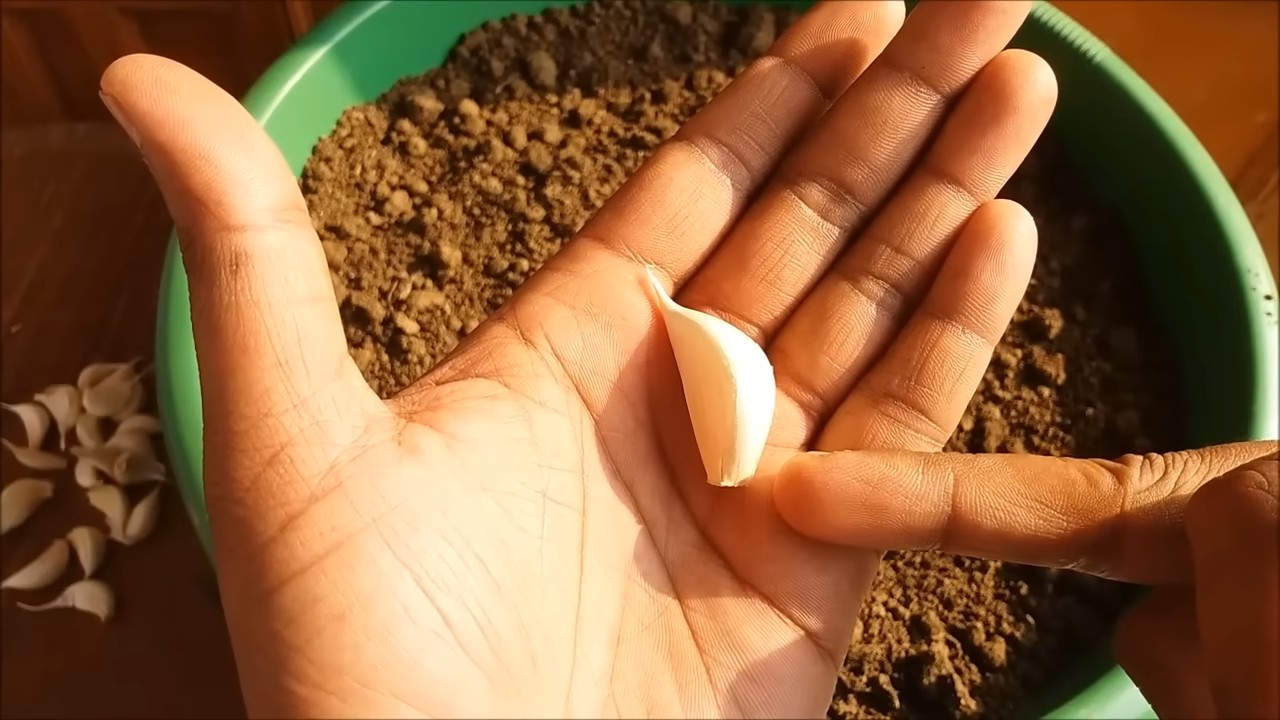
1. Separate the Cloves: Gently separate the cloves from the bulb. Leave the papery skin on each clove intact. Don’t separate them too far in advance, as they can dry out. Only separate the cloves right before you’re ready to plant.
2. Prepare the Planting Bed: Rake the soil smooth and remove any rocks or debris.
3. Dig the Holes: Dig holes that are about 4-6 inches deep and 6-8 inches apart. Space rows about 10-12 inches apart.
4. Plant the Cloves: Place each clove in a hole, pointy side up (the pointy side is where the leaves will emerge).
5. Cover the Cloves: Cover the cloves with soil and gently pat it down.
6. Water Thoroughly: Water the planting bed thoroughly after planting. This will help settle the soil and encourage root growth.
7. Mulch, Mulch, Mulch!: Apply a thick layer of mulch (straw, shredded leaves, or wood chips) over the planting bed. Mulch helps to insulate the soil, retain moisture, suppress weeds, and prevent soil erosion. I prefer straw because it decomposes slowly and provides good insulation.
Winter Care
Even though your garlic is planted in the fall, it still needs some TLC during the winter months.
* Monitor Moisture: While you don’t want the soil to be soggy, you also don’t want it to dry out completely. Check the soil moisture periodically and water if needed, especially during dry spells.
* Protect from Extreme Cold: If you live in an area with very harsh winters, you may want to add an extra layer of protection, such as a row cover or burlap sacks.
* Patience is Key: Don’t be discouraged if you don’t see any growth until spring. The garlic is busy developing its roots underground.
Spring and Summer Care
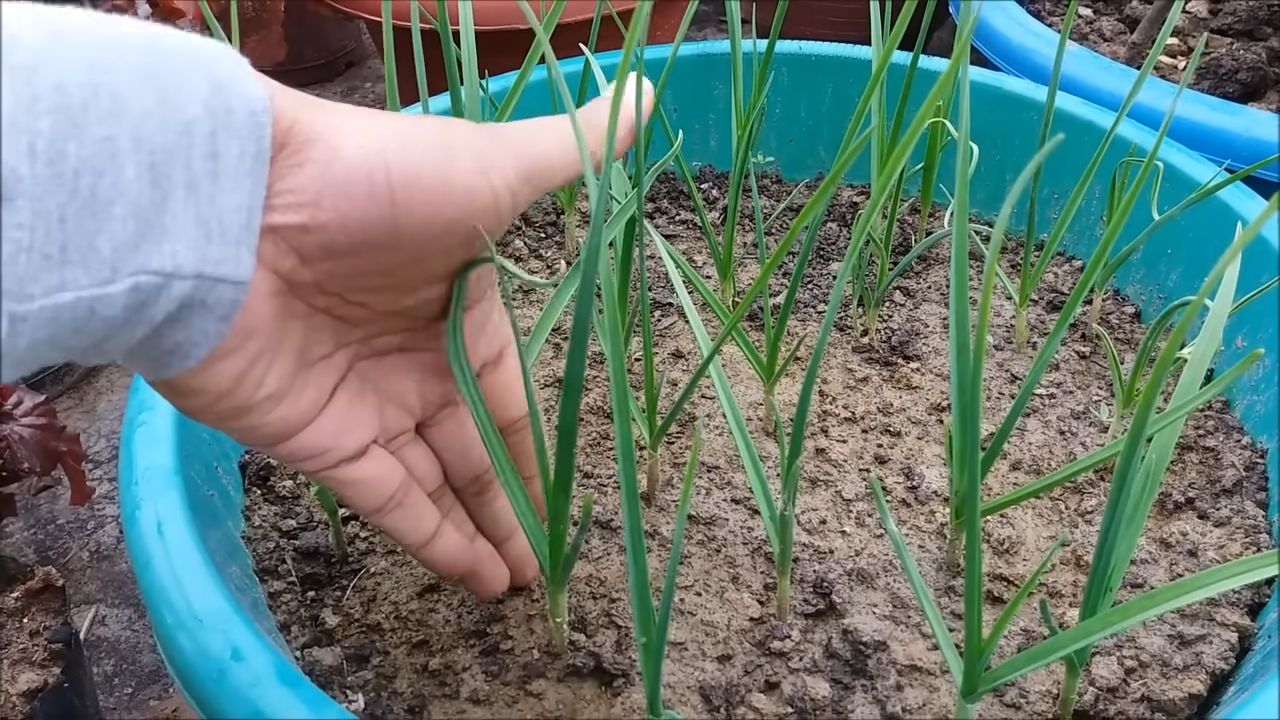
As the weather warms up, your garlic will start to grow! Here’s what you need to do to keep it happy and healthy:
* Fertilizing: In the spring, fertilize your garlic with a balanced fertilizer or compost tea. This will provide the nutrients it needs to grow strong and produce large bulbs. I like to use fish emulsion, as it’s a natural and effective fertilizer.
* Watering: Water regularly, especially during dry periods. Garlic needs consistent moisture to thrive.
* Weeding: Keep the planting bed free of weeds. Weeds compete with garlic for nutrients and water.
* Scapes: If you’re growing hardneck garlic, you’ll notice flower stalks (scapes) emerging in the spring or early summer. Cut off the scapes as soon as they start to curl. This will encourage the plant to put more energy into bulb development. Don’t throw the scapes away! They’re delicious and can be used in pesto, stir-fries, or grilled.
* Pest and Disease Control: Keep an eye out for pests and diseases. Common garlic pests include aphids and onion thrips. Diseases include white rot and garlic rust. If you notice any problems, take action immediately. There are many organic pest and disease control options available.
Harvesting Your Garlic
The moment we’ve all been waiting for! Harvesting your garlic is the most rewarding part of the process.
* When to Harvest: Garlic is typically ready to harvest in mid-summer, about 8-9 months after planting. A good indicator that it’s time to harvest is when the bottom leaves start to turn yellow and brown. Don’t wait too long to harvest, or the bulbs may start to split.
* How to Harvest: Gently loosen the soil around the bulbs with a garden fork or trowel. Carefully lift the bulbs out of the ground. Be careful not to damage the bulbs.
* Curing Your Garlic: Curing is essential for long-term storage. Brush off any excess soil from the bulbs. Tie the garlic plants together in bundles of 4-6 bulbs. Hang the bundles in a well-ventilated, dry, and shady place for 2-4 weeks. The garlic is cured when the necks are dry and the outer skins are papery.
* Storing Your Garlic: Once the garlic is cured, cut off the roots and trim the stalks to about 1-2 inches. Store the bulbs in a cool, dry, and dark place. Properly cured and stored garlic can last for several months.
Troubleshooting
Even with the best planning, things can sometimes go wrong. Here are a few common problems and how to fix them:
* Small Bulbs: If your garlic bulbs are small, it could be due to several factors, including poor soil, insufficient sunlight, or not enough water. Make sure your garlic is planted in well-drained, fertile soil, gets at least 6 hours of sunlight per day, and is watered regularly.
* Pests and Diseases: As mentioned earlier, keep an eye out for pests and diseases. Treat any problems promptly with organic pest and disease control methods.
* Rotting Bulbs: Rotting bulbs can be caused by overwatering or poor drainage. Make sure your soil is well-drained and avoid overwatering.
Enjoying Your Homegrown Garlic
Congratulations! You’ve successfully grown your own garlic. Now it’s time to enjoy the fruits (or rather, bulbs) of your labor. Use your homegrown garlic in all your favorite recipes. It’s so much more flavorful than store-bought garlic! You can also save some of your best bulbs to plant next year.
Growing garlic is a rewarding and easy DIY project that anyone can do. With a little bit of planning and effort, you can enjoy a bountiful harvest of delicious, homegrown garlic. Happy gardening!

Conclusion
So, there you have it! This simple, yet incredibly effective, DIY trick for growing garlic is a game-changer, especially for beginners. Forget complicated gardening techniques and expensive equipment. This method offers a straightforward, accessible path to harvesting your own flavorful garlic, right from your home.
Why is this a must-try? Because it simplifies the entire process. It eliminates the guesswork often associated with planting depth, soil composition, and watering schedules. It’s a low-maintenance approach that yields surprisingly impressive results. Imagine the satisfaction of using your own homegrown garlic in your favorite dishes, knowing you nurtured it from a single clove. The intense flavor and aroma of freshly harvested garlic are simply unmatched by store-bought varieties.
But the beauty of this DIY garlic growing hack lies not only in its simplicity but also in its adaptability. Feel free to experiment with different varieties of garlic to discover your personal favorite. Try planting in different containers – terracotta pots, repurposed buckets, or even raised beds – to see what works best for your space and climate. You can also explore companion planting, adding herbs like rosemary or thyme to your garlic container to deter pests and enhance the overall health of your plants.
Consider this: you can even tailor the growing medium to your specific needs. While a standard potting mix works well, you can amend it with compost or worm castings to boost nutrient levels and improve drainage. For those in colder climates, mulching around the base of the plants will provide extra insulation during the winter months.
This isn’t just about growing garlic; it’s about connecting with nature, learning new skills, and enjoying the fruits (or rather, bulbs!) of your labor. It’s a rewarding experience that can transform your kitchen and your perspective on food.
We wholeheartedly encourage you to give this DIY garlic growing hack a try. It’s easy, affordable, and incredibly satisfying. Don’t be intimidated if you’ve never gardened before – this is the perfect starting point. And once you’ve harvested your first crop, we’d love to hear about your experience! Share your photos, tips, and variations in the comments below. Let’s build a community of garlic growers and inspire others to embrace the joy of homegrown food. Let us know what worked for you, what challenges you faced, and any creative solutions you came up with. Together, we can unlock the secrets to successful garlic cultivation and enjoy the delicious rewards.
So, grab some garlic cloves, prepare your container, and get ready to embark on a flavorful adventure. Happy growing!
Frequently Asked Questions (FAQ)
What kind of garlic should I use for this DIY trick?
You can use any variety of garlic you prefer! Softneck varieties are generally easier to grow in warmer climates, while hardneck varieties are more cold-hardy. Elephant garlic, while technically a leek, can also be grown using this method and produces massive, mild-flavored cloves. The best approach is to source your garlic from a local farmer’s market or garden center. Avoid using garlic from the grocery store, as it may have been treated to prevent sprouting.
How deep should I plant the garlic cloves?
Plant the cloves about 2 inches deep, with the pointed end facing up. This ensures that the roots have enough room to develop and that the sprout can easily reach the surface.
What kind of soil is best for growing garlic?
Garlic prefers well-draining soil that is rich in organic matter. A good quality potting mix will work well, but you can also amend it with compost, aged manure, or worm castings to improve its fertility and drainage. Avoid heavy clay soils, as they can become waterlogged and cause the garlic cloves to rot.
How often should I water my garlic plants?
Water your garlic plants regularly, especially during dry periods. The soil should be consistently moist, but not waterlogged. Check the soil moisture by sticking your finger about an inch deep. If it feels dry, it’s time to water. Reduce watering during the winter months when the plants are dormant.
How much sunlight does garlic need?
Garlic needs at least 6 hours of sunlight per day to thrive. Choose a location that receives plenty of direct sunlight, especially during the spring and summer months. If you are growing garlic indoors, you may need to supplement with artificial lighting.
When is the best time to plant garlic?
The best time to plant garlic is in the fall, about 4-6 weeks before the first frost. This allows the cloves to develop roots before the ground freezes, giving them a head start in the spring. In warmer climates, you can plant garlic in late winter or early spring.
How long does it take for garlic to grow?
Garlic typically takes about 8-9 months to mature. You can expect to harvest your garlic in the summer, when the leaves begin to turn yellow and brown.
How do I know when my garlic is ready to harvest?
The best way to tell if your garlic is ready to harvest is to check the leaves. When about half of the leaves have turned yellow and brown, it’s time to dig up the bulbs. You can also gently dig around the base of the plant to check the size of the bulb.
Can I grow garlic in containers?
Yes, garlic grows very well in containers. Choose a container that is at least 8 inches deep and wide to allow the bulbs to develop properly. Make sure the container has drainage holes to prevent waterlogging.
What are some common pests and diseases that affect garlic?
Some common pests that affect garlic include aphids, thrips, and onion maggots. Diseases include white rot, downy mildew, and rust. You can prevent these problems by practicing good sanitation, providing adequate drainage, and using organic pest control methods.
Can I eat the garlic scapes?
Yes, garlic scapes are edible and delicious! They are the flower stalks that grow from hardneck garlic varieties. Harvest them in the spring, before they start to curl. They have a mild garlic flavor and can be used in stir-fries, pesto, or grilled.
How do I store my harvested garlic?
After harvesting, cure your garlic by hanging it in a cool, dry, and well-ventilated place for 2-3 weeks. Once the bulbs are dry, you can store them in a mesh bag or basket in a cool, dark place. Properly cured garlic can last for several months.
What if my garlic doesn’t sprout?
If your garlic doesn’t sprout, it could be due to several factors. The cloves may have been treated to prevent sprouting, the soil may be too wet or too dry, or the temperature may be too cold. Make sure you are using untreated garlic cloves, providing adequate drainage, and planting at the correct time of year.
Can I use this method to grow garlic indoors year-round?
While you can grow garlic indoors, it’s important to provide the right conditions. Garlic needs plenty of sunlight, so you may need to supplement with artificial lighting. You’ll also need to ensure that the soil is well-draining and that the temperature is consistent. While it’s possible, it may be more challenging than growing garlic outdoors during the appropriate season.
Is this DIY garlic growing hack suitable for all climates?
This method is adaptable to various climates, but adjustments may be needed. In colder climates, mulching is crucial for winter protection. In warmer climates, ensure adequate watering and consider providing shade during the hottest part of the day. Selecting garlic varieties suited to your specific climate is also essential for success.


Leave a Comment