
Growing Coral Bells from Seed can feel like a daunting task, but trust me, the reward of vibrant foliage in your garden is well worth the effort! Have you ever dreamed of a garden bursting with unique colors and textures, all grown from tiny seeds you nurtured yourself? This DIY guide unlocks the secrets to successfully cultivating these stunning plants, adding a touch of magic to your outdoor space.
Coral Bells, also known as Heuchera, have a rich history in horticulture, gaining popularity in the Victorian era for their ornamental value. Their diverse range of colors and textures has made them a favorite among gardeners for generations. But why buy expensive starter plants when you can embark on a fulfilling journey of growing your own from seed?
Many gardeners shy away from starting Coral Bells from seed, believing it’s too difficult. But I’m here to tell you it’s absolutely achievable with the right knowledge and a little patience. This DIY article will provide you with step-by-step instructions, insider tips, and troubleshooting advice to ensure your success. Imagine the satisfaction of watching those tiny seeds sprout and transform into beautiful, thriving Coral Bells, adding a personal touch to your garden that reflects your dedication and passion. Let’s get started and unlock the secrets to growing Coral Bells from Seed!

Growing Coral Bells (Heuchera) from Seed: A Comprehensive DIY Guide
Hey fellow garden enthusiasts! I’m so excited to share my experience with growing Coral Bells (Heuchera) from seed. It might seem daunting, but trust me, it’s incredibly rewarding and a fantastic way to expand your collection without breaking the bank. Coral Bells are such versatile and beautiful plants, adding vibrant color and texture to any garden. So, let’s dive in!
Why Grow Coral Bells from Seed?
Before we get started, you might be wondering why bother with seeds when you can just buy established plants. Well, there are a few compelling reasons:
* Cost-Effective: Seeds are significantly cheaper than buying mature plants, especially if you want a large number of Coral Bells.
* Variety: You can often find unique and rare varieties of Coral Bells in seed form that might not be available as plants in your local nurseries.
* Personal Satisfaction: There’s something incredibly satisfying about nurturing a plant from a tiny seed to a thriving beauty.
* Control Over Growing Conditions: Starting from seed allows you to control the growing environment from the very beginning, ensuring your plants get the best possible start.
What You’ll Need
Here’s a list of everything you’ll need to successfully grow Coral Bells from seed:
* Coral Bell Seeds: Purchase high-quality seeds from a reputable source. Fresh seeds are crucial for good germination rates.
* Seed Starting Trays or Pots: I prefer seed starting trays with individual cells, but small pots work just as well.
* Seed Starting Mix: This is a fine, sterile soil mix specifically designed for starting seeds. Avoid using regular garden soil, as it can contain pathogens and weed seeds.
* Spray Bottle: For gently watering the seeds without disturbing them.
* Humidity Dome or Plastic Wrap: To maintain consistent moisture levels.
* Grow Lights (Optional but Recommended): Coral Bell seedlings need plenty of light, especially during the winter months.
* Heat Mat (Optional): To provide bottom heat, which can speed up germination.
* Small Labels and a Permanent Marker: To keep track of your different varieties.
* Tweezers (Optional): For carefully handling the tiny seeds.
* Well-draining Potting Mix: For transplanting the seedlings into larger pots.
* Small Pots (2-4 inch): For transplanting the seedlings.
Timing is Key: When to Start Your Seeds
The best time to start Coral Bell seeds is typically late winter or early spring, about 8-10 weeks before the last expected frost. This gives the seedlings enough time to grow strong before being transplanted outdoors. I usually start mine in February or March.
Sowing the Seeds: A Step-by-Step Guide
Okay, let’s get our hands dirty! Here’s how to sow your Coral Bell seeds:
1. Prepare Your Seed Starting Trays or Pots: Fill your seed starting trays or pots with seed starting mix. Gently tap the trays to settle the mix and remove any air pockets. Moisten the mix thoroughly with water, allowing any excess water to drain away. The mix should be damp but not soggy.
2. Sow the Seeds: Coral Bell seeds are incredibly tiny, almost like dust. Because of this, I find it easiest to sprinkle them evenly over the surface of the soil. Don’t bury them too deep; they need light to germinate. A light dusting of vermiculite over the seeds can help retain moisture and prevent algae growth.
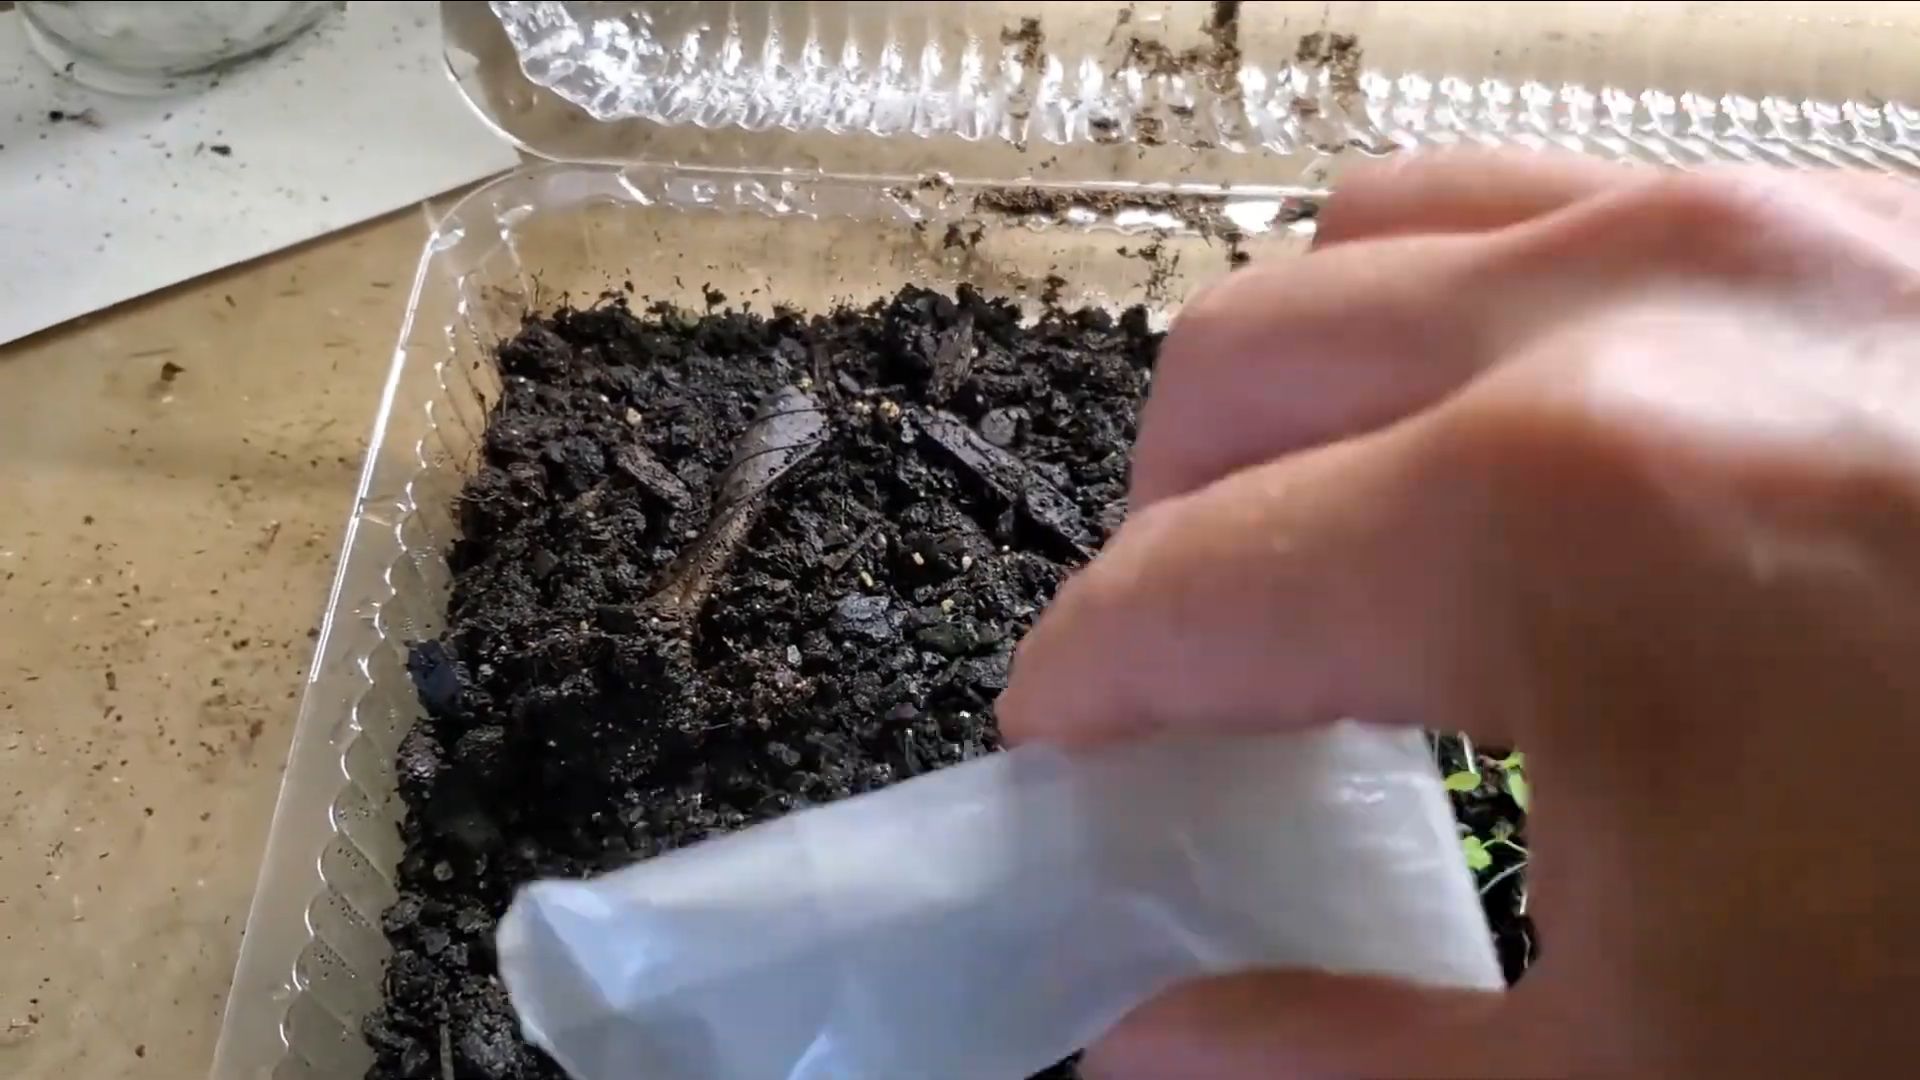
3. Mist with Water: Gently mist the surface of the soil with water using a spray bottle. Be careful not to dislodge the seeds.
4. Cover with a Humidity Dome or Plastic Wrap: This will help maintain consistent moisture levels and create a humid environment, which is essential for germination. If using plastic wrap, make sure to poke a few small holes for ventilation.
5. Provide Light and Warmth: Place the seed starting trays under grow lights or in a bright, sunny location. If you’re using a heat mat, set it to a temperature of around 70-75°F (21-24°C).
Germination: Patience is a Virtue
Germination can take anywhere from 14 to 28 days, so be patient. Keep the soil consistently moist but not waterlogged. Check the trays daily and mist with water as needed. Remove the humidity dome or plastic wrap for a few hours each day to allow for air circulation and prevent fungal diseases.
Caring for Seedlings: Nurturing Your Tiny Plants
Once the seedlings emerge, it’s time to provide them with the care they need to thrive.
1. Light: Provide plenty of light. If you’re using grow lights, keep them on for 14-16 hours per day. If you’re growing them in a sunny location, make sure they receive at least 6 hours of direct sunlight.
2. Watering: Water the seedlings regularly, but be careful not to overwater. Allow the top inch of soil to dry out slightly between waterings.
3. Fertilizing: Once the seedlings have developed their first set of true leaves (the leaves that look like miniature versions of the adult plant’s leaves), you can start fertilizing them with a diluted liquid fertilizer. I use a balanced fertilizer diluted to half strength. Fertilize every 2-3 weeks.
4. Air Circulation: Good air circulation is essential for preventing fungal diseases. Make sure the seedlings have plenty of space around them and that the air is circulating freely. A small fan can help improve air circulation.
Transplanting: Giving Your Seedlings Room to Grow
Once the seedlings have developed several sets of true leaves and are large enough to handle, it’s time to transplant them into larger pots.
1. Prepare Your Pots: Fill your small pots (2-4 inch) with well-draining potting mix.
2. Carefully Remove the Seedlings: Gently loosen the soil around the seedlings with a small tool, such as a fork or spoon. Carefully lift the seedlings out of the seed starting trays, being careful not to damage the roots.
3. Transplant the Seedlings: Make a small hole in the center of each pot and carefully place the seedling in the hole. Gently firm the soil around the seedling.
4. Water Thoroughly: Water the transplanted seedlings thoroughly and allow any excess water to drain away.
5. Provide Light and Warmth: Place the transplanted seedlings under grow lights or in a bright, sunny location.
Hardening Off: Preparing for the Great Outdoors
Before transplanting your Coral Bells into the garden, it’s essential to harden them off. This process gradually acclimates the plants to outdoor conditions, such as sunlight, wind, and temperature fluctuations.
1. Start Slowly: Begin by placing the seedlings outdoors in a sheltered location for a few hours each day. Gradually increase the amount of time they spend outdoors each day.
2. Protect from Harsh Conditions: Protect the seedlings from direct sunlight, strong winds, and extreme temperatures.
3. Monitor the Plants: Keep a close eye on the seedlings and watch for signs of stress, such as wilting or sunburn. If you notice any signs of stress, bring the plants back indoors and gradually reintroduce them to outdoor conditions.
4. After a Week or Two: After a week or two of hardening off, the seedlings should be ready to be transplanted into the garden.
Planting in the Garden: Finding the Perfect Spot
Coral Bells prefer a location with partial shade, especially in hot climates. They can tolerate full sun in cooler climates, but their foliage may scorch in intense sunlight. The soil should be well-draining and rich in organic matter.
1. Prepare the Soil: Dig a hole that is slightly larger than the root ball of the seedling. Amend the soil with compost or other organic matter to improve drainage and fertility.
2. Plant the Seedlings: Carefully remove the seedling from its pot and gently loosen the roots. Place the seedling in the hole and backfill with soil. Firm the soil around the seedling.
3. Water Thoroughly: Water the newly planted Coral Bells thoroughly and allow any excess water to drain away.
4. Mulch: Apply a layer of mulch around the plants to help retain moisture, suppress weeds, and regulate soil temperature.
Ongoing Care: Keeping Your Coral Bells Happy
Once your Coral Bells are established in the garden, they require minimal care.
* Watering: Water regularly, especially during dry periods. Avoid overwatering, as this can lead to root rot.
* Fertilizing: Fertilize in the spring with a balanced fertilizer.
* Deadheading: Remove spent flower stalks to encourage more blooms.
* Division: Divide the plants every few years to prevent overcrowding and rejuvenate them.
* Winter Protection: In colder climates, provide winter protection by mulching around
Conclusion
So, there you have it! Growing Coral Bells from seed might seem a little daunting at first, but with a little patience and the right approach, you can unlock a world of vibrant foliage and delicate blooms right in your own backyard. This DIY trick isn’t just about saving money; it’s about experiencing the joy of nurturing life from its very beginning and gaining a deeper appreciation for the beauty of nature.
Why is this a must-try? Because it opens up a realm of possibilities that you simply can’t access when buying established plants. You’re no longer limited to the varieties available at your local garden center. You can experiment with rare and unusual cultivars, create your own unique hybrids, and tailor your garden to your exact aesthetic preferences. Imagine the satisfaction of knowing that those stunning Coral Bells gracing your borders are the result of your own hard work and dedication!
But the benefits extend beyond just aesthetics. Growing from seed allows you to select the healthiest and most vigorous seedlings, ensuring that your plants are well-adapted to your specific climate and soil conditions. You’ll also be contributing to biodiversity by preserving and propagating heirloom varieties that might otherwise be lost.
Looking for some variations to try? Consider experimenting with different seed starting mediums. Some gardeners swear by peat moss, while others prefer coconut coir or a soilless mix. You can also try different lighting conditions to see what works best for your seedlings. A simple fluorescent shop light can be surprisingly effective, or you can invest in a more sophisticated grow light system.
Another fun variation is to try cold stratification. Some Coral Bell varieties benefit from a period of cold, moist storage before sowing. Simply place the seeds in a damp paper towel, seal them in a plastic bag, and refrigerate them for a few weeks before planting. This mimics the natural winter conditions that these seeds would experience in the wild and can improve germination rates.
Don’t be afraid to get creative with your planting containers, either. You can use anything from recycled yogurt cups to egg cartons to specialized seed starting trays. Just make sure that your containers have adequate drainage to prevent waterlogging.
And finally, remember that patience is key. Coral Bells can be slow to germinate, so don’t be discouraged if you don’t see results immediately. Keep the soil consistently moist, provide adequate light, and wait patiently for those tiny seedlings to emerge.
We wholeheartedly encourage you to give this DIY trick a try. It’s a rewarding and enriching experience that will transform the way you think about gardening. Once you’ve successfully grown your own Coral Bells from seed, we’d love to hear about your experience! Share your tips, tricks, and photos with us in the comments below. Let’s create a community of Coral Bell enthusiasts and inspire others to embrace the joy of seed starting. Remember, mastering the art of growing Coral Bells from seed is not just about the plants; it’s about the journey, the learning, and the connection to nature. Happy gardening!
Frequently Asked Questions (FAQ)
How long does it take for Coral Bell seeds to germinate?
Germination times for Coral Bell seeds can vary quite a bit depending on the variety, the freshness of the seeds, and the environmental conditions. Generally, you can expect to see seedlings emerge anywhere from 14 to 60 days after sowing. It’s crucial to maintain consistent moisture and warmth during this period. Don’t give up if you don’t see sprouts right away; patience is key! Some varieties are simply slower to germinate than others. If you’ve waited longer than 60 days and still haven’t seen any action, it might be worth trying a different batch of seeds or adjusting your growing conditions.
What is the best soil mix for starting Coral Bell seeds?
Coral Bells prefer well-draining soil, so a good seed starting mix is essential. Avoid using garden soil, as it can be too heavy and may contain pathogens that can harm your delicate seedlings. A commercially available seed starting mix is a great option, as it’s typically sterile and has a fine texture that’s ideal for germination. Alternatively, you can make your own mix by combining equal parts of peat moss (or coconut coir), perlite, and vermiculite. This combination provides good drainage, aeration, and moisture retention. Make sure to moisten the mix thoroughly before sowing your seeds.
Do Coral Bell seeds need light to germinate?
Yes, Coral Bell seeds are very small and need light to germinate. They are considered light-dependent germinators. This means that they should not be covered with soil when sown. Simply sprinkle the seeds on the surface of the moist seed starting mix and gently press them down. Providing adequate light is crucial for successful germination. A fluorescent shop light or a grow light is ideal, but a bright windowsill can also work. Keep the light on for at least 12-16 hours per day.
How often should I water my Coral Bell seedlings?
Maintaining consistent moisture is essential for Coral Bell seedlings, but overwatering can be just as detrimental as underwatering. The goal is to keep the soil consistently moist but not soggy. Water when the surface of the soil feels dry to the touch. Use a gentle watering can or a spray bottle to avoid disturbing the delicate seedlings. Bottom watering is also a good option; simply place the container in a tray of water and allow the soil to absorb the moisture from below.
When should I transplant my Coral Bell seedlings?
Transplant your Coral Bell seedlings when they have developed at least two sets of true leaves and are large enough to handle without damaging them. This typically occurs a few weeks after germination. Gently loosen the seedlings from their containers and transplant them into individual pots filled with a well-draining potting mix. Be careful not to damage the roots during transplanting. Water the seedlings thoroughly after transplanting and place them in a location with bright, indirect light.
Can I grow Coral Bells from seed directly in the garden?
While it’s possible to direct sow Coral Bell seeds in the garden, it’s generally not recommended. Coral Bell seeds are very small and delicate, and they require specific conditions to germinate successfully. Starting them indoors gives you more control over the environment and increases your chances of success. However, if you do choose to direct sow, make sure to prepare the soil well, sow the seeds thinly, and keep the area consistently moist. Be prepared for a lower germination rate compared to starting them indoors.
What are some common problems when growing Coral Bells from seed?
Some common problems include damping off (a fungal disease that causes seedlings to collapse), overwatering, underwatering, and insufficient light. Damping off can be prevented by using a sterile seed starting mix and avoiding overwatering. Ensure proper drainage and ventilation to prevent fungal growth. Overwatering can lead to root rot, while underwatering can cause the seedlings to dry out and die. Providing adequate light is essential for healthy growth.
How do I harden off my Coral Bell seedlings before planting them outdoors?
Hardening off is the process of gradually acclimating your seedlings to outdoor conditions before transplanting them into the garden. This helps them to adjust to the sun, wind, and temperature fluctuations. Start by placing the seedlings outdoors in a sheltered location for a few hours each day, gradually increasing the amount of time they spend outside over the course of a week or two. Protect them from direct sunlight and strong winds during the initial hardening off period.
What are some good companion plants for Coral Bells?
Coral Bells make excellent companions for a variety of plants, including hostas, ferns, astilbes, and other shade-loving perennials. They also pair well with spring-blooming bulbs like tulips and daffodils. Their colorful foliage provides a beautiful contrast to the green foliage of other plants, and they attract pollinators to the garden.
How do I collect seeds from my Coral Bells?
To collect seeds, allow the flower stalks to dry completely on the plant. Once the seed pods are dry and brown, carefully cut them off and place them in a paper bag. Allow the seed pods to dry further for a few days, then gently crush them to release the seeds. Separate the seeds from the chaff by sifting them through a fine-mesh sieve. Store the seeds in an airtight container in a cool, dry place until you’re ready to sow them. Keep in mind that seeds from hybrid Coral Bells may not come true to type, meaning that the offspring may not resemble the parent plant.

Leave a Comment