
Growing Chili Peppers at Home can seem daunting, but trust me, it’s easier than you think! Imagine plucking fiery, vibrant peppers straight from your own garden, ready to spice up your next meal. Forget those bland, store-bought chilies – we’re talking about homegrown flavor explosions! For centuries, chili peppers have been cultivated across the globe, from their origins in South America where they were revered not only for their culinary uses but also for their medicinal properties and even as a form of currency.
But why should you bother with growing your own? Well, besides the sheer satisfaction of nurturing something from seed to harvest, you’ll have access to varieties you simply won’t find in supermarkets. Plus, you’ll know exactly what’s gone into your peppers – no nasty pesticides or hidden chemicals. In this DIY guide, I’m going to share my favorite tips and tricks for successfully growing chili peppers at home, even if you have limited space or a less-than-green thumb. Get ready to add some serious heat to your life!
Chili Peppers zu Hause anbauen: Dein feuriger Leitfaden
Hey Chili-Liebhaber! Hast du jemals davon geträumt, deine eigenen, super-scharfen Chilis zu Hause anzubauen? Ich kann dir sagen, es ist einfacher als du denkst und unglaublich befriedigend! Stell dir vor, du erntest deine eigenen Jalapeños für Nachos oder Habaneros für eine selbstgemachte Hot Sauce. In diesem Artikel zeige ich dir, wie du das ganz einfach hinbekommst. Los geht’s!
Was du brauchst: Die Zutaten für deinen Chili-Erfolg
Bevor wir loslegen, hier eine Liste der Dinge, die du brauchst:
* Chili-Samen: Wähle deine Lieblingssorten! Von milden Poblano bis zu feurigen Ghost Peppers, die Auswahl ist riesig. Achte auf qualitativ hochwertige Samen von einem vertrauenswürdigen Anbieter.
* Anzuchterde: Normale Blumenerde ist zu schwer für die Anzucht. Anzuchterde ist leichter und besser für die zarten Wurzeln der Keimlinge.
* Anzuchtgefäße: Kleine Töpfe, Anzuchtschalen oder sogar Eierkartons funktionieren super. Hauptsache, sie haben Abzugslöcher.
* Pflanztöpfe: Größere Töpfe (mindestens 15-20 cm Durchmesser) für die späteren Stadien.
* Blumenerde: Eine gute, nährstoffreiche Blumenerde ist wichtig für das Wachstum deiner Chilis.
* Dünger: Ein ausgewogener Flüssigdünger oder Langzeitdünger speziell für Gemüse.
* Gießkanne oder Sprühflasche: Zum sanften Bewässern.
* Pflanzschilder: Damit du nicht vergisst, welche Sorte wo wächst.
* (Optional) Heizmatte: Beschleunigt die Keimung, besonders bei wärmeliebenden Sorten.
* (Optional) Pflanzenlampe: Hilfreich, wenn du wenig Sonnenlicht hast.
Phase 1: Die Anzucht – Der Start deiner Chili-Reise
Die Anzucht ist ein wichtiger Schritt, besonders wenn du in einer Region mit kürzeren Sommern lebst. So geht’s:
1. Samen vorbereiten (optional): Um die Keimung zu beschleunigen, kannst du die Samen für 24 Stunden in lauwarmem Wasser einweichen. Das weicht die harte Samenschale auf.
2. Anzuchtgefäße befüllen: Fülle deine Anzuchtgefäße mit Anzuchterde. Drücke die Erde leicht an, aber nicht zu fest.
3. Samen aussäen: Lege 1-2 Samen pro Gefäß auf die Erde und bedecke sie mit einer dünnen Schicht Anzuchterde (ca. 0,5 cm).
4. Bewässern: Befeuchte die Erde vorsichtig mit einer Sprühflasche. Die Erde sollte feucht, aber nicht nass sein.
5. Warm stellen: Stelle die Anzuchtgefäße an einen warmen Ort (22-28°C). Eine Heizmatte kann hier Wunder wirken.
6. Feuchtigkeit halten: Decke die Gefäße mit Frischhaltefolie oder einem Deckel ab, um die Luftfeuchtigkeit hoch zu halten. Lüfte sie täglich kurz, um Schimmelbildung zu vermeiden.
7. Warten und beobachten: Nach einigen Tagen bis Wochen (je nach Sorte) sollten die ersten Keimlinge sprießen. Sobald sie da sind, entferne die Abdeckung.
8. Licht geben: Stelle die Keimlinge an einen hellen Ort. Wenn du nicht genügend Sonnenlicht hast, verwende eine Pflanzenlampe.
9. Vereinzeln: Wenn die Keimlinge ein paar Blätter haben, kannst du sie vereinzeln. Das bedeutet, dass du den schwächeren Keimling entfernst, wenn du zwei pro Gefäß gesät hast.
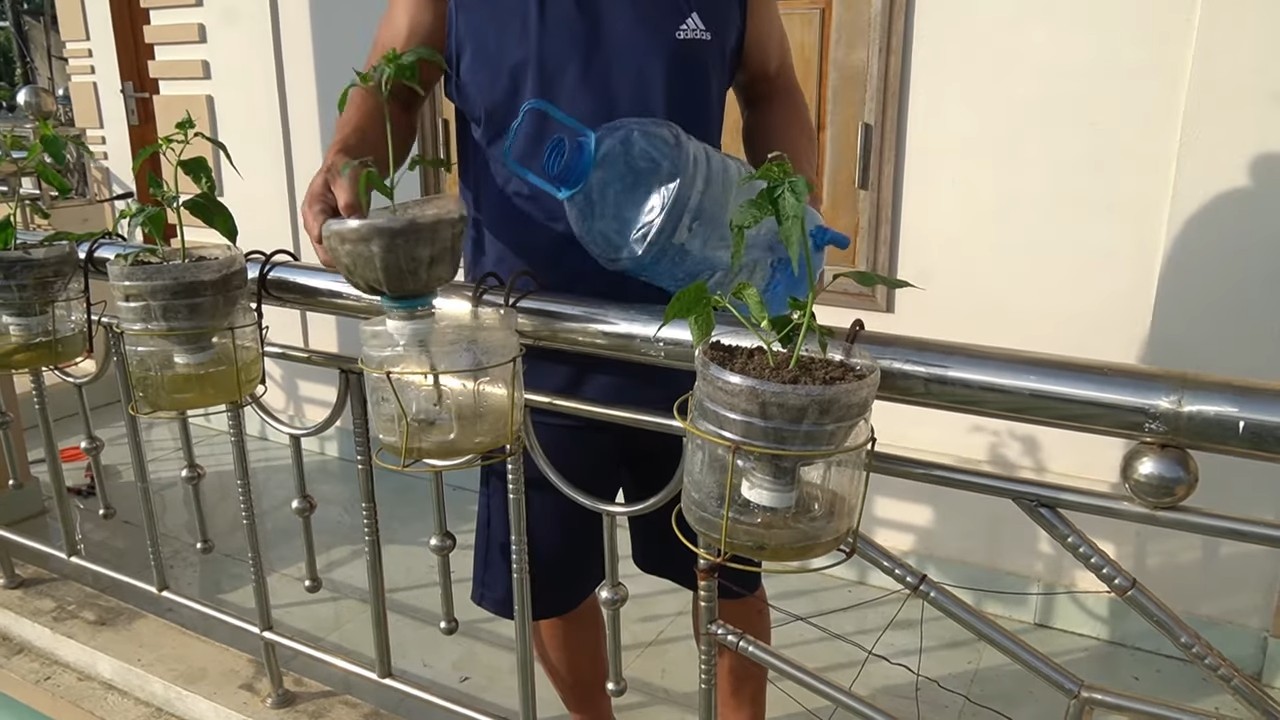
Phase 2: Umtopfen – Mehr Platz zum Wachsen
Sobald deine Chili-Pflänzchen etwas größer geworden sind, ist es Zeit, sie in größere Töpfe umzutopfen.
1. Vorbereitung: Fülle die größeren Töpfe mit Blumenerde.
2. Pflänzchen vorsichtig aus dem Anzuchtgefäß holen: Drücke vorsichtig von unten gegen das Gefäß, um den Wurzelballen zu lösen. Sei dabei sehr vorsichtig, um die Wurzeln nicht zu beschädigen.
3. Einpflanzen: Setze das Pflänzchen in den neuen Topf und fülle den restlichen Raum mit Blumenerde auf. Die Oberseite des Wurzelballens sollte mit der Erdoberfläche abschließen.
4. Bewässern: Gieße die Pflanze gründlich an.
5. Standort: Stelle die Pflanze an einen hellen, warmen Ort.
Phase 3: Pflege – Damit deine Chilis prächtig gedeihen
Die richtige Pflege ist entscheidend für eine reiche Chili-Ernte.
1. Gießen: Gieße regelmäßig, aber vermeide Staunässe. Die Erde sollte immer leicht feucht sein. Überprüfe die Feuchtigkeit, indem du deinen Finger in die Erde steckst.
2. Düngen: Dünge deine Chilis regelmäßig mit einem Flüssigdünger oder Langzeitdünger. Befolge die Anweisungen auf der Verpackung.
3. Sonnenlicht: Chilis lieben die Sonne! Stelle sie an einen sonnigen Standort, idealerweise mit mindestens 6 Stunden direkter Sonneneinstrahlung pro Tag.
4. Schädlinge und Krankheiten: Achte auf Schädlinge wie Blattläuse oder Spinnmilben. Bei Befall kannst du natürliche Schädlingsbekämpfungsmittel verwenden, wie z.B. eine Seifenlösung.
5. Ausgeizen (optional): Bei einigen Chili-Sorten kann das Ausgeizen (Entfernen der Seitentriebe in den Blattachseln) die Ernte verbessern. Informiere dich, ob das für deine Sorte empfehlenswert ist.
6. Stützen (optional): Wenn deine Chili-Pflanzen sehr groß und schwer werden, kann es sinnvoll sein, sie mit Stäben zu stützen.
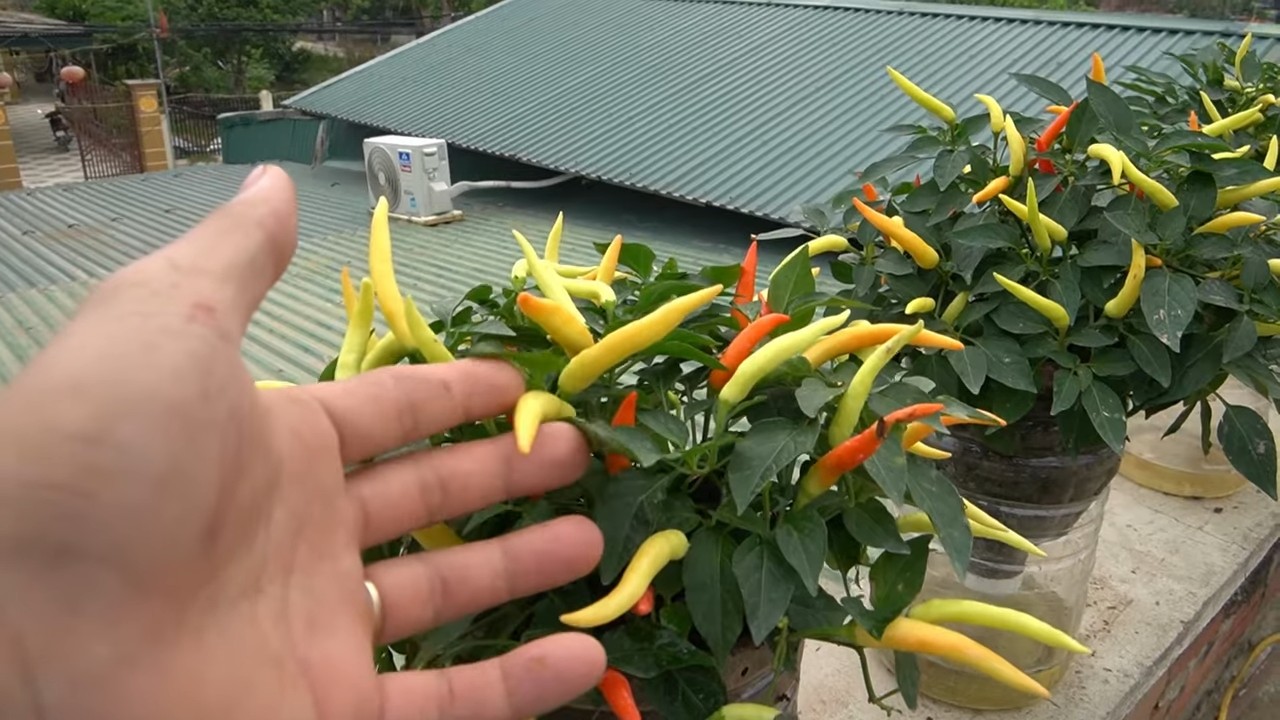
Phase 4: Ernte – Die Früchte deiner Arbeit
Endlich ist es soweit! Die Erntezeit ist gekommen.
1. Reife erkennen: Die Farbe der Chilis ändert sich, wenn sie reif sind. Die genaue Farbe hängt von der Sorte ab. Sie werden in der Regel rot, gelb, orange oder braun.
2. Ernten: Schneide die Chilis mit einer Schere oder einem Messer ab. Achte darauf, den Stiel nicht zu beschädigen.
3. Genießen: Verwende deine frisch geernteten Chilis in deinen Lieblingsgerichten oder trockne sie, um sie länger haltbar zu machen.
Zusätzliche Tipps für Chili-Profis (oder solche, die es werden wollen!)
* Überwinterung: Wenn du deine Chili-Pflanzen überwintern möchtest, schneide sie im Herbst zurück und stelle sie an einen kühlen, hellen Ort. Gieße sie nur sparsam.
* Kreuzbestäubung: Wenn du verschiedene Chili-Sorten anbaust, können sie sich kreuzbestäuben. Das bedeutet, dass die Samen der nächsten Generation nicht sortenrein sind. Wenn du sortenreine Samen gewinnen möchtest, musst du die Blüten isolieren.
* Samen gewinnen: Um Samen zu gewinnen, lasse die Chilis vollständig ausreifen und trocknen. Entnimm die Samen und lagere sie an einem kühlen, trockenen Ort.
* Experimentieren: Probiere verschiedene Sorten und Anbaumethoden aus, um herauszufinden, was für dich am besten funktioniert.
Ich hoffe, dieser Leitfaden hilft dir dabei, deine eigenen, feurigen Chilis zu Hause anzubauen. Viel Spaß beim Gärtnern und guten Appetit! Und denk dran: Sei vorsichtig mit der Schärfe!
Conclusion
So, there you have it! Growing chili peppers at home isn’t just a fun gardening project; it’s a gateway to a world of fresh, flavorful possibilities. From adding a fiery kick to your favorite dishes to creating unique homemade sauces, the rewards of nurturing your own chili plants are truly endless. We’ve covered everything from selecting the right seeds and providing optimal growing conditions to troubleshooting common problems and harvesting your bountiful crop.
But why is this DIY trick a must-try? Because it empowers you to control the entire process, from seed to table. You know exactly what goes into your peppers – no hidden pesticides or questionable growing practices. Plus, the taste of a homegrown chili pepper, bursting with freshness and vibrant flavor, is simply unmatched by anything you can buy in a store. It’s an experience that connects you to nature and elevates your culinary creations.
Don’t be afraid to experiment! Try different varieties of chili peppers to discover your favorites. Jalapeños, habaneros, serranos, ghost peppers – the possibilities are vast and exciting. You can even cross-pollinate different varieties to create your own unique hybrids, adding a touch of personalized flair to your garden. Consider growing your peppers in containers if you have limited space, or even indoors with the help of grow lights. The key is to adapt the techniques to your specific environment and preferences.
Beyond the culinary benefits, growing chili peppers at home offers a sense of accomplishment and satisfaction. Watching your tiny seedlings sprout and develop into thriving plants, laden with colorful peppers, is a truly rewarding experience. It’s a reminder of the power of nature and the simple joys of gardening.
We encourage you to take the plunge and embark on your own chili pepper growing adventure. Start small, be patient, and don’t be afraid to make mistakes. Every challenge is an opportunity to learn and grow, both literally and figuratively. And most importantly, have fun!
Once you’ve harvested your first batch of homegrown chilies, we’d love to hear about your experience. Share your tips, tricks, and favorite recipes in the comments below. Let’s create a community of chili pepper enthusiasts, sharing our knowledge and inspiring each other to grow the best peppers possible. Your insights could be invaluable to other aspiring gardeners. So, get your hands dirty, embrace the heat, and discover the joy of growing chili peppers at home!
Frequently Asked Questions (FAQ)
What is the best time of year to start growing chili peppers from seed?
The ideal time to start growing chili peppers from seed depends on your climate. In general, you should aim to start seeds indoors 6-8 weeks before the last expected frost. This allows the seedlings to develop a strong root system before being transplanted outdoors. If you live in a warmer climate with a longer growing season, you can start seeds directly in the ground after the last frost. However, starting indoors provides a head start and protects the seedlings from harsh weather conditions. Check your local weather forecasts and gardening resources to determine the best time to start seeds in your specific area.
How much sunlight do chili pepper plants need?
Chili pepper plants thrive in full sunlight, requiring at least 6-8 hours of direct sunlight per day. Insufficient sunlight can lead to leggy growth, reduced flowering, and smaller, less flavorful peppers. If you’re growing chili peppers indoors, supplement natural sunlight with grow lights to ensure they receive adequate light. Position the plants in a south-facing window if possible, and rotate them regularly to ensure even exposure to sunlight. When transplanting seedlings outdoors, choose a location that receives plenty of sunlight throughout the day.
What type of soil is best for growing chili peppers?
Chili pepper plants prefer well-draining, fertile soil with a slightly acidic pH of 6.0-7.0. Amend heavy clay soil with compost, peat moss, or other organic matter to improve drainage and aeration. Sandy soil can be improved by adding compost or other organic matter to increase its water-holding capacity. You can also use a commercially available potting mix specifically formulated for vegetables. Before planting, test the soil pH and amend it as needed to ensure optimal growing conditions.
How often should I water my chili pepper plants?
Water chili pepper plants regularly, especially during hot, dry weather. The soil should be kept consistently moist but not waterlogged. Overwatering can lead to root rot, while underwatering can stress the plants and reduce pepper production. Check the soil moisture level by inserting your finger into the soil about an inch deep. If the soil feels dry, it’s time to water. Water deeply and thoroughly, allowing the water to reach the roots. Avoid watering the foliage, as this can promote fungal diseases.
What are some common pests and diseases that affect chili pepper plants?
Chili pepper plants can be susceptible to various pests and diseases, including aphids, spider mites, whiteflies, blossom-end rot, and fungal diseases. Regularly inspect your plants for signs of infestation or disease. Treat infestations with insecticidal soap, neem oil, or other organic pest control methods. Prevent blossom-end rot by ensuring consistent watering and providing adequate calcium to the soil. Improve air circulation around the plants to prevent fungal diseases. Remove any infected leaves or plants to prevent the spread of disease.
How do I know when my chili peppers are ripe?
The ripeness of chili peppers depends on the variety. In general, chili peppers are ripe when they reach their mature color and size. The color can range from green to red, yellow, orange, or even purple, depending on the variety. The peppers should also feel firm and slightly glossy. You can also taste a small piece of the pepper to check for its heat level. Be careful when handling hot peppers, and wear gloves to protect your skin from irritation.
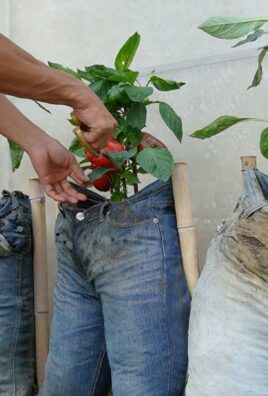
Can I grow chili peppers in containers?
Yes, chili peppers can be successfully grown in containers. Choose a container that is at least 12 inches in diameter and has drainage holes. Use a well-draining potting mix and provide adequate sunlight and water. Container-grown chili peppers may require more frequent watering and fertilization than those grown in the ground. Consider using a slow-release fertilizer or liquid fertilizer to provide the plants with the nutrients they need.
How do I store my harvested chili peppers?
There are several ways to store harvested chili peppers. You can dry them, freeze them, pickle them, or make them into sauces or powders. To dry chili peppers, string them together and hang them in a well-ventilated area until they are completely dry. You can also dry them in a dehydrator or oven. To freeze chili peppers, wash and dry them thoroughly, then place them in freezer bags. To pickle chili peppers, follow a recipe for pickled peppers. To make sauces or powders, follow a recipe for your desired product.
How can I increase the heat level of my chili peppers?
Several factors can influence the heat level of chili peppers, including genetics, growing conditions, and stress. To increase the heat level, provide the plants with plenty of sunlight, water, and nutrients. Avoid overwatering or underwatering, as this can stress the plants and reduce pepper production. You can also try adding Epsom salts to the soil, as this can help increase the production of capsaicin, the compound that gives chili peppers their heat. Remember that the heat level of chili peppers can vary depending on the variety and growing conditions.
What are some creative ways to use my homegrown chili peppers?
The possibilities are endless! You can use them to make homemade hot sauce, chili oil, salsa, or chili powder. Add them to your favorite dishes for a spicy kick, such as tacos, enchiladas, stir-fries, and soups. You can also use them to make chili-infused vinegar or oil. Experiment with different recipes and flavor combinations to discover your favorites. Don’t be afraid to get creative and have fun!
Leave a Comment