
Growing Chard at Home can seem daunting, but trust me, it’s easier than you think! Have you ever dreamed of stepping into your backyard and harvesting vibrant, nutritious greens for a delicious and healthy meal? Well, dream no more! This article is your ultimate guide to unlocking the secrets of successfully cultivating this leafy powerhouse right in your own garden.
Chard, with its colorful stalks and crinkled leaves, isn’t just a pretty face. It boasts a rich history, dating back to ancient Greece and Rome, where it was prized for its medicinal properties and culinary versatility. For centuries, cultures around the world have embraced chard as a staple in their diets, and now, you can too!
Why should you bother with growing chard at home? Simple! Freshness, flavor, and control. Store-bought chard often pales in comparison to the vibrant taste and texture of homegrown varieties. Plus, you have complete control over what goes into your plants, ensuring they’re free from harmful pesticides and chemicals. In this article, I’ll share my favorite DIY tricks and hacks to make growing chard a breeze, even if you’re a complete beginner. Get ready to transform your garden and your plate with this amazing vegetable!
Growing Vibrant Chard at Home: A DIY Guide
Okay, let’s get our hands dirty! I’m so excited to share my guide on growing beautiful and delicious chard right in your own backyard (or even in containers!). Chard is such a rewarding vegetable to grow – it’s packed with nutrients, adds a pop of color to your garden, and is incredibly versatile in the kitchen. Plus, it’s relatively easy to care for, making it perfect for beginner gardeners like me (when I started!).
Choosing Your Chard Variety
Before we dive into the nitty-gritty, let’s talk about chard varieties. This is where the fun begins because chard comes in a rainbow of colors!
* **Bright Lights:** This is probably the most popular variety, and for good reason! It boasts stems in shades of red, yellow, orange, pink, and white. It’s a real showstopper in the garden.
* **Ruby Red:** As the name suggests, this variety has vibrant red stems and deep green leaves. It’s a classic choice and adds a beautiful contrast to your garden.
* **Fordhook Giant:** If you’re looking for a reliable and productive variety, Fordhook Giant is a great option. It has dark green, heavily crumpled leaves and thick, white stems.
* **Lucullus:** This variety has light green leaves and thick, white stems. It’s known for its mild flavor and tender texture.
I personally love growing Bright Lights because it adds so much visual interest to my garden. But honestly, you can’t go wrong with any of these varieties!
Preparing Your Garden Bed (or Container!)
Chard needs a good foundation to thrive, so let’s get our soil ready.
* **Sunlight:** Chard loves sunshine! Aim for at least 6 hours of direct sunlight per day. If you’re in a particularly hot climate, some afternoon shade can be beneficial.
* **Soil:** Chard prefers well-drained soil that is rich in organic matter. If your soil is heavy clay or sandy, amend it with compost or well-rotted manure. This will improve drainage and provide essential nutrients.
* **pH:** Chard grows best in soil with a pH between 6.0 and 7.0. You can test your soil pH with a simple soil testing kit from your local garden center. If your soil is too acidic, you can add lime to raise the pH. If it’s too alkaline, you can add sulfur to lower the pH.
For Garden Beds:
1. **Clear the area:** Remove any weeds, rocks, or debris from the area where you plan to plant your chard.
2. **Amend the soil:** Spread a 2-3 inch layer of compost or well-rotted manure over the soil surface.
3. **Till or dig:** Use a garden fork or tiller to incorporate the compost into the soil to a depth of about 12 inches.
4. **Rake smooth:** Rake the soil smooth and level.
For Containers:
1. **Choose a container:** Select a container that is at least 12 inches deep and wide. Make sure it has drainage holes to prevent waterlogging.
2. **Use potting mix:** Fill the container with a high-quality potting mix. Avoid using garden soil in containers, as it can become compacted and doesn’t drain well.
3. **Moisten the soil:** Water the potting mix thoroughly before planting.
Sowing the Seeds
Now for the exciting part – planting the seeds! You can either start your chard seeds indoors or sow them directly in the garden. I usually prefer direct sowing because it’s less work, but starting indoors can give you a head start, especially if you live in a colder climate.
Direct Sowing:
1. **Timing:** Sow chard seeds in the spring after the last frost, or in late summer for a fall harvest.
2. **Spacing:** Sow seeds about ½ inch deep and 1 inch apart in rows that are 12-18 inches apart.
3. **Watering:** Water the soil gently after planting.
4. **Thinning:** Once the seedlings emerge (usually in 5-10 days), thin them to 6-12 inches apart. This will give them enough room to grow.
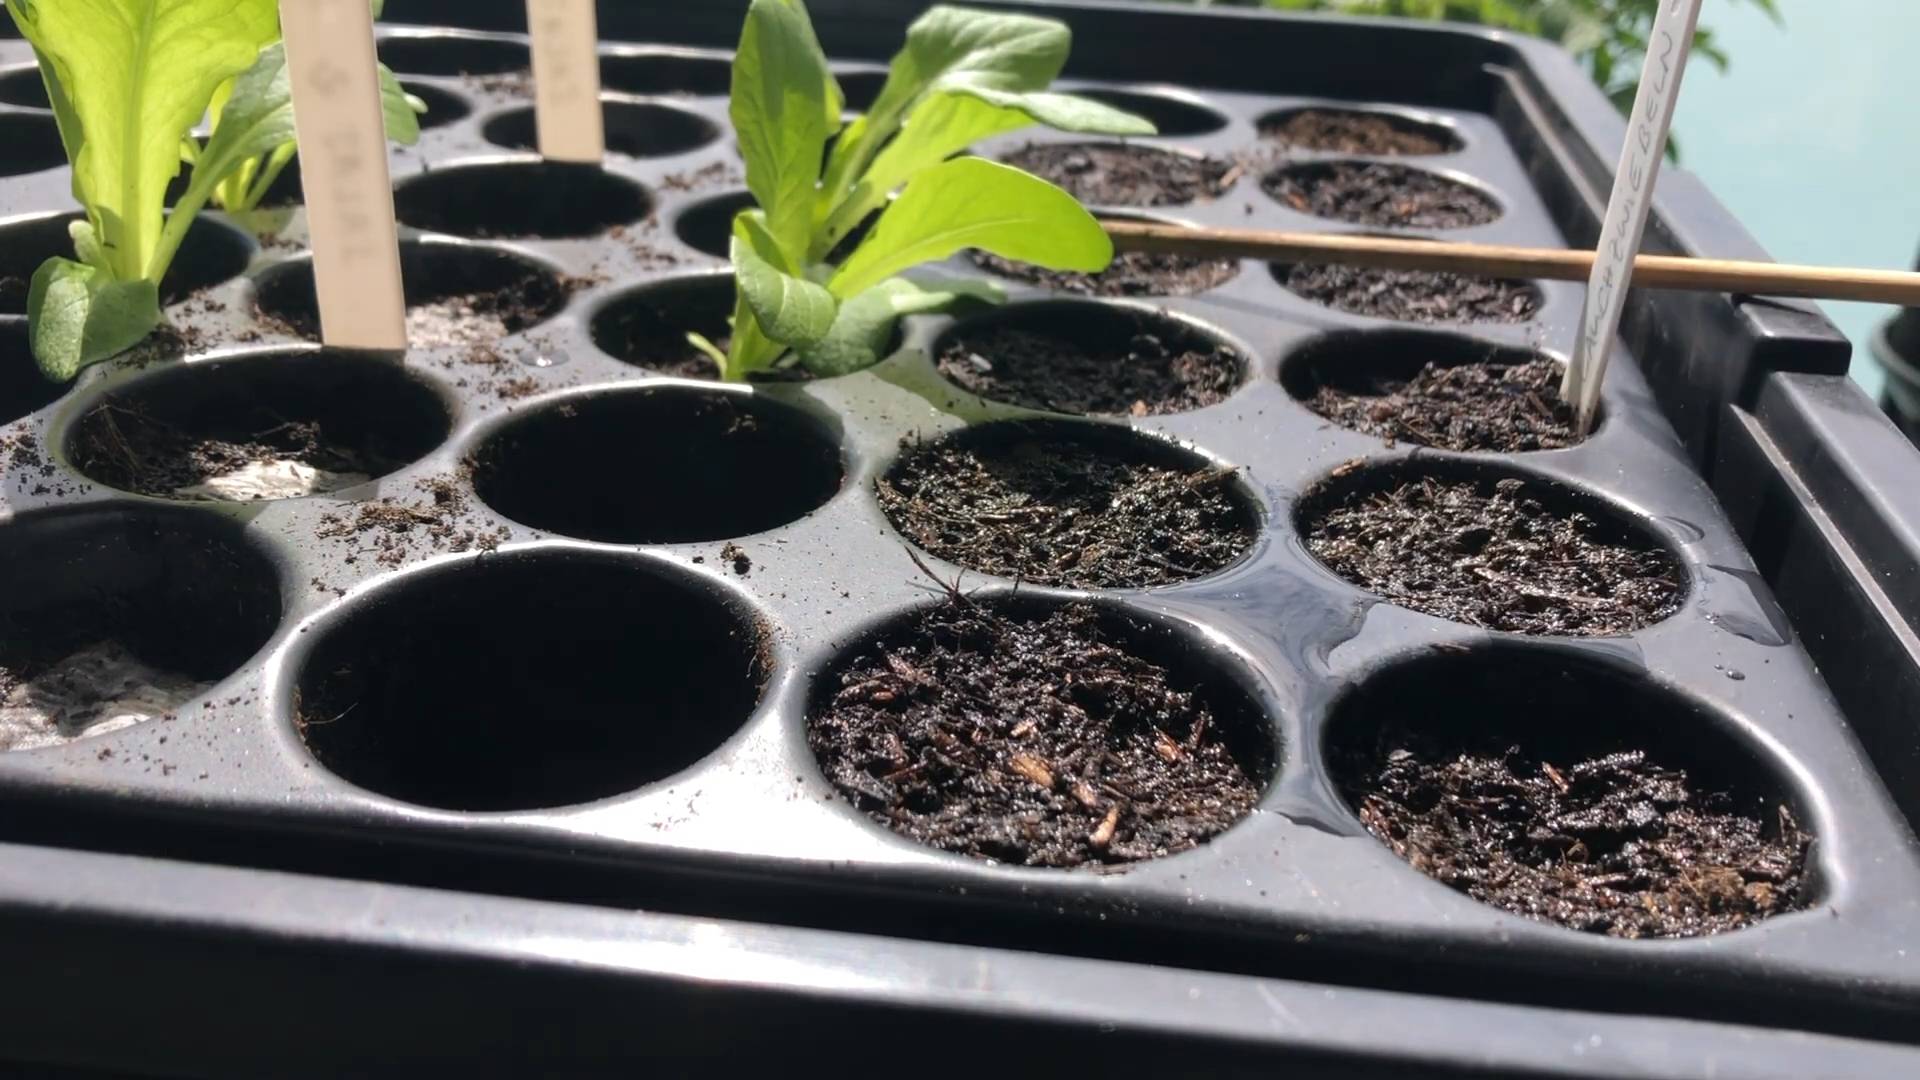
Starting Seeds Indoors:
1. **Timing:** Start seeds indoors 4-6 weeks before the last frost.
2. **Containers:** Sow seeds in seed trays or small pots filled with seed-starting mix.
3. **Depth:** Sow seeds about ½ inch deep.
4. **Watering:** Keep the soil moist but not soggy.
5. **Light:** Place the seed trays under grow lights or in a sunny window.
6. **Hardening off:** Before transplanting the seedlings outdoors, gradually acclimate them to outdoor conditions by exposing them to increasing amounts of sunlight and wind over a period of 7-10 days.
7. **Transplanting:** Transplant the seedlings into the garden, spacing them 6-12 inches apart.
Caring for Your Chard
Once your chard is planted, it’s time to give it some TLC.
* **Watering:** Chard needs consistent moisture, especially during hot, dry weather. Water deeply whenever the top inch of soil feels dry.
* **Fertilizing:** Chard is a heavy feeder, so it benefits from regular fertilization. Apply a balanced fertilizer every 4-6 weeks. You can also side-dress with compost or well-rotted manure.
* **Weeding:** Keep the area around your chard plants free of weeds. Weeds compete with chard for nutrients and water.
* **Mulching:** Apply a layer of mulch around your chard plants to help retain moisture, suppress weeds, and regulate soil temperature. I like to use straw or shredded leaves.
* **Pest Control:** Chard is generally pest-resistant, but it can be susceptible to aphids, slugs, and snails. Inspect your plants regularly and take action if you see any pests. You can handpick pests, use insecticidal soap, or apply diatomaceous earth.
* Bolting: Bolting is when the plant prematurely sends up a flower stalk. This can happen when the weather gets too hot. To prevent bolting, try to plant your chard in a location that gets some afternoon shade, and keep the soil consistently moist. If your chard does bolt, you can still harvest the leaves, but they may become bitter.
Harvesting Your Chard
The best part! You can start harvesting chard leaves as soon as they are large enough to eat, usually about 6-8 weeks after planting.
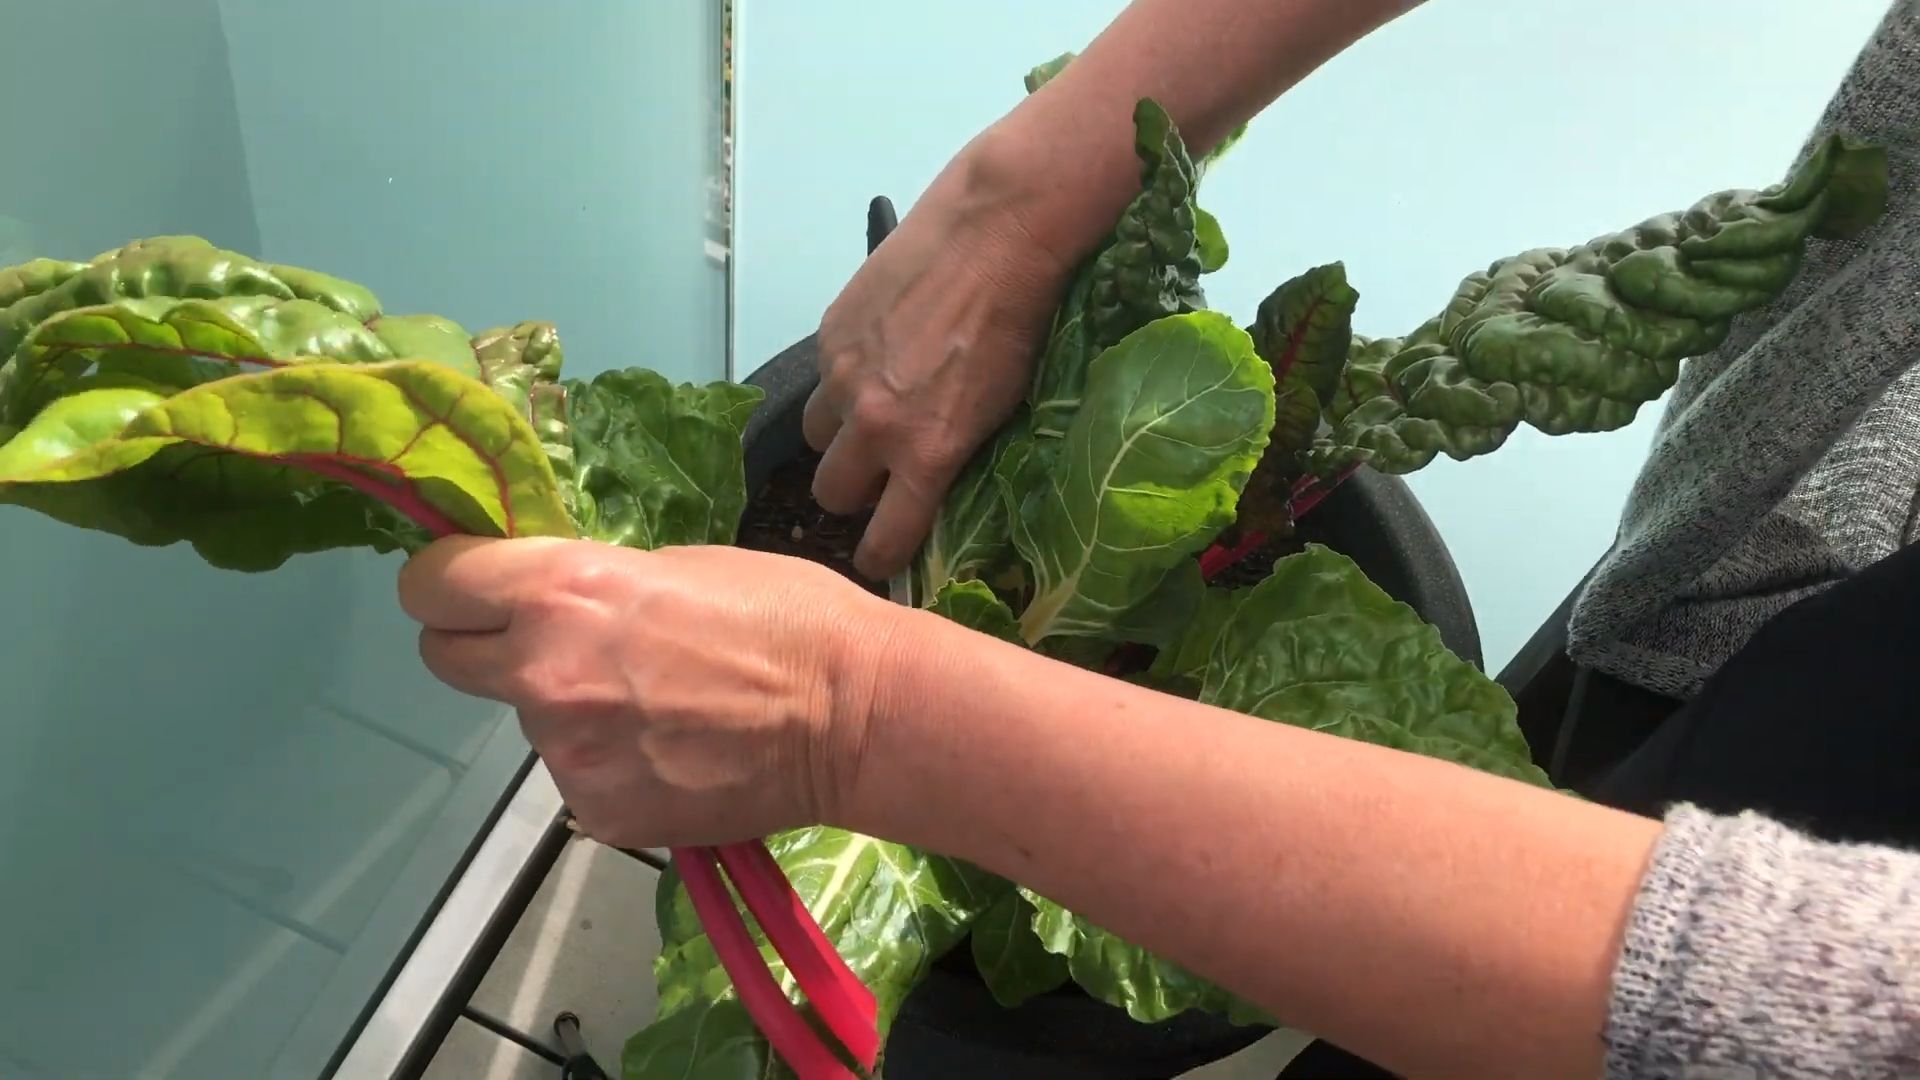
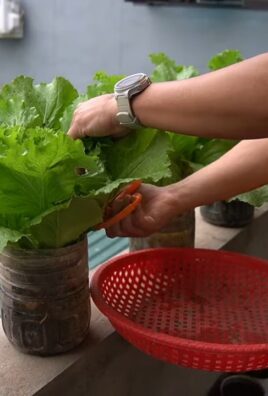
1. **Harvesting method:** Harvest the outer leaves first, leaving the inner leaves to continue growing. This is called “cut-and-come-again” harvesting.
2. **How to harvest:** Use a sharp knife or scissors to cut the leaves off at the base of the plant.
3. **Frequency:** Harvest regularly to encourage continued production.
4. **Storage:** Chard leaves can be stored in the refrigerator for up to a week. Wrap them in a damp paper towel and place them in a plastic bag.
Enjoying Your Harvest
Now that you’ve harvested your beautiful chard, it’s time to enjoy it! Chard is incredibly versatile and can be used in a variety of dishes.
* **Sautéed:** Sauté chard with garlic and olive oil for a simple and delicious side dish.
* **Steamed:** Steam chard and serve it with a squeeze of lemon juice.
* **In soups and stews:** Add chard to soups and stews for extra nutrients and flavor.
* **In salads:** Use young, tender chard leaves in salads.
* **In smoothies:** Add chard to smoothies for a healthy boost.
* **Chard Stems:** Don’t throw away the stems! They are also edible and can be cooked like celery. Try sautéing them, adding them to soups, or pickling them.
My Favorite Chard Recipe: Sautéed Chard with Garlic and Lemon
This is my go-to recipe for using up my chard harvest. It’s quick, easy, and so flavorful!
Ingredients:
* 1 bunch of chard, washed and chopped
* 2 cloves garlic, minced
* 2 tablespoons olive oil
* 1 tablespoon lemon juice
* Salt and pepper to taste
Instructions:
1. Heat the olive oil in a large skillet over medium heat.
2. Add the garlic and sauté for 1 minute, or until fragrant.
3. Add the chard and sauté for 5-7 minutes, or until the leaves are wilted and tender.
4. Stir in the lemon juice, salt, and pepper.
5. Serve immediately.
Growing chard at home is such a rewarding experience. Not only do you get to enjoy fresh, delicious vegetables, but you also get to connect with nature and learn about the growing process. I hope this guide has inspired you to give it
Conclusion
So, there you have it! Growing chard at home isn’t just a gardening project; it’s an investment in your health, your culinary creativity, and your connection to the natural world. We’ve walked through the simple steps, from selecting the right seeds to harvesting your vibrant, leafy bounty. But why is this DIY trick a must-try?
Firstly, the flavor of homegrown chard is simply unmatched. Forget the slightly bitter, sometimes wilted chard you find at the grocery store. Freshly harvested chard bursts with a mild, earthy sweetness that elevates any dish. You control the entire process, ensuring optimal growing conditions and harvesting at the peak of freshness.
Secondly, growing chard at home is incredibly rewarding. There’s a unique satisfaction in nurturing a plant from seed to table. Watching those tiny sprouts emerge and transform into lush, colorful leaves is a visual treat and a testament to your gardening skills. It’s a fantastic way to de-stress, connect with nature, and appreciate the origins of your food.
Thirdly, it’s economical! A single packet of chard seeds can yield a continuous supply of greens for months, significantly reducing your grocery bill. Plus, you’re reducing your carbon footprint by eliminating the transportation and packaging associated with store-bought produce.
But the benefits don’t stop there. Growing your own chard allows for endless experimentation and customization. Want to add a spicy kick? Try interplanting with hot peppers. Looking for a more visually stunning garden? Choose a variety of chard with brightly colored stems, like ‘Bright Lights’ or ‘Ruby Red’. You can even grow chard in containers on your balcony or patio, making it accessible to even the most urban gardeners.
Consider these variations to enhance your chard-growing experience:
* Succession Planting: Sow seeds every few weeks to ensure a continuous harvest throughout the growing season.
* Companion Planting: Plant chard alongside other vegetables like onions, garlic, and carrots to deter pests and improve growth.
* Chard Chips: For a healthy and delicious snack, toss chard leaves with olive oil and salt, then bake until crispy.
* Freezing for Later: Blanch and freeze excess chard for use in soups, stews, and casseroles during the off-season.
We’ve provided you with the knowledge and inspiration to embark on your chard-growing journey. Now, it’s your turn to get your hands dirty! Don’t be afraid to experiment, learn from your mistakes, and most importantly, have fun.
We are confident that you will find growing chard at home to be a fulfilling and delicious experience. So, grab your seeds, prepare your soil, and get ready to enjoy the freshest, most flavorful chard you’ve ever tasted.
We encourage you to try this DIY trick and share your experiences with us! Post photos of your chard garden, share your favorite chard recipes, and let us know what tips and tricks you’ve discovered along the way. Together, we can create a community of chard-loving gardeners and inspire others to embrace the joys of homegrown produce. Happy gardening!
Frequently Asked Questions (FAQ)
What is the best time of year to plant chard?
Chard is a cool-season crop, meaning it thrives in temperatures between 50°F and 70°F (10°C and 21°C). You can plant chard in early spring, about 2-3 weeks before the last expected frost. For a fall harvest, sow seeds in late summer, about 6-8 weeks before the first expected frost. In warmer climates, you can grow chard throughout the winter.
How much sunlight does chard need?
Chard prefers full sun, which means at least 6 hours of direct sunlight per day. However, it can tolerate partial shade, especially in hotter climates. If you’re growing chard in a container, make sure to place it in a sunny location.
What kind of soil is best for growing chard?
Chard prefers well-drained soil that is rich in organic matter. Amend your soil with compost or aged manure before planting to improve its fertility and drainage. Chard also prefers a slightly acidic to neutral soil pH, between 6.0 and 7.0.
How often should I water chard?
Chard needs consistent moisture to thrive. Water deeply whenever the top inch of soil feels dry to the touch. Avoid overwatering, as this can lead to root rot. Mulching around your chard plants can help retain moisture and suppress weeds.
How do I harvest chard?
You can start harvesting chard leaves when they are about 6 inches long. Simply cut the outer leaves near the base of the plant, leaving the inner leaves to continue growing. This cut-and-come-again method allows you to harvest chard continuously throughout the growing season.
What are some common pests and diseases that affect chard?
Chard is generally a pest-resistant crop, but it can be susceptible to aphids, flea beetles, and leaf miners. You can control these pests with insecticidal soap or neem oil. Chard can also be affected by fungal diseases like downy mildew and leaf spot. To prevent these diseases, ensure good air circulation around your plants and avoid overhead watering.
Can I grow chard in containers?
Yes, chard grows well in containers. Choose a container that is at least 12 inches deep and wide to allow for adequate root growth. Use a well-draining potting mix and water regularly. Place the container in a sunny location.
How do I store harvested chard?
To store harvested chard, wash the leaves thoroughly and pat them dry. Wrap the leaves in a damp paper towel and store them in a plastic bag in the refrigerator. Chard can be stored for up to a week. You can also blanch and freeze chard for longer storage.
What are some ways to use chard in cooking?
Chard is a versatile vegetable that can be used in a variety of dishes. You can sauté it with garlic and olive oil, add it to soups and stews, or use it in salads. Chard stems can also be cooked and eaten. Try adding chard to omelets, frittatas, or quiches.
Is chard nutritious?
Yes, chard is a highly nutritious vegetable. It is an excellent source of vitamins A, C, and K, as well as minerals like magnesium, potassium, and iron. Chard is also a good source of fiber and antioxidants. Adding chard to your diet can help improve your overall health and well-being.
Leave a Comment