
Growing Cauliflower at Home might seem daunting, conjuring images of sprawling farms and expert gardeners. But what if I told you that you could cultivate this nutritious and delicious vegetable right in your own backyard, or even on your balcony? Imagine the satisfaction of harvesting your own fresh, crisp cauliflower, knowing exactly where it came from and how it was grown!
Cauliflower, a member of the Brassica family, has a rich history dating back to ancient times. Originating in the Mediterranean region, it was prized by the Romans and has since become a staple in cuisines worldwide. From creamy soups to roasted delights, cauliflower’s versatility makes it a culinary chameleon.
But why bother with the effort of growing your own? In today’s world, where concerns about food security and the quality of produce are ever-present, taking control of your food source is more important than ever. Plus, store-bought cauliflower can sometimes lack the freshness and flavor of homegrown varieties. By learning simple DIY tricks and hacks, you can bypass the grocery store and enjoy the unparalleled taste of freshly harvested cauliflower. This DIY guide will provide you with the knowledge and confidence to successfully growing cauliflower at home, regardless of your gardening experience. Let’s get started!
Growing Cauliflower: Your DIY Guide for Your Own Garden
Hey garden friends! Harvesting cauliflower from your own garden is an incredibly satisfying feeling. And don’t worry, it’s not as difficult as you might think. I’ll show you how you can grow your own cauliflower with a little patience and the right tips. Let’s get started!
The Preparation: The Key to Success
Before we start planting, we need to make a few important preparations. It’s just like cooking: the right ingredients and good preparation are key!
- Choosing the right variety: There are different cauliflower varieties that vary in ripening time, size, and heat resistance. For beginners, I recommend varieties like ‘Snowball’ or ‘Erfurter Zwerg’. They are relatively easy to care for and provide reliable yields. It’s best to check with a specialty store to see which varieties are best suited for your climate and region.
- The perfect location: Cauliflower loves the sun! Choose a location that gets at least six hours of direct sunlight per day. The soil should also be well-draining and rich in nutrients. Cauliflower really dislikes waterlogging.
- Preparing the soil: Cauliflower is a heavy feeder, which means it needs a lot of nutrients. Therefore, prepare the soil well by working in compost or well-rotted manure. This provides a good foundation and supplies the plants with everything they need. The soil’s pH should ideally be between 6.5 and 7.0. You can check the pH with a soil test and adjust it with lime or sulfur if necessary.
Sowing and Starting Seeds: The Start of Your Cauliflower Adventure
There are two ways to grow cauliflower: either you sow the seeds directly into the garden bed, or you start the plants indoors. I recommend starting them indoors, as this gives you control over germination and better protects the young plants from pests.
- Sowing indoors: Start sowing indoors about six to eight weeks before the last expected frost. Fill small starter pots with seed starting mix and sow the seeds about 1 cm (0.4 inches) deep. Keep the soil moist, but not wet. The ideal germination temperature is around 18-20°C (64-68°F).
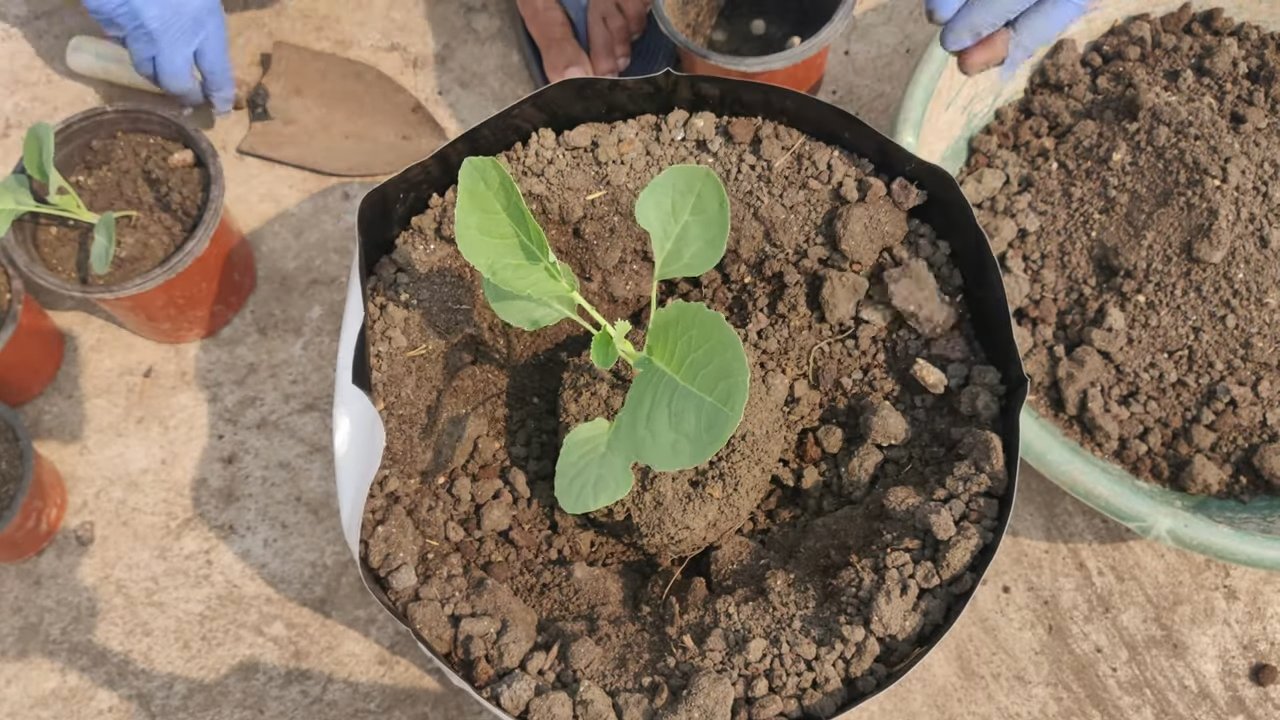
- Germination and care: After about a week, the first seedlings should be visible. Place the pots in a bright location, for example, on a windowsill. Make sure the soil doesn’t dry out. When the plants are large enough, you can transplant them into larger pots.
- Hardening off: Before you move the plants outdoors, you should harden them off. This means you gradually acclimate them to outdoor conditions. Place the pots outside for a few hours during the day and bring them back in at night. Increase the time outdoors each day until the plants can finally stay outside all day.
Planting Out: Off to the Garden Bed!
Once the danger of frost has passed and the plants are about 15-20 cm (6-8 inches) tall, they can be moved to the garden bed.
- Prepare the bed: Loosen the soil in the bed and remove weeds. Dig planting holes that are slightly larger than the root balls of the plants.
- Planting: Carefully place the plants in the planting holes and fill the holes with soil. Press the soil down lightly.
- Watering: Water the plants thoroughly after planting. This helps them get established in their new bed.
- Plant spacing: Pay attention to the correct plant spacing. Cauliflower needs room to develop. A distance of about 50-60 cm (20-24 inches) between plants and 60-70 cm (24-28 inches) between rows is ideal.
Care: Ensuring Your Cauliflower Thrives
Cauliflower isn’t super demanding, but it does need some care to grow well and form nice heads.
- Watering: Cauliflower needs regular water, especially during head formation. Make sure the soil is always moist, but not wet. It’s best to water in the morning so the leaves can dry during the day. This helps prevent fungal diseases.
- Fertilizing: As mentioned, cauliflower is a heavy feeder. Fertilize the plants regularly with an organic fertilizer or a special cauliflower fertilizer. Start fertilizing about two weeks after planting out and repeat every two to three weeks.
- Weeding: Keep the bed free of weeds. Weeds compete with the cauliflower for nutrients and water.
- Pest protection: Cauliflower can be attacked by various pests, such as cabbage whites, flea beetles, or cabbage root flies. Check the plants regularly and combat pests with biological agents if necessary. A crop cover can help protect the plants from pests.
- Blanching: To get a beautiful white cauliflower head, you can tie the leaves together around the head once it is about the size of a tennis ball. This prevents the head from turning green in the sun. However, make sure the leaves are not too tight, so the head can still breathe.
The Harvest: The Reward for Your Efforts
After about 60-80 days, depending on the variety, your cauliflower is ready to be harvested.
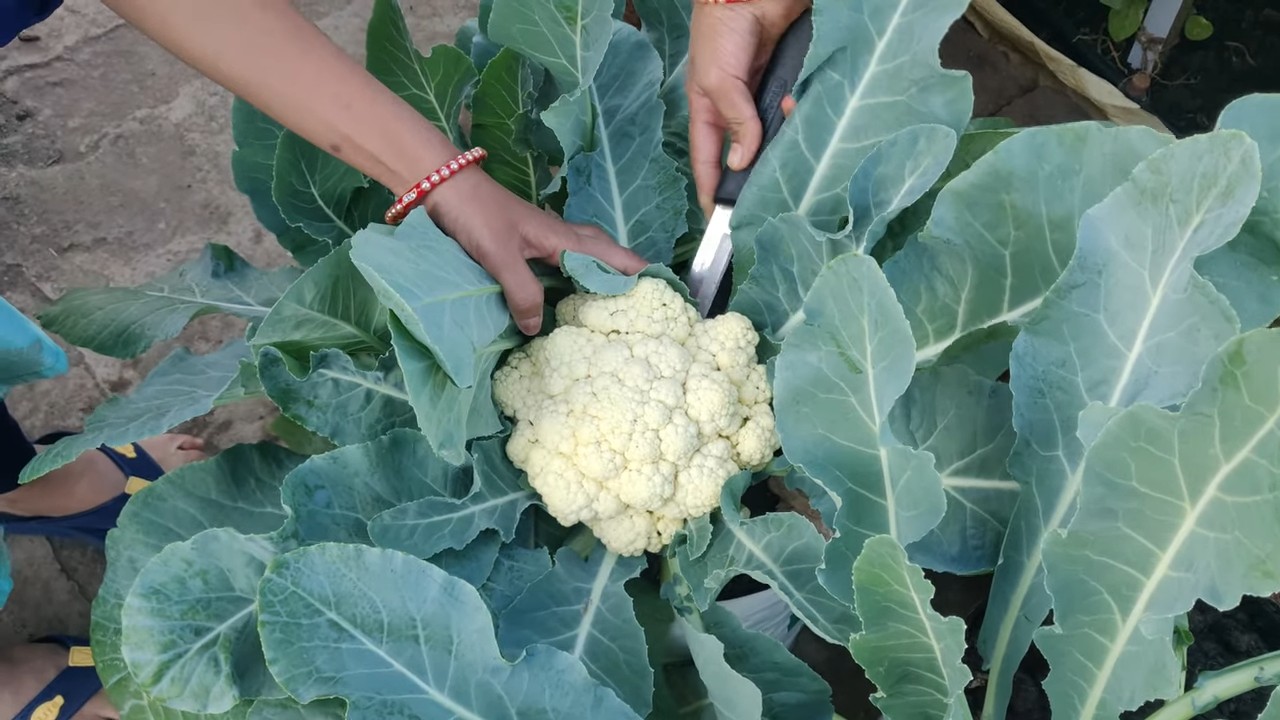
- When to harvest: The cauliflower is ripe when the head is firm and compact, and the florets are still closed. When the florets begin to open, it’s time to harvest.
- Harvesting: Cut the cauliflower head off with a sharp knife. Leave a few leaves on the stalk to protect the head from drying out.
- Storage: Cauliflower keeps for about a week in the refrigerator. You can also blanch and freeze it to make it last longer.
Common Problems and Solutions
Problems can also arise when growing cauliflower. Here are a few common problems and how you can solve them:
- Yellow leaves: Yellow leaves can be a sign of a nutrient deficiency. Fertilize the plants with a suitable fertilizer.
- Small heads: Small heads can be caused by a lack of water or nutrients. Ensure adequate watering and fertilization.
- Pests: Combat pests with biological agents or a crop cover.
- Fungal diseases: Fungal diseases can be caused by high humidity or waterlogging. Ensure good ventilation and avoid waterlogging.
Additional Tips for Growing Cauliflower
- Practice crop rotation: Do not grow cauliflower in the same spot every year. Rotate the planting area to prevent diseases and pests.
- Companion planting: Cauliflower gets along well with other vegetables like beans, peas, or lettuce.
- Mulching: Mulch the soil around the plants with straw or grass clippings. This keeps the soil moist and suppresses weeds.
Conclusion: Cauliflower from Your Own Garden is Possible!
With a little patience and the right tips, you too can grow your own cauliflower. It’s a great feeling to have the vegetables you grew yourself on your plate. So, what are you waiting for? Grab your shovel and let’s get started! I wish you much success and a bountiful harvest
Conclusion
So, there you have it! Growing cauliflower at home, while it might seem daunting at first, is an incredibly rewarding experience. From the satisfaction of nurturing a tiny seedling into a robust, edible head to the unparalleled freshness and flavor you simply can’t find in store-bought varieties, the benefits are numerous. We’ve walked you through the key steps, from selecting the right variety and preparing your soil to warding off pests and knowing exactly when to harvest your prize-winning cauliflower.
But why is this DIY trick a must-try? Beyond the sheer joy of gardening, growing your own cauliflower allows you to control exactly what goes into your food. No more worrying about hidden pesticides or long transportation times diminishing the nutritional value. You’re in charge, ensuring your family enjoys the healthiest, most delicious cauliflower possible. Plus, let’s be honest, there’s a certain bragging right that comes with serving a dish featuring cauliflower you grew yourself!
Don’t be afraid to experiment! Consider these variations to personalize your cauliflower growing experience:
* **Colored Cauliflower:** Branch out from the traditional white and try growing purple, orange, or green cauliflower varieties. These add a vibrant splash of color to your garden and your plate.
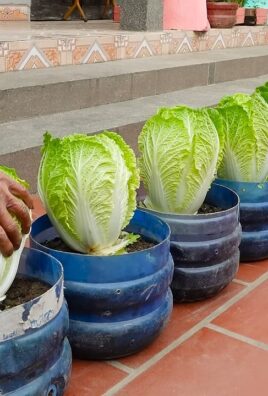
* **Container Gardening:** If you’re short on space, cauliflower can be successfully grown in large containers. Just ensure you choose a compact variety and provide adequate drainage.
* **Succession Planting:** Plant cauliflower seeds every few weeks to enjoy a continuous harvest throughout the growing season. This ensures you always have fresh cauliflower on hand.
* Roasted Garlic Cauliflower: Once you’ve harvested your beautiful cauliflower, try roasting it with garlic and herbs for a simple yet flavorful side dish. The possibilities are endless!
We understand that gardening can sometimes feel intimidating, but we encourage you to take the plunge and give growing cauliflower at home a try. The rewards are well worth the effort. Remember to start small, be patient, and don’t be afraid to learn from your mistakes. Every gardener, even the most experienced, has faced challenges along the way.
We’re confident that with a little dedication and the guidance provided in this article, you’ll be harvesting your own delicious cauliflower in no time. And most importantly, we want to hear about your experience! Share your tips, tricks, and triumphs in the comments below. Let’s create a community of cauliflower-growing enthusiasts and learn from each other. What variety did you choose? What challenges did you face? What delicious recipes did you create with your homegrown cauliflower? We can’t wait to hear your stories! So, get your hands dirty, embrace the process, and enjoy the satisfaction of growing your own food. Happy gardening!
Frequently Asked Questions (FAQ)
What is the best time of year to plant cauliflower?
The best time to plant cauliflower depends on your climate. Cauliflower thrives in cool weather, so it’s generally planted in the spring for a fall harvest or in the late summer for a winter or early spring harvest in milder climates. In areas with hot summers, avoid planting cauliflower during the hottest months, as high temperatures can cause the heads to become loose and bitter. Check your local extension office for specific planting recommendations for your region.
How much sunlight does cauliflower need?
Cauliflower requires at least six hours of direct sunlight per day to thrive. Choose a planting location that receives ample sunlight throughout the day. If you’re growing cauliflower in containers, you may need to move them around to ensure they get enough sunlight. Insufficient sunlight can result in small, underdeveloped heads.
What kind of soil is best for growing cauliflower?
Cauliflower prefers well-drained, fertile soil that is rich in organic matter. The ideal soil pH is between 6.0 and 7.0. Before planting, amend your soil with compost or well-rotted manure to improve its fertility and drainage. Avoid planting cauliflower in heavy clay soil, as this can lead to waterlogging and root rot.
How often should I water cauliflower?
Cauliflower needs consistent moisture to grow properly. Water deeply and regularly, especially during dry periods. Aim to keep the soil consistently moist but not waterlogged. Mulching around the plants can help retain moisture and suppress weeds. Check the soil moisture regularly and adjust your watering schedule as needed.
What are some common pests and diseases that affect cauliflower?
Cauliflower is susceptible to several pests and diseases, including cabbage worms, aphids, flea beetles, clubroot, and black rot. Regularly inspect your plants for signs of infestation or disease. Use organic pest control methods, such as insecticidal soap or neem oil, to control pests. Practice crop rotation and choose disease-resistant varieties to prevent diseases. Remove any infected plants promptly to prevent the spread of disease.
How do I prevent cauliflower heads from turning yellow?
To prevent cauliflower heads from turning yellow, you can blanch them by tying the outer leaves together over the developing head. This protects the head from direct sunlight and helps it retain its white color. Start blanching when the head is about 2-3 inches in diameter. Check the head regularly to ensure it doesn’t become too tight or rot.
When is cauliflower ready to harvest?
Cauliflower is typically ready to harvest when the head is firm, compact, and about 6-8 inches in diameter. The exact harvesting time will depend on the variety and growing conditions. Check the seed packet or plant tag for specific harvesting instructions. Use a sharp knife to cut the head from the plant, leaving a few leaves attached to protect the head.
Can I grow cauliflower in containers?
Yes, cauliflower can be successfully grown in containers, but you’ll need to choose a large container (at least 5 gallons) and a compact variety. Ensure the container has good drainage and use a high-quality potting mix. Water regularly and fertilize as needed. Container-grown cauliflower may require more frequent watering and fertilization than plants grown in the ground.
What are some good companion plants for cauliflower?
Good companion plants for cauliflower include herbs like rosemary, thyme, and sage, which can help repel pests. Other beneficial companion plants include marigolds, nasturtiums, and garlic. Avoid planting cauliflower near other members of the brassica family, such as broccoli, cabbage, and kale, as they can attract the same pests and diseases.
How can I store cauliflower after harvesting?
After harvesting, store cauliflower in the refrigerator. Wrap the head loosely in plastic wrap or place it in a perforated plastic bag. Cauliflower can be stored in the refrigerator for up to a week. To extend its shelf life, you can blanch and freeze cauliflower florets.

Leave a Comment