
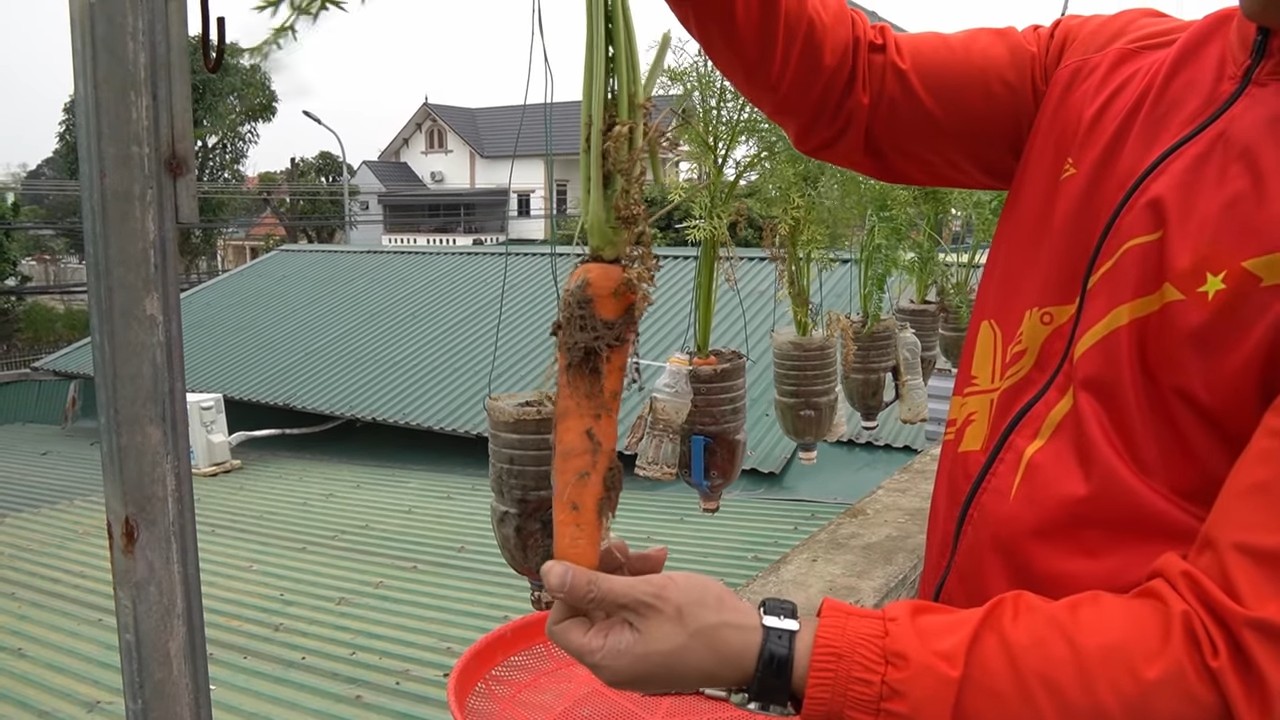
Growing carrots in hanging bottles might sound like something out of a futuristic garden, but trust me, it’s a surprisingly simple and incredibly rewarding DIY project! Forget struggling with rocky soil and pesky carrot flies – we’re taking carrot cultivation to new heights, literally!
For centuries, gardeners have toiled in the earth, battling the elements and pests to coax delicious vegetables from the ground. While traditional methods are tried and true, sometimes a little innovation can make all the difference. Think of this as a modern twist on the age-old practice of container gardening, which has roots stretching back to ancient civilizations. From the Hanging Gardens of Babylon to the humble window boxes of today, humans have always found creative ways to cultivate plants in limited spaces.
But why should you consider growing carrots in hanging bottles? Well, for starters, it’s a fantastic solution for those with limited garden space, like apartment dwellers or anyone with a small balcony. Plus, it minimizes soil-borne diseases and pests, giving your carrots a much better chance of thriving. And let’s be honest, it looks pretty darn cool! Imagine a cascade of vibrant green carrot tops dangling from your porch, promising a delicious harvest just inches away. I’m excited to show you how to create your own vertical carrot garden with just a few simple materials and a little bit of elbow grease. Let’s get started!
Karotten in Hängeflaschen ziehen: Eine DIY-Anleitung für den vertikalen Garten
Hallo liebe Gartenfreunde! Habt ihr wenig Platz, aber trotzdem Lust auf frische, knackige Karotten aus dem eigenen Anbau? Dann habe ich hier genau das Richtige für euch: Karotten in Hängeflaschen ziehen! Diese Methode ist nicht nur platzsparend, sondern auch ein echter Hingucker und super einfach umzusetzen. Lasst uns gemeinsam loslegen!
Was du brauchst:
* Leere Plastikflaschen (am besten 5-Liter-Flaschen oder größer)
* Ein scharfes Messer oder eine Schere
* Bohrmaschine oder Nagel und Hammer
* Stabile Schnur oder Draht zum Aufhängen
* Gute Blumenerde (am besten eine Mischung aus Gartenerde, Kompost und Sand)
* Karottensamen (am besten Sorten, die nicht zu lang werden, z.B. “Pariser Markt”)
* Gießkanne oder Sprühflasche
* Optional: Drainagematerial (Kies, Blähton)
Vorbereitung der Flaschen:
1. Reinigung: Zuerst müsst ihr die Plastikflaschen gründlich reinigen. Entfernt alle Etiketten und spült sie mit warmem Wasser und Spülmittel aus. Achtet darauf, dass keine Spülmittelreste zurückbleiben.
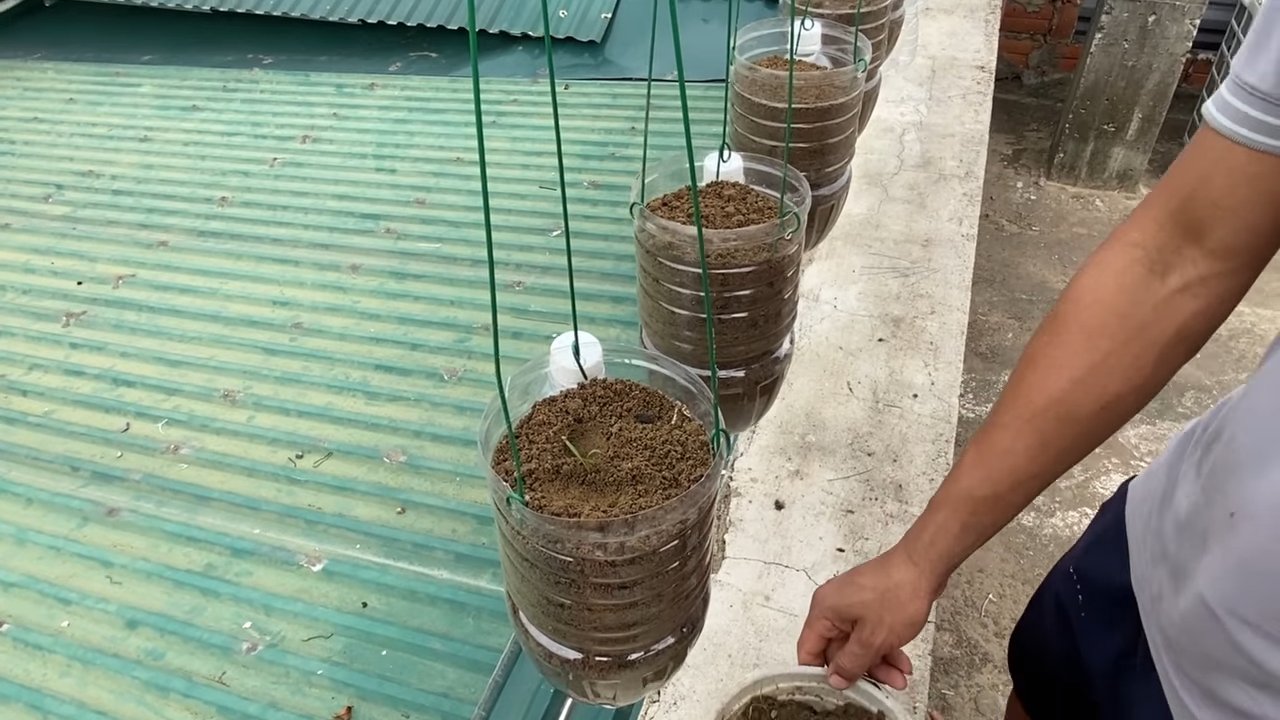
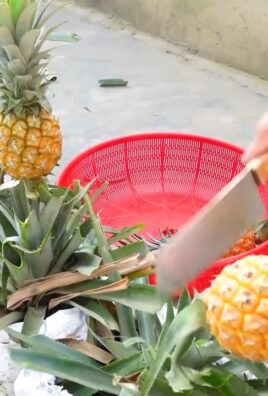
2. Schneiden der Flaschen: Jetzt kommt der spannende Teil! Mit dem Messer oder der Schere schneidet ihr ein großes Rechteck aus der Seite der Flasche. Dieses Rechteck dient als Pflanzöffnung. Die Größe hängt davon ab, wie viele Karotten ihr in einer Flasche ziehen möchtet. Ich empfehle, das Rechteck etwa 15-20 cm hoch und 20-30 cm breit zu machen. Lasst am Boden der Flasche genügend Platz, damit die Erde nicht herausfällt.
3. Drainagelöcher bohren: Damit das Wasser gut ablaufen kann und keine Staunässe entsteht, bohrt ihr mit der Bohrmaschine oder dem Nagel und Hammer mehrere kleine Löcher in den Boden der Flasche. Achtet darauf, dass die Löcher nicht zu groß sind, damit die Erde nicht herausrieselt.
4. Aufhängelöcher anbringen: Nun bohrt ihr oder schlagt ihr Löcher in den oberen Rand der Flasche, durch die ihr die Schnur oder den Draht zum Aufhängen ziehen könnt. Ich empfehle, mindestens zwei Löcher gegenüberliegend anzubringen, damit die Flasche stabil hängt.
Befüllen der Flaschen:
1. Drainageschicht einfüllen (optional): Wenn ihr möchtet, könnt ihr eine Schicht Drainagematerial (Kies oder Blähton) auf den Boden der Flasche geben. Das hilft, Staunässe zu vermeiden.
2. Erde einfüllen: Füllt die Flasche nun mit der Blumenerde. Achtet darauf, dass die Erde locker und luftig ist. Drückt sie nicht zu fest an, damit die Wurzeln der Karotten gut wachsen können. Lasst oben einen Rand von etwa 5 cm frei.
Aussaat der Karottensamen:
1. Samen aussäen: Verteilt die Karottensamen gleichmäßig in der Erde. Achtet darauf, dass die Samen nicht zu dicht beieinander liegen, da die Karotten sonst nicht genügend Platz zum Wachsen haben. Ich empfehle, etwa 2-3 cm Abstand zwischen den Samen zu lassen.
2. Samen bedecken: Bedeckt die Samen mit einer dünnen Schicht Erde (etwa 0,5 cm).
3. Angießen: Gießt die Erde vorsichtig mit der Gießkanne oder der Sprühflasche an. Achtet darauf, dass die Erde gleichmäßig feucht ist, aber nicht zu nass.
Aufhängen und Pflege:
1. Flaschen aufhängen: Zieht die Schnur oder den Draht durch die Löcher am oberen Rand der Flasche und knotet sie fest. Hängt die Flaschen an einem sonnigen Ort auf, der vor starkem Wind geschützt ist. Karotten brauchen mindestens 6 Stunden Sonne pro Tag.
2. Gießen: Gießt die Karotten regelmäßig, besonders in trockenen Perioden. Die Erde sollte immer leicht feucht sein, aber nicht nass. Vermeidet Staunässe.
3. Düngen (optional): Wenn ihr möchtet, könnt ihr die Karotten während der Wachstumsphase mit einem organischen Dünger düngen. Achtet darauf, dass der Dünger für Gemüse geeignet ist.
4. Ausdünnen: Wenn die Karottenpflänzchen etwa 5 cm hoch sind, müsst ihr sie eventuell ausdünnen. Entfernt die schwächsten Pflänzchen, damit die übrigen genügend Platz zum Wachsen haben.
Ernte:
Die Erntezeit hängt von der Karottensorte ab. In der Regel sind Karotten nach etwa 60-80 Tagen erntereif. Ihr erkennt es daran, dass die Karotten die gewünschte Größe erreicht haben und aus der Erde herausragen. Zieht die Karotten vorsichtig aus der Erde.
Zusätzliche Tipps und Tricks:
* Sortenwahl: Wählt Karottensorten, die nicht zu lang werden, da sie besser für den Anbau in Hängeflaschen geeignet sind. Sorten wie “Pariser Markt” oder “Rondo” sind ideal.
* Erde: Verwendet eine gute Blumenerde, die locker und luftig ist. Eine Mischung aus Gartenerde, Kompost und Sand ist optimal.
* Sonne: Karotten brauchen viel Sonne, um gut zu wachsen. Hängt die Flaschen an einem sonnigen Ort auf.
* Gießen: Gießt die Karotten regelmäßig, aber vermeidet Staunässe.
* Schädlinge: Achtet auf Schädlinge wie Karottenfliegen. Ihr könnt die Flaschen mit einem Netz schützen.
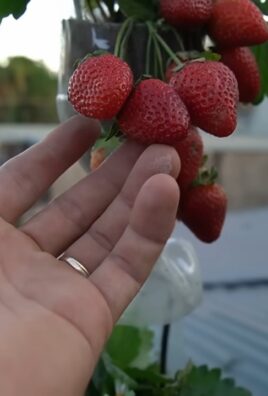
* Vertikale Gärten erweitern: Diese Methode eignet sich auch für andere Gemüsesorten wie Radieschen, Salat oder Kräuter. Probiert es einfach aus!
Häufige Probleme und Lösungen:
* Karotten wachsen nicht: Das kann verschiedene Ursachen haben. Möglicherweise bekommen die Karotten nicht genügend Sonne, die Erde ist zu trocken oder zu nährstoffarm. Achtet darauf, dass die Karotten mindestens 6 Stunden Sonne pro Tag bekommen, gießt sie regelmäßig und düngt sie bei Bedarf.
* Karotten sind klein und dünn: Das kann daran liegen, dass die Karotten zu dicht beieinander stehen. Dünnt die Pflänzchen aus, damit die übrigen genügend Platz zum Wachsen haben.
* Karotten sind von Schädlingen befallen: Achtet auf Schädlinge wie Karottenfliegen. Ihr könnt die Flaschen mit einem Netz schützen oder natürliche Schädlingsbekämpfungsmittel verwenden.
* Staunässe: Staunässe kann zu Wurzelfäule führen. Achtet darauf, dass die Flaschen ausreichend Drainagelöcher haben und gießt nicht zu viel.
Warum Karotten in Hängeflaschen ziehen?
* Platzsparend: Ideal für Balkone, Terrassen oder kleine Gärten.
* Dekorativ: Ein echter Hingucker und eine tolle Möglichkeit, den Garten zu verschönern.
* Einfach: Auch für Anfänger geeignet.
* Nachhaltig: Wiederverwendung von Plastikflaschen.
* Frische Ernte: Immer frische Karotten zur Hand.
Ich hoffe, diese Anleitung hilft euch dabei, eure eigenen Karotten in Hängeflaschen zu ziehen. Es ist wirklich ein tolles Projekt, das nicht nur Spaß macht, sondern auch leckere Ergebnisse liefert. Viel Erfolg und viel Spaß beim Gärtnern! Lasst mich wissen, wie es bei euch läuft! Ich freue mich über eure Erfahrungen und Fotos!
Conclusion
So, there you have it! Growing carrots in hanging bottles isn’t just a quirky gardening experiment; it’s a game-changer for small spaces, a defense against pesky soil-borne pests, and a surprisingly efficient way to cultivate these vibrant root vegetables. If you’ve been dreaming of fresh, homegrown carrots but thought you lacked the space or the ideal soil conditions, this DIY trick is your answer.
Why is this a must-try? Because it democratizes gardening. It empowers apartment dwellers, balcony enthusiasts, and anyone with limited ground space to enjoy the unparalleled satisfaction of harvesting their own food. It’s also incredibly rewarding to witness the entire growth process, from tiny seedlings to plump, juicy carrots dangling from your makeshift vertical garden. Plus, let’s be honest, it’s a conversation starter! Imagine the delight of your friends and neighbors when they see your innovative carrot display.
But the beauty of this method lies in its adaptability. Feel free to experiment with different bottle sizes to accommodate various carrot varieties. Shorter, rounder carrots like ‘Parisian’ or ‘Thumbelina’ thrive in smaller containers, while longer, thinner varieties like ‘Nantes’ might appreciate a taller bottle. You can also play around with the growing medium. While a standard potting mix works well, consider adding some compost or vermicast to boost nutrient content and improve drainage.
Don’t be afraid to get creative with your hanging system, too. Use macrame hangers, repurposed rope, or even sturdy wire to suspend your bottles. Just ensure the bottles are securely fastened and can withstand the weight of the soil and developing carrots. Consider painting the bottles to add a splash of color to your space, or even decorating them with stencils or decoupage for a truly personalized touch.
And here’s a pro tip: rotate your bottles regularly to ensure even sunlight exposure for all sides of the plants. This will promote uniform growth and prevent your carrots from leaning towards the light.
We wholeheartedly encourage you to give this DIY trick a try. It’s a fun, affordable, and incredibly satisfying way to grow your own carrots, regardless of your gardening experience. Once you’ve harvested your first batch of homegrown goodness, you’ll be hooked!
We’re eager to hear about your experiences! Share your photos, tips, and challenges in the comments below. Let’s build a community of bottle-carrot enthusiasts and inspire others to embrace this innovative gardening technique. Let us know what carrot varieties you tried, what kind of bottles you used, and any modifications you made to the process. Your insights could be invaluable to fellow gardeners. So, grab some bottles, some soil, and some carrot seeds, and get ready to embark on a rewarding gardening adventure! Happy growing!
Frequently Asked Questions (FAQ)
What kind of bottles are best for growing carrots?
The best bottles for growing carrots are typically plastic bottles, such as those used for water, soda, or juice. The size of the bottle will depend on the variety of carrots you plan to grow. Shorter, rounder varieties like ‘Parisian’ or ‘Thumbelina’ can thrive in smaller bottles (around 2-3 liters), while longer, thinner varieties like ‘Nantes’ will need taller bottles (4-5 liters or larger). Make sure the bottles are clean and have drainage holes at the bottom. Clear or translucent bottles are preferable, as they allow you to monitor the soil moisture levels. Avoid using bottles that have contained harmful chemicals or pesticides.
How do I prepare the bottles for planting?
First, thoroughly clean the bottles with soap and water to remove any residue. Then, drill or poke several drainage holes in the bottom of each bottle to prevent waterlogging. You can also add a layer of gravel or small stones at the bottom of the bottle to further improve drainage. If you’re using clear bottles, consider painting the outside (except for a small viewing strip) to prevent algae growth, which can hinder root development. Finally, create a sturdy hanging system using rope, wire, or macrame. Ensure the bottles are securely fastened and can support the weight of the soil and plants.
What kind of soil should I use?
A well-draining potting mix is ideal for growing carrots in hanging bottles. Avoid using garden soil, as it can be too heavy and compact, hindering root growth. Look for a potting mix that contains a blend of peat moss, perlite, and vermiculite. You can also amend the potting mix with compost or well-rotted manure to provide additional nutrients. A slightly acidic soil pH (around 6.0 to 6.8) is optimal for carrot growth.
How often should I water the carrots?
Water your carrots regularly, especially during hot and dry weather. The soil should be consistently moist but not waterlogged. Check the soil moisture levels by inserting your finger into the soil. If the top inch feels dry, it’s time to water. Water slowly and deeply, allowing the water to drain out of the drainage holes. Avoid overhead watering, as this can lead to fungal diseases.
How much sunlight do carrots need?
Carrots need at least 6 hours of direct sunlight per day to thrive. Choose a location for your hanging bottles that receives plenty of sunlight. If you don’t have a sunny spot, you can supplement with artificial grow lights. Rotate the bottles regularly to ensure even sunlight exposure for all sides of the plants.
How long does it take for carrots to grow in bottles?
The time it takes for carrots to mature in bottles depends on the variety and growing conditions. Generally, carrots take between 60 and 80 days to mature. Check the seed packet for specific information on the maturity time for your chosen variety. You can harvest carrots when they reach the desired size and color.
How do I harvest the carrots?
Harvesting carrots from bottles is relatively easy. Gently loosen the soil around the carrot and carefully pull it out of the bottle. If the carrot is difficult to remove, you can try gently squeezing the bottle to loosen the soil. Be careful not to damage the carrot during harvesting.
What are some common problems when growing carrots in bottles?
Some common problems when growing carrots in bottles include:
* **Poor drainage:** Ensure the bottles have adequate drainage holes to prevent waterlogging.
* **Lack of sunlight:** Provide at least 6 hours of direct sunlight per day.
* **Nutrient deficiencies:** Amend the soil with compost or fertilizer to provide essential nutrients.
* **Pests and diseases:** Monitor the plants regularly for pests and diseases. Use organic pest control methods if necessary.
* **Overcrowding:** Thin out the seedlings to provide adequate space for the carrots to grow.
Can I grow other vegetables in hanging bottles?
Yes, you can grow other vegetables in hanging bottles, such as herbs, lettuce, spinach, and strawberries. Choose vegetables that have shallow root systems and don’t require a lot of space.
What kind of fertilizer should I use for carrots in bottles?
A balanced, slow-release fertilizer is ideal for carrots grown in bottles. Look for a fertilizer with an NPK ratio of around 5-10-10. You can also use organic fertilizers, such as compost tea or fish emulsion. Apply the fertilizer according to the package instructions. Avoid over-fertilizing, as this can lead to excessive foliage growth and poor root development.
Leave a Comment