
Growing Bell Peppers in Pots – sounds easier than it is, right? I get it! You’re dreaming of plump, colorful bell peppers bursting with flavor, fresh from your own little garden oasis. But maybe you’re short on space, or perhaps your soil isn’t exactly bell pepper-friendly. Don’t worry, I’m here to tell you that abundant bell pepper harvests are totally achievable, even in containers!
For centuries, container gardening has allowed people to cultivate food and beauty in even the most limited spaces. From the hanging gardens of Babylon to the window boxes of modern city dwellers, the desire to nurture plants close at hand is deeply ingrained in us. And let’s be honest, who doesn’t love the satisfaction of biting into a bell pepper they’ve nurtured from a tiny seedling?
But why bother with the extra effort of growing bell peppers in pots? Well, for starters, it gives you complete control over the growing environment. You can choose the perfect soil mix, move your plants to chase the sun, and protect them from unexpected frosts. Plus, it’s a fantastic way to garden if you have limited mobility or simply want to keep your precious peppers closer to the kitchen! This DIY guide is packed with simple, effective tricks and hacks that will transform you into a container gardening pro. I’m going to share my secrets for choosing the right pot, selecting the best varieties, and providing the perfect care to ensure a bountiful harvest. Get ready to enjoy the freshest, most flavorful bell peppers you’ve ever tasted – all thanks to the magic of growing bell peppers in pots!
Growing Bell Peppers in Pots: A Beginner’s Guide
Hey there, fellow gardening enthusiasts! I’m so excited to share my tried-and-true method for growing vibrant, delicious bell peppers right in pots. Forget needing a huge garden – with a little know-how, you can enjoy homegrown peppers even on a small balcony or patio. I’ve been doing this for years, and trust me, the satisfaction of harvesting your own peppers is unbeatable!
Choosing the Right Pot and Soil
Before we even think about seeds, let’s talk about the foundation of our pepper-growing success: the pot and the soil.
* Pot Size Matters: Bell peppers need room to spread their roots. I recommend a pot that’s at least 12 inches in diameter and 12 inches deep. Bigger is generally better, so if you have the space, go for a 5-gallon container or larger. This gives the roots plenty of space to grow and helps retain moisture.
* Drainage is Key: Make sure your pot has drainage holes! Peppers hate sitting in soggy soil, which can lead to root rot. If your pot doesn’t have enough drainage, you can drill a few extra holes in the bottom.
* Choosing the Right Soil: Don’t use garden soil in your pots! It’s too heavy and doesn’t drain well. Instead, opt for a high-quality potting mix. I like to use a mix that’s specifically formulated for vegetables, as it usually contains added nutrients. You can also amend your potting mix with compost for extra richness.
Starting Your Bell Pepper Seeds (or Buying Seedlings)
You have two main options here: starting your own seeds or buying seedlings from a nursery. Both are perfectly fine, but starting from seed gives you more control over the varieties you grow.
* Starting from Seed: This is my preferred method because I love the whole process!
* When to Start: Start your seeds indoors 6-8 weeks before the last expected frost in your area.
* How to Start: Fill a seed tray or small pots with seed-starting mix. Sow the seeds about ¼ inch deep and gently water them. Keep the soil consistently moist but not soggy.
* Warmth is Essential: Bell pepper seeds need warmth to germinate. I use a heat mat under my seed tray to keep the soil temperature around 80-85°F (27-29°C). Once the seeds germinate, remove the heat mat.
* Light is Crucial: Once the seedlings emerge, they need plenty of light. If you don’t have a sunny windowsill, use a grow light. I keep my grow light on for about 14-16 hours a day.
* Buying Seedlings: This is a great option if you’re short on time or don’t have the space to start seeds indoors.
* Choosing Healthy Seedlings: Look for seedlings that are about 4-6 inches tall, with healthy green leaves and a sturdy stem. Avoid seedlings that are leggy, yellowed, or have any signs of pests or diseases.
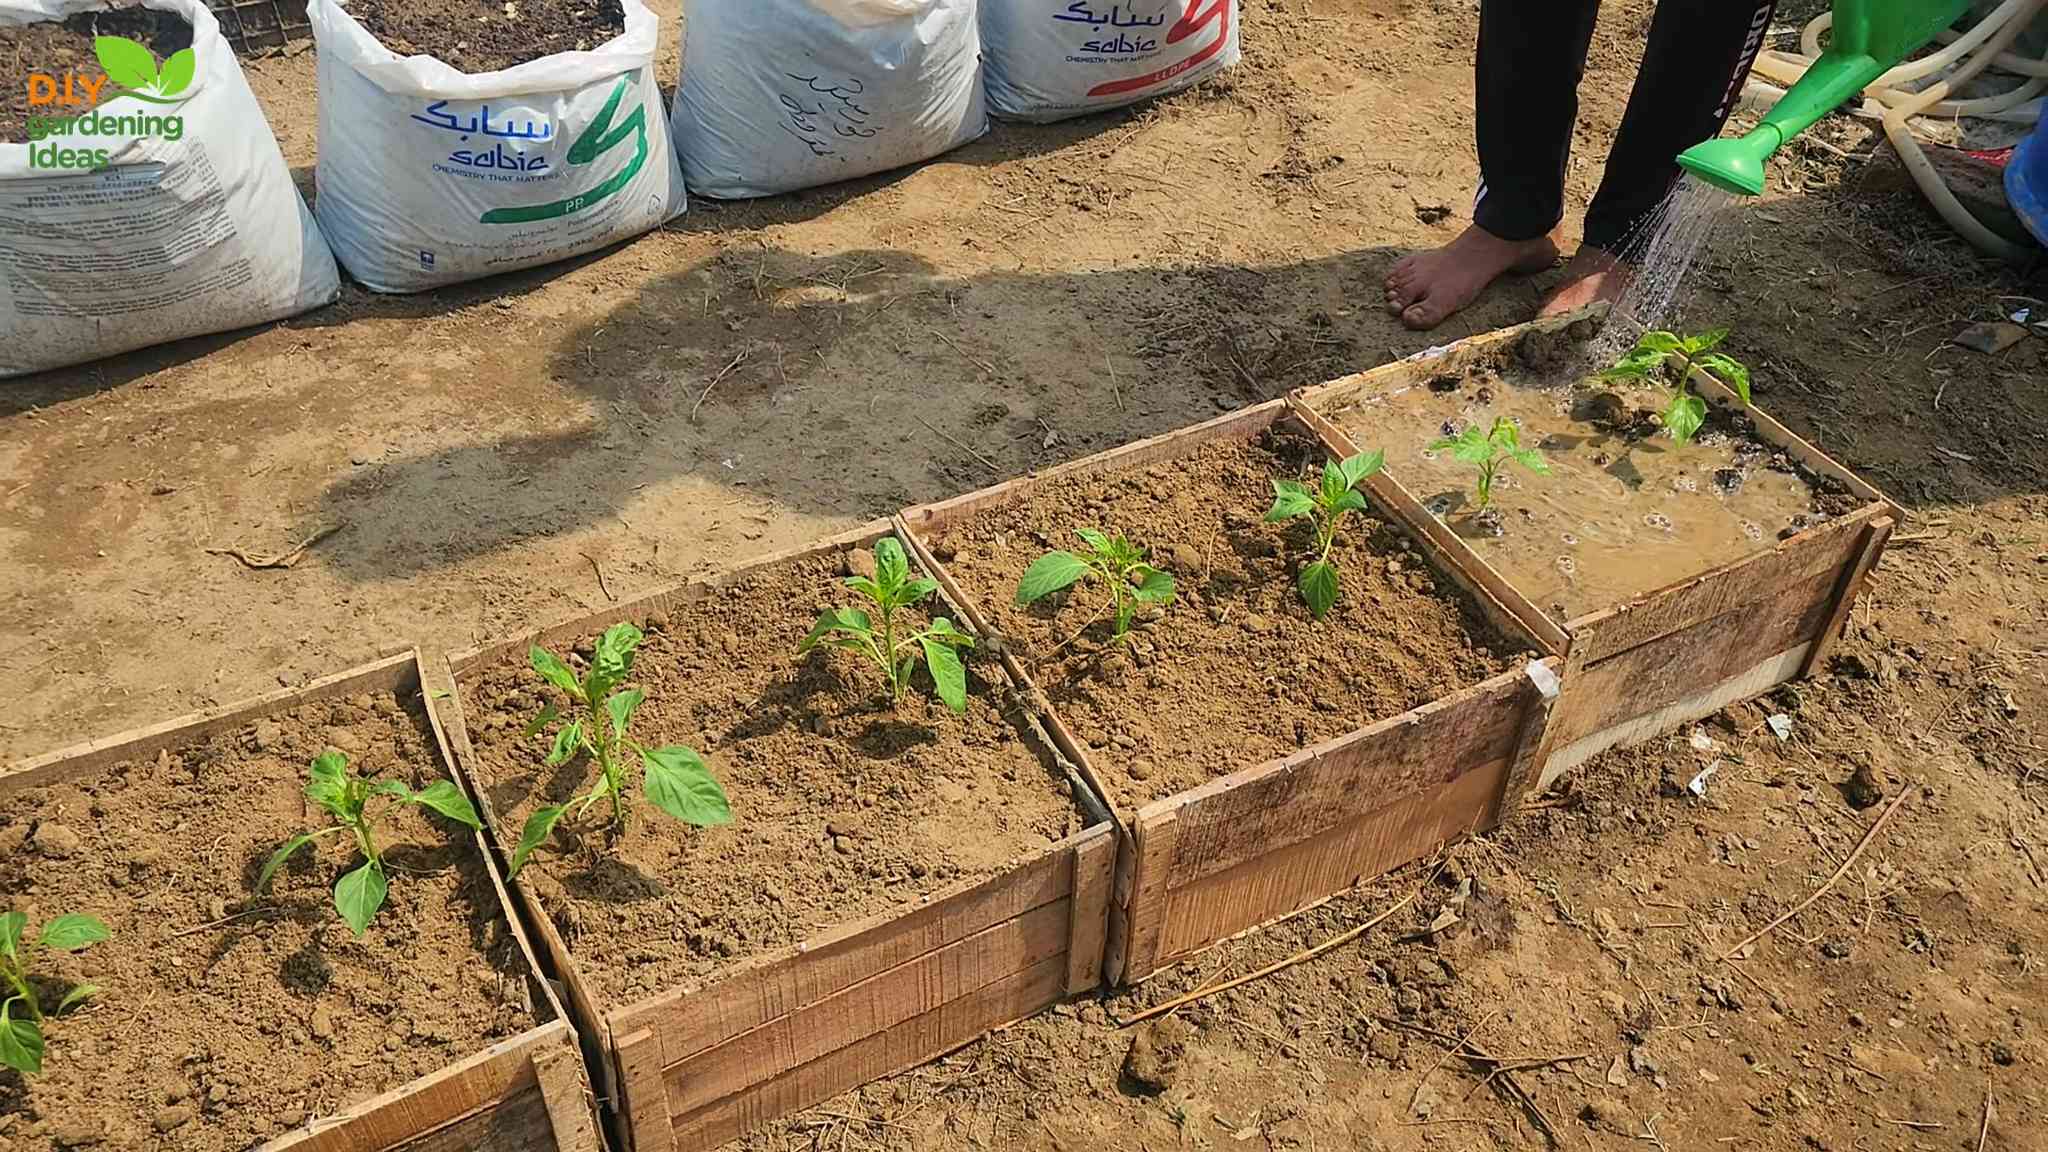
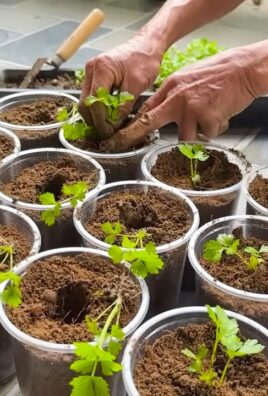
Transplanting Your Seedlings
Whether you started your own seeds or bought seedlings, you’ll need to transplant them into your pots.
1. Harden Off Your Seedlings: Before transplanting, you need to “harden off” your seedlings. This means gradually exposing them to outdoor conditions over a period of about a week. Start by placing them outside in a sheltered spot for an hour or two each day, gradually increasing the amount of time they spend outdoors. This helps them adjust to the sun, wind, and temperature changes.
2. Prepare Your Pots: Fill your pots with potting mix, leaving a few inches of space at the top.
3. Gently Remove the Seedlings: Carefully remove the seedlings from their seed trays or pots. If the roots are tightly bound, gently loosen them with your fingers.
4. Plant the Seedlings: Dig a hole in the potting mix that’s large enough to accommodate the root ball. Place the seedling in the hole and gently backfill with potting mix. Make sure the top of the root ball is level with the soil surface.
5. Water Thoroughly: Water the seedlings thoroughly after transplanting.
Caring for Your Bell Pepper Plants
Now comes the fun part: watching your pepper plants grow and thrive! Here’s what you need to do to keep them happy:
* Sunlight: Bell peppers need at least 6-8 hours of sunlight per day. Place your pots in a sunny location where they’ll get plenty of direct sunlight.
* Watering: Water your pepper plants regularly, especially during hot, dry weather. The soil should be consistently moist but not soggy. Check the soil moisture by sticking your finger into the soil. If the top inch or two feels dry, it’s time to water.
* Fertilizing: Bell peppers are heavy feeders, so they need regular fertilization. I like to use a balanced fertilizer (like 10-10-10) every 2-3 weeks. You can also use a liquid fertilizer diluted according to the package directions.
* Support: As your pepper plants grow, they may need support to prevent them from falling over. You can use stakes, cages, or trellises to support the plants. I find that tomato cages work really well for bell peppers.
* Pruning: Pruning isn’t strictly necessary, but it can help improve air circulation and encourage fruit production. I like to remove any suckers (small shoots that grow from the base of the plant) to encourage the plant to focus its energy on producing peppers.
* Pest and Disease Control: Keep an eye out for pests and diseases. Common pests that affect bell peppers include aphids, spider mites, and whiteflies. You can control these pests with insecticidal soap or neem oil. Common diseases include blossom end rot and fungal diseases. Blossom end rot is caused by a calcium deficiency, so you can prevent it by adding calcium to the soil. Fungal diseases can be prevented by ensuring good air circulation and avoiding overwatering.
Harvesting Your Bell Peppers
The moment you’ve been waiting for! Harvesting your own bell peppers is so rewarding.
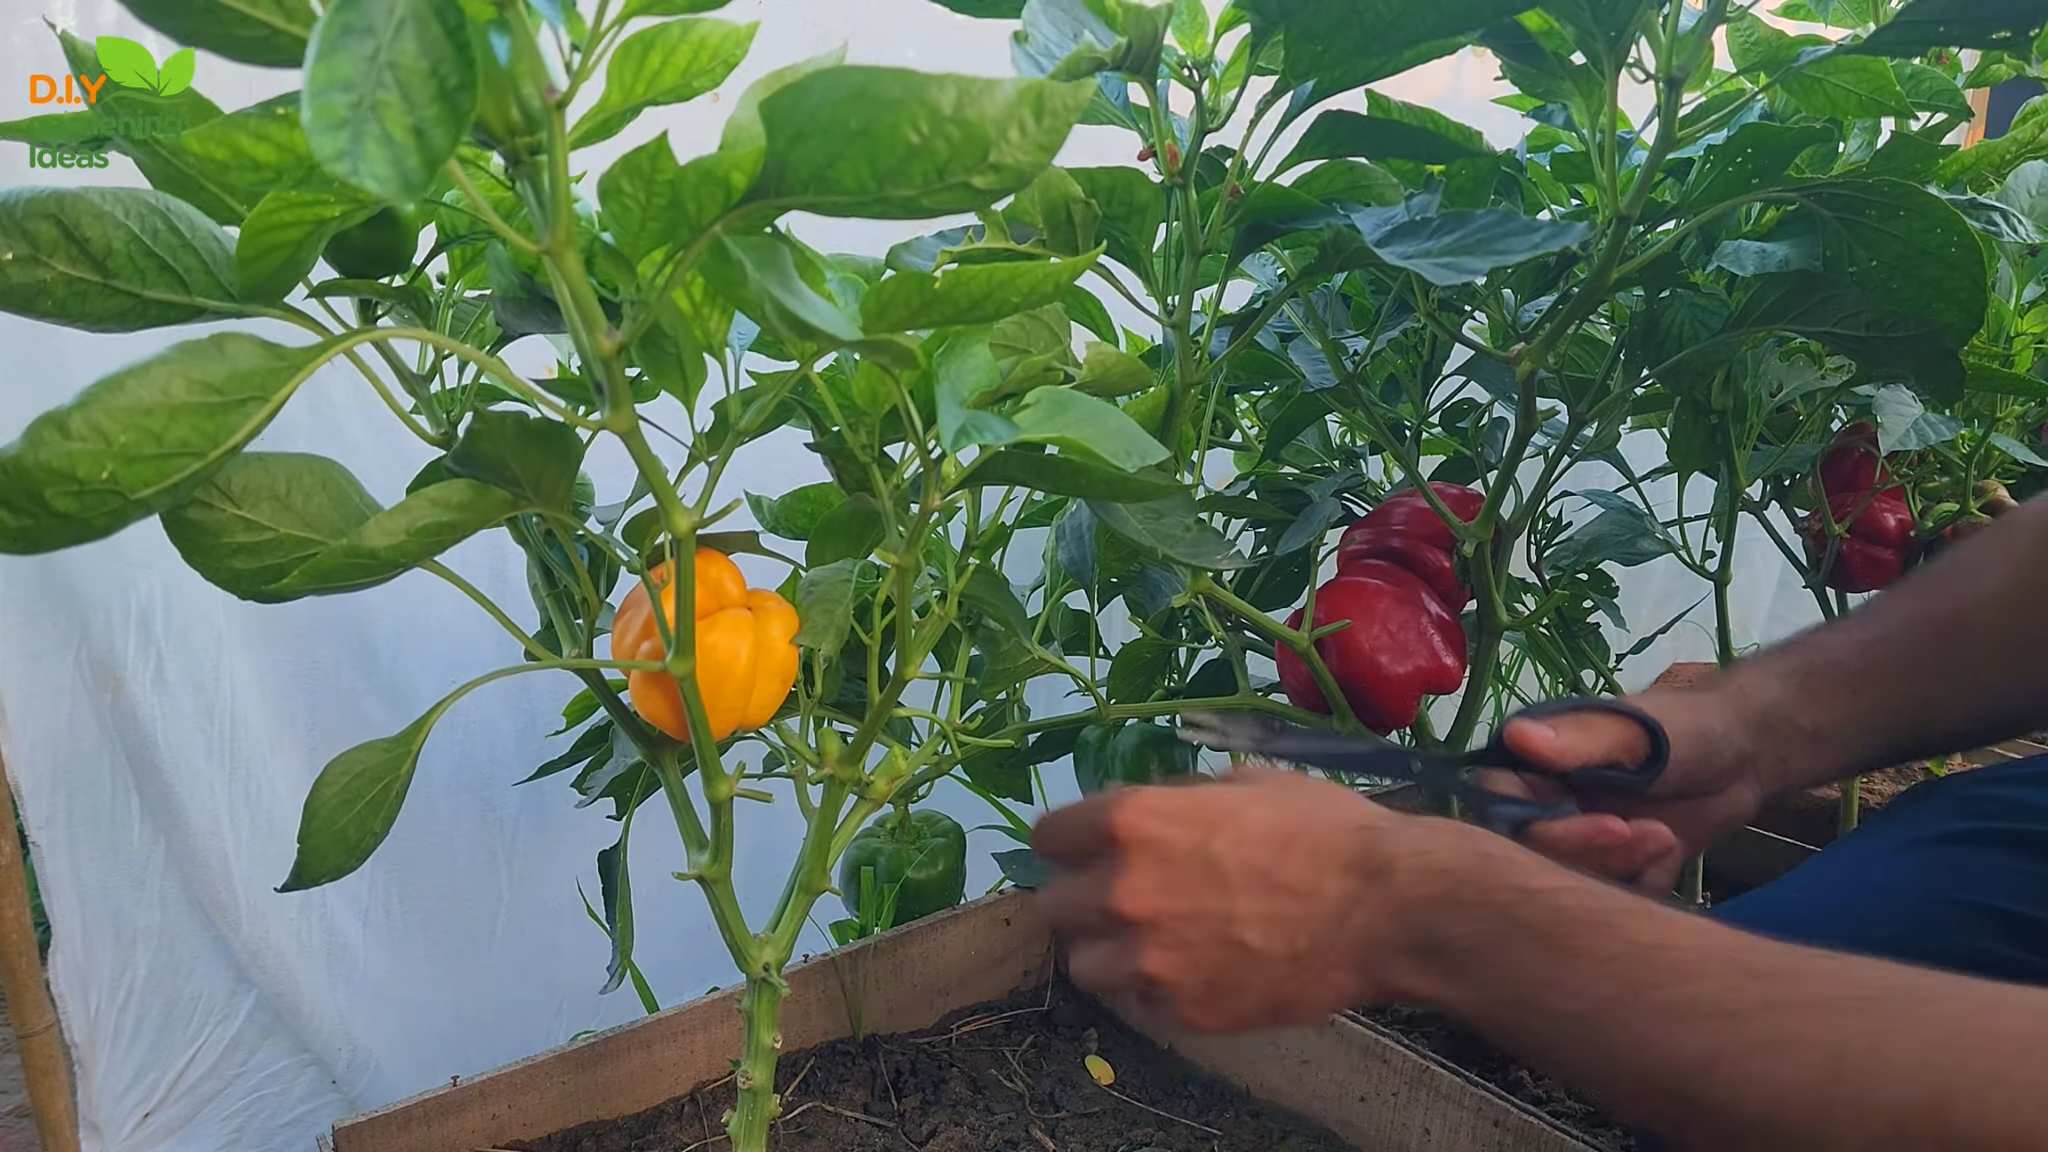
1. When to Harvest: Bell peppers can be harvested at any stage of maturity, depending on your preference. Green bell peppers are less ripe and have a slightly bitter taste. Red, yellow, and orange bell peppers are fully ripe and have a sweeter taste.
2. How to Harvest: Use a sharp knife or pruning shears to cut the peppers from the plant. Cut the stem about an inch above the pepper.
3. Enjoy Your Harvest: Use your homegrown bell peppers in your favorite recipes! They’re delicious in salads, stir-fries, omelets, and so much more.
Troubleshooting Common Problems
Even with the best care, you might encounter some problems along the way. Here are a few common issues and how to fix them:
* Blossom End Rot: This is a common problem that causes the bottom of the peppers to rot. It’s caused by a calcium deficiency. To prevent it, add calcium to the soil before planting and water regularly. You can also use a calcium spray on the plants.
* Aphids: These tiny pests can suck the sap from your pepper plants, causing them to weaken and become distorted. You can control aphids with insecticidal soap or neem oil.
* Spider Mites: These tiny pests can cause the leaves of your pepper plants to become speckled and yellowed. You can control spider mites with insecticidal soap or neem oil.
* Sunscald: This occurs when the peppers are exposed to too much direct sunlight, causing them to become sunburned. To prevent sunscald, provide some shade for your pepper plants during the hottest part of the day.
Choosing the Right Bell Pepper Variety
There are so many different bell pepper varieties to choose from! Here are a few of my favorites for growing in pots:
* ‘Yolo Wonder’: This is a classic green bell pepper that’s reliable and easy to grow.
* ‘California Wonder’: Another popular green bell pepper that’s known for its large size and thick walls.
* ‘Golden Bell’: A beautiful yellow bell pepper that’s sweet and flavorful.
* ‘Red Knight’: A delicious red bell pepper that’s perfect for salads and stir-fries.
* ‘Mini Bell’: These small bell peppers are perfect for snacking and stuffing.
Extra Tips for Success
* Rotate Your Crops: Don’t plant bell peppers in the same spot year after year. Rotate your crops to prevent soilborne diseases.
* Mulch Your Plants: Mulching helps to retain moisture in the soil and suppress weeds. I like to use straw or wood chips as mulch.
* Water in the Morning: Water your pepper plants in the morning so that the foliage has time to dry before nightfall. This helps to prevent fungal diseases.
* Be Patient: Bell
Conclusion
So, there you have it! Growing bell peppers in pots is not only achievable, but it can be incredibly rewarding. We’ve walked through the essential steps, from selecting the right pot and soil to providing adequate sunlight and consistent watering. But why is this DIY approach a must-try?
Firstly, it offers unparalleled flexibility. Whether you have a sprawling garden or a tiny balcony, container gardening allows you to cultivate these vibrant vegetables virtually anywhere. Imagine the convenience of fresh, homegrown bell peppers just steps from your kitchen! Secondly, it gives you complete control over the growing environment. You can tailor the soil composition, nutrient levels, and even the amount of sunlight your plants receive, leading to healthier, more productive bell pepper plants. This is especially beneficial if you live in an area with less-than-ideal soil conditions.
Beyond the basics, there’s plenty of room for experimentation and personalization. Consider trying different varieties of bell peppers. From the classic green to the sweet red, yellow, and even purple, each offers a unique flavor profile and visual appeal. You could also explore companion planting. Basil, for example, is known to repel pests and improve the flavor of bell peppers. Marigolds are another excellent choice, adding a splash of color while deterring nematodes.
Don’t be afraid to get creative with your container choices, too. While standard plastic pots work perfectly well, you could also repurpose old buckets, wooden crates, or even grow bags. Just ensure that your chosen container has adequate drainage to prevent waterlogging.
The key to successful bell pepper cultivation in pots lies in consistent care and attention. Regularly check the soil moisture, fertilize as needed, and be vigilant for signs of pests or diseases. With a little effort, you’ll be rewarded with a bountiful harvest of delicious, homegrown bell peppers.
We’ve covered a lot of ground, but the best way to truly master this skill is to dive in and get your hands dirty. Start small, experiment with different techniques, and learn from your experiences. Remember, even seasoned gardeners encounter challenges along the way. The important thing is to persevere and enjoy the process.
We are confident that with the knowledge you’ve gained, you’re well-equipped to embark on your own bell pepper growing adventure. So, grab your pots, soil, and seeds, and get ready to experience the joy of harvesting your own homegrown goodness.
Now, we want to hear from you! Have you tried growing bell peppers in pots before? What challenges did you face, and what successes did you celebrate? Share your tips, tricks, and experiences in the comments below. Your insights could help other aspiring gardeners achieve their own bell pepper growing dreams. Let’s create a community of passionate container gardeners, sharing our knowledge and inspiring each other to grow the best bell peppers possible. We are excited to see your bell pepper growing journey!
Frequently Asked Questions (FAQ)
What is the best size pot for growing bell peppers?
A: Generally, a pot that is at least 12 inches in diameter and 12 inches deep is recommended for growing bell peppers. However, larger pots (14-16 inches) are even better, as they provide more room for the roots to grow and allow for better water retention. The larger the pot, the less frequently you’ll need to water. If you’re planning to grow multiple bell pepper plants in a single container, choose a pot that is large enough to accommodate their mature size, typically allowing at least 12 inches between plants.
What type of soil is best for bell peppers in pots?
A: Bell peppers thrive in well-draining, nutrient-rich soil. A good potting mix specifically formulated for vegetables is ideal. Avoid using garden soil, as it can be too heavy and compact in containers, hindering drainage and root growth. You can also create your own potting mix by combining equal parts of peat moss (or coconut coir), perlite, and compost. Adding a slow-release fertilizer to the potting mix at planting time will provide a steady supply of nutrients throughout the growing season.
How much sunlight do bell peppers need when grown in pots?
A: Bell peppers require at least 6-8 hours of direct sunlight per day to produce a good yield. Choose a sunny location for your potted bell peppers, such as a south-facing balcony or patio. If you don’t have a spot that receives enough sunlight, you can supplement with grow lights. Rotate the pots regularly to ensure that all sides of the plant receive adequate sunlight.
How often should I water bell peppers in pots?
A: Water bell peppers regularly, especially during hot, dry weather. The soil should be kept consistently moist, but not waterlogged. Check the soil moisture by sticking your finger about an inch into the soil. If it feels dry, it’s time to water. Water deeply, until water drains out of the bottom of the pot. Avoid overhead watering, as this can increase the risk of fungal diseases.
What kind of fertilizer should I use for bell peppers in pots?
A: Bell peppers are heavy feeders and benefit from regular fertilization. Use a balanced fertilizer (e.g., 10-10-10) or a fertilizer specifically formulated for vegetables. Follow the instructions on the fertilizer label for application rates and frequency. You can also supplement with organic fertilizers, such as compost tea or fish emulsion. Avoid over-fertilizing, as this can lead to excessive foliage growth at the expense of fruit production.
How do I prevent pests and diseases on bell peppers in pots?
A: Regularly inspect your bell pepper plants for signs of pests or diseases. Common pests include aphids, spider mites, and whiteflies. You can control these pests with insecticidal soap, neem oil, or by handpicking them off the plants. To prevent fungal diseases, ensure good air circulation around the plants and avoid overhead watering. If you notice any signs of disease, such as leaf spots or wilting, remove the affected leaves immediately.
When should I harvest my bell peppers?
A: Bell peppers are typically ready to harvest 60-90 days after transplanting, depending on the variety. The peppers should be firm, glossy, and have reached their mature color. You can harvest green bell peppers at any stage of maturity, but they will be sweeter and more flavorful if allowed to ripen to their final color (red, yellow, orange, or purple). Use a sharp knife or pruning shears to cut the peppers from the plant, leaving a short stem attached.
Can I overwinter my bell pepper plants in pots?
A: Yes, you can overwinter your bell pepper plants in pots, especially if you live in a colder climate. Before the first frost, bring the pots indoors to a bright, cool location. Reduce watering and fertilization during the winter months. The plants may lose some of their leaves, but they should start to regrow in the spring. Once the weather warms up, gradually acclimate the plants to outdoor conditions before moving them back outside permanently.
Why are my bell pepper flowers falling off?
A: Bell pepper flower drop can be caused by several factors, including temperature stress (too hot or too cold), insufficient pollination, and nutrient deficiencies. Ensure that your plants are receiving adequate sunlight, water, and fertilizer. You can also try hand-pollinating the flowers by gently shaking the plant or using a small paintbrush to transfer pollen from one flower to another.
Can I grow different varieties of bell peppers in the same pot?
A: While it’s technically possible to grow different varieties of bell peppers in the same large pot, it’s generally not recommended. Different varieties may have different growth habits and nutrient requirements, which can make it difficult to provide optimal care for all plants. It’s best to grow each variety in its own separate pot to ensure that each plant receives the specific care it needs to thrive.
Leave a Comment