
Growing Artichokes at Home might seem like a culinary dream reserved for seasoned gardeners, but I’m here to tell you it’s totally achievable, even if you’re a beginner! Imagine plucking your own spiky treasures straight from your backyard, ready to be steamed, grilled, or dipped in garlicky aioli. Forget those pricey supermarket artichokes – we’re about to embark on a delicious DIY adventure!
Artichokes, with their architectural beauty and unique flavor, have a rich history. Originating in the Mediterranean, they were prized by the ancient Greeks and Romans, who considered them a delicacy and even an aphrodisiac! Over centuries, their cultivation spread, becoming a staple in European cuisine and eventually making their way to the Americas. Today, they symbolize abundance and culinary sophistication.
But why should you bother growing artichokes at home? Well, for starters, homegrown produce always tastes better! Plus, you’ll know exactly what went into nurturing your artichokes, avoiding any unwanted pesticides or chemicals. More importantly, it’s incredibly rewarding to watch these majestic plants thrive under your care. This DIY guide will provide you with simple, effective tricks and hacks to successfully cultivate these unique vegetables, even if you have limited space or gardening experience. I’ll walk you through everything from choosing the right variety to harvesting your very own artichoke bounty. Let’s get started!
Growing Artichokes Yourself: Your Comprehensive DIY Guide
Hello garden friends! I love artichokes – their unique taste and impressive appearance make them a real highlight in any garden. And the best part? You can easily grow them yourself! In this guide, I’ll show you step-by-step how to grow your own artichokes and enjoy a bountiful harvest. Don’t worry, it’s easier than you think!
What You Need for Growing Artichokes
Before we get started, let’s make sure you have everything you need on hand. Here is a list of the materials and tools you’ll need:
- Artichoke seeds or plants: You can either start with seeds or buy pre-grown plants. I recommend plants for beginners as they provide quicker results.
- Seedling pots or trays: For starting the seeds indoors.
- Seed starting mix: Special soil for starting seeds that is low in nutrients and loose.
- Garden soil: High-quality garden soil for the bed or pot.
- Compost or organic fertilizer: To enrich the soil.
- Watering can or garden hose: For watering the plants.
- Spade or shovel: For turning over the soil and planting the artichokes.
- Gardening gloves: To protect your hands.
- Mulching material (e.g., straw or bark mulch): To keep the soil moist and suppress weeds.
- Plant stakes (optional): To support the plants if needed.
- Scissors or knife: For harvesting the artichokes.
The Preparation: The Key to Success
Proper preparation is the key to a successful artichoke harvest. Here are the steps you should follow:
1. Choosing a Location
Artichokes love the sun! Choose a location that receives at least 6-8 hours of direct sunlight per day. The soil should also be well-draining to prevent waterlogging. A spot protected from the wind is ideal, as strong winds can damage the plants.
2. Soil Preparation
Artichokes are heavy feeders, which means they require a lot of nutrients. Therefore, prepare the soil thoroughly:
- Dig the soil to the depth of a spade and remove weeds, stones, and roots.
- Enrich the soil with plenty of compost or organic fertilizer. This improves the soil structure and provides the plants with important nutrients.
- Loosen the soil so that the roots can grow well.
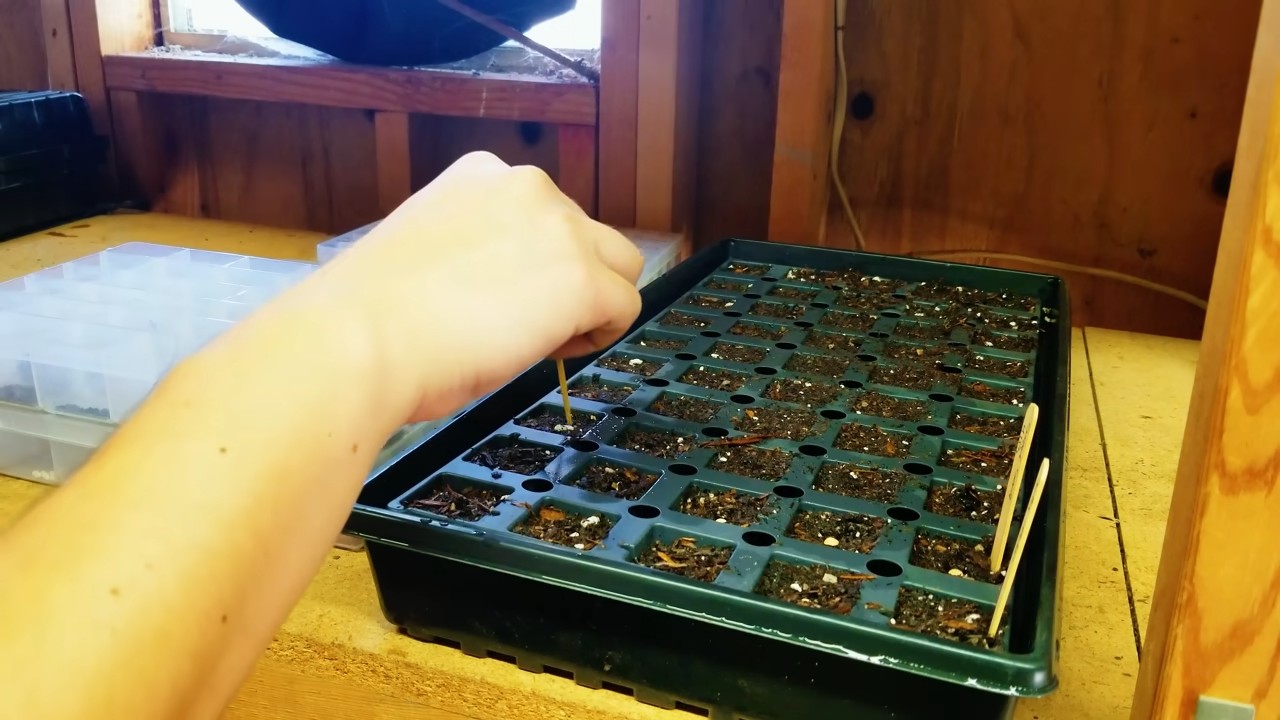
3. Starting Seeds (Optional)
If you start with seeds, you should start them indoors about 8-10 weeks before the last frost:
- Fill seedling pots or trays with seed starting mix.
- Place 2-3 seeds per pot about 1 cm deep into the soil.
- Moisten the soil lightly and place the pots in a warm, bright place (e.g., on a windowsill).
- Keep the soil moist, but not wet.
- Once the seedlings are large enough (about 5-10 cm), you can transplant them into larger pots.
The Planting: Off to the Garden Bed!
Once the danger of frost has passed and the soil temperature is at least 10°C (50°F), you can plant the artichokes in a garden bed or in pots.
- Dig a hole that is twice the size of the plant’s root ball.
- Carefully place the plant in the hole, making sure not to damage the root ball.
- Fill the hole with garden soil and press the soil down lightly.
- Water the plant thoroughly.
- If you are planting multiple artichokes, maintain a distance of about 90-120 cm (3-4 feet) between the plants. This gives them enough space to grow.
The Care: Helping Your Artichokes Thrive
Proper care is crucial for a bountiful harvest. Here are some tips you should follow:
1. Watering
Artichokes need regular water, especially during the growing season. Water the plants thoroughly when the top layer of soil is dry. Avoid waterlogging, as this can lead to root rot.
2. Fertilizing
Artichokes are heavy feeders and require regular fertilization. Fertilize the plants every 2-3 weeks with an organic fertilizer or compost.
3. Weed Control
Keep the bed free of weeds, as weeds deprive the artichokes of nutrients and water. Remove weeds regularly by hand or with a weeder.
4. Mulching
A layer of mulch made of straw or bark mulch helps to keep the soil moist, suppress weeds, and regulate the soil temperature. Apply a layer of mulch about 5-10 cm (2-4 inches) thick around the plants.
5. Protection from Pests and Diseases
Artichokes can be affected by various pests and diseases, such as aphids, slugs, or powdery mildew. Check the plants regularly and take action if necessary. For aphids, for example, nettle tea or ladybug larvae can help. Against slugs, you can use slug pellets or slug fences. For powdery mildew, you should remove affected leaves and treat the plants with a fungicide.
6. Overwintering
Artichokes are generally perennials, but not winter-hardy. In regions with cold winters, you should therefore protect the plants from frost. In the fall, cut the plants back to about 15 cm (6 inches) above the ground and cover them with a thick layer of straw or leaves. Alternatively, you can dig up the plants and overwinter them in a cool, frost-free room.
The Harvest: The Reward for Your Effort
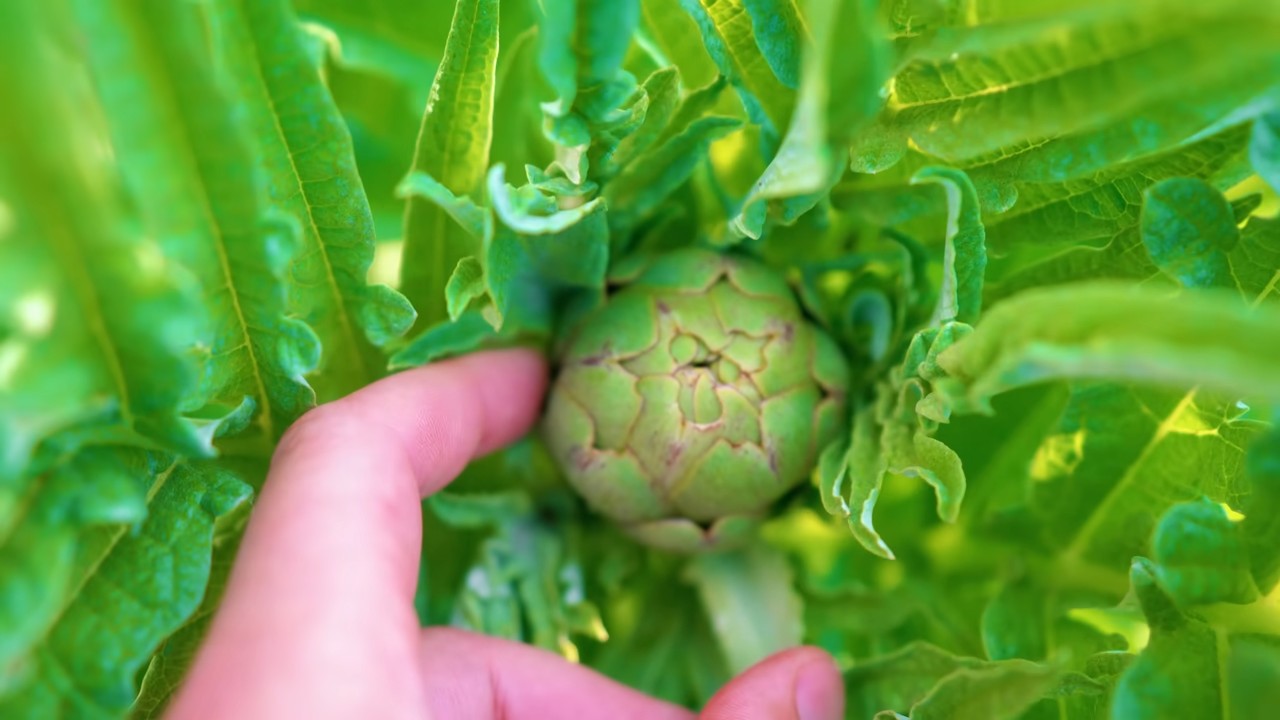
The harvest time for artichokes is usually from June to September. The artichokes are ripe when the buds are firm and closed, and the outer bracts are slightly spread apart.
- Cut the artichokes with a sharp knife or scissors about 5-10 cm (2-4 inches) below the bud.
- Harvest the largest buds first, as they ripen the fastest.
- After harvesting, you can store the artichokes in the refrigerator. They will keep for about a week there.
Growing Artichokes in Pots: An Alternative for Balconies and Patios
If you don’t have a garden, you can also grow artichokes in pots on a balcony or patio. For this, choose a large pot with a diameter of at least 40 cm (16 inches) and use high-quality garden soil. Make sure the pot has sufficient drainage holes to prevent waterlogging. The care for artichokes in a pot is similar to in a garden bed. You need to water and fertilize them regularly and protect them from pests and diseases. In winter, you should move the pots to a sheltered place or cover the plants with fleece.
Avoiding Common Mistakes
Here are some common mistakes you should avoid when growing artichokes:
Improper overwintering: Artichokes are not winter-hardy and must be protected from frost.
Wrong location: Artichokes need a lot of sun. A shady location will lead to poor growth and a poor harvest.
Waterlogging: Artichokes do not tolerate waterlogging. Ensure well-draining soil and avoid excessive watering.
Lack of fertilization: Artichokes are heavy feeders and need regular fertilization.
Neglecting weed control: Weeds deprive the artichokes of nutrients and water.
Conclusion
So, there you have it! Growing artichokes at home might seem daunting at first, but with a little patience, the right conditions, and these simple DIY tricks, you can cultivate your own supply of these delicious and nutritious thistles. Imagine stepping out into your garden and harvesting fresh, plump artichokes, ready to be steamed, grilled, or baked to perfection. The satisfaction of knowing you nurtured them from seedling to table is truly unparalleled.
This isn’t just about saving money at the grocery store; it’s about connecting with your food source, understanding the growing process, and enjoying the freshest possible ingredients. Plus, artichoke plants are stunning additions to any garden, adding a touch of Mediterranean elegance with their silvery-green foliage and striking purple flowers (if you let them bloom!).
Don’t be afraid to experiment with different varieties to find your favorite flavor profile. ‘Green Globe’ is a classic choice, but consider trying ‘Violetta’ for a slightly sweeter taste or ‘Romanesco’ for its unique conical shape. You can also adjust the DIY tricks to suit your specific climate and soil conditions. For example, if you live in a particularly hot climate, provide extra shade during the hottest part of the day. If your soil is heavy clay, amend it generously with compost and other organic matter to improve drainage.
Remember, success in gardening often comes from trial and error. Don’t get discouraged if your first attempt isn’t perfect. Learn from your mistakes, adjust your approach, and keep trying. The rewards of homegrown artichokes are well worth the effort.
We wholeheartedly encourage you to give this DIY artichoke growing method a try. It’s a rewarding experience that will not only provide you with delicious food but also connect you with nature in a meaningful way. Once you’ve harvested your first crop, be sure to share your experience with us! We’d love to hear about your successes, challenges, and any variations you’ve tried. Share your photos and tips in the comments below – let’s build a community of home artichoke growers! Embrace the journey of **growing artichokes at home** and savor the fruits (or rather, the thistles!) of your labor.
Frequently Asked Questions (FAQ)
What are the biggest challenges when growing artichokes at home, and how can I overcome them?
One of the most common challenges is providing the right climate. Artichokes thrive in mild climates with cool, moist summers and mild winters. If you live in an area with hot summers, provide afternoon shade and ensure consistent watering. In colder climates, protect the plants from frost by mulching heavily or covering them with burlap. Another challenge is pest control. Aphids, snails, and slugs can be problematic. Regularly inspect your plants and use organic pest control methods like neem oil or diatomaceous earth. Good drainage is also crucial, as artichokes don’t tolerate soggy soil. Amend heavy clay soil with plenty of compost and consider planting in raised beds.
How long does it take to grow artichokes from seed to harvest?
Growing artichokes from seed can take a bit longer than starting with transplants. Generally, it takes about 150 to 180 days from seed to harvest. Starting seeds indoors 8-10 weeks before the last expected frost can give you a head start. Transplants, on the other hand, can produce artichokes in their first year, typically within 100 to 120 days of planting. Be patient and remember that the first year might yield a smaller harvest, but the plants will become more productive in subsequent years.
What kind of soil is best for growing artichokes?
Artichokes prefer well-drained, fertile soil with a slightly acidic to neutral pH (around 6.0 to 7.0). Loamy soil is ideal, but you can amend other soil types to improve their suitability. For clay soil, add plenty of compost, aged manure, and other organic matter to improve drainage and aeration. For sandy soil, incorporate organic matter to help retain moisture and nutrients. Before planting, conduct a soil test to determine its pH and nutrient levels. Amend the soil as needed based on the test results.
How often should I water my artichoke plants?
Artichokes need consistent moisture, especially during the growing season. Water deeply and regularly, aiming for about 1-2 inches of water per week. Check the soil moisture regularly and water when the top inch feels dry. Avoid overwatering, as this can lead to root rot. During hot, dry weather, you may need to water more frequently. Mulching around the plants can help retain moisture and suppress weeds. Reduce watering during the dormant season.
What are some common pests and diseases that affect artichokes, and how can I prevent or treat them?
Common pests include aphids, snails, slugs, artichoke plume moths, and spider mites. Aphids can be controlled with insecticidal soap or neem oil. Snails and slugs can be handpicked or trapped. Artichoke plume moths can be difficult to control, but row covers can help prevent them from laying eggs on the plants. Spider mites can be treated with horticultural oil. Common diseases include powdery mildew, botrytis blight, and root rot. Powdery mildew can be prevented by ensuring good air circulation and treating with a fungicide if necessary. Botrytis blight can be prevented by avoiding overhead watering and removing infected leaves. Root rot can be prevented by ensuring good drainage and avoiding overwatering.
Can I grow artichokes in containers?
Yes, you can grow artichokes in containers, but you’ll need a large container (at least 20 gallons) to accommodate their extensive root system. Choose a well-draining potting mix and ensure the container has drainage holes. Water regularly and fertilize every few weeks with a balanced fertilizer. Container-grown artichokes may need more frequent watering and fertilization than those grown in the ground. Also, consider the location of the container, ensuring it receives at least 6-8 hours of sunlight per day.
How do I know when my artichokes are ready to harvest?
Artichokes are ready to harvest when the buds are plump and firm, and the bracts (the outer leaves) are still tightly closed. The size of the artichoke will vary depending on the variety, but generally, they should be about 3-4 inches in diameter. To harvest, cut the stem about 2-3 inches below the base of the bud. Harvest before the bracts begin to open, as this indicates that the artichoke is becoming tough and less flavorful.
What are some creative ways to use homegrown artichokes?
Beyond the classic steamed artichoke with dipping sauce, there are countless ways to enjoy your homegrown bounty. Try grilling them for a smoky flavor, stuffing them with breadcrumbs and herbs, or adding them to pasta dishes, salads, and pizzas. Artichoke hearts can be marinated, pickled, or used in dips and spreads. You can even make artichoke soup or puree them into a creamy sauce. Don’t forget the stems! They are also edible and can be peeled and cooked like the hearts.
How do I overwinter artichoke plants in cold climates?
In colder climates, artichokes need protection from frost and freezing temperatures. After the first frost, cut back the foliage to about 6 inches above the ground. Mulch heavily around the plants with straw, leaves, or other organic material. You can also cover the plants with burlap or a cold frame for added protection. In very cold climates, you may need to dig up the plants and store them in a cool, dark place until spring. Replant them in the garden after the last frost.
Are artichokes perennials?
Yes, artichokes are perennials in mild climates (zones 7-10). In these zones, they will come back year after year, producing larger and more abundant harvests. In colder climates, they are often grown as annuals, as they may not survive the winter. However, with proper winter protection, you may be able to overwinter them and enjoy them as perennials.
Leave a Comment