
Grow Water Spinach Easily and unlock a world of fresh, vibrant greens right in your backyard! Have you ever dreamed of harvesting your own delicious, nutritious vegetables without the hassle of complicated gardening techniques? Well, get ready to turn that dream into reality! This DIY guide is packed with simple, effective tricks to help you cultivate thriving water spinach, even if you’re a complete beginner.
Water spinach, also known as Ong Choy or Kangkong, has a rich history, deeply rooted in Asian cuisine and culture. For centuries, it’s been a staple in dishes across Southeast Asia, prized for its mild flavor and impressive nutritional benefits. Beyond its culinary appeal, growing your own water spinach connects you to this heritage, allowing you to experience a taste of tradition in your own home.
But why should you bother with this DIY project? In today’s world, where access to fresh, affordable produce can be a challenge, learning to grow water spinach easily offers a fantastic solution. Imagine stepping outside your door to harvest crisp, leafy greens for your stir-fries, salads, or soups. Not only will you save money, but you’ll also enjoy the satisfaction of knowing exactly where your food comes from and that it’s free from harmful chemicals. Plus, it’s a fun and rewarding hobby that can bring a touch of nature and tranquility to your daily life. Let’s get started!

Grow Your Own Water Spinach: A Beginner-Friendly DIY Guide
Hey there, fellow plant enthusiasts! Ever wanted to grow your own fresh, delicious, and incredibly fast-growing greens? Well, look no further than water spinach, also known as kangkong or ong choy! This semi-aquatic vegetable is a staple in many Asian cuisines, and the best part? It’s surprisingly easy to cultivate at home, even if you don’t have a green thumb. I’m going to walk you through everything you need to know to get started.
What You’ll Need
Before we dive into the nitty-gritty, let’s gather our supplies. This is a pretty low-cost project, which is always a win in my book!
* Water Spinach Seeds or Cuttings: You can find seeds online or at your local Asian grocery store. Cuttings from mature plants work great too, and are often easier to get started with.
* A Container: A large bucket, tub, or even a repurposed plastic container will do. Make sure it’s at least 12 inches deep.
* Soil: A good quality potting mix or garden soil will work. You don’t need anything too fancy.
* Water: Tap water is fine, but letting it sit out for a day or two to dechlorinate is even better.
* Sunlight: Water spinach loves sunshine! Aim for at least 6 hours of direct sunlight per day.
* Optional: Fertilizer (liquid or slow-release), a small pump for aeration (if you’re feeling fancy).
Choosing Your Growing Method: Seeds vs. Cuttings
You have two main options for starting your water spinach journey: seeds or cuttings. Both have their pros and cons, so let’s break them down.
* Seeds:
* Pros: Widely available, relatively inexpensive, allows you to see the entire growth cycle.
* Cons: Can take a bit longer to germinate, may require more patience.
* Cuttings:
* Pros: Faster growth, easier to establish, great way to propagate existing plants.
* Cons: Requires access to a mature water spinach plant, may not be as readily available.
Personally, I’ve had great success with both methods, but I often prefer cuttings because they give you a head start.
Growing Water Spinach from Seeds: A Step-by-Step Guide
If you’re opting for the seed route, here’s how to get those little guys sprouting:
1. Soak the Seeds: Before planting, soak the water spinach seeds in warm water for 12-24 hours. This helps to soften the seed coat and encourages faster germination. I usually put them in a small bowl on my kitchen counter.
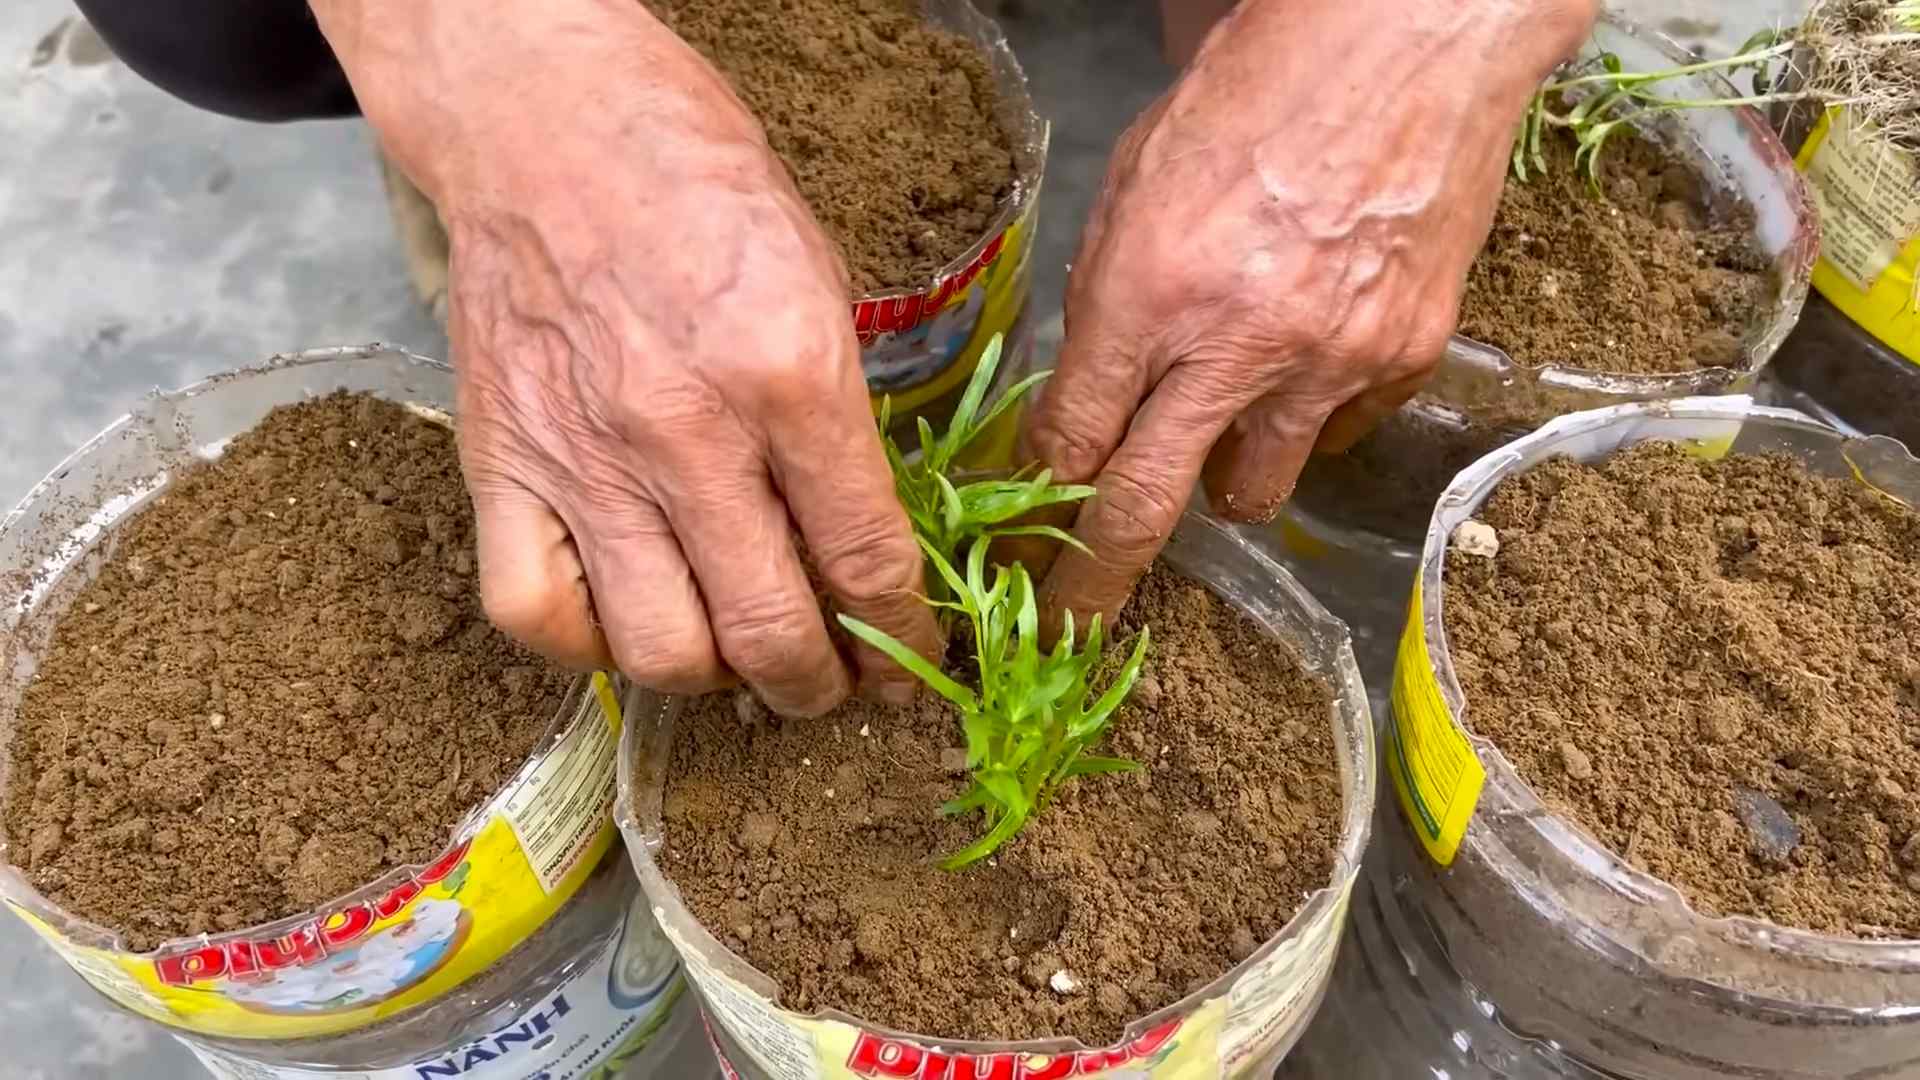
2. Prepare Your Container: Fill your container with soil, leaving about 2-3 inches of space at the top. Water the soil thoroughly until it’s evenly moist but not soggy.
3. Sow the Seeds: Sprinkle the soaked seeds evenly over the surface of the soil. You don’t need to bury them too deep; just gently press them into the soil. A light covering of soil is fine.
4. Water Gently: Use a spray bottle or a watering can with a gentle rose to water the seeds. Avoid blasting them with water, as this can dislodge them.
5. Create a Humid Environment: Cover the container with a clear plastic bag or plastic wrap to create a humid environment. This will help to keep the soil moist and promote germination.
6. Place in a Warm, Sunny Spot: Put the container in a warm location that receives plenty of sunlight. A windowsill or a sunny balcony is ideal.
7. Monitor and Water: Check the soil moisture daily and water as needed to keep it consistently moist. Remove the plastic covering once the seeds have germinated, which usually takes about 7-14 days.
8. Thin Seedlings (Optional): Once the seedlings have developed a few sets of true leaves, you can thin them out if they’re too crowded. This will give the remaining plants more room to grow.
Growing Water Spinach from Cuttings: A Simpler Approach
If you have access to water spinach cuttings, this method is even easier!
1. Obtain Cuttings: Take cuttings from a healthy water spinach plant. The cuttings should be about 6-8 inches long and have several nodes (the points where leaves emerge).
2. Remove Lower Leaves: Remove the leaves from the bottom 2-3 inches of the cuttings. This will expose the nodes, which will develop roots.
3. Rooting in Water: Place the cuttings in a glass or jar of water, ensuring that the nodes are submerged. Change the water every 1-2 days to keep it fresh.
4. Wait for Roots: Within a few days to a week, you should start to see roots emerging from the nodes.
5. Plant the Cuttings: Once the roots are about an inch long, you can plant the cuttings in your prepared container of soil.
6. Water Thoroughly: Water the newly planted cuttings thoroughly to help them establish.
7. Provide Support (Optional): If the cuttings are a bit wobbly, you can provide them with some support by using small stakes or chopsticks.
Maintaining Your Water Spinach: The Key to Success
Once your water spinach plants are established, here’s how to keep them thriving:
* Watering: Water spinach loves water, so keep the soil consistently moist. You can even partially submerge the container in water, creating a more aquatic environment. I usually fill a tray with water and place the container inside.
* Sunlight: Ensure your plants receive at least 6 hours of direct sunlight per day. If you’re growing them indoors, you may need to supplement with a grow light.
* Fertilizing: Water spinach is a heavy feeder, so fertilize it regularly with a liquid fertilizer or slow-release fertilizer. Follow the instructions on the fertilizer packaging. I like to use a balanced fertilizer every couple of weeks.
* Pruning: Prune your water spinach regularly to encourage bushier growth and prevent it from becoming too leggy. Simply pinch off the tips of the stems.
* Pest Control: Water spinach is generally pest-resistant, but keep an eye out for aphids or other common garden pests. If you spot any, you can treat them with insecticidal soap or neem oil.
* Aeration (Optional): If you’re growing your water spinach in a completely aquatic environment, you may want to consider adding a small pump to aerate the water. This will help to prevent stagnation and promote healthy root growth.
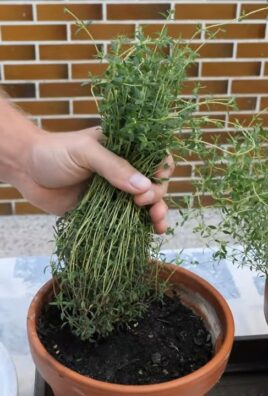
Harvesting Your Water Spinach: The Best Part!
The best thing about growing water spinach is how quickly you can start harvesting! You can usually start harvesting about 4-6 weeks after planting.
* Harvesting Technique: To harvest, simply cut the stems about 6-8 inches from the top. The plants will continue to grow and produce new shoots.
* Harvesting Frequency: You can harvest your water spinach every few days or weeks, depending on how quickly it’s growing.
* Storage: Freshly harvested water spinach is best used immediately. However, you can store it in the refrigerator for a few days in a plastic bag.
Troubleshooting: Common Issues and Solutions
Even with the best care, you might encounter a few challenges along the way. Here are some common issues and how to address them:
* Yellowing Leaves: This could be a sign of nutrient deficiency. Try fertilizing your plants with a balanced fertilizer.
* Slow Growth: This could be due to insufficient sunlight, water, or nutrients. Make sure your plants are getting enough of all three.
* Pest Infestation: Treat any pest infestations promptly with insecticidal soap or neem oil.
* Stunted Growth: This could be caused by root rot, which is often a result of overwatering. Make sure your container has good drainage and avoid letting the soil become waterlogged.
Enjoying Your Homegrown Water Spinach: Delicious Recipes
Now that you’ve harvested your own water spinach, it’s time to enjoy the fruits (or rather, vegetables!) of your labor. Here are a few delicious ways to prepare it:
* Stir-fries: Water spinach is a popular ingredient in stir-fries. Simply stir-fry it with garlic, ginger, and your favorite sauce.
* Soups: Add water spinach to soups for a nutritious and flavorful boost.
* Salads: Use young, tender water spinach leaves in salads.
* Steamed: Steam water spinach and serve it with a dipping sauce.
I personally love a simple stir-fry with garlic, oyster sauce, and a touch of chili. It’s quick, easy, and incredibly satisfying!
Growing water spinach is a rewarding and enjoyable
Conclusion
So, there you have it! Growing your own water spinach, or kangkong, is not only achievable but surprisingly simple with this DIY trick. Forget expensive gardening equipment or complicated setups. This method offers a cost-effective and space-saving way to enjoy fresh, nutritious greens right from your home. The beauty of this approach lies in its adaptability. Whether you have a sprawling garden or a small balcony, you can tailor this technique to fit your specific needs and environment.
Why is this DIY method a must-try? Because it empowers you to take control of your food source. You know exactly what goes into your water spinach – no harmful pesticides or hidden chemicals. Plus, the satisfaction of harvesting your own homegrown vegetables is unparalleled. Imagine the pride you’ll feel serving a stir-fry made with water spinach you nurtured from seed to table.
Beyond the basic setup, there’s plenty of room for experimentation. Try different containers – from repurposed plastic tubs to stylish ceramic pots. You can also explore various nutrient solutions to optimize growth. Some gardeners swear by adding a diluted seaweed extract for an extra boost of minerals. Another variation involves using an aquarium as a growing medium, creating a symbiotic relationship between the plants and fish. The fish waste provides nutrients for the water spinach, while the plants filter the water, creating a healthy environment for both.
Don’t be afraid to get creative and personalize your water spinach growing experience. The key is to provide adequate sunlight, consistent moisture, and a nutrient-rich environment. With a little care and attention, you’ll be rewarded with a bountiful harvest of delicious and healthy water spinach.
We wholeheartedly encourage you to give this DIY trick a try. It’s a rewarding project that connects you with nature and provides you with a sustainable source of fresh produce. And most importantly, we want to hear about your experiences! Share your photos, tips, and challenges in the comments below. Let’s build a community of water spinach enthusiasts and learn from each other. Your insights could inspire others to embark on their own gardening journey. So, grab your seeds, gather your materials, and get ready to experience the joy of growing your own **water spinach** easily! Let us know how it goes!
Frequently Asked Questions (FAQ)
What exactly is water spinach and why should I grow it?
Water spinach, also known as kangkong or ong choy, is a semi-aquatic leafy green vegetable popular in Southeast Asian cuisine. It’s packed with vitamins, minerals, and antioxidants, making it a highly nutritious addition to your diet. Growing your own water spinach ensures you have access to fresh, organic greens without relying on store-bought options, which may contain pesticides or have traveled long distances. It’s also a fast-growing plant, providing a quick and rewarding gardening experience.
How much sunlight does water spinach need?
Water spinach thrives in full sun, requiring at least 6 hours of direct sunlight per day. If you’re growing it indoors, supplement with grow lights to ensure adequate light exposure. Insufficient sunlight can lead to leggy growth and reduced yields. If you live in a very hot climate, providing some afternoon shade can prevent the leaves from scorching.
What kind of water should I use for growing water spinach?
Tap water is generally suitable for growing water spinach, but it’s best to let it sit for 24 hours to allow chlorine to dissipate. You can also use rainwater or well water. Avoid using water that is heavily chlorinated or contains high levels of salts. Regularly monitor the pH of the water, ideally keeping it between 6.0 and 7.0 for optimal growth.
How often should I change the water in my container?
The frequency of water changes depends on the size of your container and the growth rate of your plants. As a general rule, change the water every 1-2 weeks to prevent the buildup of algae and maintain a healthy nutrient balance. If you notice the water becoming cloudy or developing an unpleasant odor, change it more frequently. When changing the water, be careful not to disturb the roots of the plants.
What kind of fertilizer or nutrient solution should I use?
Water spinach is a heavy feeder and requires a nutrient-rich environment to thrive. You can use a balanced liquid fertilizer specifically formulated for leafy greens. Follow the instructions on the fertilizer packaging for proper dilution rates. Alternatively, you can use organic options like compost tea or diluted fish emulsion. Avoid over-fertilizing, as this can lead to nutrient burn and damage the plants.
How long does it take for water spinach to grow?
Water spinach is a fast-growing plant, typically ready for harvest within 4-6 weeks from planting. You can start harvesting the leaves when they reach about 6-8 inches in length. Regular harvesting encourages continued growth and prevents the plants from becoming too leggy.
How do I harvest water spinach?
Harvest water spinach by cutting the stems about 2-3 inches above the water line. This allows the plant to regrow and produce more leaves. You can harvest multiple times from the same plant. It’s best to harvest in the morning when the leaves are at their freshest.
Can I grow water spinach in cold weather?
Water spinach is a tropical plant and prefers warm temperatures. It does not tolerate frost or freezing temperatures. If you live in a cold climate, you can grow water spinach indoors under grow lights. Maintain a temperature of at least 60°F (15°C) for optimal growth.
Are there any pests or diseases that affect water spinach?
Water spinach is generally resistant to pests and diseases, but it can be susceptible to aphids, spider mites, and fungal infections. Regularly inspect your plants for any signs of infestation or disease. Treat any problems promptly with organic pest control methods or fungicides. Good air circulation and proper watering practices can help prevent fungal diseases.
Can I eat the stems of water spinach?
Yes, both the leaves and stems of water spinach are edible. The stems are slightly tougher than the leaves, so they may require a longer cooking time. They have a mild, slightly sweet flavor and can be used in stir-fries, soups, and salads.
Is it legal to grow water spinach everywhere?
In some regions, water spinach is considered an invasive species and its cultivation may be restricted or prohibited. Before growing water spinach, check with your local agricultural authorities to ensure it is legal in your area. If it is considered invasive, consider growing it in a completely contained system to prevent it from escaping into the environment.
What are some creative ways to use my homegrown water spinach?
Beyond stir-fries, water spinach can be used in a variety of dishes. Add it to soups and stews for a boost of nutrients. Use it as a filling for spring rolls or dumplings. Blanch it and toss it with a sesame dressing for a simple salad. You can even juice it for a healthy green smoothie. The possibilities are endless!


Leave a Comment