
Grow Taro at Home and unlock a world of culinary possibilities right in your backyard! Have you ever dreamt of harvesting your own exotic ingredients, adding a touch of the tropics to your meals? Well, dream no more! This DIY guide will walk you through the surprisingly simple steps of cultivating this fascinating root vegetable, bringing a taste of Polynesian paradise to your home garden.
Taro, also known as Kalo in Hawaiian culture, boasts a rich history deeply intertwined with the traditions and sustenance of many Pacific Island communities. For centuries, it has been a staple food, revered not only for its nutritional value but also for its cultural significance. Imagine connecting with this ancient heritage as you nurture your own taro plants!
But why should you bother learning how to grow taro at home? In today’s world, where access to fresh, unique produce can be limited, cultivating your own taro offers a fantastic solution. Not only will you enjoy the satisfaction of growing your own food, but you’ll also gain access to a versatile ingredient perfect for soups, stews, chips, and the traditional Hawaiian dish, poi. Plus, it’s a fantastic conversation starter! Let’s dive in and discover the secrets to successfully growing taro in your own home garden.
Growing Taro at Home: A Beginner’s Guide
Hey there, fellow plant enthusiasts! Ever thought about growing your own taro? It might seem a little exotic, but trust me, it’s totally doable, even if you don’t have a sprawling tropical garden. I’m going to walk you through everything you need to know to cultivate this delicious and nutritious root vegetable right in your own home or backyard. Let’s get started!
Choosing Your Taro Variety
Before we dive into the nitty-gritty, let’s talk about taro varieties. There are tons of different types, each with its own unique characteristics. Some are better suited for growing in containers, while others thrive in larger garden beds. Here’s a quick rundown:
* Bun Long: This is a popular variety known for its large, flavorful corms (the edible root). It generally does well in warmer climates.
* Dasheen: Another common variety, Dasheen produces smaller corms but is known for its excellent taste. It’s often grown in flooded conditions, but can also adapt to drier environments.
* Eddoe: Eddoe produces smaller, more numerous corms than Dasheen. It’s a good option if you’re looking for a higher yield of smaller taro roots.
* Elephant Ear Taro (Colocasia gigantea): While technically edible, this variety is often grown for its massive, ornamental leaves. The corms are less palatable than other varieties.
My Recommendation: If you’re a beginner, I’d suggest starting with Dasheen or Eddoe. They’re relatively easy to grow and adapt well to different conditions.
Preparing for Planting
Okay, so you’ve chosen your taro variety. Now it’s time to get everything ready for planting. This involves selecting the right location, preparing the soil, and sourcing your taro corms or cuttings.
* Location, Location, Location: Taro loves sunlight! Aim for a spot that gets at least 6-8 hours of direct sunlight each day. If you’re growing indoors, a sunny windowsill or a grow light will do the trick.
* Soil Preparation is Key: Taro thrives in rich, well-draining soil that retains moisture. A mixture of potting soil, compost, and peat moss works wonders. The soil should be slightly acidic to neutral (pH 6.0-7.0).
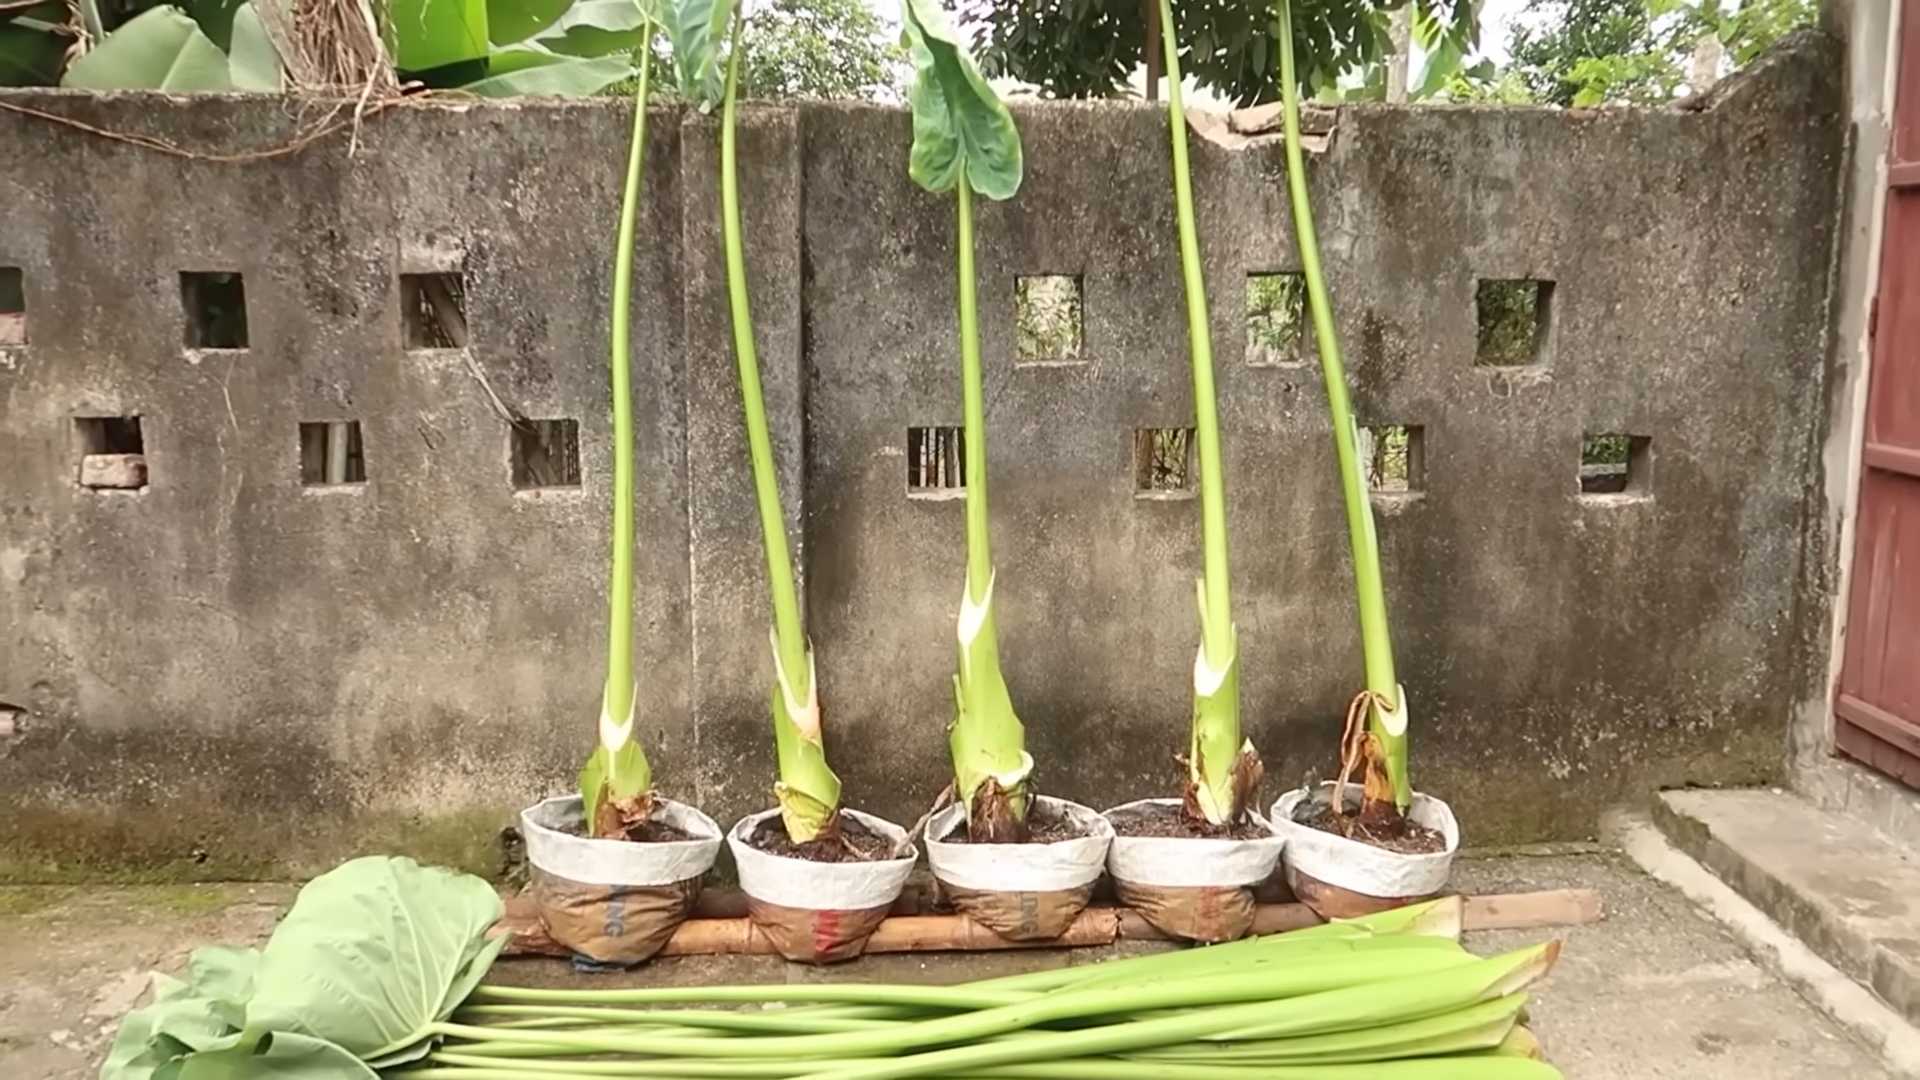
* Sourcing Your Taro: You can find taro corms or cuttings at your local nursery, garden center, or even online. Make sure you choose healthy, disease-free specimens. If you’re using corms, look for ones that are firm and free of blemishes. If you’re using cuttings, make sure they have healthy roots and leaves.
Step-by-Step Planting Guide
Alright, let’s get our hands dirty! Here’s a step-by-step guide to planting your taro:
1. Choose Your Container (If Applicable): If you’re growing taro in a container, select one that’s at least 12 inches in diameter and 12 inches deep. Make sure it has drainage holes to prevent waterlogging.
2. Prepare the Soil: Fill your container or garden bed with the soil mixture you prepared earlier.
3. Planting the Corm or Cutting:
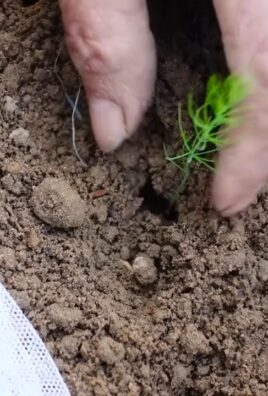
* For Corms: Dig a hole that’s about 4-6 inches deep. Place the corm in the hole with the pointed end facing up. Cover it with soil and gently pat it down.
* For Cuttings: Dig a hole that’s large enough to accommodate the roots. Place the cutting in the hole and cover the roots with soil. Gently pat the soil down.
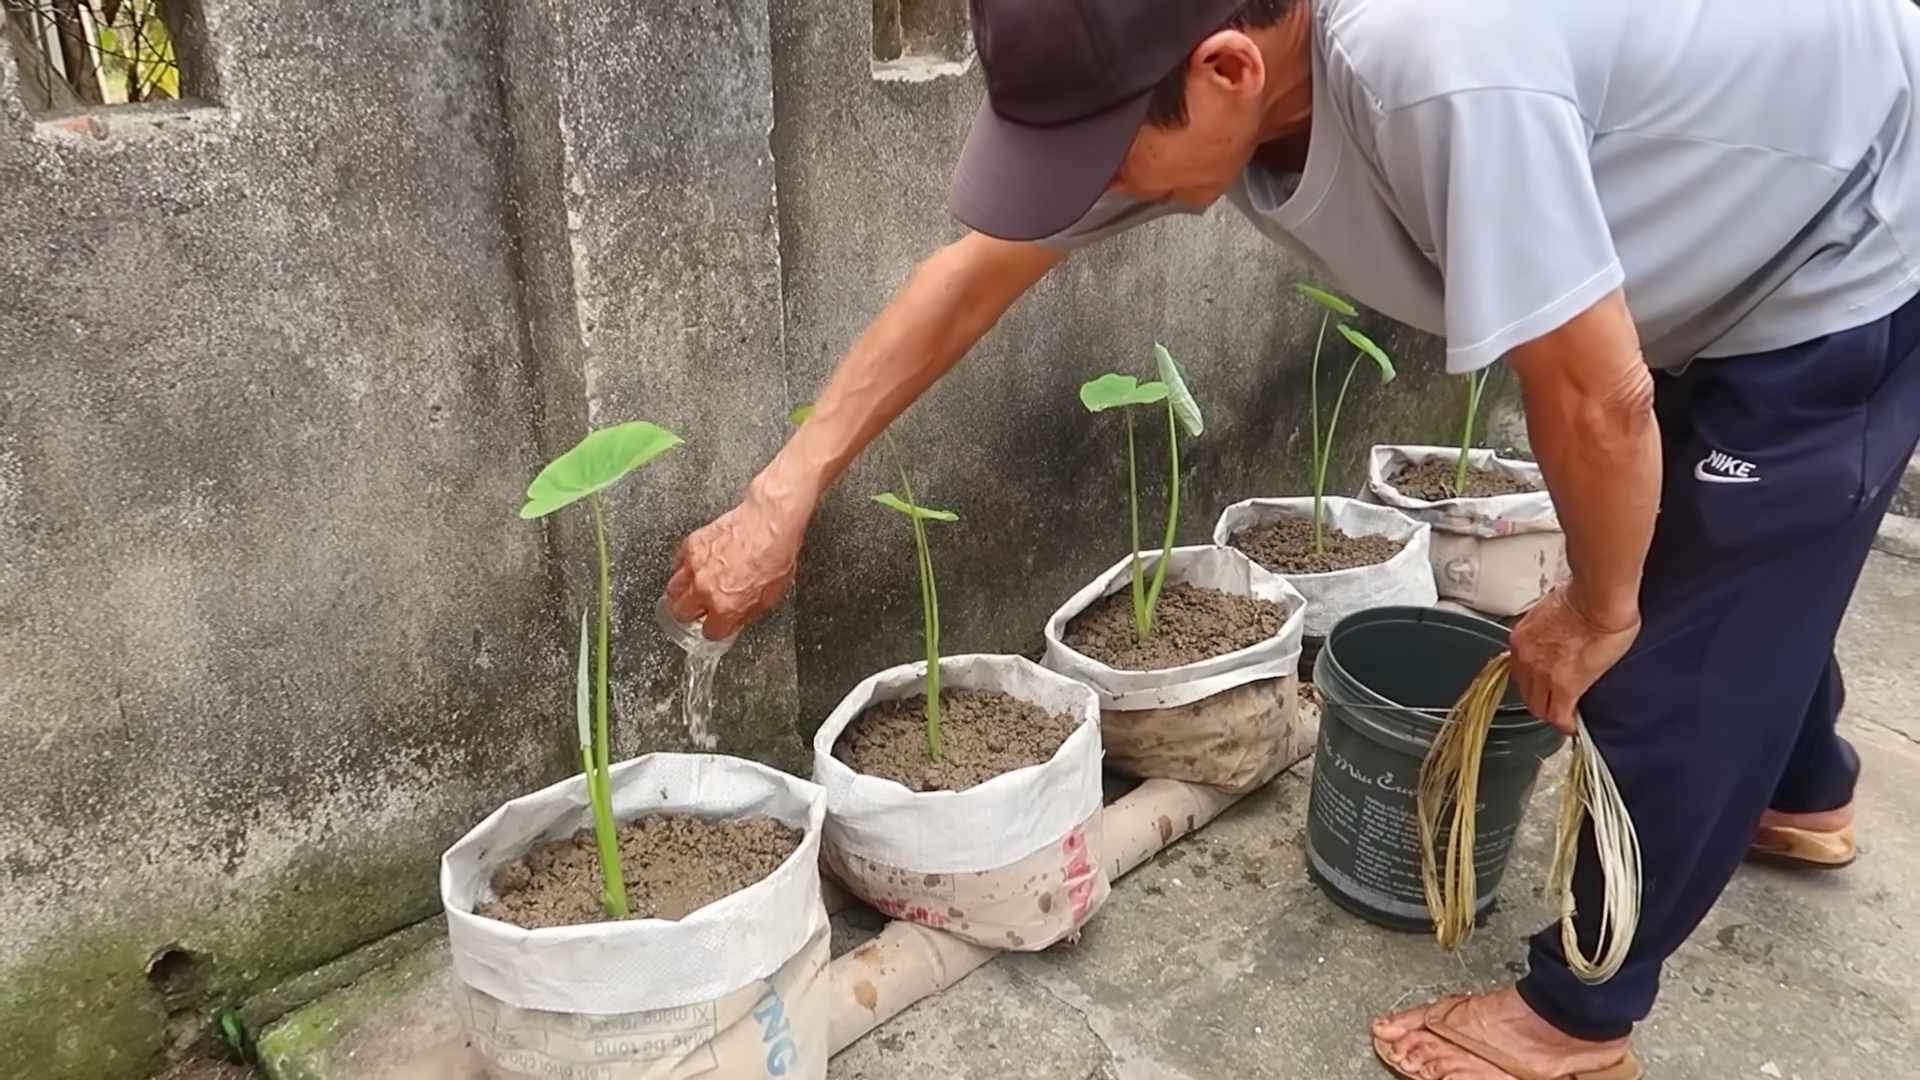
4. Water Thoroughly: After planting, water the soil thoroughly until it’s evenly moist.
5. Mulch (Optional): Add a layer of mulch around the base of the plant to help retain moisture and suppress weeds.
Caring for Your Taro Plant
Now that your taro is planted, it’s time to provide it with the care it needs to thrive. This includes watering, fertilizing, and protecting it from pests and diseases.
* Watering: Taro loves moisture, so water it regularly, especially during hot, dry weather. The soil should always be moist, but not waterlogged. Check the soil moisture by sticking your finger about an inch into the soil. If it feels dry, it’s time to water.
* Fertilizing: Taro is a heavy feeder, so it needs regular fertilization. Use a balanced fertilizer (e.g., 10-10-10) every 4-6 weeks during the growing season. Follow the instructions on the fertilizer package. You can also supplement with organic fertilizers like compost tea or fish emulsion.
* Pest and Disease Control: Taro is generally resistant to pests and diseases, but it can be susceptible to aphids, spider mites, and fungal infections. Inspect your plants regularly for signs of infestation or disease. If you spot any problems, treat them promptly with an appropriate insecticide or fungicide. Neem oil is a great organic option for controlling many common pests.
* Humidity: Taro thrives in humid environments. If you live in a dry climate, you may need to increase the humidity around your plants. You can do this by misting them regularly, placing them on a pebble tray filled with water, or using a humidifier.
* Temperature: Taro prefers warm temperatures (70-85°F). Protect your plants from frost and freezing temperatures. If you live in a cold climate, you may need to bring your taro plants indoors during the winter.
Harvesting Your Taro
The moment we’ve all been waiting for! Harvesting your own taro is incredibly rewarding. Here’s how to know when it’s time to harvest and how to do it:
* When to Harvest: Taro is typically ready to harvest 6-12 months after planting, depending on the variety and growing conditions. The leaves will start to turn yellow and die back when the corms are mature.
* How to Harvest:
1. Loosen the soil around the base of the plant with a garden fork or shovel.
2. Gently lift the plant out of the soil.
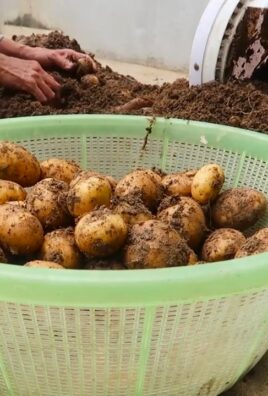
3. Separate the corms from the plant.
4. Wash the corms thoroughly to remove any dirt or debris.
* Storing Your Taro: Store your harvested taro corms in a cool, dry place. They can be stored for several weeks.
Troubleshooting Common Problems
Even with the best care, you might encounter some problems while growing taro. Here are a few common issues and how to address them:
* Yellowing Leaves: This can be caused by overwatering, underwatering, nutrient deficiencies, or pest infestations. Check the soil moisture, fertilize your plants, and inspect them for pests.
* Stunted Growth: This can be caused by insufficient sunlight, poor soil, or root rot. Make sure your plants are getting enough sunlight, amend the soil with compost, and avoid overwatering.
* Root Rot: This is a fungal disease that can be caused by overwatering or poor drainage. Improve drainage by adding perlite or sand to the soil. Treat with a fungicide if necessary.
* Pest Infestations: Aphids, spider mites, and other pests can damage taro plants. Treat infestations with an appropriate insecticide or neem oil.
Enjoying Your Homegrown Taro
Congratulations! You’ve successfully grown your own taro. Now it’s time to enjoy the fruits (or rather, roots) of your labor. Taro can be cooked in a variety of ways, including boiling, steaming, baking, and frying. It’s a staple ingredient in many cuisines around the world.
A Word of Caution: Raw taro contains calcium oxalate crystals, which can cause irritation to the mouth and throat. Always cook taro thoroughly before eating it.
Some Delicious Ideas:
* Taro Chips: Slice the taro thinly and bake or fry them until crispy.
* Taro Mash: Boil or steam the taro until tender, then mash it with butter, milk, and seasonings.
* Taro Curry: Add taro to your favorite curry recipe for a hearty and flavorful dish.
* Poi: A traditional Hawaiian dish made from pounded taro.
Propagating Taro
Want to expand your taro patch? Propagating taro is easy! You can do it by dividing the corms or by taking stem cuttings.
* Dividing Corms: When you harvest your taro, you’ll notice that the corms often have smaller “daughter” corms attached to them. You can separate these daughter corms and plant them individually to create new plants.
* Taking Stem Cuttings: Cut a stem from a healthy taro plant, making sure it has at least one node (the point where a leaf grows). Place the cutting in water until roots develop, then plant it in soil.
Final ThoughtsChoosing Your Taro Variety
Before we dive into the nitty-gritty, let’s talk about taro varieties. There are tons of different types, each with its own unique characteristics. Some are better suited for growing in containers, while others thrive in larger garden beds. Here’s a quick rundown:
* Bun Long: This is a popular variety known for its large, flavorful corms (the edible root). It generally does well in warmer climates.
* Dasheen: Another common variety, Dasheen produces smaller corms but is known for its excellent taste. It’s often grown in flooded conditions, but can also adapt to drier environments.
* Eddoe: Eddoe produces smaller, more numerous corms than Dasheen. It’s a good option if you’re looking for a higher yield of smaller taro roots.
* Elephant Ear Taro (Colocasia gigantea): While technically edible, this variety is often grown for its massive, ornamental leaves. The corms are less palatable than other varieties.
My Recommendation: If you’re a beginner, I’d suggest starting with Dasheen or Eddoe. They’re relatively easy to grow and adapt well to different conditions.
Preparing for Planting
Okay, so you’ve chosen your taro variety. Now it’s time to get everything ready for planting. This involves selecting the right location, preparing the soil, and sourcing your taro corms or cuttings.
* Location, Location, Location: Taro loves sunlight! Aim for a spot that gets at least 6-8 hours of direct sunlight each day. If you’re growing indoors, a sunny windowsill or a grow light will do the trick.
* Soil Preparation is Key: Taro thrives in rich, well-draining soil that retains moisture. A mixture of potting soil, compost, and peat moss works wonders. The soil should be slightly acidic to neutral (pH 6.0-7.0).
* Sourcing Your Taro: You can find taro corms or cuttings at your local nursery, garden center, or even online. Make sure you choose healthy, disease-free specimens. If you’re using corms, look for ones that are firm and free of blemishes. If you’re using cuttings, make sure they have healthy roots and leaves.
Step-by-Step Planting Guide
Alright, let’s get our hands dirty! Here’s a step-by-step guide to planting your taro:
1. Choose Your Container (If Applicable): If you’re growing taro in a container, select one that’s at least 12 inches in diameter and 12 inches deep. Make sure it has drainage holes to prevent waterlogging.
2. Prepare the Soil: Fill your container or garden bed with the soil mixture you prepared earlier.
3. Planting the Corm or Cutting:
* For Corms: Dig a hole that’s about 4-6 inches deep. Place the corm in the hole with the pointed end facing up. Cover it with soil and gently pat it down.
* For Cuttings: Dig a hole that’s large enough to accommodate the roots. Place the cutting in the hole and cover the roots with soil. Gently pat the soil down.
4. Water Thoroughly: After planting, water the soil thoroughly until it’s evenly moist.
5. Mulch (Optional): Add a layer of mulch around the base of the plant to help retain moisture and suppress weeds.
Caring for Your Taro Plant
Now that your taro is planted, it’s time to provide it with the care it needs to thrive. This includes watering, fertilizing, and protecting it from pests and diseases.
* Watering: Taro loves moisture, so water it regularly, especially during hot, dry weather. The soil should always be moist, but not waterlogged. Check the soil moisture by sticking your finger about an inch into the soil. If it feels dry, it’s time to water.
* Fertilizing: Taro is a heavy feeder, so it needs regular fertilization. Use a balanced fertilizer (e.g., 10-10-10) every 4-6 weeks during the growing season. Follow the instructions on the fertilizer package. You can also supplement with organic fertilizers like compost tea or fish emulsion.
* Pest and Disease Control: Taro is generally resistant to pests and diseases, but it can be susceptible to aphids, spider mites, and fungal infections. Inspect your plants regularly for signs of infestation or disease. If you spot any problems, treat them promptly with an appropriate insecticide or fungicide. Neem oil is a great organic option for controlling many common pests.
* Humidity: Taro thrives in humid environments. If you live in a dry climate, you may need to increase the humidity around your plants. You can do this by misting them regularly, placing them on a pebble tray filled with water, or using a humidifier.
* Temperature: Taro prefers warm temperatures (70-85°F). Protect your plants from frost and freezing temperatures. If you live in a cold climate, you may need to bring your taro plants indoors during the winter.
Harvesting Your Taro
The moment we’ve all been waiting for! Harvesting your own taro is incredibly rewarding. Here’s how to know when it’s time to harvest and how to do it:
* When to Harvest: Taro is typically ready to harvest 6-12 months after planting, depending on the variety and growing conditions. The leaves will start to turn yellow and die back when the corms are mature.
* How to Harvest:
1. Loosen the soil around the base of the plant with a garden fork or shovel.
2. Gently lift the plant out of the soil.
3. Separate the corms from the plant.
4. Wash the corms thoroughly to remove any dirt or debris.
* Storing Your Taro: Store your harvested taro corms in a cool, dry place. They can be stored for several weeks.
Troubleshooting Common Problems
Even with the best care, you might encounter some problems while growing taro. Here are a few common issues and how to address them:
* Yellowing Leaves: This can be caused by overwatering, underwatering, nutrient deficiencies, or pest infestations. Check the soil moisture, fertilize your plants, and inspect them for pests.
* Stunted Growth: This can be caused by insufficient sunlight, poor soil, or root rot. Make sure your plants are getting enough sunlight, amend the soil with compost, and avoid overwatering.
* Root Rot: This is a fungal disease that can be caused by overwatering or poor drainage. Improve drainage by adding perlite or sand to the soil. Treat with a fungicide if necessary.
* Pest Infestations: Aphids, spider mites, and other pests can damage taro plants. Treat infestations with an appropriate insecticide or neem oil.
Enjoying Your Homegrown Taro
Congratulations! You’ve successfully grown your own taro. Now it’s time to enjoy the fruits (or rather, roots) of your labor. Taro can be cooked in a variety of ways, including boiling, steaming, baking, and frying. It’s a staple ingredient in many cuisines around the world.
A Word of Caution: Raw taro contains calcium oxalate crystals, which can cause irritation to the mouth and throat. Always cook taro thoroughly before eating it.
Some Delicious Ideas:
* Taro Chips: Slice the taro thinly and bake or fry them until crispy.
* Taro Mash: Boil or steam the taro until tender, then mash it with butter, milk, and seasonings.
* Taro Curry: Add taro to your favorite curry recipe for a hearty and flavorful dish.
* Poi: A traditional Hawaiian dish made from pounded taro.
Propagating Taro
Want to expand your taro patch? Propagating taro is easy! You can do it by dividing the corms or by taking stem cuttings.
* Dividing Corms: When you harvest your taro, you’ll notice that the corms often have smaller “daughter” corms attached to them. You can separate these daughter corms and plant them individually to create new plants.
* Taking Stem Cuttings: Cut a stem from a healthy taro plant, making sure it has at least one node (the point where a leaf grows). Place the cutting in water until roots develop, then plant it in soil.
Final Thoughts
Conclusion
So, there you have it! Growing taro at home, while it might seem daunting at first, is surprisingly achievable and incredibly rewarding. We’ve walked you through the essential steps, from selecting the right variety to nurturing your plant to a bountiful harvest. But why should you even bother?
The answer is multifaceted. First and foremost, the taste of homegrown taro is simply unparalleled. Forget the bland, mass-produced stuff you find in supermarkets. Homegrown taro offers a nuanced flavor profile, earthy and slightly sweet, that will elevate your culinary creations to a whole new level. Imagine creamy taro soups, crispy taro chips, or even a decadent taro pie, all made with ingredients you nurtured yourself.
Beyond the taste, growing your own taro offers a connection to nature that’s often missing in our modern lives. There’s something deeply satisfying about watching a tiny sprout transform into a thriving plant, knowing that you played a vital role in its growth. It’s a mindful activity that can reduce stress and promote a sense of well-being. Plus, you’ll have a readily available source of fresh, organic taro, free from harmful pesticides and herbicides.
But the benefits don’t stop there. Growing taro at home is also a sustainable practice. By reducing your reliance on commercially grown taro, you’re minimizing your carbon footprint and supporting a more environmentally friendly food system. You’re also contributing to biodiversity by cultivating a plant that might not be readily available in your local area.
Now, let’s talk about variations. While we’ve focused on the traditional method of growing taro in soil, you can also experiment with hydroponics or aquaponics. These methods offer a faster growth rate and require less space, making them ideal for urban gardeners. You can also try growing different varieties of taro, each with its unique flavor and texture. Consider exploring Bun-long, a popular variety known for its purple flesh, or Dasheen, a classic choice for its starchy roots.
Don’t be afraid to get creative with your taro cultivation. Try companion planting with other vegetables or herbs to create a thriving ecosystem in your garden. Experiment with different fertilizers to see what works best for your soil and climate. And most importantly, don’t give up if you encounter challenges along the way. Growing taro, like any gardening endeavor, requires patience and persistence.
This DIY taro growing trick is a game-changer for anyone who loves fresh, flavorful ingredients and wants to connect with nature. It’s a sustainable, rewarding, and delicious way to enhance your culinary experience.
So, what are you waiting for? Grab a taro corm, find a sunny spot in your garden, and get ready to embark on a taro-growing adventure. We’re confident that you’ll be amazed by the results. And when you do, we want to hear all about it! Share your experiences, tips, and photos with us in the comments below. Let’s create a community of taro enthusiasts and inspire others to discover the joys of growing their own food. Happy growing!
Frequently Asked Questions (FAQ)
What is the best time of year to plant taro?
The ideal time to plant taro is during the late spring or early summer, after the last frost has passed. Taro thrives in warm, humid conditions, so planting during this period will give your plants the best chance of success. The soil temperature should be consistently above 65°F (18°C) for optimal growth. If you live in a region with mild winters, you may be able to plant taro year-round, but be sure to protect your plants from frost.
How much sunlight does taro need?
Taro prefers partial shade, especially during the hottest part of the day. While it needs sunlight to grow, too much direct sun can scorch the leaves. Aim for at least 4-6 hours of sunlight per day, but make sure your plants are protected from intense afternoon sun. If you’re growing taro indoors, place it near a sunny window or use grow lights to supplement natural light.
What kind of soil is best for growing taro?
Taro thrives in rich, well-draining soil that is high in organic matter. The ideal soil pH is between 5.5 and 6.5. Before planting, amend your soil with compost, aged manure, or other organic materials to improve its fertility and drainage. If your soil is heavy clay, consider adding sand or perlite to improve drainage. Taro also benefits from regular fertilization, so be sure to feed your plants with a balanced fertilizer every few weeks during the growing season.
How often should I water my taro plants?
Taro needs consistent moisture to thrive. Water your plants deeply whenever the top inch of soil feels dry to the touch. Avoid overwatering, as this can lead to root rot. During hot, dry weather, you may need to water your plants more frequently. Mulching around your taro plants can help to retain moisture in the soil and reduce the need for frequent watering.
How long does it take for taro to mature?
Taro typically takes 7-12 months to mature, depending on the variety and growing conditions. You’ll know your taro is ready to harvest when the leaves start to turn yellow and die back. The corms (the underground stems that are the edible part of the plant) will also become larger and more firm. To harvest, carefully dig up the entire plant and separate the corms from the roots and stems.
Are taro leaves edible?
Yes, taro leaves are edible, but they must be cooked thoroughly before consumption. Raw taro leaves contain calcium oxalate crystals, which can cause irritation and discomfort. Cooking the leaves breaks down these crystals, making them safe to eat. Taro leaves can be used in a variety of dishes, such as soups, stews, and stir-fries. They have a slightly spinach-like flavor and are a good source of vitamins and minerals.
How do I store taro corms?
Taro corms can be stored in a cool, dry place for several weeks. Avoid storing them in the refrigerator, as this can cause them to become mushy. To prolong their shelf life, you can also store taro corms in a root cellar or bury them in sand. Before storing, make sure the corms are clean and free from any signs of damage or disease.
What are some common pests and diseases that affect taro?
Taro can be susceptible to a variety of pests and diseases, including aphids, spider mites, and root rot. To prevent these problems, keep your plants healthy and well-nourished. Inspect your plants regularly for signs of pests or diseases, and take action promptly if you notice any problems. Organic pest control methods, such as neem oil or insecticidal soap, can be effective in controlling aphids and spider mites. To prevent root rot, make sure your soil is well-draining and avoid overwatering.
Can I grow taro in containers?
Yes, you can grow taro in containers, but you’ll need to choose a large container that is at least 12 inches in diameter and depth. Make sure the container has drainage holes to prevent waterlogging. Use a well-draining potting mix that is rich in organic matter. Container-grown taro may require more frequent watering and fertilization than taro grown in the ground.
Is taro poisonous to pets?
Yes, taro is considered toxic to pets, including dogs and cats. All parts of the plant contain calcium oxalate crystals, which can cause irritation and discomfort if ingested. Symptoms of taro poisoning in pets include drooling, vomiting, and difficulty swallowing. If you suspect your pet has ingested taro, contact your veterinarian immediately. Keep taro plants out of reach of pets to prevent accidental ingestion.
Leave a Comment