
Grow Swiss Chard Indoors? Absolutely! Imagine fresh, vibrant Swiss chard gracing your plate, even when the snow is falling outside. It’s not just a dream; it’s a delicious reality you can create right in your own home. For centuries, gardeners have sought ways to extend the growing season, and indoor gardening, while perhaps not as ancient as outdoor cultivation, has a rich history of providing sustenance and beauty year-round. Think of Victorian orangeries, filled with exotic fruits and vegetables, or even simpler window boxes overflowing with herbs.
But why should you learn to grow Swiss chard indoors? Well, for starters, it’s incredibly rewarding! There’s nothing quite like nurturing a plant from seed to harvest. Plus, store-bought Swiss chard can sometimes be pricey and lack the freshness of homegrown. With a few simple tricks and DIY hacks, you can have a constant supply of this nutritious leafy green, packed with vitamins and minerals, right at your fingertips. I’m going to show you how to easily grow Swiss Chard Indoors, even if you don’t have a green thumb. Get ready to ditch those wilted grocery store greens and embrace the joy of fresh, homegrown goodness!
Growing Swiss Chard Indoors: A Beginner’s Guide
Hey there, fellow plant enthusiasts! Ever thought about growing your own vibrant, nutritious Swiss chard right inside your home? It’s easier than you might think, and trust me, the satisfaction of harvesting your own greens is totally worth it. I’ve been growing Swiss chard indoors for a while now, and I’m excited to share my tips and tricks with you. Let’s get started!
What You’ll Need
Before we dive into the nitty-gritty, let’s gather our supplies. Here’s a list of everything you’ll need to successfully grow Swiss chard indoors:
* Seeds: Choose a variety of Swiss chard you like. ‘Bright Lights’ is a popular choice for its colorful stems, but ‘Fordhook Giant’ is also a reliable option.
* Containers: You’ll need pots or containers that are at least 6-8 inches deep. Swiss chard needs room for its roots to grow. I prefer using containers with drainage holes to prevent waterlogging.
* Potting Mix: Use a high-quality potting mix that’s well-draining. Avoid using garden soil, as it can compact and hinder drainage.
* Grow Lights (Optional but Recommended): While Swiss chard can tolerate some shade, it thrives with plenty of light. If you don’t have a sunny windowsill, grow lights are a great investment.
* Watering Can or Spray Bottle: For gentle watering.
* Fertilizer: A balanced liquid fertilizer will help your Swiss chard grow strong and healthy.
* Seed Starting Tray (Optional): If you prefer to start your seeds indoors before transplanting.
Getting Started: Planting Your Swiss Chard
Okay, now that we have everything we need, let’s get our hands dirty!
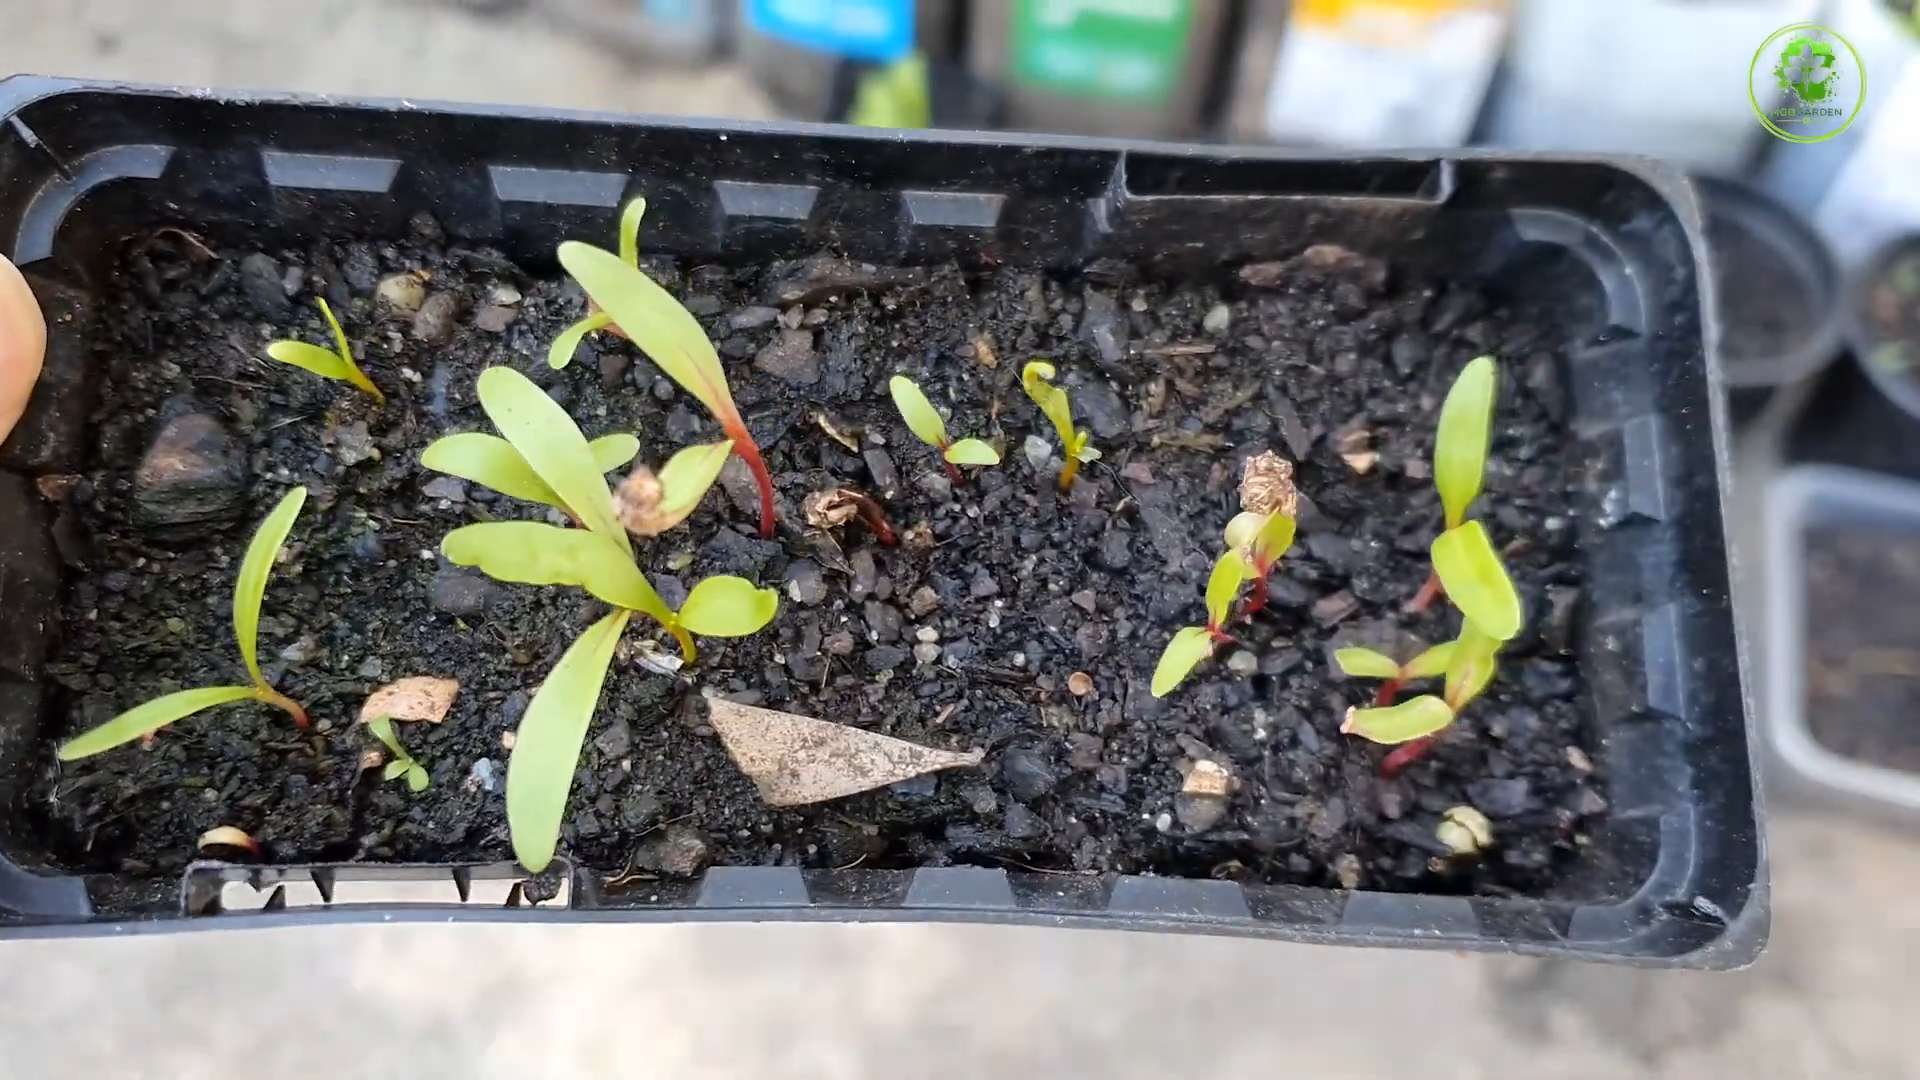
1. Starting Seeds (Optional): You can either sow your Swiss chard seeds directly into your containers or start them in a seed starting tray. If you’re using a seed starting tray, fill it with potting mix and sow the seeds about ½ inch deep. Keep the soil moist and warm (around 70-75°F). You should see seedlings emerge in about 5-10 days.
2. Direct Sowing: If you’re direct sowing, fill your containers with potting mix, leaving about an inch of space at the top. Sow the seeds about ½ inch deep and 1-2 inches apart. Gently cover the seeds with soil and water thoroughly.
3. Watering: Keep the soil consistently moist, but not soggy. Water gently to avoid disturbing the seeds. I like to use a spray bottle to mist the soil until the seedlings emerge.
4. Providing Light: Place your containers in a sunny windowsill that receives at least 6 hours of direct sunlight per day. If you’re using grow lights, position them about 6-12 inches above the soil surface and keep them on for 12-16 hours per day.
Nurturing Your Swiss Chard: Care and Maintenance
Once your Swiss chard seedlings have emerged, it’s time to focus on providing them with the care they need to thrive.
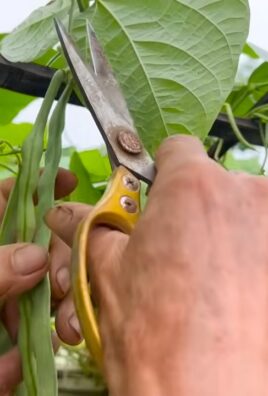
1. Thinning Seedlings: If you sowed your seeds close together, you’ll need to thin the seedlings once they have a few true leaves. This will give them enough space to grow. Snip off the weaker seedlings at the soil line, leaving the strongest ones about 4-6 inches apart.
2. Watering: Water your Swiss chard regularly, keeping the soil consistently moist. Avoid overwatering, as this can lead to root rot. Check the soil moisture by sticking your finger about an inch into the soil. If it feels dry, it’s time to water.
3. Fertilizing: Feed your Swiss chard with a balanced liquid fertilizer every 2-3 weeks. Follow the instructions on the fertilizer label for proper dilution. I like to use a fertilizer that’s specifically formulated for leafy greens.
4. Providing Light: Continue to provide your Swiss chard with plenty of light. If you’re using grow lights, adjust their height as the plants grow to ensure they’re getting adequate light.
5. Temperature: Swiss chard prefers temperatures between 60-75°F. Avoid exposing your plants to extreme temperatures.
6. Pest Control: Keep an eye out for pests such as aphids, spider mites, and whiteflies. If you notice any pests, you can try spraying them with insecticidal soap or neem oil. I’ve found that regular inspection and early intervention are key to preventing pest infestations.
Harvesting Your Bounty: Enjoying Your Homegrown Swiss Chard
The best part of growing Swiss chard indoors is, of course, harvesting your own fresh greens!
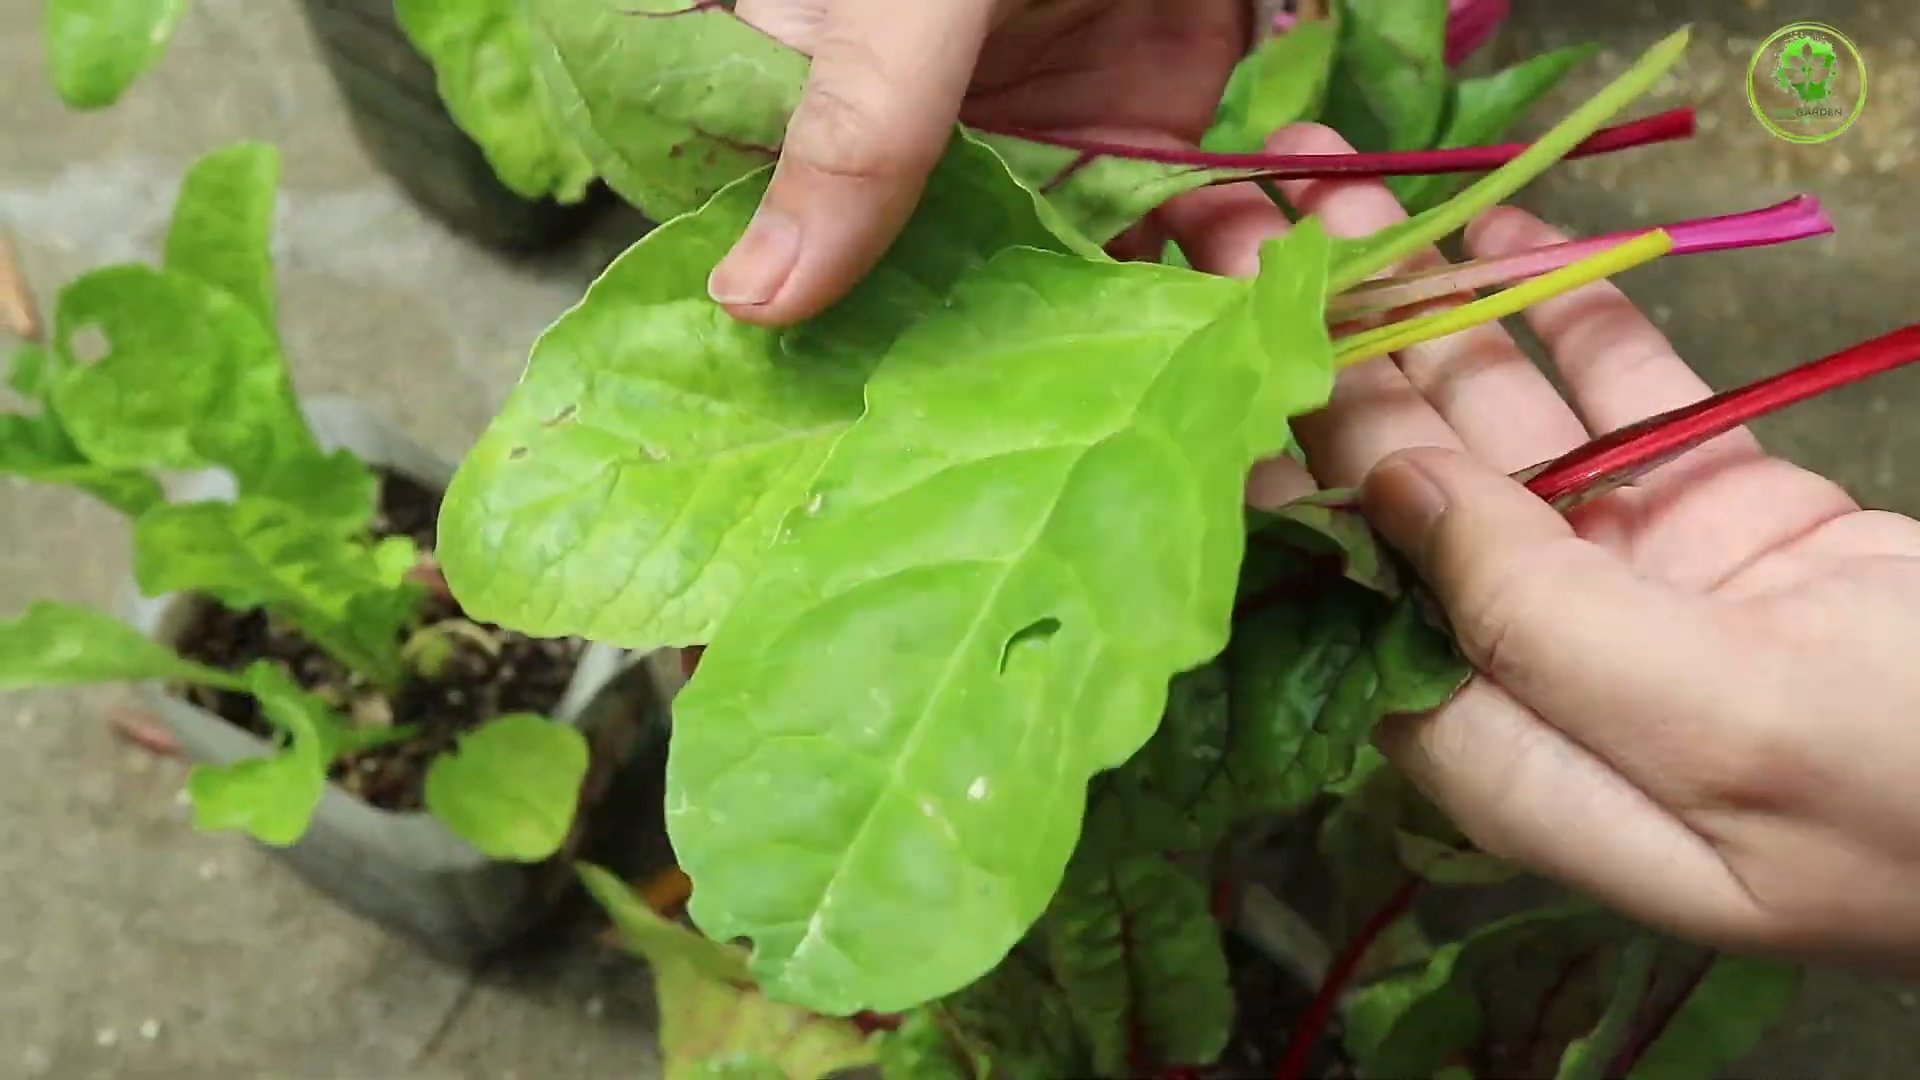
1. When to Harvest: You can start harvesting Swiss chard leaves when they are about 6-8 inches long.
2. How to Harvest: Use a sharp knife or scissors to cut the outer leaves near the base of the plant. Leave the inner leaves to continue growing. This will allow you to harvest from the same plant multiple times.
3. Storing Your Harvest: Store your harvested Swiss chard leaves in the refrigerator in a plastic bag or container. They should stay fresh for about a week.
Troubleshooting: Common Issues and Solutions
Even with the best care, you might encounter some challenges when growing Swiss chard indoors. Here are some common issues and how to address them:
* Yellowing Leaves: This could be a sign of overwatering, underwatering, or nutrient deficiency. Check the soil moisture and adjust your watering accordingly. If the soil is consistently moist, you might be overwatering. If the soil is dry, you need to water more frequently. You can also try fertilizing your plants to provide them with the nutrients they need.
* Leggy Growth: This is usually caused by insufficient light. Make sure your plants are getting enough sunlight or grow light.
* Pest Infestations: As mentioned earlier, keep an eye out for pests and treat them promptly with insecticidal soap or neem oil.
* Slow Growth: This could be due to a variety of factors, including insufficient light, poor soil, or nutrient deficiency. Make sure your plants are getting enough light, use a high-quality potting mix, and fertilize them regularly.
Tips and Tricks for Success
Here are a few extra tips and tricks that I’ve learned over the years that can help you grow even more successful Swiss chard indoors:
* Rotate Your Plants: If you’re growing your Swiss chard in a windowsill, rotate the containers regularly to ensure that all sides of the plants are getting equal amounts of sunlight.
* Provide Good Air Circulation: Good air circulation can help prevent fungal diseases. You can improve air circulation by placing a small fan near your plants.
* Succession Planting: To ensure a continuous harvest, sow new seeds every few weeks. This is called succession planting.
* Experiment with Different Varieties: Don’t be afraid to try different varieties of Swiss chard to see which ones you like best.
* Don’t Give Up! Growing plants can be challenging, but it’s also incredibly rewarding. If you encounter any problems, don’t give up! Just keep learning and experimenting, and you’ll eventually find what works best for you.
Enjoying Your Homegrown Swiss Chard
Now that you’ve successfully grown your own Swiss chard indoors, it’s time to enjoy the fruits (or rather, the leaves!) of your labor. Swiss chard is a versatile vegetable that can be used in a variety of dishes. You can sauté it, steam it, add it to soups and stews, or even eat it raw in salads.
Here are a few of my favorite ways to use homegrown Swiss chard:
* Sautéed Swiss Chard with Garlic and Olive Oil: This is a simple and delicious way to enjoy Swiss chard. Just sauté the leaves with garlic and olive oil until they’re tender.
* Swiss Chard and Ricotta Stuffed Shells: This is a hearty and flavorful dish that’s perfect for a cold winter night.
* Swiss Chard Smoothie: Add a handful of Swiss chard to your favorite smoothie for a boost of nutrients.
Growing Swiss chard indoors is a fun and rewarding experience. With a little bit of care and attention, you can enjoy fresh, nutritious greens all year round. So, what are you waiting for? Get started today! Happy gardening!
Conclusion
So, there you have it! Growing Swiss chard indoors is not only possible, but it’s also incredibly rewarding. Imagine having a constant supply of fresh, vibrant greens right at your fingertips, regardless of the season. No more last-minute trips to the grocery store or settling for wilted, pre-packaged chard. This DIY trick empowers you to cultivate your own little edible oasis, bringing a touch of nature and self-sufficiency into your home.
But why is this a must-try? Beyond the convenience, growing your own Swiss chard allows you to control the entire process, from the quality of the soil to the absence of harmful pesticides. You’re ensuring that you and your family are consuming the healthiest, most nutritious greens possible. Plus, let’s be honest, there’s a certain satisfaction that comes from nurturing a plant from seed to harvest. It’s a tangible connection to the natural world, a reminder of the simple joys of life.
And the best part? This isn’t a one-size-fits-all endeavor. Feel free to experiment with different varieties of Swiss chard. Rainbow chard, with its vibrant stems of red, yellow, and orange, can add a splash of color to your indoor garden and your meals. Or, try growing smaller, more compact varieties if you’re limited on space. You can also play around with different container sizes and growing mediums to find what works best for your environment. Consider adding companion plants like basil or marigolds to deter pests and enhance the overall health of your indoor garden.
Don’t be afraid to get creative with your harvest, too! Swiss chard is incredibly versatile in the kitchen. Sauté it with garlic and olive oil for a simple side dish, add it to soups and stews for extra nutrients, or use it as a substitute for spinach in your favorite recipes. You can even juice it for a healthy and refreshing green drink.
We wholeheartedly encourage you to give this DIY trick a try. It’s a fun, educational, and ultimately delicious way to enhance your life. And once you’ve experienced the joy of harvesting your own homegrown Swiss chard, we’re confident you’ll be hooked!
But don’t keep your newfound knowledge to yourself! We want to hear about your experiences. Share your tips, tricks, and triumphs in the comments below. Let us know what varieties you’re growing, what challenges you’ve faced, and what delicious dishes you’ve created. Together, we can build a community of indoor gardeners and inspire others to embrace the joys of growing their own food. So, grab your seeds, potting mix, and a sunny spot, and get ready to embark on a rewarding journey of growing Swiss chard indoors. Happy gardening!
Frequently Asked Questions
What kind of soil is best for growing Swiss chard indoors?
A well-draining potting mix is crucial for successful indoor Swiss chard cultivation. Avoid using garden soil, as it tends to compact and doesn’t provide adequate drainage. Look for a potting mix specifically formulated for vegetables or herbs. You can also create your own mix by combining equal parts of peat moss, perlite, and vermiculite. Adding compost to the mix will provide essential nutrients and improve drainage. Ensure the pH level of the soil is between 6.0 and 7.0 for optimal growth.
How much sunlight does Swiss chard need when grown indoors?
Swiss chard thrives in bright, indirect sunlight. Aim for at least 6 hours of sunlight per day. If you don’t have a south-facing window that provides sufficient light, consider using grow lights. Fluorescent or LED grow lights are excellent options for indoor gardening. Position the lights a few inches above the plants and adjust the height as they grow. Rotate the plants regularly to ensure even light exposure on all sides.
How often should I water my indoor Swiss chard?
Water your Swiss chard regularly, keeping the soil consistently moist but not waterlogged. Check the soil moisture by sticking your finger about an inch deep. If the soil feels dry, it’s time to water. Water deeply, allowing the excess water to drain out of the bottom of the pot. Avoid overwatering, as this can lead to root rot. During the warmer months, you may need to water more frequently. Reduce watering during the cooler months when the plants are not actively growing.
What are some common pests and diseases that affect indoor Swiss chard?
While growing Swiss chard indoors reduces the risk of pest and disease infestations, it’s still important to be vigilant. Common pests that may affect indoor Swiss chard include aphids, spider mites, and whiteflies. Regularly inspect your plants for signs of infestation, such as small insects, webbing, or sticky residue. Treat infestations with insecticidal soap or neem oil. Diseases such as powdery mildew and fungal leaf spots can also affect Swiss chard. Ensure good air circulation around the plants and avoid overwatering to prevent these diseases. Remove any infected leaves promptly to prevent the spread of disease.
How do I harvest Swiss chard that I’ve grown indoors?
You can begin harvesting Swiss chard leaves when they are about 6 inches long. Harvest the outer leaves first, leaving the inner leaves to continue growing. Use a sharp knife or scissors to cut the leaves near the base of the plant. Avoid pulling the leaves, as this can damage the plant. Regular harvesting will encourage the plant to produce more leaves. You can harvest Swiss chard continuously throughout the growing season.
Can I grow Swiss chard from seed indoors?
Yes, growing Swiss chard from seed indoors is a great way to start your indoor garden. Sow the seeds about ½ inch deep in a seed-starting mix. Keep the soil moist and warm, and the seeds should germinate within a week or two. Once the seedlings have developed a few true leaves, transplant them into larger pots filled with potting mix.
What are some good companion plants for Swiss chard?
Companion planting can benefit your indoor Swiss chard by deterring pests, improving soil health, and enhancing growth. Some good companion plants for Swiss chard include:
* **Basil:** Repels aphids and whiteflies.
* **Marigolds:** Repel nematodes and other soil pests.
* **Garlic:** Repels aphids and other pests.
* **Onions:** Repel aphids and other pests.
* **Lettuce:** Provides ground cover and helps retain moisture.
How long does it take for Swiss chard to mature when grown indoors?
Swiss chard typically takes about 50-60 days to mature when grown indoors from seed. However, you can start harvesting leaves earlier, as soon as they are large enough to use. The time to maturity can vary depending on the variety of Swiss chard, the growing conditions, and the amount of light it receives.
Can I grow Swiss chard in a hydroponic system indoors?
Yes, Swiss chard can be successfully grown in a hydroponic system indoors. Hydroponics allows you to grow plants without soil, using nutrient-rich water solutions. Swiss chard thrives in hydroponic systems, as it receives a constant supply of nutrients and water. You can use various hydroponic systems, such as deep water culture, nutrient film technique, or ebb and flow systems.
How do I store harvested Swiss chard?
To store harvested Swiss chard, wash the leaves thoroughly and pat them dry. Wrap the leaves in a damp paper towel and place them in a plastic bag or container. Store the Swiss chard in the refrigerator for up to a week. You can also freeze Swiss chard for longer storage. Blanch the leaves in boiling water for a few minutes, then cool them in ice water. Drain the leaves and pack them into freezer bags or containers. Frozen Swiss chard can be stored for up to a year.

Leave a Comment