
Grow Snack Peppers
I’ve always loved the vibrant colors and sweet heat of snack peppers, but let’s be honest, buying them from the grocery store can get expensive! That’s why I’m so excited to share my Grow Snack Peppers guide with you – a collection of home gardening tricks and DIY solutions to help you cultivate your own delicious pepper harvest right in your backyard or even on your balcony. Growing your own food is incredibly rewarding, and snack peppers are the perfect beginner-friendly crop.
The history of peppers is fascinating! Originally from the Americas, these spicy fruits have traveled the globe, becoming a staple in countless cuisines. From mild bell peppers to fiery habaneros, the diversity is astounding. But the joy of growing snack peppers yourself goes beyond just the delicious end product; it’s about connecting with nature, understanding the life cycle of a plant, and experiencing the satisfaction of nurturing something from seed to harvest.
Why Grow Your Own Snack Peppers?
In today’s world, we’re all looking for ways to save money and eat healthier. Growing your own snack peppers allows you to do both! You’ll have access to fresh, pesticide-free peppers whenever you want, and you’ll be amazed at how much flavor homegrown peppers possess compared to store-bought ones. Plus, it’s a fantastic way to get the kids involved in gardening and teach them about where their food comes from. This Grow Snack Peppers guide is packed with simple, effective techniques to ensure a bountiful harvest, no matter your experience level.
So, grab your gardening gloves and let’s get started on this exciting journey of growing your own delicious snack peppers! I’ll walk you through everything from seed starting to harvesting, sharing my best tips and tricks along the way. Get ready to experience the joy of homegrown goodness!
Growing Snack Peppers: A DIY Guide to a Spicy Harvest
I love snack peppers! They’re so versatile – perfect for salads, sandwiches, or just a quick, spicy snack. And the best part? Growing them yourself is surprisingly easy. This guide will walk you through the entire process, from seed to harvest, so you can enjoy your own homegrown peppers all summer long.
Phase 1: Starting Seeds Indoors
- Choose your pepper variety: There’s a huge range of snack pepper varieties available, from sweet to fiery hot. Consider your spice preference and the space you have available. Smaller varieties are ideal for containers.
- Gather your supplies: You’ll need seed starting mix (not regular garden soil!), small pots or seed trays, a heat mat (optional but highly recommended), a spray bottle, and a sunny location.
- Sow the seeds: Fill your pots or trays with seed starting mix, moistening it gently with the spray bottle. Plant your pepper seeds about ¼ inch deep and about 1 inch apart. Gently cover with more seed starting mix.
- Provide warmth and humidity: Place your pots on a heat mat set to around 75-80°F (24-27°C). This significantly speeds up germination. Cover the pots with a clear plastic dome or plastic wrap to maintain humidity. Make sure to vent daily to prevent mold.
- Maintain moisture: Keep the seed starting mix consistently moist, but not soggy. Use the spray bottle to water gently, avoiding overwatering which can lead to damping off (a fungal disease).
- Monitor for germination: Germination usually takes 7-21 days, depending on the variety and temperature. Once you see sprouts, remove the plastic dome or wrap and gradually acclimate the seedlings to lower humidity.
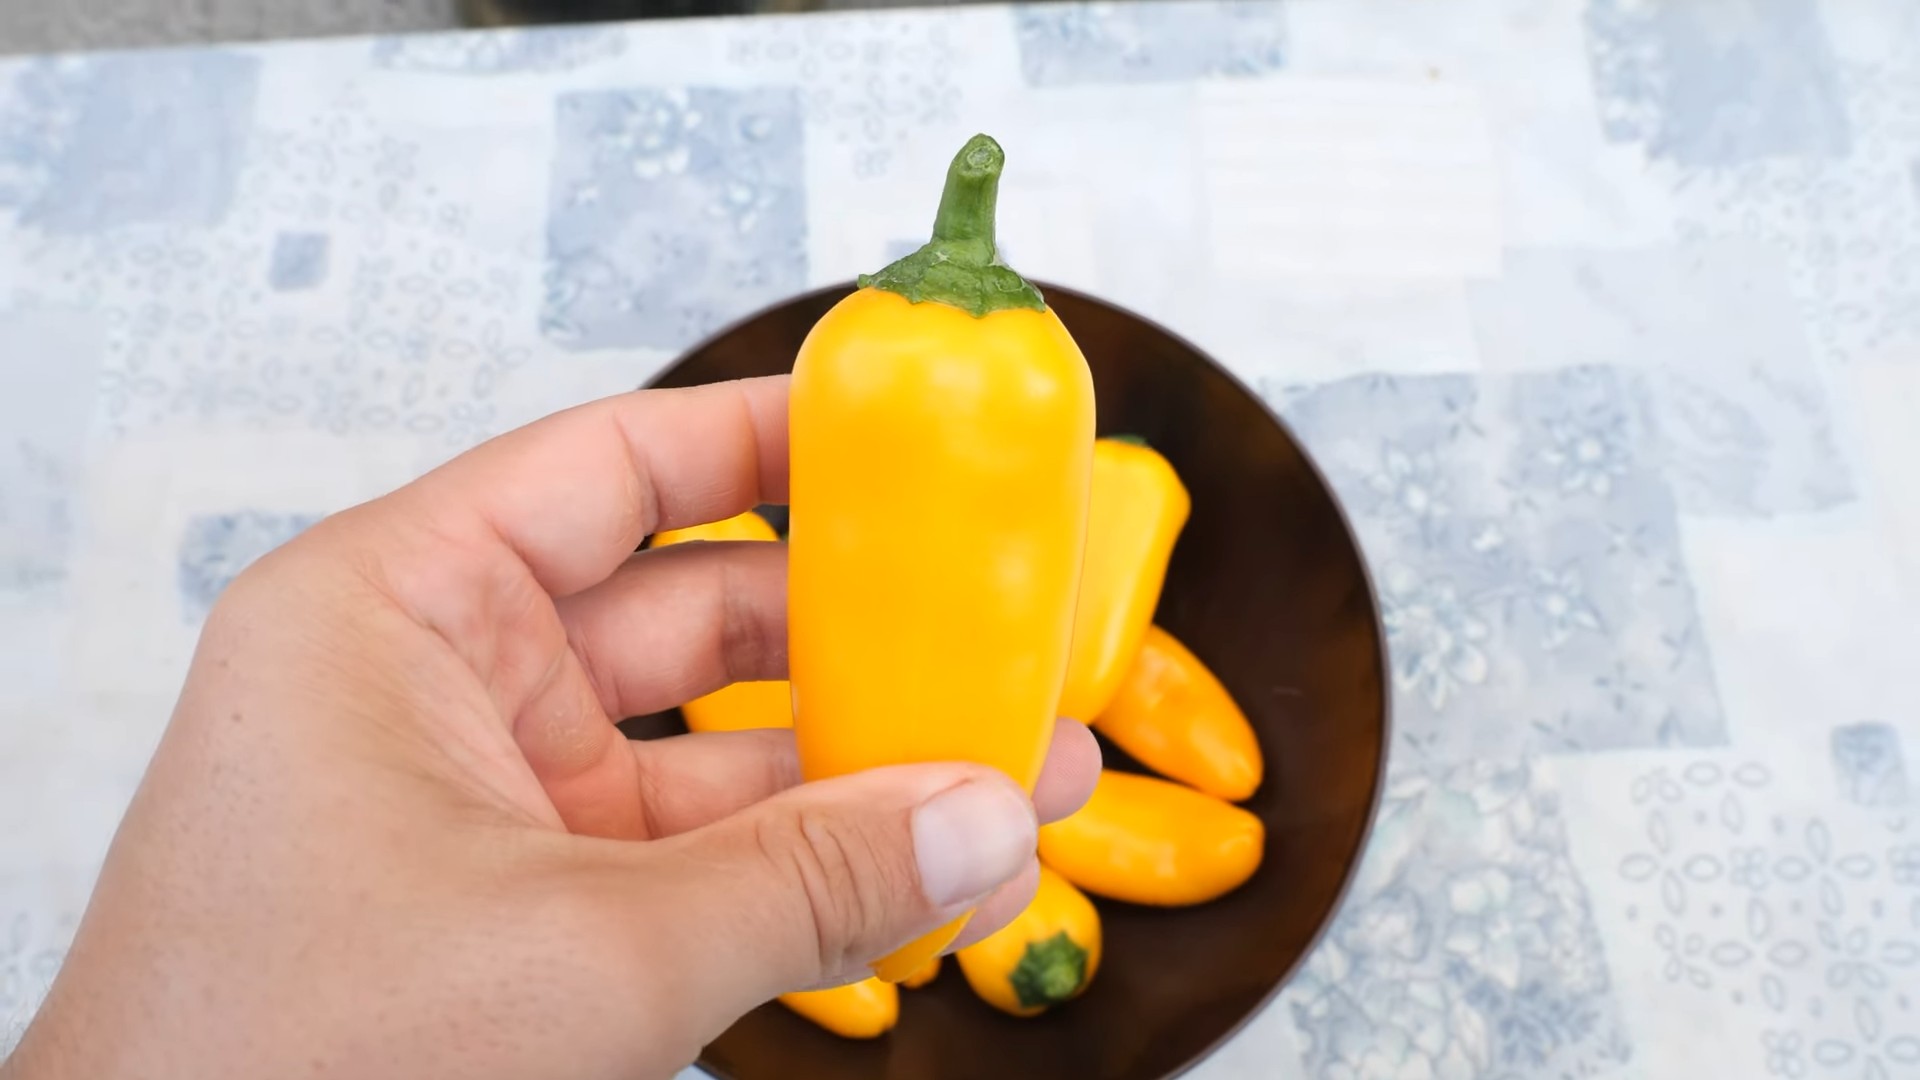
- I carefully selected ‘Sweet Banana’ pepper seeds for their mild flavor and prolific yield. I found them at my local garden center.
- I used small peat pots, which are biodegradable and easy to transplant. I filled them with a seed starting mix specifically formulated for peppers.
- I planted two seeds per pot, about ¼ inch deep. I gently pressed the soil around the seeds but didn’t pack it down too tightly.
- My heat mat was a game-changer! The seedlings emerged much faster than I expected. I made sure to mist the soil daily to maintain humidity.
- After about a week, the first tiny sprouts appeared! I carefully removed the plastic wrap, starting with short periods of ventilation each day.
- I continued to mist the seedlings regularly, ensuring the soil remained moist but not waterlogged. I avoided getting water on the leaves to prevent fungal diseases.
Phase 2: Transplanting Seedlings
- Wait for the right time: Transplant your seedlings outdoors after the last frost and when the soil temperature is consistently above 60°F (15°C). They should have at least two sets of true leaves.
- Choose a sunny location: Peppers need at least 6-8 hours of direct sunlight per day. Select a spot in your garden or a large container that receives ample sunlight.
- Prepare the soil: Amend your soil with compost or other organic matter to improve drainage and fertility. Peppers prefer well-drained soil that is slightly acidic (pH 6.0-6.8).
- Dig planting holes: Dig holes slightly larger than your peat pots or root balls. Space your plants 12-18 inches apart, depending on the mature size of the variety.
- Transplant carefully: Gently remove the seedlings from their pots, being careful not to damage the roots. Plant them in the holes, covering the roots with soil. Water thoroughly after transplanting.
- Provide support (optional): For taller pepper varieties, consider providing support with stakes or cages to prevent the plants from flopping over.
- I waited until mid-May, after the threat of frost had passed, to transplant my pepper seedlings outdoors.
- I chose a sunny spot in my garden that receives at least 8 hours of direct sunlight daily.
- I mixed a generous amount of compost into the soil to improve its drainage and fertility. I also tested the soil pH to ensure it was within the ideal range.
- I dug holes about 6 inches apart, leaving enough space for the plants to grow.
- I carefully removed each seedling from its peat pot, gently loosening the roots if necessary. I planted them in the holes, ensuring the soil was firmly packed around the roots.
- I watered the newly transplanted seedlings thoroughly, making sure the soil was evenly moistened.
Phase 3: Ongoing Care
- Regular watering: Keep the soil consistently moist, but avoid overwatering. Water deeply and less frequently rather than shallowly and often. The frequency will depend on your climate and weather conditions.
- Fertilizing: Feed your pepper plants every 2-3 weeks with a balanced liquid fertilizer. Follow the instructions on the fertilizer label carefully.
- Pest and disease control: Monitor your plants regularly for pests and diseases. Treat any problems promptly using appropriate organic or chemical controls. Prevention is key – ensure good air circulation around the plants.
- Mulching: Apply a layer of mulch around the base of the plants to help retain moisture, suppress weeds, and regulate soil temperature.
- Harvesting: Harvest your peppers when they reach their mature size and color. This will vary depending on the variety, but generally, you can start harvesting when the peppers are firm and brightly colored.
- I watered my pepper plants deeply once or twice a week, depending on the weather. I avoided watering during the hottest part of the day to minimize evaporation.
- I used a balanced liquid fertilizer every two weeks, following the instructions on the label carefully. I diluted the fertilizer to avoid burning the plants.
- I regularly inspected my plants for pests and diseases. Fortunately, I didn’t encounter any major problems. Good air circulation helped prevent fungal diseases.
- I applied a layer of straw mulch around the base of the plants to help retain moisture and suppress weeds.
- The first sweet banana peppers were ready for harvest about 70 days after transplanting. They were a beautiful bright yellow color and firm to the touch. The taste was amazing!
Phase 4: Troubleshooting
Common Problems and Solutions
Problem: Blossom-end rot: This is characterized by a dark, leathery spot at the blossom end of the pepper. It’s usually caused by inconsistent watering.
Solution: Ensure consistent soil moisture. Water deeply and regularly, especially during dry periods.
Problem: Yellowing leaves: This can be caused by nutrient deficiencies, overwatering, or pests.
Solution: Check the soil for nutrient levels and fertilize if necessary. Adjust watering practices and inspect for pests.
Problem: Pepper plants not producing fruit: This can be due to insufficient pollination, lack of sunlight, or temperature stress.
Solution: Ensure adequate sunlight and proper temperatures. Hand-pollination can be helpful in some cases.
Problem: Pests: Aphids, spider mites, and other pests can attack pepper plants.
Solution: Use insecticidal soap or neem oil to control pests. Introduce beneficial insects like ladybugs to help control pest populations.

Conclusion
So there you have it – a simple, effective, and rewarding method for growing your own snack peppers! This DIY approach to growing snack peppers offers a unique blend of convenience, cost-effectiveness, and the undeniable satisfaction of nurturing your own plants from seed to harvest. Forget expensive grocery store peppers; you’ll be amazed at the flavor and freshness of homegrown peppers. This method is perfect for beginners and seasoned gardeners alike, offering a manageable project with significant rewards. The ability to control the growing environment, choose your preferred pepper varieties, and enjoy the freshest peppers possible makes this DIY trick a must-try for anyone with even a small space. You’ll be surprised at how easy it is to cultivate a bountiful harvest right in your own home or garden.
Beyond the basic method outlined, there are numerous ways to personalize your snack pepper growing experience. Experiment with different pepper varieties – from sweet bell peppers to fiery jalapeños, the possibilities are endless! Consider using different growing mediums, such as coco coir or a well-draining soil mix, to optimize your plants’ growth. You can also explore vertical gardening techniques to maximize space, especially if you’re working with a limited area. For those with limited sunlight, consider investing in grow lights to supplement natural light, ensuring healthy plant development. Don’t be afraid to get creative and adapt the method to your specific needs and environment. The key is to have fun and enjoy the process of nurturing your plants.
We strongly encourage you to try this DIY method for growing snack peppers. It’s a rewarding experience that connects you with the natural world and provides you with delicious, healthy peppers all season long. Share your experiences with us! We’d love to hear about your successes, challenges, and any unique variations you’ve implemented. Post pictures of your thriving pepper plants on social media using #GrowSnackPeppers and tag us – we can’t wait to see your bountiful harvests! Remember, the journey of growing your own food is as fulfilling as the delicious results. So grab some seeds, get your hands dirty, and embark on this exciting adventure of growing your own snack peppers. You won’t regret it!
Frequently Asked Questions
What type of peppers are best for beginners?
For beginners, we recommend starting with easy-to-grow varieties like bell peppers or banana peppers. These peppers are relatively low-maintenance and produce a good yield, even for novice gardeners. They are also less susceptible to common pepper plant diseases.
How much sunlight do snack peppers need?
Snack peppers thrive in full sun, meaning at least six to eight hours of direct sunlight per day. If you’re growing them indoors, you’ll need to supplement with grow lights to ensure they receive adequate light. Insufficient sunlight can lead to weak plants and poor yields.
What kind of soil is best for growing snack peppers?
Snack peppers prefer well-draining soil that is rich in organic matter. A good quality potting mix or garden soil amended with compost will provide the necessary nutrients and drainage. Avoid heavy clay soils, which can retain too much water and lead to root rot.
How often should I water my snack peppers?
Water your snack peppers regularly, keeping the soil consistently moist but not waterlogged. The frequency of watering will depend on factors such as weather conditions, pot size, and soil type. It’s best to check the soil moisture before watering – if the top inch of soil feels dry, it’s time to water.
What are some common problems when growing snack peppers and how can I solve them?
Common problems include blossom-end rot (caused by inconsistent watering), pest infestations (aphids, spider mites), and fungal diseases. Consistent watering, regular pest checks, and good air circulation can help prevent these issues. If problems arise, consult a gardening guide or your local nursery for advice on treatment.
Can I grow snack peppers in containers?
Absolutely! Container gardening is a great option for growing snack peppers, especially if you have limited space. Choose containers that are at least 12 inches in diameter to allow for adequate root development. Ensure the containers have drainage holes to prevent waterlogging.
When can I expect to harvest my snack peppers?
The time it takes to harvest your snack peppers will vary depending on the variety and growing conditions. Generally, you can expect to harvest your first peppers anywhere from 60 to 80 days after planting the seeds. Harvest peppers when they are firm, brightly colored, and have reached their mature size.
What should I do with my harvested snack peppers?
Enjoy your fresh, homegrown snack peppers! You can eat them raw, add them to salads, salsas, stir-fries, or use them in any recipe that calls for fresh peppers. You can also preserve your harvest by freezing or pickling them for later use. The possibilities are endless!
Is this method suitable for all climates?
While this method is adaptable, success depends on your climate. Snack peppers need warm temperatures to thrive. In cooler climates, you may need to start seeds indoors and transplant them outdoors after the last frost. In very hot climates, providing shade during the hottest part of the day might be necessary.
What if my pepper plants aren’t producing many peppers?
Several factors can affect pepper production, including insufficient sunlight, improper watering, nutrient deficiencies, or pest infestations. Review the growing conditions and address any potential issues. Ensure your plants receive adequate sunlight, water, and nutrients. Regularly check for pests and diseases and take appropriate action if necessary. Sometimes, simply waiting a bit longer can also yield results.
Leave a Comment