
Grow Potatoes Indoors? Absolutely! Imagine harvesting fresh, homegrown potatoes right from your kitchen, no matter the season or the size of your outdoor space. It sounds like a dream, right? Well, it’s a dream within reach, and I’m here to show you how. For centuries, potatoes have been a staple food around the world, originating in the Andes Mountains and becoming a vital part of countless cultures. Now, you can bring that rich history and delicious flavor into your own home with this simple and rewarding DIY project.
In today’s fast-paced world, many of us lack the time or space for traditional gardening. Apartment living, busy schedules, and unpredictable weather can all put a damper on our green thumb aspirations. That’s where the magic of growing potatoes indoors comes in! This DIY guide will provide you with easy-to-follow steps and clever hacks to successfully grow potatoes indoors, even if you’ve never gardened before. Not only will you enjoy the satisfaction of nurturing your own food, but you’ll also have access to fresh, flavorful potatoes whenever you need them. So, let’s ditch the store-bought spuds and embark on this exciting indoor gardening adventure together!
Growing Potatoes Indoors: A Spud-tacular Guide!
Okay, potato lovers, gather ’round! Ever dreamt of having fresh, homegrown potatoes even when the weather outside is frightful? Well, dream no more! I’m going to walk you through the surprisingly simple process of growing potatoes indoors. It’s a fun, rewarding project, and you’ll be enjoying your own little potato harvest before you know it.
What You’ll Need: The Potato Starter Kit
Before we dive in, let’s make sure you have everything you need. This isn’t a super complicated project, but having the right supplies will make things much smoother.
* Seed Potatoes: This is the most important part! You can’t just use any old potato from the grocery store. Those are often treated to prevent sprouting. Look for certified seed potatoes at your local garden center or online. Choose varieties that are known to do well in containers, like Yukon Gold, Red Pontiac, or fingerling potatoes. I personally love Yukon Gold for their creamy texture.
* Large Containers: Think big! Potatoes need room to grow. I recommend containers that are at least 10 gallons in size. Fabric grow bags are a great option because they allow for good drainage and aeration. You can also use plastic tubs, but make sure they have drainage holes.
* Potting Mix: Don’t use garden soil! It’s too heavy and compacts easily, which potatoes hate. A good quality potting mix that’s light and airy is essential. You can also amend it with compost for extra nutrients.
* Grow Lights (Optional but Recommended): While potatoes can technically grow indoors with just natural light, they’ll do much better with supplemental grow lights, especially during the shorter days of winter.
* Watering Can or Hose: For, you know, watering.
* Fertilizer: A balanced, slow-release fertilizer will keep your potatoes happy and well-fed.
* Sharp Knife (for cutting seed potatoes): Make sure it’s clean to prevent disease.
* Spray Bottle (for misting): Helps maintain humidity.
Step-by-Step: From Seed to Spud
Alright, let’s get our hands dirty! Here’s the breakdown of how to grow potatoes indoors:
Phase 1: Preparing the Seed Potatoes
This is a crucial step. We need to encourage those seed potatoes to sprout before planting.
1. Chitting (Sprouting): This is the process of encouraging your seed potatoes to sprout “eyes” (those little buds that will become stems). Place your seed potatoes in a cool, bright location (but not direct sunlight) for about 2-3 weeks. You can use an egg carton or a shallow tray to keep them upright. You’ll notice small green sprouts emerging from the eyes. This is what we want!
2. Cutting (Optional): If your seed potatoes are large (bigger than an egg), you can cut them into smaller pieces. Each piece should have at least 1-2 eyes. This will give you more plants. Let the cut pieces air dry for a day or two to allow the cut surfaces to callous over. This helps prevent rot. I usually cut mine if they are bigger than a golf ball.
Phase 2: Planting the Seed Potatoes
Now for the fun part – getting those potatoes in the soil!
1. Fill the Container: Fill your container about one-third full with potting mix.
2. Plant the Seed Potatoes: Place the seed potatoes (sprouted side up) on top of the soil. Space them evenly if you’re planting multiple potatoes in one container.
3. Cover with Soil: Cover the seed potatoes with about 4 inches of potting mix.
4. Water Gently: Water the soil gently until it’s moist but not soggy.
Phase 3: Growing and “Hilling”
This is where the magic happens. As the potato plants grow, we’ll need to “hill” them, which means adding more soil to encourage more potato production.
1. Provide Light: Place your container in a location with plenty of light. If you’re using grow lights, position them about 6-12 inches above the plants. I usually keep my grow lights on for about 14-16 hours a day.
2. Water Regularly: Keep the soil consistently moist, but not waterlogged. Check the soil moisture regularly by sticking your finger in the soil. If the top inch feels dry, it’s time to water.
3. Fertilize: Start fertilizing your potato plants about 2-3 weeks after they emerge. Use a balanced, slow-release fertilizer according to the package directions.
4. Hilling: As the potato plants grow, you’ll notice stems emerging from the soil. When the stems are about 6-8 inches tall, it’s time to “hill” them. Add more potting mix to the container, covering the stems up to about half their height. This encourages the plants to produce more potatoes along the buried stems. Repeat this process every few weeks as the plants grow, until the container is almost full. I usually hill mine every 2-3 weeks.
5. Monitor for Pests and Diseases: Keep an eye out for common potato pests like aphids or potato beetles. If you spot any, treat them with an appropriate organic insecticide. Also, watch out for diseases like blight. Good air circulation and proper watering can help prevent these problems.
Phase 4: Harvesting Your Indoor Potato Crop
The moment we’ve all been waiting for!
1. When to Harvest: Your potatoes will be ready to harvest about 2-3 months after planting, depending on the variety. You’ll know they’re ready when the foliage starts to turn yellow and die back.
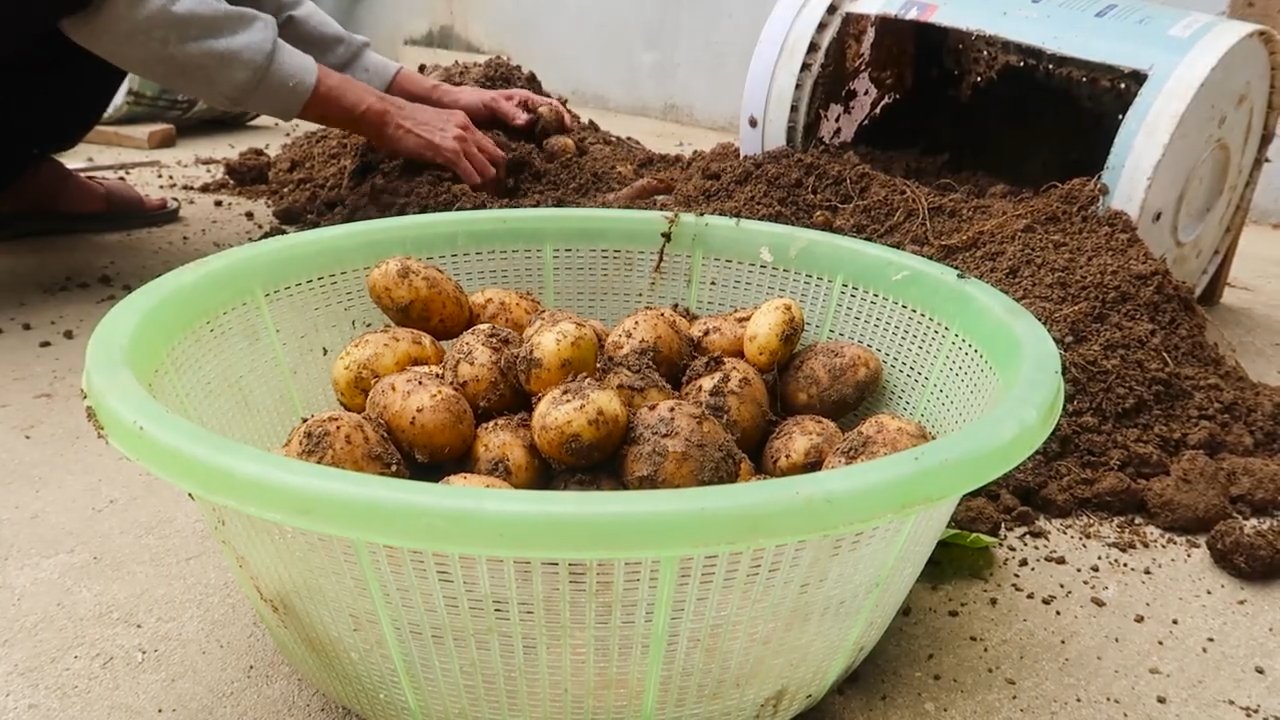
2. Harvesting: Stop watering the plants a week or two before harvesting. This will help the potatoes cure and store better. To harvest, gently tip the container over and carefully remove the potatoes from the soil. You can also reach into the container and feel around for the potatoes.
3. Curing: After harvesting, cure the potatoes by placing them in a cool, dark, and well-ventilated place for about a week. This will help them develop a thicker skin and prevent spoilage.
Troubleshooting: Common Issues and Solutions
Even with the best intentions, things can sometimes go wrong. Here are a few common issues you might encounter and how to fix them:
* Leggy Plants: If your potato plants are tall and spindly with long spaces between the leaves, they’re probably not getting enough light. Move them to a brighter location or supplement with grow lights.
* Yellowing Leaves: Yellowing leaves can be a sign of overwatering, underwatering, or nutrient deficiency. Check the soil moisture and adjust your watering accordingly. If the soil is consistently moist, you might be overwatering. If it’s dry, you need to water more often. Also, make sure you’re fertilizing regularly.
* No Potatoes: If your plants are growing well but not producing any potatoes, it could be due to a lack of hilling. Make sure you’re hilling the plants regularly to encourage potato production. It could also be a nutrient deficiency. Try using a fertilizer that’s higher in phosphorus and potassium.
* Pests: Keep a close eye on your plants for pests like aphids, spider mites, or potato beetles. Treat them with an appropriate organic insecticide as soon as you spot them.
Tips for Success: Potato Growing Pro-Tips
Here are a few extra tips to help you become a potato-growing pro:
* Choose the Right Variety: As I mentioned earlier, some potato varieties are better suited for container growing than others. Stick with varieties like Yukon Gold, Red Pontiac, or fingerling potatoes.
* Use Fabric Grow Bags: Fabric grow bags provide excellent drainage and aeration, which potatoes love.
* Don’t Overwater: Overwatering is a common mistake that can lead to root rot. Make sure the soil is moist but not soggy.
* Provide Plenty of Light: Potatoes need plenty of light to grow well. If you don’t have enough natural light, supplement with grow lights.
* Hill Regularly: Hilling is essential for encouraging potato production.
* Be Patient: Growing potatoes takes time. Don’t get discouraged if you don’t see results immediately. Just keep watering, fertilizing, and hilling, and you’ll be rewarded with a bountiful harvest.
Growing potatoes indoors is a fun and rewarding project that anyone can do. With a little bit of planning and effort, you can enjoy fresh, homegrown potatoes all year round. So, what are you waiting for? Get started today and experience the joy of growing your own spuds! Happy growing!
Conclusion
So, there you have it! Growing potatoes indoors is not just a quirky gardening experiment; it’s a genuinely rewarding and surprisingly simple way to enjoy fresh, homegrown potatoes year-round, regardless of your outdoor space. We’ve walked you through the process, from selecting the right seed potatoes to providing the optimal growing environment, and hopefully, dispelled any myths you might have heard about the difficulty of indoor potato cultivation.
Why is this DIY trick a must-try? Because it offers a unique connection to your food source. There’s something incredibly satisfying about nurturing a plant from a humble seed potato to a bountiful harvest, all within the comfort of your own home. Imagine the pride of serving a meal featuring potatoes you grew yourself, knowing exactly where they came from and what went into their cultivation. Beyond the satisfaction, growing potatoes indoors is also a fantastic way to extend your growing season, ensuring a steady supply of fresh potatoes even during the colder months when outdoor gardening is impossible. It’s also a great option for those with limited outdoor space, such as apartment dwellers or city residents who crave the taste of homegrown produce.
But the benefits don’t stop there. This method is also incredibly educational, especially for children. It’s a hands-on way to teach them about plant life cycles, the importance of sunlight and water, and the rewards of patience and care. Plus, it’s a fun and engaging activity that the whole family can enjoy together.
Now, let’s talk about variations. While we’ve focused on growing potatoes in containers, you can also experiment with other methods, such as using grow bags or even repurposed materials like old tires or laundry baskets. The key is to ensure adequate drainage and enough space for the potato plants to develop their root systems and tubers. You can also try different varieties of potatoes to see which ones thrive best in your indoor environment. Consider starting with smaller, faster-maturing varieties like Yukon Gold or fingerling potatoes. For a fun twist, try growing colorful potatoes like purple or red varieties to add a vibrant touch to your meals.
Don’t be afraid to experiment with different lighting setups as well. While natural sunlight is ideal, you can supplement with grow lights to ensure your potato plants receive enough light, especially during the darker months. LED grow lights are a great option as they are energy-efficient and provide a full spectrum of light that promotes healthy plant growth.
Ultimately, the success of your indoor potato growing venture depends on your willingness to learn, adapt, and experiment. So, don’t be discouraged if you encounter challenges along the way. Every gardener, even experienced ones, faces setbacks from time to time. The key is to learn from your mistakes and keep trying.
We wholeheartedly encourage you to give this DIY trick a try. It’s a rewarding, educational, and delicious experience that you won’t regret. And most importantly, we want to hear about your experience! Share your photos, tips, and challenges with us in the comments section below. Let’s create a community of indoor potato growers and learn from each other. What variety did you choose? What growing medium worked best for you? What challenges did you face, and how did you overcome them? Your insights could be invaluable to other aspiring indoor potato gardeners.
So, grab your seed potatoes, prepare your containers, and get ready to embark on a rewarding journey of growing potatoes indoors. Happy gardening!
Frequently Asked Questions (FAQ)
1. What are the best potato varieties to grow indoors?
Smaller, faster-maturing potato varieties tend to perform best indoors. Yukon Gold, fingerling potatoes (like Russian Banana or French Fingerling), and other early-season varieties are excellent choices. These varieties typically produce smaller plants and mature more quickly than larger, late-season varieties, making them well-suited for container gardening. Experimenting with different varieties is encouraged to see what thrives best in your specific indoor environment. Red potatoes can also be grown indoors.
2. How much sunlight do indoor potato plants need?
Potato plants require at least 6-8 hours of direct sunlight per day. If you don’t have a sunny window, you’ll need to supplement with grow lights. LED grow lights are a great option as they are energy-efficient and provide a full spectrum of light that promotes healthy plant growth. Position the grow lights about 6-12 inches above the plants and adjust as they grow taller. Insufficient light can lead to leggy growth and reduced tuber production.
3. What type of soil is best for growing potatoes in containers?
A well-draining potting mix is essential for growing potatoes in containers. Avoid using garden soil, as it can become compacted and prevent proper drainage. A mix of equal parts potting soil, compost, and perlite or vermiculite is ideal. The compost provides nutrients, while the perlite or vermiculite improves drainage and aeration. Ensure the container has drainage holes to prevent waterlogging, which can lead to root rot.
4. How often should I water my indoor potato plants?
Water your potato plants regularly, keeping the soil consistently moist but not waterlogged. Check the soil moisture by sticking your finger about an inch deep. If the soil feels dry, it’s time to water. Water deeply, allowing the excess water to drain out of the drainage holes. Avoid overwatering, as this can lead to root rot. The frequency of watering will depend on factors such as the size of the container, the temperature, and the humidity.
5. How do I “hill” my potato plants indoors?
Hilling is the process of adding more soil around the stems of the potato plants as they grow. This encourages the formation of more tubers along the buried stems. As your potato plants grow, gradually add more soil to the container, burying the lower portion of the stems. Leave only the top few sets of leaves exposed. Repeat this process every few weeks until the container is nearly full.
6. When will my indoor potatoes be ready to harvest?
Indoor potatoes typically take 70-90 days to mature, depending on the variety. You’ll know they’re ready to harvest when the foliage starts to turn yellow and die back. You can also gently dig around the base of the plant to check the size of the tubers. If they’re large enough for your liking, you can harvest them.
7. Can I grow potatoes from store-bought potatoes?
While you can technically grow potatoes from store-bought potatoes, it’s not recommended. Store-bought potatoes may have been treated with sprout inhibitors to prevent them from sprouting, which can hinder their growth. Additionally, they may carry diseases that can affect your plants. It’s best to use certified seed potatoes, which are specifically grown for planting and are disease-free.
8. What are some common pests and diseases that affect indoor potato plants?
Common pests that can affect indoor potato plants include aphids, spider mites, and whiteflies. Regularly inspect your plants for signs of infestation and take action promptly. You can use insecticidal soap or neem oil to control these pests. Diseases that can affect indoor potato plants include early blight, late blight, and root rot. Ensure proper ventilation and avoid overwatering to prevent these diseases. If you notice any signs of disease, remove the affected leaves or plants immediately.
9. Can I grow potatoes indoors year-round?
Yes, you can grow potatoes indoors year-round, provided you have adequate light and temperature control. Indoor growing allows you to bypass seasonal limitations and enjoy fresh, homegrown potatoes regardless of the weather outside.
10. How do I store my harvested potatoes?
Store your harvested potatoes in a cool, dark, and dry place. A temperature of 45-50°F (7-10°C) is ideal. Avoid storing them in the refrigerator, as this can cause them to develop a sweet taste. Store them in a well-ventilated container, such as a burlap sack or a cardboard box with holes. Properly stored potatoes can last for several months.

Leave a Comment