
Grow Pineapples at Home? Absolutely! Imagine plucking a juicy, sun-ripened pineapple straight from your own backyard. Sounds like a tropical dream, right? Well, it’s more attainable than you might think! For centuries, pineapples have symbolized hospitality and warmth, a tradition stemming from their exotic appeal and the effort required to cultivate them. Think about it – a pineapple gracing your table was once a sign of true generosity and a testament to your gardening prowess.
But let’s be honest, buying pineapples from the store can be a bit of a gamble. Sometimes they’re not quite ripe, or they lack that intense, sweet flavor you crave. That’s where this DIY guide comes in! I’m going to share some simple, yet effective tricks and hacks that will empower you to grow pineapples at home, regardless of your gardening experience. We’ll cover everything from selecting the perfect pineapple top to nurturing your plant for optimal growth.
Why should you bother? Because nothing beats the satisfaction of harvesting your own food, especially something as delicious and rewarding as a pineapple. Plus, it’s a fantastic way to add a touch of the tropics to your home and impress your friends and family. So, grab your gardening gloves, and let’s get started on this exciting pineapple-growing adventure!

Growing Pineapples Yourself: Your Tropical Dream for Home
Hey everyone! Have you ever dreamed of harvesting your own pineapples? I’ll show you how you can easily make this tropical dream a reality at home. It’s easier than you think and a lot of fun!
What you’ll need:
- A ripe pineapple (preferably from an organic store, as these are often untreated)
- A sharp knife
- A pot (approx. 15-20 cm / 6-8 inches in diameter)
- High-quality potting soil or seed-starting mix
- Optional: Rooting powder
- A spray bottle with water
- Patience (Pineapples take time!)
Preparing the Pineapple: Off with its Crown!
- Choosing the right pineapple: In the store, pick out a nice, ripe pineapple. It should be golden-yellow, have a pleasant scent, and the leaves should be easy to pluck. Avoid pineapples with brown or mushy spots.
- Cutting off the crown: With a sharp knife, cut off the leafy crown of the pineapple. Make sure to leave about 2-3 cm (1 inch) of fruit flesh on the crown.
- Removing the fruit flesh: Now comes the trickier part. Carefully remove the remaining fruit flesh from the crown. This is important because it can otherwise rot and hinder root formation. You can either cut off the flesh with a knife or carefully peel it away. Be careful not to damage the small brown dots (these are the future roots!).
- Removing the lower leaves: Remove the bottom leaves of the crown, so that about 2-3 cm (1 inch) of the stalk is exposed. This encourages root formation.
- Optional: Rooting powder: If you wish, you can dip the stalk in rooting powder. This is not a must, but it does speed up the process.
Rooting: Let the Water Flow!
There are two methods here that I’d like to show you:
Method 1: Rooting in a Glass of Water
- Preparation: Fill a glass with water. The water should be clean and at room temperature.
- Place the pineapple: Put the pineapple crown in the glass so that the stalk is in the water, but the leaves are not.
- Location: Place the glass in a bright, warm spot, but not in direct sunlight.
- Change the water: Change the water every 2-3 days to prevent rot.
- Be patient: After a few weeks (approx. 4-8 weeks), the first roots should form.
Method 2: Direct Rooting in Soil
- Prepare the pot: Fill the pot with potting soil or seed-starting mix.
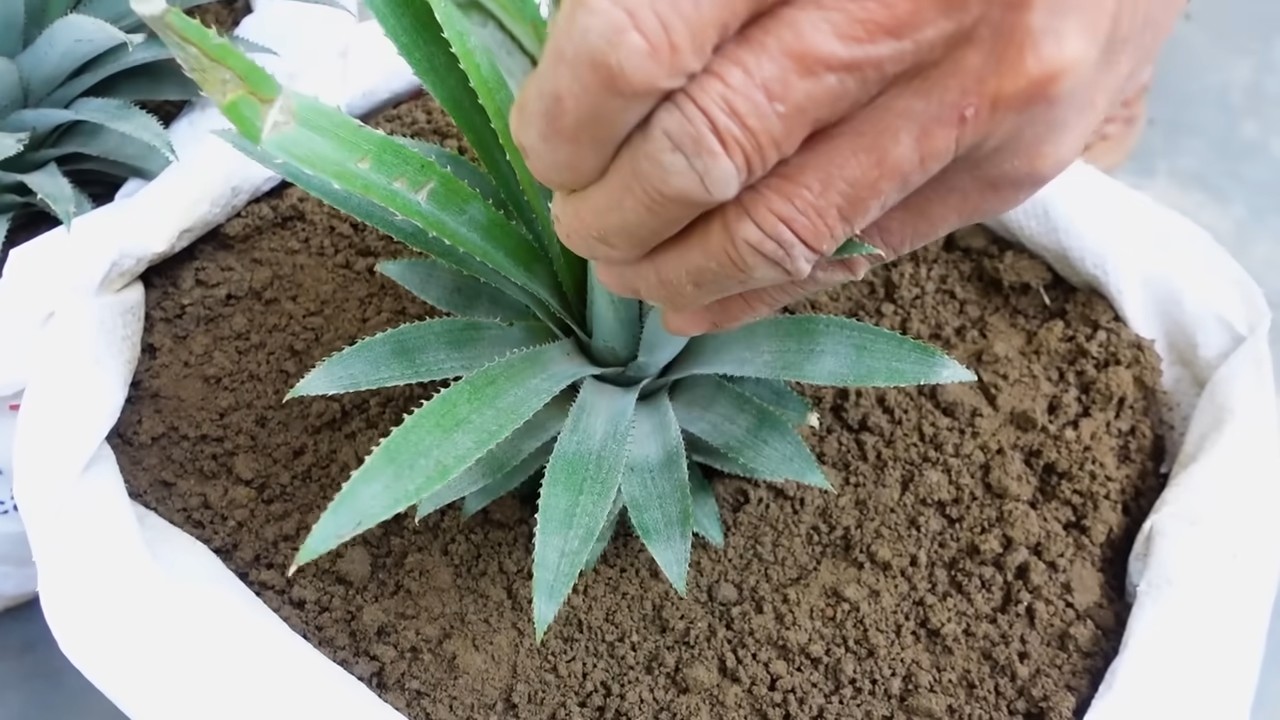
- Place the pineapple crown: Make a small hole in the soil and place the pineapple crown so that the stalk is covered.
- Water: Gently water the soil so that it is moist, but not wet.
- Location: Place the pot in a bright, warm spot, but not in direct sunlight.
- Maintain moisture: Keep the soil moist, but avoid waterlogging. Spray the leaves regularly with water.
- Be patient: You’ll need patience here too. It can take several weeks for roots to form.
Planting: Into the Soil!
Once the roots are about 2-3 cm (1 inch) long (with the water glass method), it’s time to plant the pineapple.
- Prepare the pot: Fill the pot with potting soil or seed-starting mix. Make sure the pot is large enough (approx. 15-20 cm / 6-8 inches in diameter).
- Place the pineapple: Make a hole in the soil and carefully place the pineapple inside. The roots should be well covered.
- Water: Gently water the soil so that it is moist, but not wet.
- Location: Place the pot in a bright, warm location. Pineapples love sun, but avoid the harsh midday sun, especially in the first few days after planting.
Care: How to Keep Your Pineapple Happy!
- Watering: Water the pineapple regularly, but avoid waterlogging. The soil should always be slightly moist. In winter, the pineapple needs less water.
- Fertilizing: During the growing season (spring and summer), fertilize the pineapple every 2-3 weeks with a liquid fertilizer for houseplants or a special pineapple fertilizer.
- Humidity: Pineapples love high humidity. Spray the leaves regularly with water or place the pot on a saucer with water and pebbles.
- Temperature: Pineapples prefer warm temperatures between 20 and 30 degrees Celsius (68-86°F). In winter, the temperature should not fall below 15 degrees Celsius (59°F).
- Repotting: When the pineapple has outgrown its pot, you can transplant it into a larger one.
- Pests: Watch out for pests like spider mites or mealybugs. If infested, you can treat the pineapple with a suitable pesticide.
The Flower: A Sign of Hope!
After about 2-3 years (sometimes longer), it’s possible that your pineapple will flower. The flower is a beautiful event and a sign that you’ve done everything right!
- Recognizing the flower: The flower appears as a small, red cone in the center of the plant.
- Be patient: After flowering, it will take several more months for the pineapple fruit to develop.
- Support: When the fruit becomes heavy, it can be a good idea to support the plant so it doesn’t tip over.
The Harvest: Finally, a Pineapple!
When the pineapple fruit is ripe, it will turn a golden-yellow color and smell pleasant.
- Harvest time: The pineapple is ripe when it can be easily detached from the stalk.
- Harvesting: Cut the pineapple with a sharp knife.
- Enjoy: And now comes the best part: Enjoy your homegrown pineapple!
Additional Tips:
- Patience is important: Pineapples take time to grow and bear fruit. Don’t be discouraged if it doesn’t work right away.
- The right location: A bright, warm location is crucial for success.
- The right soil: Use high-quality potting soil or seed-starting mix.
- The right care: Pay attention to proper watering, fertilizing, and humidity.
- Experiment: Try different methods to find out what works best for you.
I hope this guide helps you grow your own pineapples. It’s a great feeling to harvest the fruits of your labor! Good luck and have fun gardening
Conclusion
So, there you have it! Growing pineapples at home might seem like a tropical dream reserved for professional farmers, but as you’ve discovered, it’s an incredibly rewarding and surprisingly accessible project for anyone with a little patience and a sunny spot. This DIY trick isn’t just about saving money on store-bought fruit; it’s about connecting with nature, understanding the life cycle of a plant, and experiencing the unparalleled satisfaction of harvesting something you nurtured from a simple pineapple top.
Why is this a must-try? Because it’s more than just a recipe for homegrown fruit; it’s a recipe for personal growth, a lesson in sustainability, and a conversation starter that will impress your friends and family. Imagine serving a pineapple you grew yourself at your next barbecue! The taste is often sweeter and more flavorful than anything you can buy in the store, and the bragging rights are definitely a bonus.
But the benefits extend beyond the delicious fruit. The pineapple plant itself is a beautiful and unique addition to any garden or indoor space. Its spiky leaves add a touch of the exotic, and its slow, deliberate growth is a constant reminder of the power of patience. Plus, it’s a fantastic project to do with kids, teaching them about botany and the origins of their food.
Looking for variations? Consider experimenting with different pineapple varieties. While the smooth Cayenne is a popular choice, you might also try growing a Sugarloaf or a Red Spanish pineapple, each with its own unique flavor profile and characteristics. You can also adjust the soil mix to suit your specific climate and growing conditions. Some gardeners prefer a slightly more acidic soil, while others find that a well-draining potting mix works just fine. Don’t be afraid to experiment and see what works best for you.
Another fun variation is to grow your pineapple in a container. This is a great option if you live in a colder climate and need to bring your plant indoors during the winter months. Just make sure to choose a pot that is large enough to accommodate the plant’s root system, and be sure to provide adequate drainage.
We wholeheartedly encourage you to give this DIY trick a try. It’s a relatively low-cost, low-effort project with a potentially huge payoff. And remember, even if your first attempt isn’t a resounding success, don’t give up! Gardening is all about learning and adapting. Each attempt will bring you closer to mastering the art of growing pineapples at home.
Most importantly, we want to hear about your experiences! Share your photos, tips, and challenges in the comments section below. Let’s create a community of pineapple enthusiasts and learn from each other’s successes and failures. Together, we can unlock the secrets to growing the perfect homegrown pineapple. So, grab a pineapple, twist off the top, and get ready to embark on a tropical adventure right in your own backyard! Let’s get growing those pineapples at home!
Frequently Asked Questions (FAQ)
How long does it take to grow a pineapple from a top?
Patience is key! Growing a pineapple from a top is a long-term project. It typically takes anywhere from 2 to 3 years for a pineapple plant to mature and produce fruit. The exact timeframe depends on factors such as climate, sunlight, soil quality, and the specific pineapple variety. Don’t be discouraged if you don’t see fruit right away. Just keep providing your plant with the care it needs, and eventually, you’ll be rewarded with a delicious homegrown pineapple.
What kind of soil is best for growing pineapples?
Pineapples thrive in well-draining, slightly acidic soil. A good potting mix for pineapples should consist of a combination of peat moss, perlite, and vermiculite. You can also add some compost or aged manure to provide additional nutrients. Avoid using heavy clay soils, as they can retain too much moisture and lead to root rot. The ideal pH range for pineapple soil is between 5.5 and 6.5. You can test the pH of your soil using a soil testing kit, which can be purchased at most garden centers.
How much sunlight do pineapples need?
Pineapples are sun-loving plants and require at least 6 hours of direct sunlight per day. If you’re growing your pineapple indoors, place it near a sunny window where it can receive plenty of light. If you don’t have a sunny window, you can supplement with artificial grow lights. When growing outdoors, choose a location that receives full sun throughout the day. In hotter climates, you may need to provide some afternoon shade to prevent the leaves from scorching.
How often should I water my pineapple plant?
Water your pineapple plant regularly, but avoid overwatering. Allow the soil to dry out slightly between waterings. During the growing season (spring and summer), you may need to water more frequently than during the dormant season (fall and winter). A good rule of thumb is to water when the top inch of soil feels dry to the touch. When watering, be sure to soak the soil thoroughly, but avoid getting water in the crown of the plant, as this can lead to rot.
How do I fertilize my pineapple plant?
Pineapples are heavy feeders and benefit from regular fertilization. Use a balanced fertilizer that is specifically formulated for tropical plants. Fertilize your pineapple plant every 2-3 months during the growing season. Follow the instructions on the fertilizer package for proper application rates. You can also use organic fertilizers, such as compost tea or fish emulsion. Avoid over-fertilizing, as this can damage the plant.
What are some common problems when growing pineapples?
Some common problems when growing pineapples include root rot, mealybugs, and scale insects. Root rot is caused by overwatering and poor drainage. To prevent root rot, make sure your pineapple plant is planted in well-draining soil and avoid overwatering. Mealybugs and scale insects are sap-sucking pests that can weaken the plant. You can control these pests by spraying the plant with insecticidal soap or neem oil.
How do I know when my pineapple is ripe?
Determining when a pineapple is ripe can be tricky, but there are a few telltale signs to look for. A ripe pineapple will have a fragrant aroma, a slightly golden color, and a firm but not hard texture. The eyes (the individual segments of the pineapple) should be relatively flat and well-developed. You can also try gently pulling on one of the leaves near the top of the pineapple. If it comes out easily, the pineapple is likely ripe.
Can I grow a pineapple indoors?
Yes, you can definitely grow a pineapple indoors! In fact, growing pineapples indoors is a great option for people who live in colder climates. To grow a pineapple indoors, you’ll need a large pot, well-draining soil, and a sunny location. Be sure to provide your pineapple plant with plenty of light and water, and fertilize it regularly. With proper care, you can enjoy homegrown pineapples even if you don’t have a backyard.
What do I do with the pineapple after I harvest it?
Once you’ve harvested your pineapple, you can enjoy it in a variety of ways. You can eat it fresh, grill it, add it to smoothies, or use it in desserts. You can also save the top of the pineapple and use it to grow another pineapple plant! Simply repeat the steps outlined in this article, and you’ll be well on your way to growing your own pineapple patch. Don’t forget to share your delicious homegrown pineapples with your friends and family!
Leave a Comment