
Grow Onions at Home – imagine stepping into your garden and plucking fresh, vibrant onions straight from the earth! It’s a dream many gardeners share, and I’m here to tell you it’s absolutely achievable, even if you’re a complete beginner. Forget those bland, store-bought onions; homegrown ones burst with flavor and are incredibly satisfying to cultivate.
Onions have a rich history, dating back thousands of years. Ancient Egyptians revered them, even using them as offerings to the gods! Throughout history, onions have been valued not only for their culinary uses but also for their medicinal properties. Now, you can continue this legacy in your own backyard!
Why should you learn to grow onions at home? Well, for starters, it’s incredibly rewarding. Plus, you’ll have access to fresh, organic onions whenever you need them. But more importantly, in today’s world, knowing how to supplement your food supply is becoming increasingly important. This DIY guide will provide you with simple, effective tricks and hacks to ensure a bountiful onion harvest, regardless of your garden size or experience level. Let’s get started and unlock the secrets to growing delicious onions right in your own home!
Grow Onions at Home: A Beginner’s Guide
Hey there, fellow gardening enthusiasts! Ever dreamt of snipping fresh onions straight from your backyard for your favorite recipes? Well, dream no more! Growing onions at home is surprisingly easy and rewarding. I’m going to walk you through everything you need to know, from choosing the right type of onion to harvesting your flavorful bounty. Let’s get started!
Choosing Your Onion Type
Before we dive into the nitty-gritty, let’s talk about onion varieties. Onions are categorized by their day length requirements, which basically means how many hours of sunlight they need to form bulbs. Choosing the right type for your region is crucial for success.
* **Long-Day Onions:** These need 14-16 hours of daylight and are best suited for northern climates. Think of states like Washington, Minnesota, and Maine. Popular long-day varieties include Walla Walla Sweet, Yellow Spanish, and Red Burgundy.
* **Short-Day Onions:** These need 10-12 hours of daylight and thrive in southern climates like Texas, Georgia, and Florida. Look for varieties like Texas Sweet White, Granex, and Red Creole.
* **Intermediate-Day Onions:** These are a bit more flexible and can grow in a wider range of climates, typically in the middle latitudes. Varieties like Candy and Superstar fall into this category.
Pro Tip: Check with your local garden center or agricultural extension office to find out which onion varieties perform best in your area.
Starting from Seeds, Sets, or Transplants?
You have three main options for starting your onion journey: seeds, sets, and transplants. Each has its pros and cons.
* **Seeds:** Starting from seeds gives you the widest selection of varieties and is the most economical option. However, it requires more time and effort, as you’ll need to start the seeds indoors 8-10 weeks before the last expected frost.
* **Sets:** Onion sets are small, immature bulbs that are already partially grown. They’re easier to handle than seeds and mature faster. However, the variety selection is limited, and they’re more prone to bolting (going to seed prematurely).
* **Transplants:** These are young onion plants that have already been started for you. They offer a good balance of convenience and variety selection. You can usually find transplants at garden centers in the spring.
For this guide, I’ll focus on using onion sets, as they’re the easiest option for beginners.
Preparing Your Garden Bed
Onions need well-drained, fertile soil to thrive. Here’s how to prepare your garden bed:
1. **Choose a Sunny Location:** Onions need at least 6-8 hours of direct sunlight per day.
2. **Test Your Soil:** A soil test will tell you the pH level and nutrient content of your soil. Onions prefer a slightly acidic to neutral pH (6.0-7.0). You can purchase a soil testing kit at most garden centers or send a sample to your local agricultural extension office.
3. **Amend the Soil:** Based on your soil test results, amend the soil with compost, aged manure, or other organic matter to improve drainage and fertility. I like to add a generous amount of compost to my onion beds.
4. **Loosen the Soil:** Use a garden fork or tiller to loosen the soil to a depth of at least 12 inches. This will allow the onion roots to penetrate easily.
5. **Remove Rocks and Debris:** Remove any rocks, roots, or other debris from the soil.
6. **Create Raised Beds (Optional):** If your soil is poorly drained, consider creating raised beds to improve drainage.
Planting Your Onion Sets
Now for the fun part – planting!
1. **Choose Healthy Sets:** Select onion sets that are firm and free from blemishes. Avoid sets that are soft, moldy, or sprouting.
2. **Soak the Sets (Optional):** Soaking the sets in water for a few hours before planting can help them get off to a good start.
3. **Planting Depth:** Plant the sets about 1 inch deep, with the pointed end facing up.
4. **Spacing:** Space the sets 4-6 inches apart in rows that are 12-18 inches apart. This will give the onions enough room to grow.
5. **Water Thoroughly:** After planting, water the sets thoroughly to settle the soil.
Caring for Your Onions
Once your onions are planted, it’s important to provide them with proper care to ensure a bountiful harvest.
1. **Watering:** Onions need consistent moisture, especially during bulb formation. Water deeply whenever the top inch of soil feels dry. Avoid overwatering, as this can lead to rot.
2. **Weeding:** Keep the onion bed free of weeds, as weeds can compete with the onions for nutrients and water. Hand-pull weeds carefully to avoid disturbing the onion roots.
3. **Fertilizing:** Onions are heavy feeders, so they benefit from regular fertilization. Apply a balanced fertilizer (e.g., 10-10-10) every 2-3 weeks, following the instructions on the fertilizer label. I also like to side-dress my onions with compost tea every few weeks.
4. **Mulching:** Apply a layer of mulch around the onions to help retain moisture, suppress weeds, and regulate soil temperature. Straw, shredded leaves, or wood chips are good mulching options.
5. **Pest and Disease Control:** Onions are relatively pest-resistant, but they can be susceptible to certain pests and diseases, such as onion maggots, thrips, and fungal diseases. Inspect your plants regularly for signs of problems and take action promptly. You can use organic pesticides or fungicides if necessary.
Harvesting Your Onions
The moment you’ve been waiting for! Knowing when to harvest your onions is key to getting the best flavor and storage life.
1. **Harvest Time:** Onions are typically ready to harvest when the tops start to fall over and turn yellow or brown. This usually happens in late summer or early fall, depending on the variety and your climate.
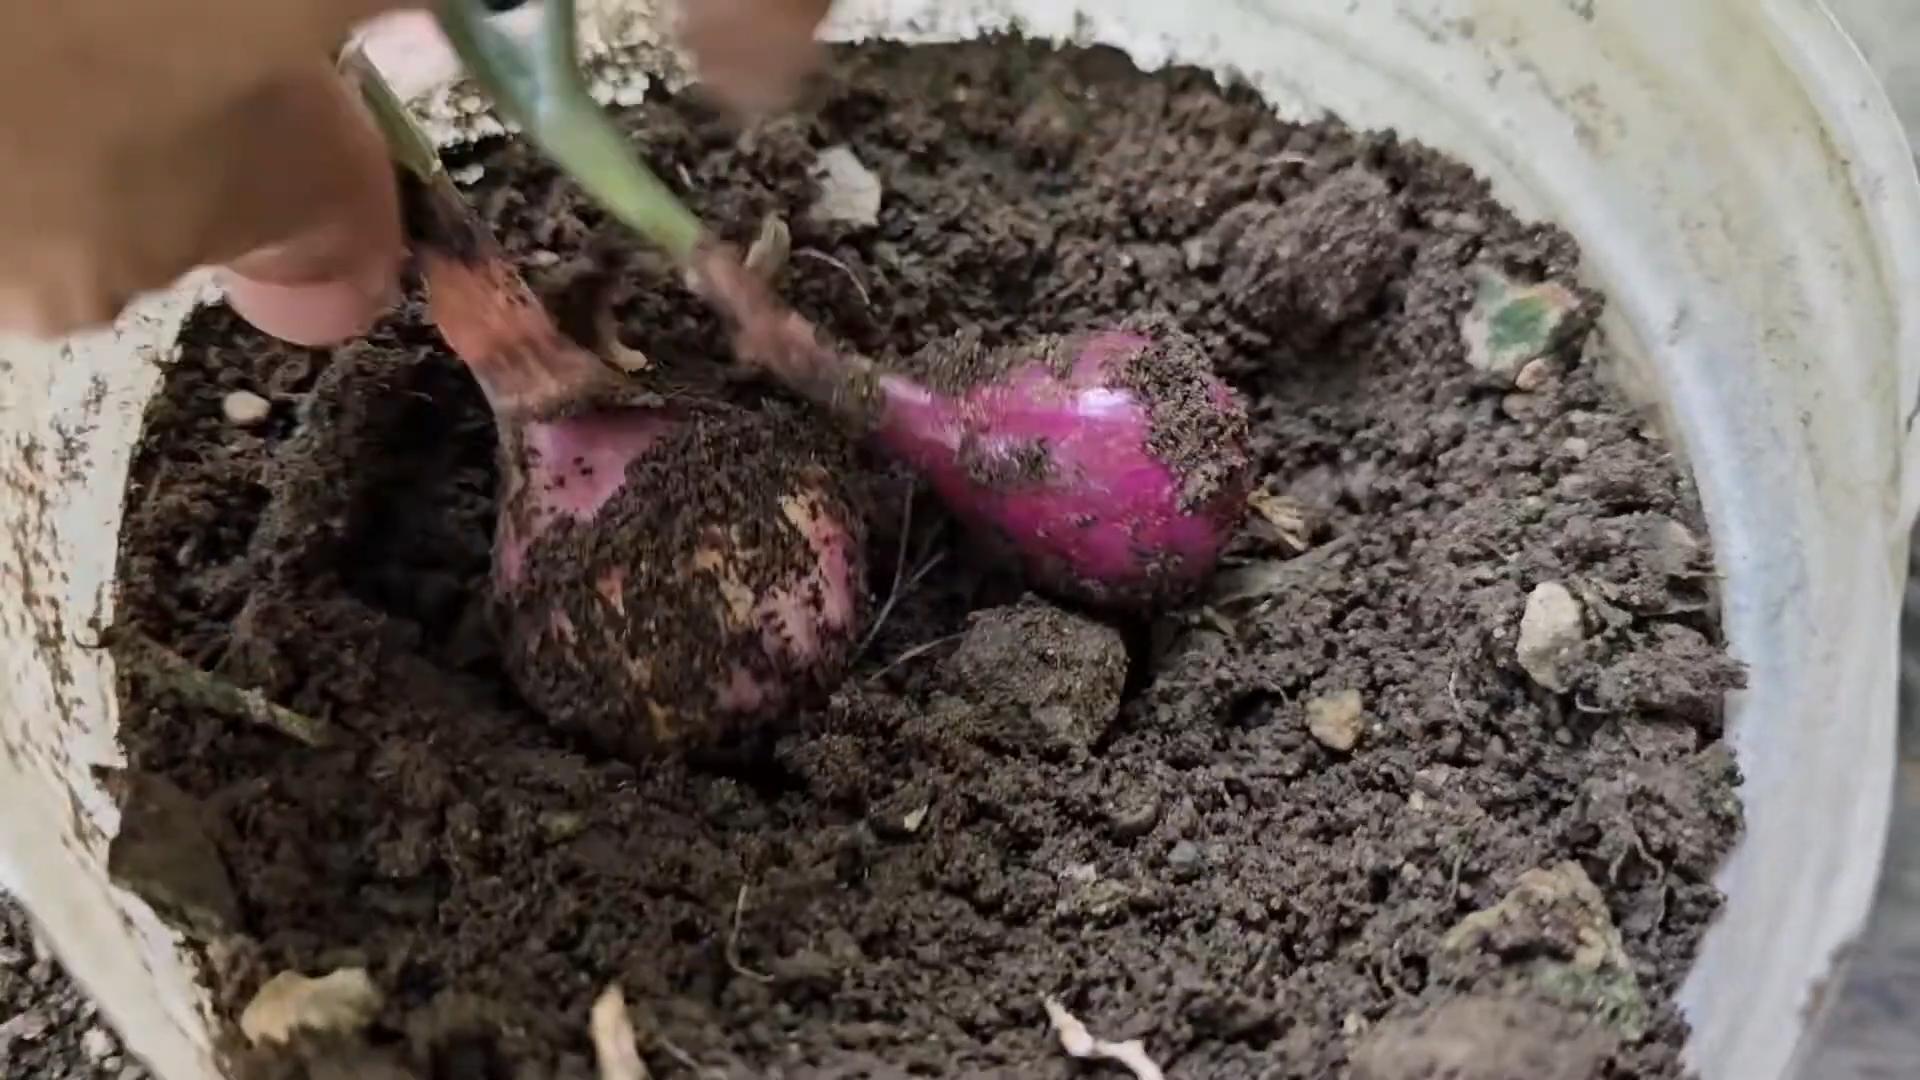
2. **Lifting the Onions:** Gently lift the onions from the soil with a garden fork or trowel. Be careful not to damage the bulbs.
3. **Curing the Onions:** Curing is essential for extending the storage life of your onions. To cure them, spread them out in a single layer in a warm, dry, well-ventilated place for 2-3 weeks. The outer skins will dry and become papery.
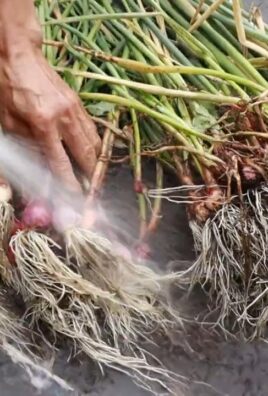
4. **Trimming the Tops and Roots:** After curing, trim the tops to about 1-2 inches above the bulb and trim the roots to about 1/2 inch.
5. **Storing Your Onions:** Store your cured onions in a cool, dry, well-ventilated place, such as a basement or pantry. You can store them in mesh bags or crates. Avoid storing them in plastic bags, as this can trap moisture and cause them to rot.
Important Note: Sweet onions, like Walla Walla Sweet and Texas Sweet White, don’t store as well as other varieties. Use them within a few weeks of harvest.
Troubleshooting Common Onion Problems
Even with the best care, you might encounter some challenges along the way. Here are a few common problems and how to address them:
* **Bolting (Premature Seed Production):** Bolting is when an onion plant sends up a flower stalk prematurely. This can happen if the plant experiences stress, such as extreme temperature fluctuations. To prevent bolting, choose the right onion variety for your climate and avoid planting sets that are too large. If an onion bolts, you can still harvest it, but the bulb may not be as large or flavorful.
* **Small Bulbs:** Small bulbs can be caused by a variety of factors, including poor soil fertility, insufficient sunlight, overcrowding, and inadequate watering. Make sure your onions are getting enough nutrients, sunlight, and water, and that they’re spaced properly.
* **Onion Maggots:** Onion maggots are small, white larvae that feed on the roots of onion plants. They can cause the plants to wilt and die. To prevent onion maggots, use row covers to protect your plants and practice crop rotation. You can also use beneficial nematodes to control the maggots in the soil.
* **Thrips:** Thrips are tiny, slender insects that suck the sap from onion leaves. They can cause the leaves to become silvery or distorted. To control thrips, use insecticidal soap or neem oil.
* **Fungal Diseases:** Onions are susceptible to several fungal diseases, such as downy mildew and purple blotch. These diseases can cause the leaves to develop spots or lesions. To prevent fungal diseases, provide good air circulation, avoid overhead watering, and use a fungicide if necessary.
Enjoying Your Homegrown Onions
Congratulations! You’ve successfully grown your own onions at home. Now it’s time to enjoy the fruits (or rather, vegetables) of your labor. Use your homegrown onions in your favorite recipes, from soups and stews to salads and stir-fries. The
Conclusion
So, there you have it! Growing onions at home, whether from scraps, sets, or seeds, is not just a cost-effective way to ensure a steady supply of this kitchen staple; it’s a deeply rewarding experience that connects you to the food you eat. We’ve explored the simple steps, from preparing your soil to nurturing your seedlings, and hopefully demystified the process of cultivating these pungent bulbs in your own backyard or even on your windowsill.
Why is this DIY trick a must-try? Because it empowers you to take control of your food source, reduce your reliance on grocery stores, and enjoy the unparalleled flavor of freshly harvested onions. Imagine the satisfaction of adding homegrown onions to your favorite dishes, knowing that you nurtured them from start to finish. Plus, it’s an incredibly sustainable practice, especially when you’re regrowing onions from scraps that would otherwise end up in the compost bin.
But the beauty of growing onions at home lies in its versatility. Feel free to experiment with different varieties to discover your favorites. Try growing red onions for their vibrant color and slightly sweeter flavor, or perhaps shallots for a more delicate, garlic-like taste. You can also explore different growing methods. If you’re short on space, consider container gardening. Onions thrive in pots, making them perfect for balconies or patios. You can even try hydroponics for a truly unique and efficient growing experience.
Don’t be afraid to get creative with your onion-growing endeavors. Companion planting can also enhance your onion crop. Carrots, for example, are known to deter onion flies, while onions can repel carrot root flies. Marigolds are another excellent companion plant, helping to keep nematodes at bay.
And remember, growing onions at home isn’t just about the bulbs themselves. The green tops are also incredibly versatile in the kitchen. Use them as a substitute for chives, add them to salads, or incorporate them into stir-fries for a burst of fresh onion flavor.
We understand that gardening can sometimes feel daunting, especially for beginners. But we encourage you to take the plunge and give growing onions at home a try. It’s a surprisingly simple and satisfying process, and the rewards are well worth the effort.
This is more than just a gardening project; it’s a step towards a more sustainable and self-sufficient lifestyle.
So, grab your gardening gloves, prepare your soil, and get ready to experience the joy of harvesting your own homegrown onions. We’re confident that you’ll be amazed at how easy and rewarding it can be.
We’d love to hear about your experiences! Share your tips, tricks, and photos with us in the comments below. Let’s create a community of home onion growers and inspire others to embrace the joys of gardening. What varieties are you growing? What challenges have you faced, and how did you overcome them? Your insights can help others succeed in their own onion-growing adventures. Let’s all learn and grow together!
Frequently Asked Questions (FAQ)
Q: What is the best time of year to plant onions?
A: The best time to plant onions depends on your climate and whether you’re starting from seeds, sets, or scraps. In general, onions are a cool-season crop, so they’re typically planted in the spring or fall.
* **Spring Planting:** If you live in a region with cold winters, plant onion sets or transplants in the spring, as soon as the ground can be worked. This is usually around 2-4 weeks before the last expected frost. Starting from seeds indoors requires an even earlier start, typically 8-10 weeks before the last frost.
* **Fall Planting:** In milder climates with warm winters, you can plant onion sets or transplants in the fall. This allows them to establish roots over the winter and get a head start in the spring.
Check your local gardening resources for specific planting dates in your area.
Q: What kind of soil do onions need?
A: Onions thrive in well-drained, fertile soil that is rich in organic matter. The ideal soil pH is between 6.0 and 7.0. Before planting, amend your soil with compost, aged manure, or other organic materials to improve its fertility and drainage. Avoid heavy clay soils, as they can become waterlogged and lead to bulb rot. If you have clay soil, consider growing onions in raised beds or containers.
Q: How much sunlight do onions need?
A: Onions need at least 6-8 hours of direct sunlight per day to thrive. Choose a sunny location in your garden or on your balcony for your onion patch. If you’re growing onions indoors, place them near a south-facing window or use grow lights to supplement natural sunlight.
Q: How often should I water my onions?
A: Onions need consistent moisture, especially during bulb formation. Water deeply whenever the top inch of soil feels dry to the touch. Avoid overwatering, as this can lead to bulb rot. During hot, dry weather, you may need to water more frequently. Mulching around your onion plants can help to retain moisture and suppress weeds.
Q: How do I fertilize my onions?
A: Onions are heavy feeders, so regular fertilization is essential for optimal growth. Apply a balanced fertilizer (e.g., 10-10-10) at planting time and then side-dress with nitrogen-rich fertilizer every 2-3 weeks during the growing season. You can also use organic fertilizers, such as compost tea or fish emulsion. Avoid over-fertilizing, as this can lead to excessive foliage growth at the expense of bulb development.
Q: How do I know when my onions are ready to harvest?
A: Onions are typically ready to harvest when the tops begin to fall over and turn yellow or brown. This usually happens in late summer or early fall. Once the tops have fallen over, stop watering the onions and allow them to dry out in the ground for a few days. Then, carefully dig up the bulbs and cure them in a warm, dry, well-ventilated place for 1-2 weeks. Curing helps to toughen the outer skin and prevent rot during storage.
Q: Can I grow onions from scraps?
A: Yes, you can regrow onions from scraps! Save the bottom inch of an onion bulb with the roots attached and plant it in soil. Keep the soil moist, and new green shoots will emerge within a few days. While regrowing from scraps won’t produce a large bulb, you can harvest the green tops for use in cooking.
Q: What are some common onion pests and diseases?
A: Some common onion pests include onion flies, thrips, and nematodes. Common diseases include bulb rot, downy mildew, and purple blotch. To prevent pest and disease problems, practice good garden hygiene, such as removing plant debris and rotating crops. You can also use organic pest control methods, such as insecticidal soap or neem oil.
Q: How do I store my harvested onions?
A: Store cured onions in a cool, dry, well-ventilated place, such as a basement or pantry. Braiding the onion tops together and hanging them up is a traditional storage method. Onions can typically be stored for several months if properly cured and stored. Check your onions regularly for signs of spoilage and discard any that are soft or rotten.
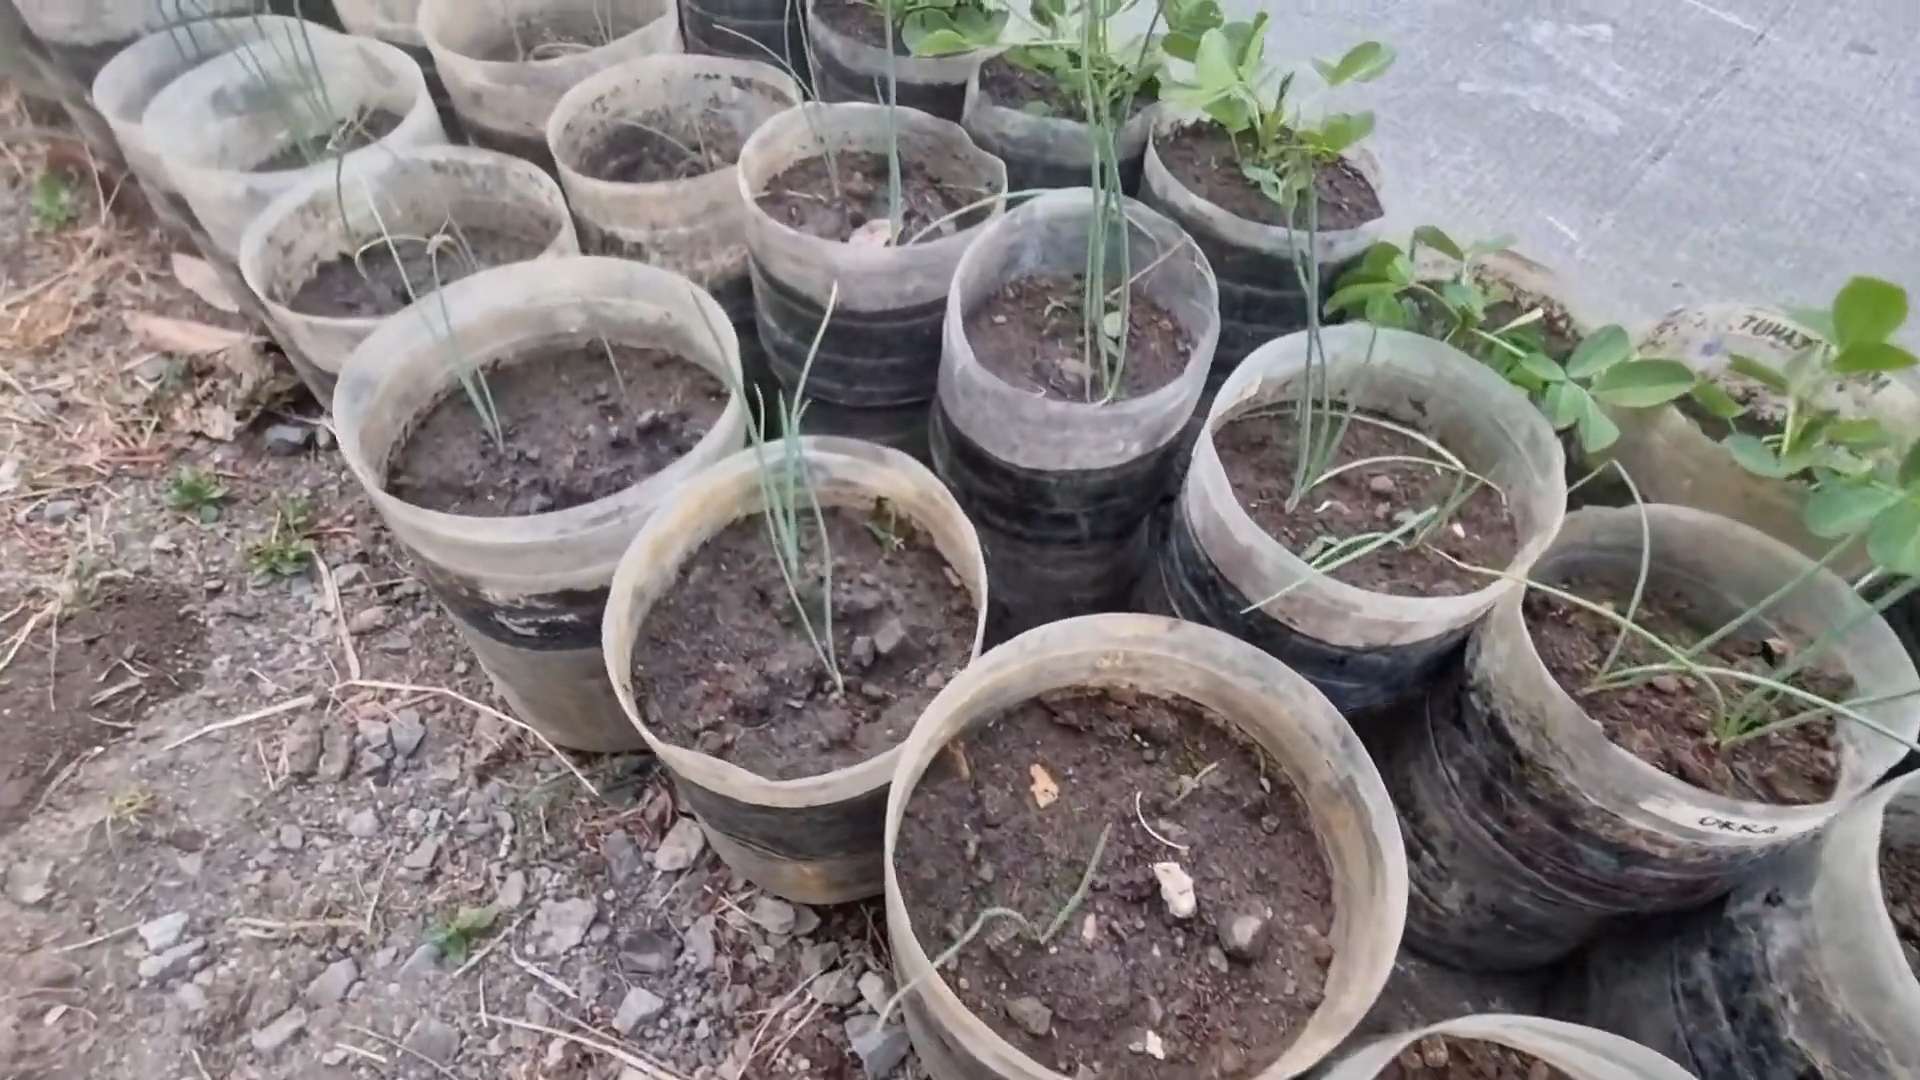
Q: Can I grow onions in containers?
A: Yes, onions grow well in containers. Choose a pot that is at least 6-8 inches deep and wide. Use a well-draining potting mix and provide plenty of sunlight and water. Container-grown onions may need to be fertilized more frequently than those grown in the ground.
Q: What are some good companion plants for onions?
A: Good companion plants for onions include carrots, marigolds, chamomile, and summer savory. Carrots deter onion flies, while onions repel carrot root flies. Marigolds help to keep nematodes at bay. Chamomile and summer savory are believed to improve the flavor of onions. Avoid planting onions near beans or peas, as they can inhibit each other’s growth.
Leave a Comment