
Grow Onions at Home – imagine stepping into your garden and plucking fresh, flavorful onions straight from the earth! No more bland supermarket bulbs; instead, picture vibrant, homegrown onions adding zest to your favorite dishes. For centuries, cultivating onions has been a cornerstone of cuisines worldwide, dating back to ancient civilizations who recognized their culinary and medicinal value. From the Egyptians who revered them to the Romans who carried them on their conquests, onions have always been a staple.
But let’s be honest, the thought of growing your own onions can seem daunting. Where do you even start? That’s where this DIY guide comes in! I’m here to share simple, effective tricks and hacks that will empower you to grow onions at home, regardless of your gardening experience. Whether you have a sprawling backyard or just a sunny windowsill, I’ll show you how to cultivate these versatile vegetables with ease.
Why do you need these tricks? Because store-bought onions often lack the robust flavor and freshness of homegrown varieties. Plus, growing your own is incredibly rewarding, sustainable, and can save you money in the long run. So, let’s ditch the grocery store and embark on this exciting journey to onion-growing success! Get ready to discover the secrets to a bountiful onion harvest, right in your own backyard (or balcony!).
Growing Onions at Home: A Beginner’s Guide
Hey there, fellow gardening enthusiasts! Ever dreamt of snipping fresh onions right from your backyard for your favorite recipes? Well, dream no more! Growing onions at home is surprisingly easy and rewarding. I’m going to walk you through everything you need to know, from choosing the right type of onion to harvesting your flavorful bounty. Let’s get our hands dirty!
Choosing Your Onion Type
Before we dive into the nitty-gritty, let’s talk about onion varieties. Onions are categorized by their day length requirements, which basically means how many hours of sunlight they need to form bulbs. Choosing the right type for your region is crucial for success.
* Long-Day Onions: These need 14-16 hours of daylight to bulb properly. They’re best suited for northern regions with long summer days. Popular varieties include Walla Walla Sweet, Yellow Spanish, and Red Burgundy.
* Short-Day Onions: These require 10-12 hours of daylight and thrive in southern climates with mild winters. Think Texas Sweet, Crystal White Wax, and Red Creole.
* Intermediate-Day Onions: As the name suggests, these are more adaptable and can grow in a wider range of climates, needing around 12-14 hours of daylight. Good choices are Candy and Superstar.
Pro Tip: Check with your local nursery or agricultural extension office to find out which onion varieties perform best in your area.
Starting from Seeds, Sets, or Transplants
You have three main options for starting your onion journey: seeds, sets, and transplants. Each has its pros and cons.
* Seeds: Starting from seeds gives you the widest variety to choose from and is the most economical option. However, it requires more time and effort, as you’ll need to start them indoors 8-10 weeks before the last expected frost.
* Sets: These are small, immature onion bulbs that are easy to plant and get a head start. They’re a good option if you’re short on time or space. However, they have a higher tendency to bolt (flower prematurely), which can reduce bulb size.
* Transplants: These are young onion plants that are already started for you. They offer a good balance of convenience and variety. You can often find a decent selection of transplants at your local garden center.
I personally prefer starting from seeds because I love the challenge and the wider selection, but sets and transplants are perfectly fine options, especially for beginners.
Preparing Your Garden Bed
Onions need a sunny spot with well-drained, fertile soil. Here’s how to get your garden bed ready:
1. Choose a Sunny Location: Onions need at least 6-8 hours of direct sunlight per day.
2. Test Your Soil: A soil test will tell you the pH level and nutrient content of your soil. Onions prefer a slightly acidic to neutral pH (6.0-7.0). You can get a soil test kit at most garden centers or send a sample to your local agricultural extension office.
3. Amend the Soil: Based on your soil test results, amend the soil with compost, well-rotted manure, or other organic matter to improve drainage, fertility, and water retention. I like to add a generous amount of compost to my onion beds.
4. Loosen the Soil: Use a garden fork or tiller to loosen the soil to a depth of at least 12 inches. This will allow the onion roots to penetrate easily.
5. Remove Rocks and Debris: Clear the area of any rocks, weeds, or other debris that could hinder growth.
6. Create Raised Beds (Optional): Raised beds can improve drainage and warm up the soil faster in the spring.
Planting Your Onions
Now for the fun part – planting! The specific planting instructions will vary slightly depending on whether you’re using seeds, sets, or transplants.
Planting from Seeds
1. Start Indoors: Sow onion seeds indoors 8-10 weeks before the last expected frost. Use seed-starting trays or small pots filled with seed-starting mix.
2. Sow Seeds: Sow seeds about ¼ inch deep and ½ inch apart. Gently water the soil.
3. Provide Light: Place the trays or pots under grow lights or in a sunny window. Keep the soil moist but not soggy.
4. Harden Off: Gradually acclimate the seedlings to outdoor conditions by exposing them to increasing amounts of sunlight and fresh air over a period of 1-2 weeks before transplanting.
5. Transplant Outdoors: Once the danger of frost has passed and the soil has warmed up, transplant the seedlings outdoors. Space them 4-6 inches apart in rows 12-18 inches apart.
Planting from Sets
1. Prepare the Soil: Make sure your garden bed is well-prepared as described above.
2. Plant the Sets: Plant the sets about 1 inch deep and 4-6 inches apart in rows 12-18 inches apart. The pointed end should be facing up.
3. Water Thoroughly: Water the sets thoroughly after planting.
Planting from Transplants
1. Prepare the Soil: Again, ensure your garden bed is ready to go.
2. Dig Holes: Dig holes that are slightly larger than the root ball of the transplants.
3. Plant the Transplants: Gently remove the transplants from their containers and place them in the holes. Make sure the top of the root ball is level with the soil surface.
4. Backfill and Water: Backfill the holes with soil and water thoroughly. Space the transplants 4-6 inches apart in rows 12-18 inches apart.
Caring for Your Onions
Once your onions are planted, it’s important to provide them with the care they need to thrive.
1. Watering: Onions need consistent moisture, especially during bulb formation. Water deeply whenever the top inch of soil feels dry. Avoid overwatering, which can lead to rot.
2. Weeding: Keep the garden bed free of weeds, which can compete with the onions for nutrients and water. Hand-pull weeds carefully to avoid disturbing the onion roots.
3. Fertilizing: Onions are heavy feeders and benefit from regular fertilization. Apply a balanced fertilizer (e.g., 10-10-10) every 2-3 weeks, following the package instructions. You can also side-dress with compost or well-rotted manure.
4. Mulching: Apply a layer of mulch around the onions to help retain moisture, suppress weeds, and regulate soil temperature. Straw, shredded leaves, or wood chips are good options.
5. Pest and Disease Control: Keep an eye out for common onion pests and diseases, such as onion thrips, onion maggots, and downy mildew. Treat infestations or infections promptly with appropriate organic or chemical controls. I prefer using neem oil for pest control.
6. Bolting Prevention: If you’re growing from sets, be aware of bolting. If you see flower stalks developing, pinch them off immediately to encourage bulb growth.
Harvesting Your Onions
The time to harvest your onions depends on the variety and your desired use.
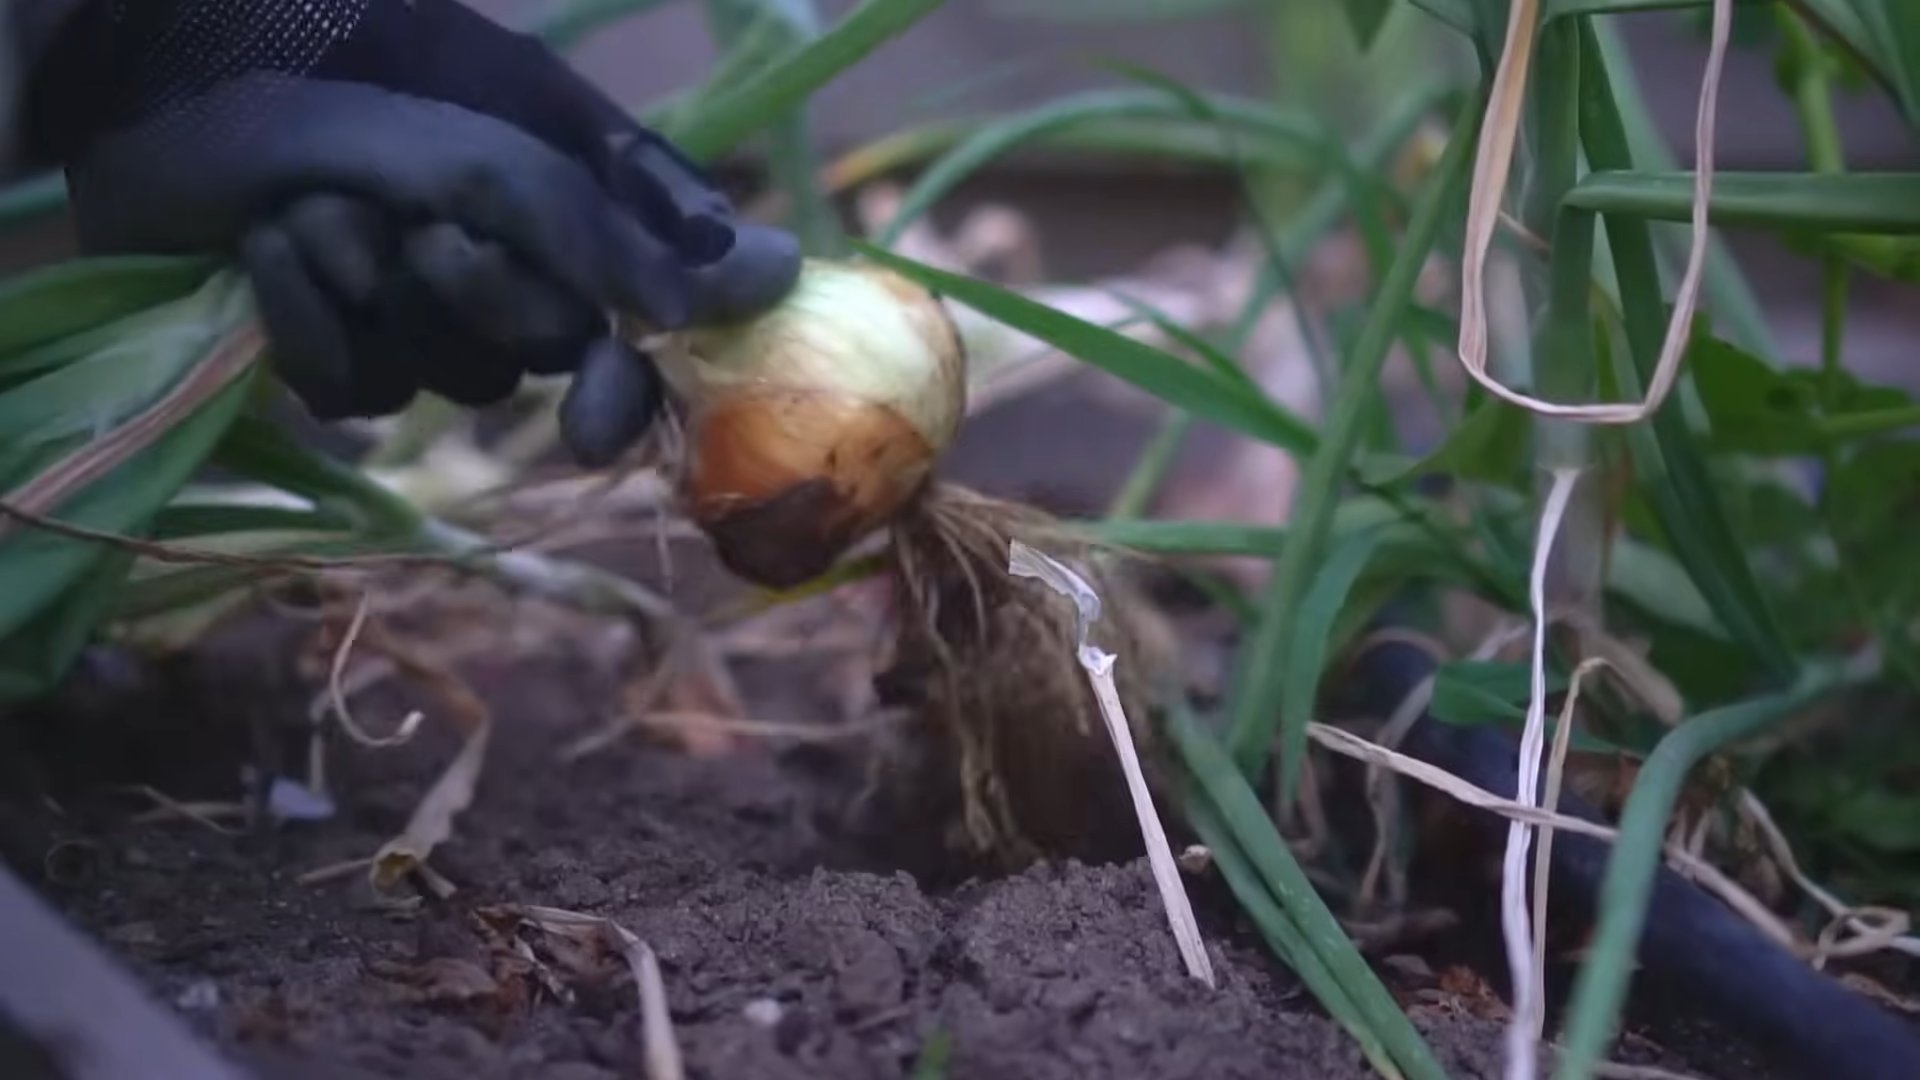
1. When to Harvest: Onions are typically ready to harvest when the tops start to fall over and turn yellow or brown. This usually happens in late summer or early fall.
2. Harvesting Process: Gently loosen the soil around the onions with a garden fork and pull them up by the tops.
3. Curing: After harvesting, cure the onions by laying them out in a single layer in a warm, dry, well-ventilated place for 2-3 weeks. This allows the outer layers to dry and toughen, which helps prevent rot during storage.
4. Storing: Once the onions are cured, store them in a cool, dry, dark place. Braiding the tops together and hanging them is a traditional storage method. You can also store them in mesh bags or crates. Properly cured and stored onions can last for several months.
Troubleshooting
Even with the best care, you might encounter some challenges along the way. Here are a few common problems and how to address them:
* Small Bulbs: This could be due to insufficient sunlight, poor soil fertility, overcrowding, or bolting. Make sure your onions are getting enough sunlight, fertilize regularly, space them properly, and pinch off any flower stalks.
* Bolting: As mentioned earlier, bolting can be a problem with sets. Choose heat-tolerant varieties and pinch off flower stalks as soon as they appear.
* Pest Infestations: Regularly inspect your onions for pests and treat infestations promptly.
* Disease Problems: Ensure good air circulation and avoid overwatering to prevent fungal diseases.
Enjoying Your Homegrown Onions
Congratulations!
Conclusion
So, there you have it! Growing onions at home, while it might seem daunting at first, is surprisingly achievable and incredibly rewarding. We’ve walked you through the process, highlighting the key steps and offering tips to ensure your success. But why should you bother? Why dedicate precious garden space (or even a sunny windowsill) to cultivating your own onions?
The answer is multifaceted. Firstly, the flavor of homegrown onions is simply superior. They possess a freshness and vibrancy that you just can’t replicate with store-bought varieties. Imagine the satisfaction of adding a perfectly diced, sweet onion to your favorite salsa, knowing you nurtured it from a tiny seed or set. Secondly, growing your own onions allows you to control the entire process, from the soil composition to the pest control methods. This means you can ensure your onions are grown organically and free from harmful chemicals.
Beyond the flavor and control, there’s also the sheer joy of gardening. Watching those little green shoots emerge from the soil, tending to them, and finally harvesting your own crop is an incredibly fulfilling experience. It connects you to nature and provides a sense of accomplishment that’s hard to beat. Plus, let’s be honest, it’s a fantastic conversation starter!
But the benefits don’t stop there. By growing your own onions, you’re also contributing to a more sustainable lifestyle. You’re reducing your reliance on commercially grown produce, which often travels long distances and contributes to carbon emissions. You’re also minimizing your use of plastic packaging, as you won’t need to buy onions wrapped in plastic from the grocery store.
Now, let’s talk about variations. While we’ve focused on a general approach to growing onions, there are plenty of ways to customize the process to suit your specific needs and preferences. For example, if you’re short on space, you can try growing onions in containers. Choose a large pot with good drainage and use a high-quality potting mix. You can even grow multiple onions in the same container, as long as you give them enough space to develop.
Another variation is to experiment with different types of onions. There are countless varieties to choose from, each with its own unique flavor and characteristics. Some popular options include yellow onions, red onions, white onions, and sweet onions. You can also try growing shallots or scallions, which are closely related to onions and offer a similar flavor profile.
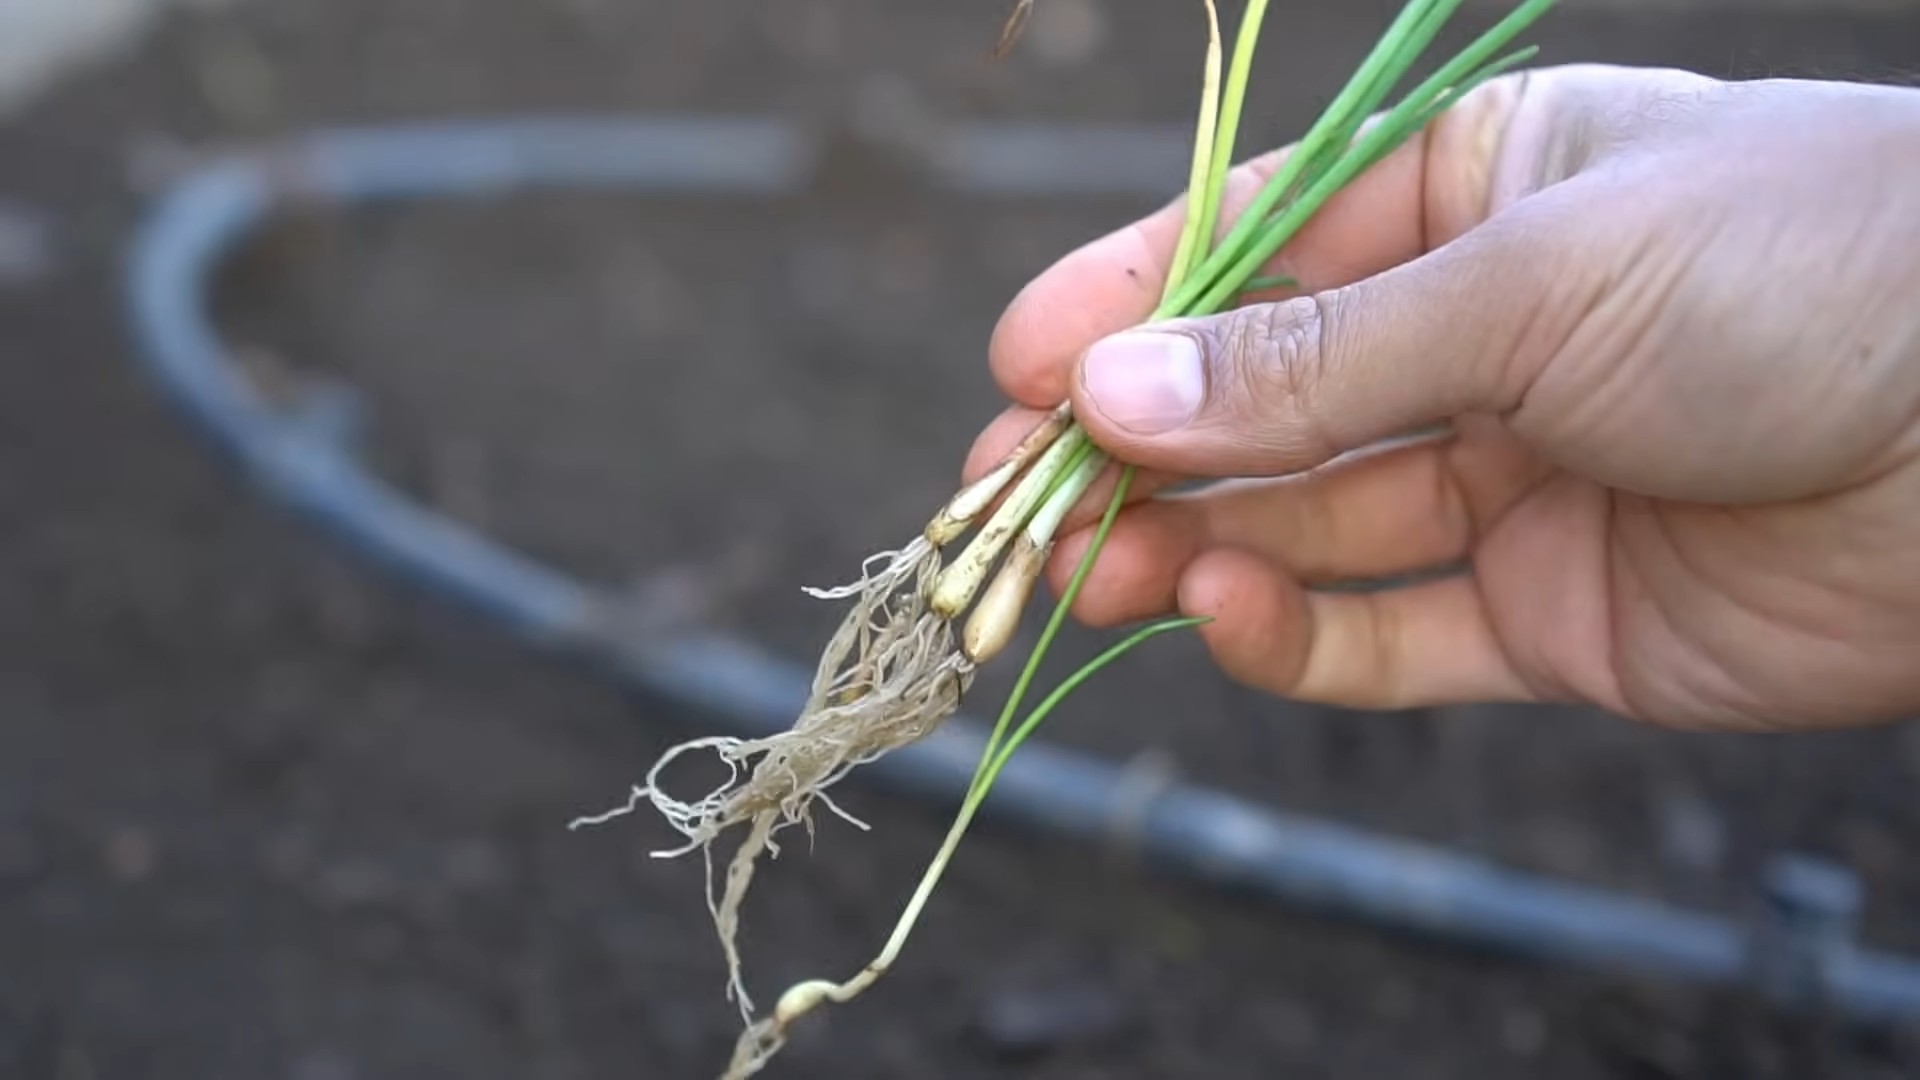
Consider exploring different planting methods as well. While we discussed starting from seeds and sets, you can also try growing onions from scraps. Simply take the root end of an onion and plant it in soil. With a little care, it will start to sprout and produce new onions. This is a great way to reduce food waste and get a free supply of onions.
Finally, don’t be afraid to experiment with different growing conditions. Onions thrive in full sun, but they can also tolerate partial shade. They prefer well-drained soil, but they can also adapt to different soil types. The key is to monitor your onions closely and adjust your growing practices as needed.
Growing onions at home is more than just a gardening project; it’s an investment in your health, your taste buds, and the environment. It’s a chance to connect with nature, learn new skills, and enjoy the satisfaction of harvesting your own food.
So, what are you waiting for? Grab some seeds or sets, find a sunny spot in your garden (or a suitable container), and get started! We’re confident that you’ll be amazed by the results. And once you’ve harvested your first crop of homegrown onions, be sure to share your experience with us. We’d love to hear your tips, tricks, and success stories. Share your photos and stories on social media using [Your Hashtag] and let’s inspire others to join the homegrown onion revolution! Happy gardening!
Frequently Asked Questions (FAQ)
What is the best time of year to plant onions?
The timing for planting onions depends largely on your climate and the type of onion you’re growing. In general, onions are classified as either long-day or short-day varieties. Long-day onions need 14-16 hours of daylight to form bulbs and are best suited for northern climates. They should be planted in early spring, as soon as the ground can be worked. Short-day onions, on the other hand, need 10-12 hours of daylight and are better suited for southern climates. They should be planted in the fall or early winter. If you live in a climate with mild winters, you can even plant short-day onions in late summer for a winter harvest. To determine which type of onion is best for your area, consult your local garden center or agricultural extension office. They can provide specific recommendations based on your region’s climate and growing conditions.
How much sun do onions need?
Onions are sun-loving plants and require at least 6-8 hours of direct sunlight per day to thrive. The more sun they receive, the larger and more flavorful the bulbs will be. If you’re growing onions indoors, place them near a south-facing window where they can get plenty of light. You may also need to supplement with artificial light, especially during the winter months. If you’re growing onions outdoors, choose a location that receives full sun throughout the day. Avoid planting them in areas that are shaded by trees or buildings. If you live in a particularly hot climate, you may want to provide some afternoon shade to prevent the onions from scorching.
What kind of soil is best for growing onions?
Onions prefer well-drained, fertile soil that is rich in organic matter. The ideal soil pH is between 6.0 and 7.0. Before planting, amend the soil with compost, aged manure, or other organic matter to improve its drainage and fertility. If your soil is heavy clay, you may need to add sand or other amendments to improve its drainage. You can also grow onions in raised beds or containers filled with a high-quality potting mix. Avoid using soil that is compacted or poorly drained, as this can lead to root rot and other problems.
How often should I water my onions?
Onions need consistent moisture to thrive, especially during bulb formation. Water them deeply whenever the top inch of soil feels dry to the touch. Avoid overwatering, as this can lead to root rot. During hot, dry weather, you may need to water your onions more frequently. A good rule of thumb is to water them every 2-3 days, or more often if the soil dries out quickly. When watering, be sure to soak the entire root zone. You can also use a soaker hose or drip irrigation system to provide consistent moisture to your onions.
How do I fertilize my onions?
Onions are heavy feeders and require regular fertilization to produce large, healthy bulbs. Before planting, incorporate a slow-release fertilizer into the soil. Look for a fertilizer that is high in phosphorus and potassium, which are essential for bulb development. After planting, fertilize your onions every 2-3 weeks with a liquid fertilizer. You can also side-dress them with compost or aged manure. Avoid using fertilizers that are high in nitrogen, as this can promote leafy growth at the expense of bulb development.
What are some common pests and diseases that affect onions?
Onions are susceptible to a variety of pests and diseases, including onion maggots, thrips, and fungal diseases like downy mildew and onion smut. To prevent pest and disease problems, practice good garden hygiene. Remove any weeds or debris from around your onions, and avoid overcrowding them. You can also use row covers to protect your onions from pests. If you notice any signs of pests or diseases, treat them promptly with an appropriate insecticide or fungicide. Organic options include neem oil, insecticidal soap, and copper fungicide.
How do I know when my onions are ready to harvest?
Onions are typically ready to harvest when the tops begin to fall over and turn yellow or brown. This usually happens in late summer or early fall, depending on the variety and your climate. Once the tops have fallen over, stop watering the onions and allow them to dry out in the ground for a few days. Then, carefully dig them up and cure them in a warm, dry place for 2-3 weeks. Curing helps to harden the outer layers of the bulbs and prevents them from rotting during storage.
How do I store my homegrown onions?
Proper storage is essential for preserving the flavor and quality of your homegrown onions. After curing, store them in a cool, dry, and well-ventilated place. A temperature between 32°F and 40°F is ideal. You can store onions in mesh bags, crates, or even old pantyhose. Hang them in a cool, dark place, such as a basement or garage. Avoid storing onions near potatoes, as they can cause each other to spoil more quickly. Properly stored onions can last for several months.
Can I grow onions from scraps?
Yes, you can absolutely grow onions from scraps! This is a great way to reduce food waste and get a free supply of onions. To grow onions from scraps, simply take the root end of an onion and plant it in soil. Make sure the root end is facing down and the top is slightly exposed. Water the onion scrap regularly and keep the soil moist. Within a few weeks, it will start to sprout and produce new onions. You can also grow scallions from scraps by placing the
Leave a Comment