
Grow More Kailan Leaves and unlock the secrets to a thriving, bountiful garden right outside your door! Have you ever dreamt of harvesting platefuls of vibrant, nutritious Kailan, ready to add a delicious and healthy boost to your meals? I know I have! But sometimes, it feels like our leafy greens are teasing us, offering just a few leaves here and there.
For centuries, cultivating leafy greens like Kailan has been a cornerstone of healthy diets across various cultures, particularly in Asian cuisine. From stir-fries to soups, Kailan’s versatility and nutritional value have made it a beloved staple. But what if I told you that you could dramatically increase your Kailan harvest with a few simple, DIY tricks?
That’s right! This article is packed with easy-to-follow hacks and techniques that will help you grow more Kailan leaves than you ever thought possible. We’ll delve into everything from soil preparation and watering strategies to pest control and harvesting methods. Whether you’re a seasoned gardener or just starting out, these tips will empower you to maximize your yield and enjoy a continuous supply of fresh, homegrown Kailan. Say goodbye to sparse harvests and hello to a flourishing Kailan patch!
Grow More Kailan Leaves: A DIY Guide to Bountiful Harvests
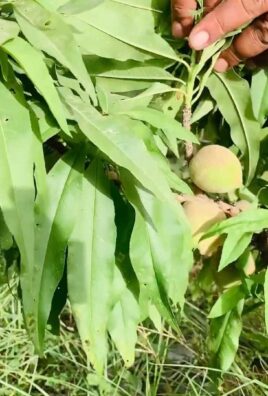
Hey there, fellow gardening enthusiasts! I’m so excited to share my secrets to growing an abundance of kailan leaves. Kailan, also known as Chinese kale, is a nutritional powerhouse and a delicious addition to stir-fries, soups, and even salads. Trust me, once you taste homegrown kailan, you’ll never want to go back to store-bought! This guide will walk you through every step, from seed to harvest, ensuring you have a thriving kailan patch.
Choosing the Right Kailan Variety
Before we dive into the nitty-gritty, let’s talk about kailan varieties. While most kailan looks similar, there are subtle differences in leaf shape, size, and taste. I personally prefer the standard variety for its robust flavor and ease of growth, but feel free to experiment!
* Standard Kailan: The most common type, known for its large, slightly ruffled leaves.
* Chinese Broccoli (Gai Lan): Closely related to kailan, with thicker stems and smaller leaves.
* Baby Kailan: Harvested when young and tender, perfect for salads.
Getting Started: Seeds vs. Seedlings
You have two options for starting your kailan journey: seeds or seedlings. Seeds are more economical, but seedlings give you a head start. I’ve had success with both, so it really comes down to personal preference.
* Seeds: Sow seeds directly into the garden or start them indoors for an earlier harvest.
* Seedlings: Purchase seedlings from a local nursery and transplant them into your garden.
Preparing the Soil: The Foundation for Success
Kailan thrives in well-drained, fertile soil. Before planting, it’s crucial to amend your soil with organic matter. This will improve drainage, aeration, and nutrient content.
* Soil pH: Kailan prefers a slightly acidic to neutral soil pH (6.0-7.0).
* Organic Matter: Incorporate compost, well-rotted manure, or other organic matter into the soil.
* Drainage: Ensure the soil drains well to prevent root rot.
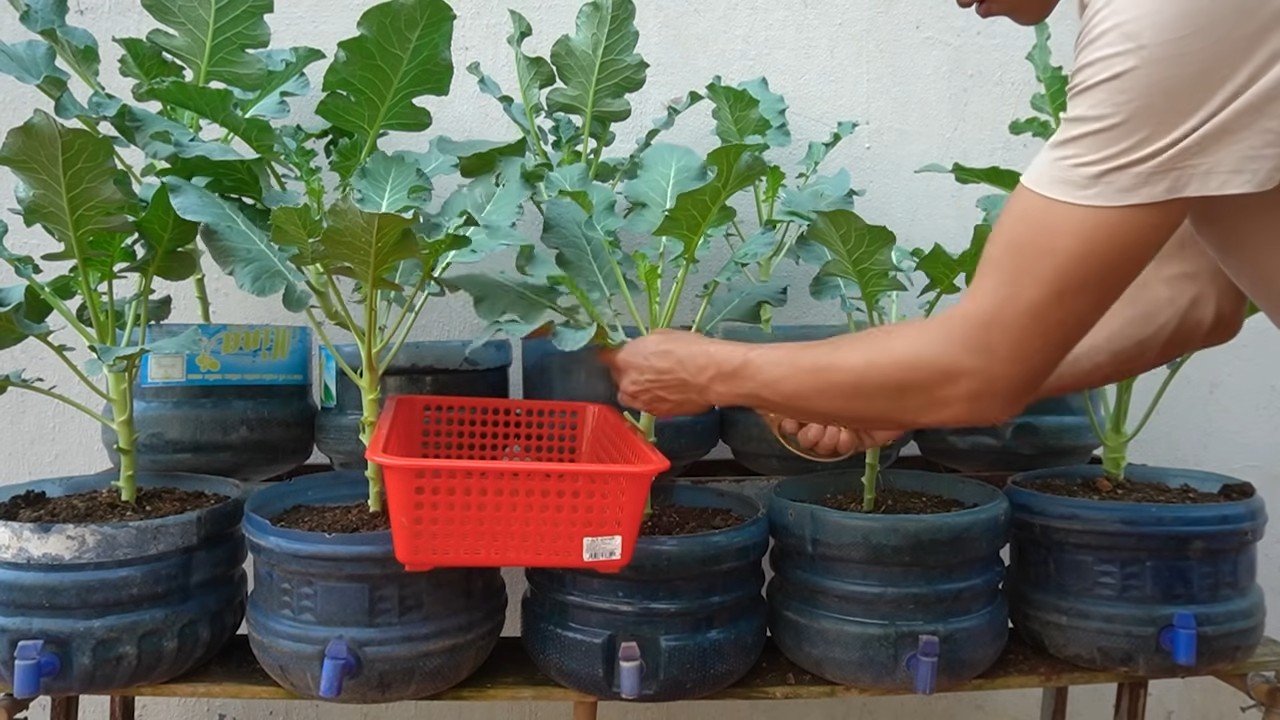
Planting Your Kailan: Giving Them Room to Grow
Whether you’re starting from seeds or seedlings, proper spacing is essential for healthy kailan plants. Overcrowding can lead to stunted growth and increased susceptibility to pests and diseases.
* Seed Spacing: Sow seeds about 1/2 inch deep and 1-2 inches apart.
* Seedling Spacing: Space seedlings 12-18 inches apart in rows that are 24-36 inches apart.
* Sunlight: Kailan needs at least 6 hours of sunlight per day.
Watering and Feeding: Keeping Your Kailan Happy
Consistent watering and regular feeding are crucial for maximizing your kailan harvest. Kailan is a heavy feeder, so it needs plenty of nutrients to produce those delicious leaves.
* Watering: Water deeply and regularly, especially during dry periods. Aim for about 1 inch of water per week.
* Fertilizing: Fertilize every 2-3 weeks with a balanced organic fertilizer. I like to use fish emulsion or compost tea.
* Mulching: Apply a layer of mulch around your kailan plants to help retain moisture and suppress weeds.
Dealing with Pests and Diseases: Protecting Your Crop
Like all plants, kailan can be susceptible to pests and diseases. Regular monitoring and preventative measures can help keep your plants healthy and productive.
* Common Pests: Aphids, cabbage worms, flea beetles, and slugs.
* Common Diseases: Black rot, clubroot, and downy mildew.
* Pest Control: Use organic pest control methods, such as insecticidal soap, neem oil, or handpicking.
* Disease Prevention: Ensure good air circulation, avoid overhead watering, and remove any infected leaves promptly.
Harvesting Your Kailan: The Moment of Truth
The best part of growing kailan is, of course, the harvest! You can start harvesting leaves when they are about 6-8 inches long.
* Harvesting Technique: Harvest outer leaves first, leaving the inner leaves to continue growing.
* Harvesting Frequency: Harvest regularly to encourage continued leaf production.
* Storage: Store kailan leaves in the refrigerator for up to a week.
Step-by-Step Instructions: From Seed to Table
Okay, let’s get down to the specifics! Here’s a detailed, step-by-step guide to growing your own kailan.
Phase 1: Starting from Seeds (Indoor or Outdoor)
1. Choose Your Method: Decide whether you want to start your seeds indoors or directly in the garden. Starting indoors gives you a head start, especially in cooler climates.
2. Prepare Your Seed Starting Mix (If Starting Indoors): Use a seed starting mix that’s light and well-draining. I like to mix equal parts peat moss, perlite, and vermiculite.
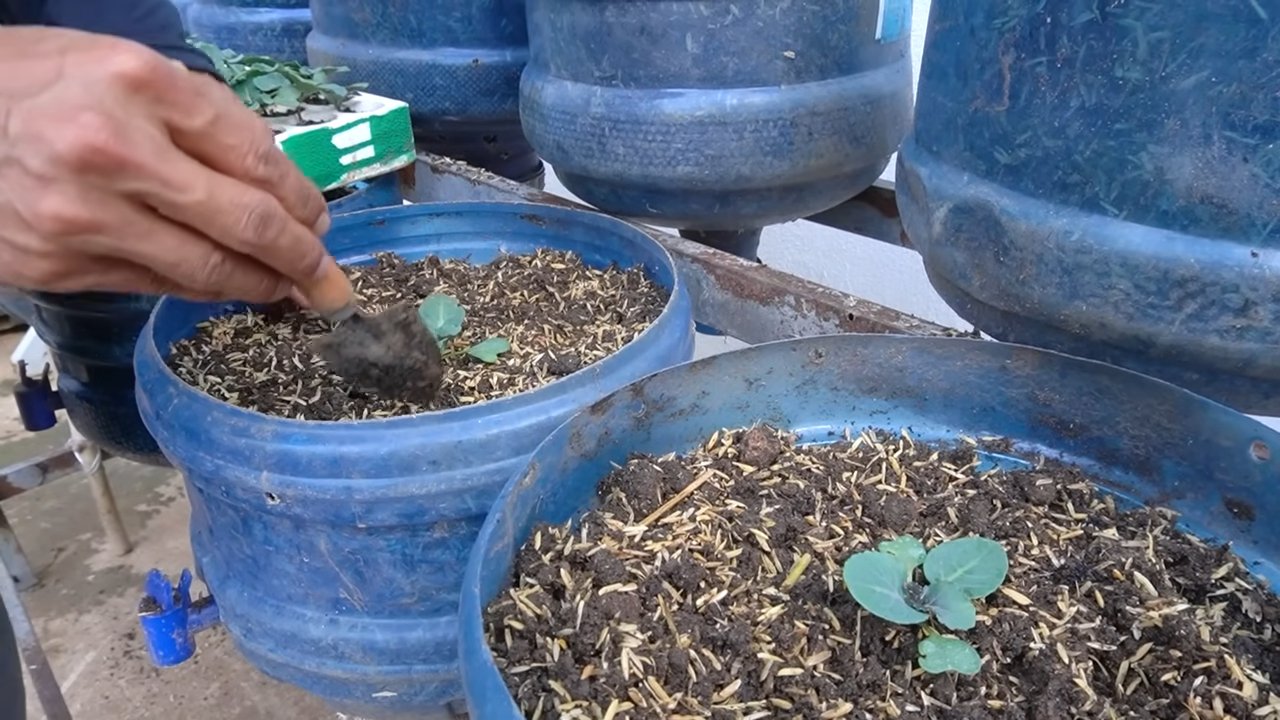
3. Sow Your Seeds: Sow seeds about 1/2 inch deep in seed trays or small pots (if starting indoors) or directly in the garden (if starting outdoors).
4. Water Gently: Water the soil gently to avoid disturbing the seeds.
5. Provide Light (If Starting Indoors): Place the seed trays under grow lights or in a sunny window.
6. Keep the Soil Moist: Keep the soil consistently moist, but not waterlogged.
7. Thin Seedlings (If Necessary): Once the seedlings have their first true leaves, thin them out so that only the strongest seedling remains in each pot or space.
8. Harden Off Seedlings (If Starting Indoors): Before transplanting your seedlings outdoors, you need to “harden them off.” This means gradually exposing them to outdoor conditions over a period of 7-10 days. Start by placing them in a sheltered spot for a few hours each day, gradually increasing the amount of time they spend outdoors.
Phase 2: Preparing the Garden Bed
1. Choose a Sunny Location: Select a location in your garden that receives at least 6 hours of sunlight per day.
2. Clear the Area: Remove any weeds, rocks, or debris from the planting area.
3. Amend the Soil: Dig in plenty of compost, well-rotted manure, or other organic matter to improve soil fertility and drainage.
4. Test the Soil pH (Optional): If you’re concerned about your soil pH, you can test it using a soil testing kit. Adjust the pH as needed to achieve a range of 6.0-7.0.
5. Rake the Soil Smooth: Rake the soil smooth to create a level planting surface.
Phase 3: Transplanting Seedlings or Direct Sowing
1. Transplant Seedlings (If Starting Indoors): Gently remove the seedlings from their pots and plant them in the garden, spacing them 12-18 inches apart in rows that are 24-36 inches apart.
2. Direct Sow Seeds (If Starting Outdoors): Sow seeds about 1/2 inch deep and 1-2 inches apart. Thin seedlings to 12-18 inches apart once they have their first true leaves.
3. Water Thoroughly: Water the newly transplanted seedlings or direct-sown seeds thoroughly.
Phase 4: Ongoing Care and Maintenance
1. Water Regularly: Water deeply and regularly, especially during dry periods. Aim for about 1 inch of water per week.
2. Fertilize Regularly: Fertilize every 2-3 weeks with a balanced organic fertilizer.
3. Weed Regularly: Keep the garden bed free of weeds, which can compete with your kailan plants for nutrients and water.
4. Monitor for Pests and Diseases: Regularly inspect your kailan plants for signs of pests or diseases. Take action promptly to prevent problems from escalating.
5. Mulch: Apply a layer of mulch around your kailan plants to help retain moisture, suppress weeds, and regulate soil temperature.
Phase 5: Harvesting and Enjoying Your Kailan
1. Harvest Outer Leaves: When the outer leaves are about 6-8 inches long, you can start harvesting them.
2. Harvest Regularly: Harvest regularly to encourage continued leaf production.
3. Store Properly: Store kailan leaves in the refrigerator for up to a week.
4. Enjoy Your Harvest: Use your homegrown kailan in stir-fries, soups, salads, or any other dish you like!
Troubleshooting Common Problems
Even with the best care, you might encounter some challenges along the way. Here are some common problems and how to address them:
*
Conclusion
So, there you have it! Growing more kailan leaves at home is not only achievable but also incredibly rewarding. This simple DIY trick transforms your kailan growing experience from a frustrating wait to a bountiful harvest. We’ve walked you through the steps, highlighting the ease and cost-effectiveness of this method. Forget relying solely on store-bought kailan; imagine stepping into your garden and harvesting fresh, vibrant leaves whenever you need them.
The beauty of this technique lies in its adaptability. Feel free to experiment with different types of fertilizers, adjusting the concentration based on your plant’s needs and your local climate. Consider companion planting with herbs like basil or mint to naturally deter pests and enhance the flavor of your kailan. You can even try this method with other leafy greens like bok choy or choy sum, adapting the watering schedule as needed.
This isn’t just about saving money; it’s about connecting with your food, understanding the growing process, and enjoying the unparalleled taste of homegrown produce. The satisfaction of nurturing a plant from a small seedling to a thriving source of delicious, nutritious leaves is truly unmatched. Plus, you’ll be reducing your carbon footprint by minimizing your reliance on commercially grown and transported vegetables.
We firmly believe that this DIY trick for growing more kailan leaves is a game-changer for any home gardener, regardless of experience level. It’s a sustainable, economical, and incredibly satisfying way to enjoy fresh, healthy greens.
Don’t just take our word for it – give it a try! We’re confident that you’ll be amazed by the results. Once you’ve experienced the joy of harvesting your own abundant kailan leaves, we encourage you to share your experience with us. Post photos of your thriving kailan plants on social media using #HomegrownKailan or leave a comment below sharing your tips and tricks. Let’s build a community of kailan enthusiasts and inspire others to embrace the joys of home gardening! Let us know if you have any questions, we are here to help you succeed in your gardening journey.
Frequently Asked Questions (FAQ)
What exactly is kailan and why should I grow it?
Kailan, also known as Chinese kale or Chinese broccoli, is a leafy green vegetable similar to broccoli but with larger, flatter leaves and thicker stems. It’s packed with vitamins A, C, and K, as well as fiber and antioxidants. Growing your own kailan ensures you have access to fresh, nutritious greens that are free from pesticides and herbicides. Plus, it tastes much better than store-bought kailan that may have been sitting on shelves for days!
How often should I water my kailan plants?
Watering frequency depends on your climate and soil type. Generally, kailan needs consistent moisture, especially during hot weather. Aim to water deeply whenever the top inch of soil feels dry to the touch. Avoid overwatering, as this can lead to root rot. A good rule of thumb is to water every 2-3 days, but adjust as needed based on your local conditions. Mulching around the plants can help retain moisture and reduce the need for frequent watering.
What kind of fertilizer should I use for kailan?
Kailan benefits from a nitrogen-rich fertilizer to promote leafy growth. You can use a balanced fertilizer (e.g., 10-10-10) or a fertilizer specifically formulated for leafy greens. Organic options like compost tea, fish emulsion, or aged manure are also excellent choices. Apply fertilizer according to the package instructions, typically every 2-4 weeks during the growing season. Be careful not to over-fertilize, as this can burn the roots and damage the plants.
How do I protect my kailan plants from pests?
Common pests that attack kailan include aphids, cabbage worms, and flea beetles. To protect your plants, consider using row covers to physically exclude pests. You can also spray your plants with insecticidal soap or neem oil, following the product instructions carefully. Companion planting with herbs like basil or rosemary can also help deter pests naturally. Regularly inspect your plants for signs of infestation and take action promptly to prevent widespread damage.
When is the best time to harvest kailan leaves?
You can start harvesting kailan leaves when they are about 6-8 inches long. Harvest the outer leaves first, leaving the inner leaves to continue growing. This cut-and-come-again method allows you to harvest kailan continuously over a long period. Avoid harvesting more than one-third of the plant at a time to ensure it continues to thrive. The best time to harvest is in the morning, when the leaves are crisp and hydrated.
Can I grow kailan in containers?
Yes, kailan can be successfully grown in containers. Choose a container that is at least 12 inches deep and wide to provide enough room for the roots to grow. Use a well-draining potting mix and ensure the container has drainage holes. Place the container in a sunny location that receives at least 6 hours of sunlight per day. Water regularly and fertilize as needed. Container-grown kailan may require more frequent watering and fertilization than kailan grown in the ground.
What are some delicious ways to cook kailan?
Kailan is a versatile vegetable that can be cooked in many different ways. It can be steamed, stir-fried, sautéed, or added to soups and stews. Popular dishes include stir-fried kailan with garlic and oyster sauce, steamed kailan with ginger and soy sauce, and kailan soup with pork or chicken. You can also add kailan to smoothies or salads for a nutritional boost. The stems of kailan are also edible and can be cooked similarly to broccoli stems.
How do I store harvested kailan leaves?
To store harvested kailan leaves, wash them thoroughly and pat them dry. Wrap the leaves in a damp paper towel and place them in a plastic bag or container in the refrigerator. Stored properly, kailan leaves can last for up to a week. Avoid storing kailan near ethylene-producing fruits like apples or bananas, as this can cause the leaves to yellow and spoil more quickly.
What if my kailan plants start to bolt (flower)?
Bolting occurs when kailan plants are exposed to high temperatures or stress. Once a plant bolts, the leaves become bitter and less palatable. To prevent bolting, try to grow kailan during cooler months or provide shade during hot weather. Water regularly and fertilize as needed to keep the plants healthy and stress-free. If your kailan plants do bolt, you can still harvest the leaves, but be aware that they may have a slightly bitter taste.
Is growing more kailan leaves really worth the effort?
Absolutely! The taste of fresh, homegrown kailan is far superior to store-bought varieties. You’ll also have the satisfaction of knowing exactly where your food comes from and that it’s free from harmful chemicals. Plus, growing your own kailan is a sustainable and cost-effective way to enjoy this nutritious vegetable. Once you experience the joy of harvesting your own abundant kailan leaves, you’ll never want to go back to buying them at the store!
Leave a Comment