
Grow Melons Easily? Absolutely! Imagine biting into a juicy, sun-ripened melon you nurtured from a tiny seed right in your own backyard. Sounds dreamy, right? Well, it doesn’t have to be just a dream! For centuries, melons have been cultivated across the globe, from the ancient Egyptians who revered them as offerings to the gods, to the vibrant markets of Asia where they symbolize prosperity and good fortune.
But let’s be honest, the thought of growing these sweet treats can be a little intimidating. Maybe you’ve tried before and ended up with something… less than spectacular. Or perhaps you’re just convinced you don’t have the “green thumb” required. That’s where these DIY tricks and hacks come in! I’m here to show you that growing delicious melons is totally achievable, even if you’re a beginner gardener.
This article is packed with simple, effective techniques to help you grow melons easily, regardless of your space or experience. We’ll cover everything from choosing the right varieties for your climate to creating the perfect soil conditions and warding off pesky pests. So, ditch the store-bought melons and get ready to enjoy the unparalleled satisfaction of harvesting your own homegrown goodness. Let’s get growing!
DIY: Grow Delicious Melons Like a Pro (Even in a Small Space!)
Okay, so you want to grow melons? Awesome! I’m here to tell you it’s totally doable, even if you don’t have acres of farmland. I’ve had success growing juicy melons in my backyard using a few simple tricks, and I’m excited to share them with you. We’re going to focus on a method that maximizes space and yield, perfect for the home gardener.
Choosing the Right Melon Variety
Before we even think about digging, let’s talk melons. Not all melons are created equal, and some are definitely better suited for smaller gardens or specific climates.
* Consider your climate: Different melons thrive in different climates. Watermelons generally need long, hot summers. Cantaloupes are a bit more forgiving, and honeydews fall somewhere in between. Do a little research on what grows well in your area. Your local nursery is a great resource!
* Think about size: Some watermelon varieties can get HUGE. If you’re short on space, opt for smaller “icebox” watermelons like Sugar Baby or personal-sized cantaloupes.
* Disease resistance: Look for varieties that are resistant to common melon diseases in your area. This will save you a lot of headaches down the road.
* Days to maturity: This is the number of days from planting to harvest. If you have a short growing season, choose varieties with a shorter maturity time.
I personally love growing Sugar Baby watermelons and Athena cantaloupes. They’re both relatively compact and produce delicious fruit.
Preparing Your Melon Patch
Melons are hungry plants, so soil preparation is key. Think of it as building a gourmet restaurant for your melon vines!
* Sunlight is crucial: Melons need at least 6-8 hours of direct sunlight per day. Choose a spot in your garden that gets plenty of sun.
* Well-drained soil is a must: Melons hate soggy feet! Make sure your soil drains well. If you have heavy clay soil, amend it with plenty of organic matter like compost or aged manure.
* Soil pH: Melons prefer a slightly acidic soil pH of around 6.0 to 6.8. You can test your soil pH with a simple soil testing kit.
* Amend, amend, amend!: This is where the magic happens. Dig in plenty of compost, aged manure, or other organic matter to enrich the soil. I like to add a slow-release fertilizer specifically formulated for vegetables as well.
Here’s my go-to soil preparation recipe:
1. Clear the area of any weeds or grass.
2. Dig a hole about 2 feet wide and 1 foot deep for each melon plant.
3. Mix the soil you removed with equal parts compost and aged manure.
4. Add a handful of slow-release fertilizer to each hole.
5. Refill the holes with the amended soil, creating a slight mound. This will help with drainage.
Starting Your Melon Seeds (or Buying Transplants)
You have two options here: start your own seeds indoors or buy transplants from a nursery. Starting your own seeds gives you more control over the varieties you grow, but it requires a bit more effort.
* Starting seeds indoors: Start your melon seeds indoors about 4-6 weeks before the last expected frost. Use seed starting trays or small pots filled with seed starting mix. Keep the soil moist but not soggy, and provide plenty of light. A heat mat can help speed up germination.
* Buying transplants: If you’re short on time or space, buying transplants is a great option. Choose healthy-looking plants with sturdy stems and no signs of disease.
Here’s how I start my melon seeds indoors:
1. Fill seed starting trays with seed starting mix.
2. Plant 2-3 seeds per cell, about 1/2 inch deep.
3. Water gently and cover the trays with a clear plastic dome to create a humid environment.
4. Place the trays on a heat mat and under grow lights.
5. Once the seeds germinate, remove the plastic dome and thin the seedlings to one per cell.
6. Harden off the seedlings by gradually exposing them to outdoor conditions for a week before transplanting.
Transplanting Your Melon Seedlings (or Planting Transplants)
Once the danger of frost has passed and the soil has warmed up, it’s time to transplant your melon seedlings into the garden.
* Choose a warm, sunny day: Avoid transplanting on a cold or windy day.
* Water the seedlings well: This will help them adjust to their new environment.
* Dig a hole slightly larger than the root ball: Gently remove the seedling from its container and loosen the roots.
* Plant the seedling at the same depth it was growing in the container: Backfill the hole with soil and gently firm it around the plant.
* Water thoroughly: Give the newly transplanted seedlings a good watering.
* Mulch around the plants: Mulch helps retain moisture, suppress weeds, and regulate soil temperature. I like to use straw or shredded leaves.
Here’s my transplanting process:
1. Water the seedlings thoroughly a few hours before transplanting.
2. Dig a hole in the prepared soil, slightly larger than the root ball of the seedling.
3. Gently remove the seedling from its container, being careful not to damage the roots.
4. Loosen the roots slightly with your fingers.
5. Place the seedling in the hole, ensuring that the top of the root ball is level with the surrounding soil.
6. Backfill the hole with soil, gently firming it around the plant.
7. Water thoroughly.
8. Apply a layer of mulch around the plant.
Training Your Melon Vines (Vertical Gardening!)
This is where the “small space” magic happens. Melons are naturally sprawling plants, but you can train them to grow vertically on a trellis or fence. This saves space, improves air circulation, and makes harvesting easier.
* Choose a sturdy trellis or fence: Melons can get heavy, so make sure your support structure is strong enough to handle the weight.
* Train the vines early: As the vines grow, gently guide them up the trellis or fence. You can use plant ties or twine to secure them.
* Support the fruit: As the melons develop, they may need extra support. You can use slings made from pantyhose or netting to support the fruit and prevent it from breaking off the vine.
Here’s how I train my melon vines vertically:
1. Install a sturdy trellis or fence near the melon plants.
2. As the vines grow, gently guide them up the trellis or fence.
3. Use plant ties or twine to secure the vines to the support structure.
4. Once the melons start to develop, create slings from pantyhose or netting to support the fruit.
5. Tie the slings to the trellis or fence, ensuring that the melons are well-supported.
Watering and Fertilizing Your Melons
Melons need consistent watering and feeding to produce juicy, delicious fruit.
* Water deeply and regularly: Water deeply at the base of the plants, avoiding wetting the foliage. Water early in the morning to allow the foliage to dry before nightfall.
* Fertilize regularly: Feed your melon plants with a balanced fertilizer every 2-3 weeks. You can also use a liquid seaweed fertilizer for an extra boost.
* Watch out for pests and diseases: Keep an eye out for common melon pests like aphids, squash bugs, and cucumber beetles. Treat any infestations promptly. Also, be aware of common melon diseases like powdery mildew and fusarium wilt.
My watering and fertilizing routine:
1. Water deeply at the base of the plants every 2-3 days, or more often during hot, dry weather.
2. Fertilize with a balanced fertilizer every 2-3 weeks.
3. Apply a liquid seaweed fertilizer every 2 weeks.
4. Inspect the plants regularly for pests and diseases.
5. Treat any infestations or diseases promptly with appropriate organic or chemical controls.
Pollinating Your Melons (If Necessary)
Most melon varieties are pollinated by bees, but sometimes you may need to hand-pollinate them, especially if you’re growing them indoors or in an area with few pollinators.
* Identify the male and female flowers: Male flowers have a long, thin stem, while female flowers have a small, immature melon at the base.
* Hand-pollinate in the morning: Use a small paintbrush to collect pollen from the male flower and transfer it to the female flower.
* Repeat for several days: Hand-pollinate several female flowers to increase your chances of success.
Here’s how I hand-pollinate my melons:
1. Identify the male and female flowers.
2.

Conclusion
So, there you have it! Growing melons, often perceived as a challenging feat reserved for seasoned gardeners, can be surprisingly accessible with this simple, yet effective DIY trick. We’ve unveiled a method that not only simplifies the process but also significantly boosts your chances of a bountiful harvest. Forget the complicated setups and expensive equipment; this approach focuses on maximizing the natural potential of your melon plants, leading to sweeter, juicier, and more abundant fruits.
Why is this DIY trick a must-try? Because it addresses the core needs of melon plants in a straightforward and efficient manner. By providing enhanced drainage, improved soil warmth, and targeted nutrient delivery, you’re creating an optimal environment for robust growth and fruit development. This translates to healthier plants that are more resistant to pests and diseases, ultimately resulting in a more rewarding gardening experience.
But the beauty of this method lies in its adaptability. Feel free to experiment with variations to suit your specific needs and preferences. For instance, if you live in a particularly hot climate, consider using lighter-colored materials for your DIY melon supports to prevent overheating. You could also incorporate companion planting techniques, such as planting basil or marigolds near your melon plants, to deter pests naturally. Another variation could involve using different types of organic matter in your soil mix, such as composted manure or worm castings, to further enrich the soil and provide essential nutrients. You can also try different types of melons, such as cantaloupe, watermelon, or honeydew, to see which ones thrive best in your garden. Remember to adjust the size of your DIY supports based on the expected size of the melon variety you choose.
Don’t be afraid to get creative and tailor this DIY melon growing trick to your unique gardening situation. The key is to understand the fundamental principles behind it and then adapt them to your specific environment and resources.
We are confident that this DIY trick will revolutionize your melon-growing endeavors. It’s a game-changer for both novice and experienced gardeners alike. It’s time to ditch the intimidation and embrace the joy of harvesting your own homegrown melons.
So, what are you waiting for? Gather your materials, prepare your garden, and get ready to witness the magic of this DIY trick firsthand. We encourage you to try this method and share your experiences with us! Let us know what worked best for you, what challenges you encountered, and any variations you discovered along the way. Your feedback will not only help us refine this technique but also inspire other gardeners to embark on their own melon-growing adventures. Share your photos, tips, and stories in the comments section below – we can’t wait to hear from you! Let’s cultivate a community of successful melon growers, one DIY trick at a time. Remember, growing melons easily is within your reach!
Frequently Asked Questions (FAQ)
What type of melons does this DIY trick work best for?
This DIY trick is generally effective for a wide variety of melon types, including cantaloupe, watermelon, honeydew, and even smaller varieties like Galia melons. However, the size and weight of the mature melon should be considered when constructing your support system. For larger watermelon varieties, you may need to reinforce the support structure to ensure it can handle the weight. Smaller melon varieties will require less robust supports. The key is to adapt the size and strength of the support to the specific melon variety you are growing.
How often should I water my melon plants when using this DIY trick?
Watering frequency depends on several factors, including your climate, soil type, and the stage of growth of your melon plants. Generally, you should aim to keep the soil consistently moist but not waterlogged. Check the soil moisture level regularly by inserting your finger about an inch deep into the soil. If it feels dry, it’s time to water. During hot and dry periods, you may need to water more frequently. When the melons are developing, consistent watering is crucial for optimal fruit size and sweetness. Consider using a soaker hose or drip irrigation system to deliver water directly to the roots, minimizing water loss through evaporation.
What type of soil is best for growing melons using this method?
Melons thrive in well-drained, fertile soil that is rich in organic matter. A slightly acidic to neutral pH (around 6.0 to 7.0) is ideal. Before planting, amend your soil with compost, well-rotted manure, or other organic materials to improve drainage, fertility, and water retention. Avoid heavy clay soils, as they can become waterlogged and hinder root development. If you have clay soil, consider adding sand or perlite to improve drainage. A good soil mix for melons would include equal parts garden soil, compost, and sand or perlite.
How do I protect my melons from pests and diseases when using this DIY trick?
Regularly inspect your melon plants for signs of pests or diseases. Common melon pests include aphids, squash bugs, and vine borers. Diseases can include powdery mildew, fusarium wilt, and anthracnose. Implement preventative measures such as crop rotation, companion planting (e.g., planting marigolds to deter pests), and using organic pest control methods like insecticidal soap or neem oil. Ensure good air circulation around your plants by spacing them adequately and pruning excess foliage. If you notice any signs of disease, remove affected leaves or plants immediately to prevent the spread. Consider using a fungicide if necessary, but always follow the instructions carefully.
Can I use this DIY trick in a container garden?
Yes, this DIY trick can be adapted for container gardening, especially for smaller melon varieties. Choose a large container with good drainage holes. The size of the container will depend on the melon variety you are growing. Use a high-quality potting mix that is well-draining and rich in organic matter. Provide a sturdy support structure that is appropriate for the size and weight of the melons. Water regularly and fertilize as needed. Place the container in a sunny location that receives at least 6-8 hours of sunlight per day.
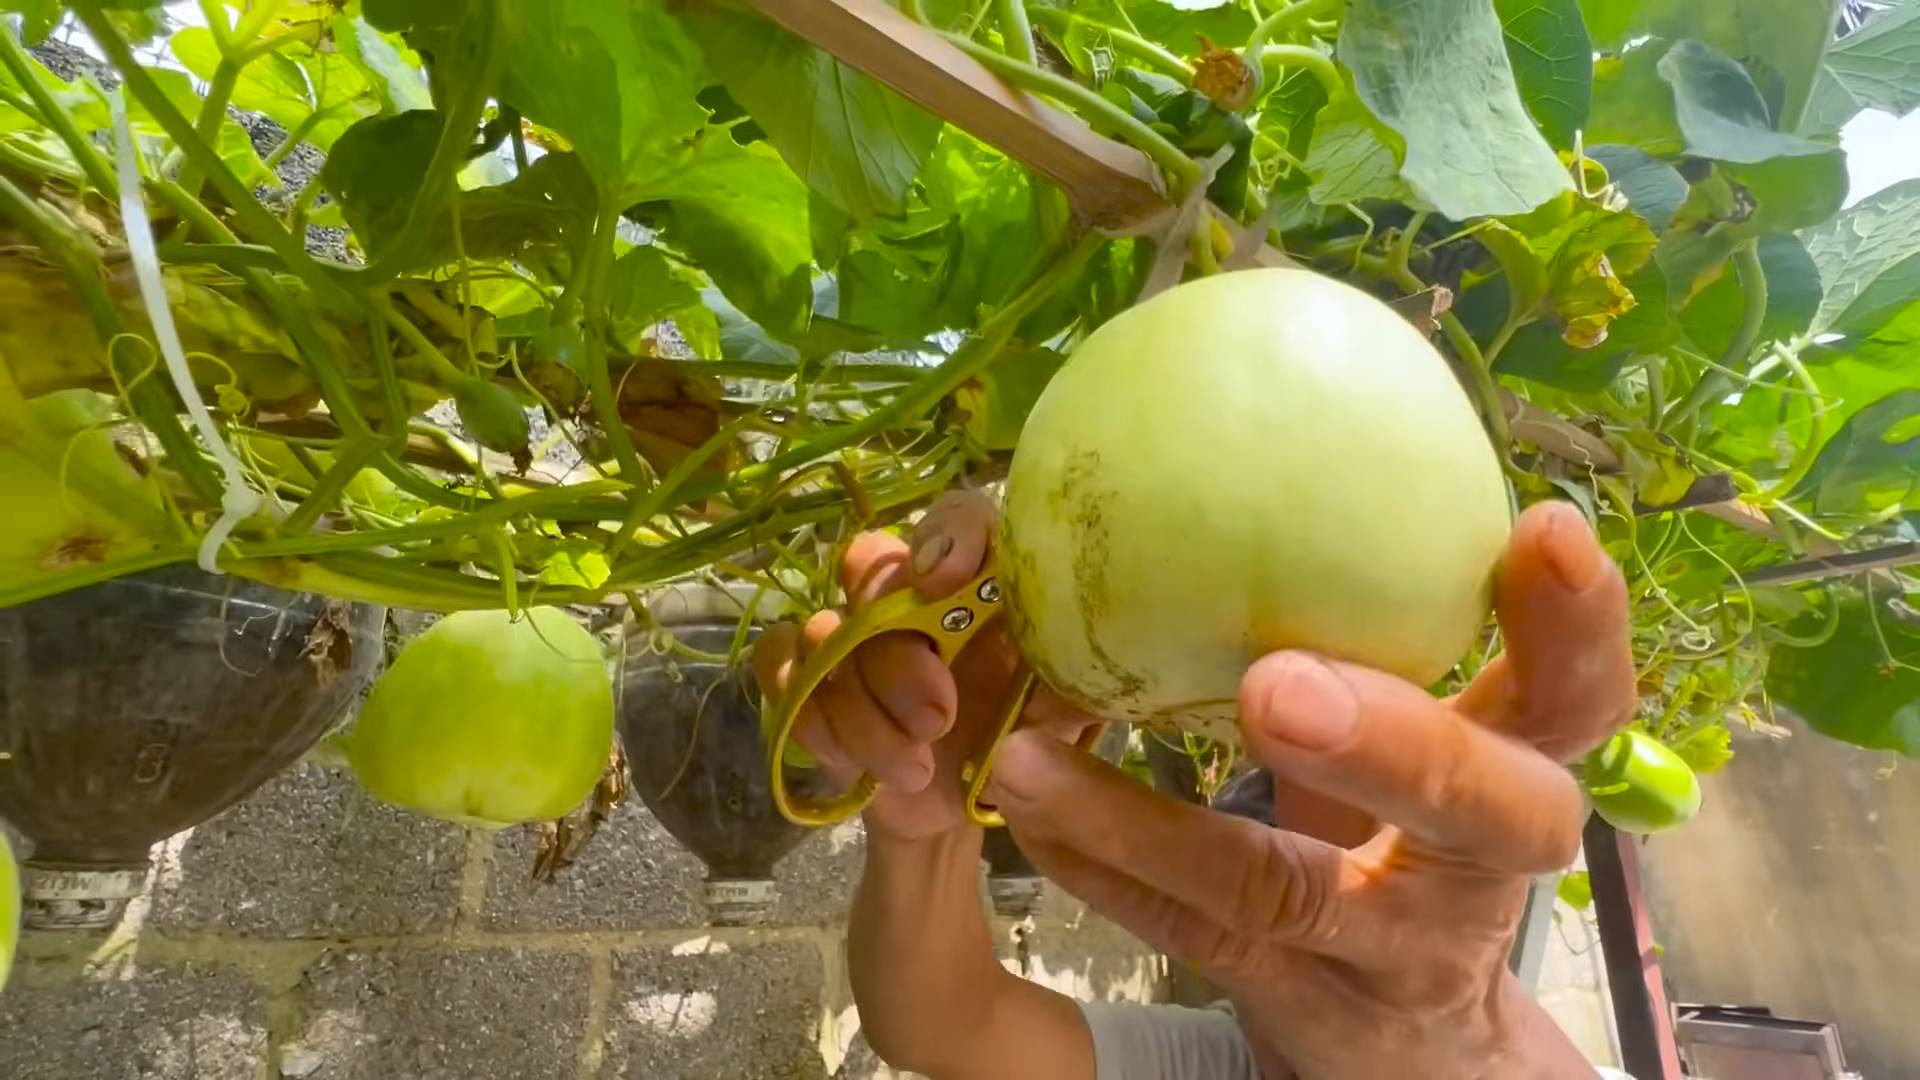
How do I know when my melons are ripe and ready to harvest?
Determining ripeness varies depending on the melon variety. For cantaloupe, look for a change in color from green to tan or yellow, a fragrant aroma, and a slight cracking around the stem. The stem should also slip easily from the vine with gentle pressure. For watermelon, look for a dull thud when you tap the melon, a yellow or creamy spot on the underside where it rested on the ground, and a dried tendril closest to the melon. Honeydew melons are ripe when they turn a creamy yellow color and have a slightly waxy feel. Always research the specific characteristics of your melon variety to ensure you harvest them at their peak ripeness.
What kind of fertilizer should I use for my melon plants?
Melons benefit from a balanced fertilizer during the early stages of growth, followed by a fertilizer higher in phosphorus and potassium during fruit development. A fertilizer with an NPK ratio of 10-10-10 is suitable for initial growth, while a fertilizer with an NPK ratio of 5-10-10 or 5-15-15 is better for fruit production. Avoid over-fertilizing with nitrogen, as this can promote excessive foliage growth at the expense of fruit development. Organic fertilizers, such as compost tea or fish emulsion, are also excellent options. Always follow the instructions on the fertilizer label and avoid applying fertilizer directly to the leaves, as this can cause burning.

Leave a Comment