
Grow Malabar Spinach Indoors? Absolutely! Imagine fresh, vibrant, and nutritious greens readily available right in your kitchen, no matter the season. Forget those bland, pre-packaged spinach options from the grocery store. With a few simple tricks, you can cultivate your own thriving Malabar spinach vine indoors, bringing a touch of the tropics to your home.
Malabar spinach, also known as Ceylon spinach or vine spinach, isn’t actually a true spinach. It’s a climbing vine with succulent leaves that have been enjoyed for centuries in Asian and African cuisines. Historically, it’s been valued not only for its delicious flavor but also for its medicinal properties. Now, you can easily bring this culinary and historical gem into your home.
Why should you learn to grow Malabar spinach indoors? Well, for starters, it’s incredibly rewarding! There’s nothing quite like harvesting your own food. Plus, it’s a fantastic way to add fresh, healthy greens to your diet, especially during colder months when outdoor gardening is limited. I’m going to share some easy-to-follow DIY tricks and hacks that will have you harvesting your own Malabar spinach in no time. Get ready to unleash your inner gardener and enjoy the delicious rewards!
Growing Malabar Spinach Indoors: Your Comprehensive DIY Guide
Hey plant friends! Have you ever heard of Malabar spinach? This climbing spinach is not only super delicious but also incredibly easy to grow, even indoors! I’ll show you how you can start your own Malabar spinach garden in your own four walls. Let’s get started!
What you need: Your Shopping List
Before we begin, here is a list of everything you’ll need for your indoor Malabar spinach project:
- Malabar spinach seeds: You can find them online or in well-stocked garden centers. Look for fresh seeds for a better germination rate.
- Seedling pots or trays: Small pots or trays with multiple cells are ideal for starting seeds.
- High-quality seed starting mix: This soil is loose and low in nutrients, perfect for germination.
- Larger pots (min. 15 liters): Once the seedlings are larger, they will need more space.
- All-purpose or vegetable soil: This soil is richer in nutrients and supports growth.
- Support/Trellis: Malabar spinach is a climber! So you will need a trellis, bamboo stakes, or a similar system.
- Spray bottle: For moistening the soil.
- Watering can: For watering the plants.
- Plant lamp (optional): If you don’t have enough sunlight.
- Liquid fertilizer for vegetables: To promote growth.
Phase 1: Starting the Seeds – How to Get the Seeds to Germinate
Starting the seeds is the first and most important step. Here I’ll show you how to get the seeds to germinate:
- Prepare the seeds: Malabar spinach seeds have a hard shell. To speed up germination, you can soak them in lukewarm water for 24 hours. This softens the shell.
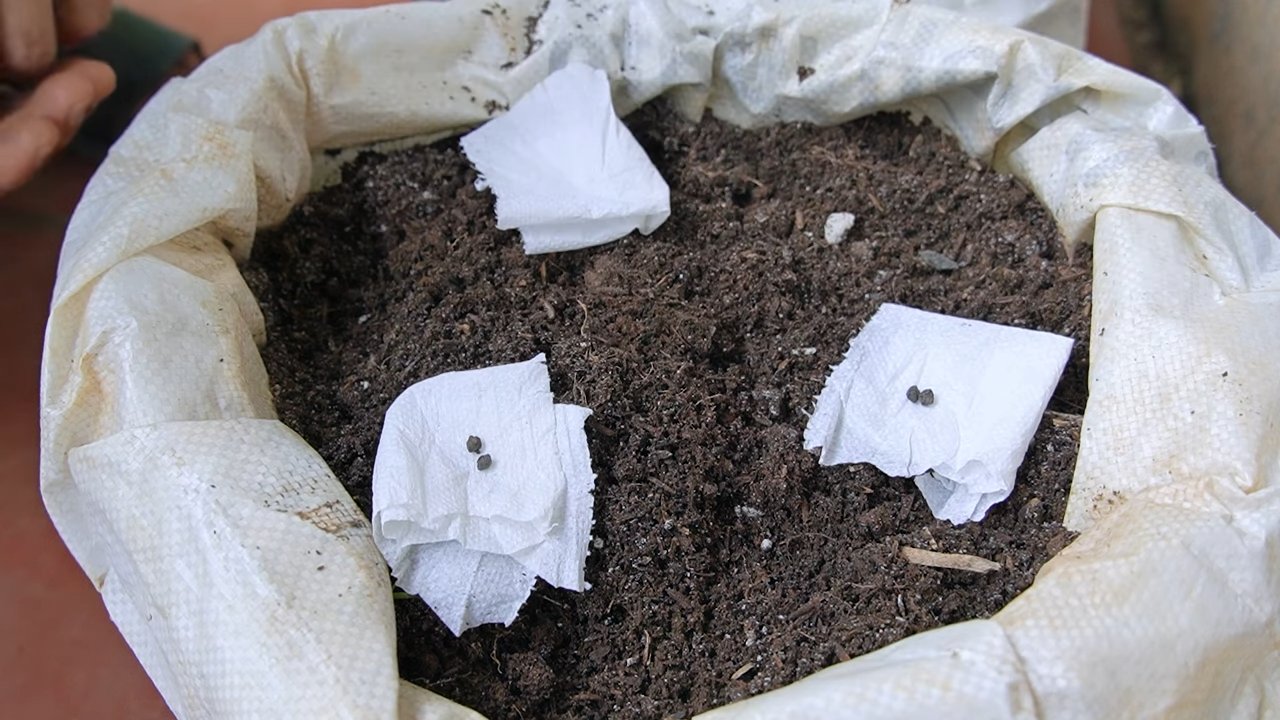
- Prepare the seedling pots: Fill the seedling pots or trays with seed starting mix. Press the soil down lightly.
- Sow the seeds: Place 2-3 seeds in each pot or cell. Cover them with about 1 cm of soil.
- Water: Moisten the soil carefully with a spray bottle. The soil should be damp, but not wet.
- Location: Place the pots in a warm and bright place. A temperature of 20-25°C is ideal. A mini-greenhouse or a clear plastic cover can help to retain moisture.
- Patience: Germination can take 1-3 weeks. Keep the soil moist and wait.
Phase 2: Transplanting – Giving the Seedlings More Space
Once the seedlings have a few leaves, it’s time to transplant them into larger pots.
- Preparation: Fill the larger pots with all-purpose or vegetable soil. Leave about 2-3 cm of space at the top.
- Carefully remove seedlings: Gently press from the bottom of the seedling pot to push the seedling out with the soil. Be careful not to damage the roots.
- Planting: Place the seedling in the larger pot. The top of the root ball should be about level with the soil surface.
- Fill up: Fill the pot with soil and press it down lightly.
- Water: Water the plant thoroughly.
- Location: Place the pot in a bright location.
Phase 3: The Care – Keeping Your Malabar Spinach Happy
Malabar spinach is relatively low-maintenance, but you should keep a few things in mind:
- Watering: Water regularly, especially on hot days. The soil should always be slightly moist, but not wet. Avoid waterlogging.
- Fertilizing: Fertilize the plants every 2-3 weeks with a liquid fertilizer for vegetables. Follow the instructions on the packaging.
- Light: Malabar spinach needs a lot of light. A south-facing window is ideal. If you don’t have enough sunlight, use a plant lamp.
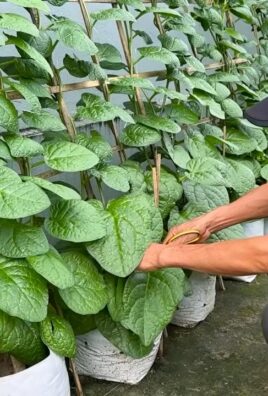
- Support/Trellis: Provide the plants with a support structure so they can climb. You can use a trellis, bamboo stakes, or a similar system.
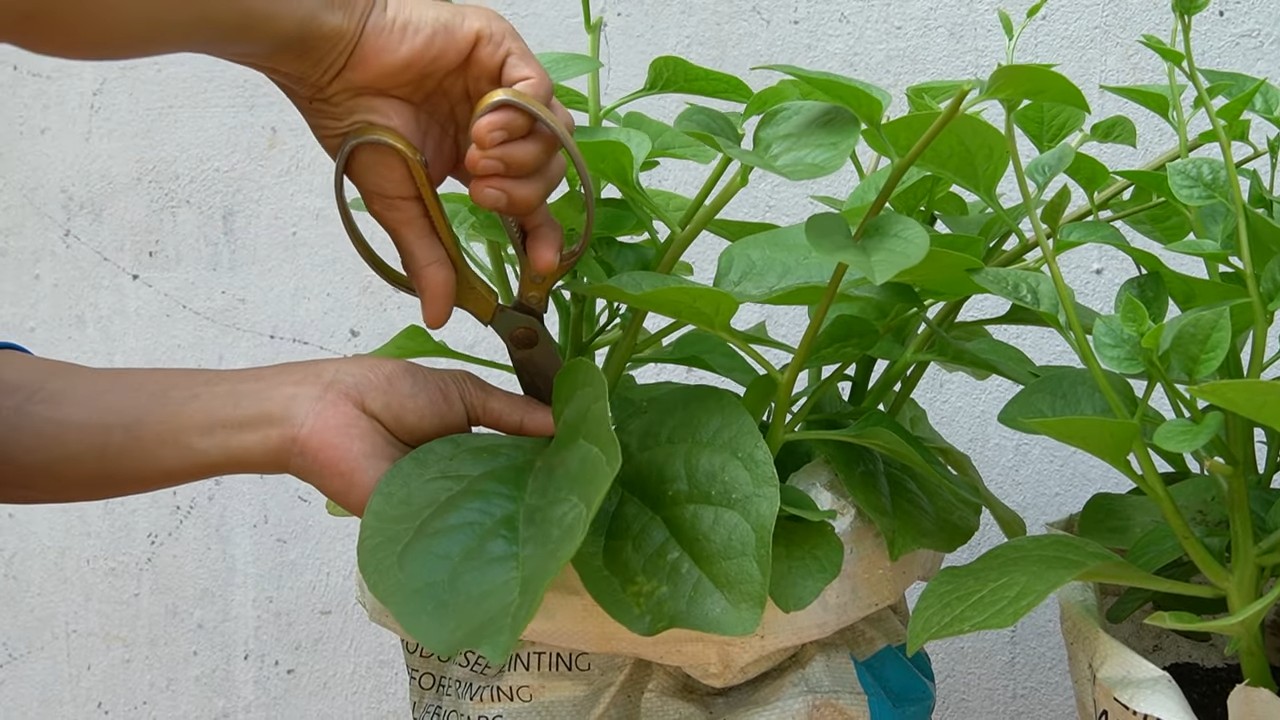
- Pruning: Regularly prune the shoot tips to encourage growth and make the plant bushier.
- Pests: Check the plants regularly for pests. Aphids and spider mites can occur. If infested, you can use natural pesticides.
Phase 4: The Harvest – Finally, Fresh Spinach!
After about 6-8 weeks, you can start harvesting.
- Harvesting: Pick the leaves and young shoots as needed. you can harvest the plant repeatedly as long as it is healthy.
- Use: Malabar spinach can be used like regular spinach. It is delicious in salads, soups, smoothies, or as a side dish.
Additional Tips and Tricks
- Humidity: Malabar spinach likes high humidity. You can increase the humidity by spraying the plants regularly with water or using a humidifier.
- Transplanting to larger pots: If the plants become too large for their pots, you can transplant them into even larger ones.
- Overwintering: Malabar spinach is not winter-hardy. In colder regions, you can overwinter the plants indoors. To do this, cut them back and place them in a cool, bright place. Water them only sparingly.
- Saving seeds: If you wish, you can also save seeds from your plants. To do this, let some flowers mature and dry. Collect the seeds and store them in a cool, dry place.
- Pay attention to the soil: The soil should be well-draining to prevent waterlogging. You can mix some sand or perlite into the soil to improve drainage.
- Observe your plants: Every plant is different. Observe your plants closely and adjust care accordingly.
Common Problems and Solutions
- Yellow leaves: Yellow leaves can be a sign of overwatering, nutrient deficiency, or too little light. Check the watering, fertilize the plants, and move them to a brighter location.
- Pests: Aphids and spider mites can occur. Spray the plants with a solution of water and dish soap or use natural pesticides.
- Slow growth: Slow growth can be a sign of too little light, nutrient deficiency, or temperatures that are too low. Move the plants to a brighter location, fertilize them, and ensure a warm environment.
- Rotten roots: Rotten roots are a sign of waterlogging. Water less and ensure good drainage.
Why Malabar Spinach? The Advantages at a Glance
- Easy to grow: Also suitable for beginners.
- Fast-growing: You can harvest after just a few weeks.
- Delicious and healthy: Rich in vitamins and minerals.
- Decorative: The climbing plants are a real eye-catcher.
- Space-saving: Ideal for small apartments.
I hope this guide helps you to grow your own Malabar spinach indoors. Happy gardening! And remember: patience and observation…
Conclusion
So, there you have it! Growing Malabar spinach indoors is not only achievable, but it’s also a rewarding experience that brings a touch of the tropics right into your home. We’ve walked you through the essential steps, from selecting the right seeds and preparing the perfect potting mix to providing adequate light and consistent watering. But why should you bother with this DIY project?
Firstly, consider the unparalleled freshness. Imagine stepping into your kitchen and harvesting vibrant, succulent leaves for your salad or stir-fry, knowing exactly where they came from and that they are free from harmful pesticides. This is a luxury that store-bought spinach simply cannot offer. Secondly, growing your own Malabar spinach indoors extends the growing season, allowing you to enjoy this nutritious green long after the outdoor plants have succumbed to the cold. This is especially beneficial for those living in colder climates where outdoor cultivation is limited.
Beyond the practical benefits, there’s also the sheer joy of nurturing a plant from seed to harvest. Witnessing the tiny sprouts emerge and gradually transform into lush vines is a deeply satisfying experience. It’s a connection to nature that can be incredibly therapeutic, especially in our increasingly urbanized lives.
But the possibilities don’t end there! Feel free to experiment with different varieties of Malabar spinach. Some cultivars offer slightly different leaf shapes and flavors, adding variety to your indoor garden. You can also try training your Malabar spinach vines to climb up trellises or supports, creating a visually stunning green wall in your home. Consider companion planting with herbs like basil or oregano, which can help deter pests and enhance the overall health of your indoor garden.
Don’t be afraid to get creative with your growing setup. If you don’t have a sunny windowsill, consider using grow lights to supplement the natural light. You can also explore hydroponic systems for a more advanced and efficient way to grow your Malabar spinach. The key is to adapt the techniques to your specific environment and preferences.
Ultimately, the success of your indoor Malabar spinach garden depends on your dedication and willingness to learn. Pay close attention to your plants, observe their growth patterns, and adjust your care accordingly. Don’t be discouraged by initial setbacks; every gardener faces challenges along the way. The important thing is to keep learning and experimenting.
We wholeheartedly encourage you to embark on this exciting journey of growing Malabar spinach indoors. It’s a simple yet profound way to connect with nature, enhance your culinary experiences, and add a touch of green to your home. And most importantly, we want to hear about your experiences! Share your tips, tricks, and photos with us in the comments below. Let’s build a community of indoor Malabar spinach enthusiasts and learn from each other. What are you waiting for? Grab some seeds, get your hands dirty, and start growing your own delicious and nutritious Malabar spinach today! Let us know how your **Malabar spinach** is growing!
Frequently Asked Questions (FAQ)
What exactly is Malabar spinach, and how is it different from regular spinach?
Malabar spinach (Basella alba or Basella rubra) is not actually related to true spinach (Spinacia oleracea). It’s a heat-loving vine native to tropical Asia and Africa. While both are leafy greens, Malabar spinach has a thicker, more succulent leaf and a slightly citrusy flavor. It’s also more tolerant of heat and humidity than regular spinach, making it an excellent choice for indoor growing, especially in warmer climates or during the summer months. Regular spinach prefers cooler temperatures and can bolt (go to seed) quickly in hot weather.
How much light does Malabar spinach need when grown indoors?
Malabar spinach thrives in bright, indirect light. Ideally, it needs at least 6-8 hours of sunlight per day. If you don’t have a sunny windowsill, you can supplement with grow lights. Fluorescent or LED grow lights are excellent options. Position the lights a few inches above the plants and adjust as needed to prevent scorching. Signs of insufficient light include leggy growth (long, thin stems) and pale leaves.
What kind of potting mix is best for growing Malabar spinach indoors?
A well-draining potting mix is crucial for healthy Malabar spinach growth. A mix of equal parts potting soil, perlite, and compost works well. The potting soil provides nutrients, the perlite improves drainage, and the compost adds organic matter. Avoid using garden soil, as it can be too heavy and may contain pests or diseases.
How often should I water my indoor Malabar spinach?
Water your Malabar spinach regularly, keeping the soil consistently moist but not waterlogged. Check the soil moisture by sticking your finger about an inch deep. If it feels dry, it’s time to water. Avoid letting the soil dry out completely, as this can stress the plants. Overwatering can lead to root rot, so ensure your pots have drainage holes.
How do I fertilize my indoor Malabar spinach?
Malabar spinach is a heavy feeder and benefits from regular fertilization. Use a balanced liquid fertilizer diluted to half strength every 2-3 weeks during the growing season (spring and summer). Look for a fertilizer with an NPK ratio (nitrogen, phosphorus, potassium) of around 10-10-10 or 20-20-20. Avoid over-fertilizing, as this can burn the roots.
What are some common pests and diseases that affect Malabar spinach, and how can I prevent them?
Common pests that can affect Malabar spinach include aphids, spider mites, and whiteflies. Regularly inspect your plants for signs of infestation, such as small insects on the leaves or webbing. You can control these pests by spraying the plants with insecticidal soap or neem oil. Good air circulation can also help prevent pest problems. Diseases are less common in indoor Malabar spinach, but root rot can occur if the soil is consistently waterlogged. Ensure proper drainage and avoid overwatering to prevent this.
How do I harvest Malabar spinach?
You can start harvesting Malabar spinach leaves when the plants are about 6-8 inches tall. Simply snip off the leaves as needed, leaving at least a few leaves on each stem to encourage continued growth. Regular harvesting will also help keep the plants bushy and prevent them from becoming too leggy. The younger leaves are more tender and flavorful than the older ones.
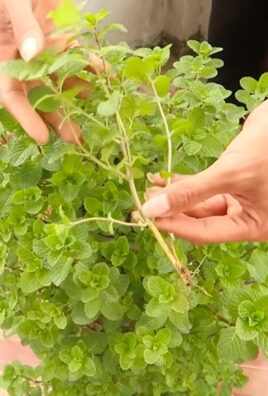
Can I grow Malabar spinach from cuttings?
Yes, Malabar spinach can be easily propagated from cuttings. Take a 4-6 inch cutting from a healthy stem and remove the lower leaves. Place the cutting in a glass of water or directly into moist potting mix. Roots should develop within a few weeks. Once the roots are established, you can transplant the cutting into a larger pot.
Is Malabar spinach safe to eat?
Yes, Malabar spinach is generally safe to eat. However, like all leafy greens, it’s important to wash the leaves thoroughly before consuming them to remove any dirt or debris. Some people may experience mild digestive upset if they consume large quantities of Malabar spinach, so it’s best to start with small portions.
How long does it take for Malabar spinach to grow indoors?
From seed to harvest, it typically takes about 60-90 days for Malabar spinach to mature indoors. However, you can start harvesting leaves as soon as the plants are large enough, which can be as early as 45 days. The growth rate will depend on factors such as light, temperature, and nutrient availability.
Can I grow Malabar spinach in a hanging basket indoors?
Absolutely! Malabar spinach is a vining plant, making it an excellent choice for hanging baskets. The trailing vines will create a beautiful cascading effect. Just make sure the hanging basket is large enough to accommodate the plant’s root system and that it has good drainage.
What are some creative ways to use Malabar spinach in cooking?
Malabar spinach can be used in a variety of dishes, just like regular spinach. It’s delicious in salads, stir-fries, soups, and stews. You can also use it to make smoothies or juice it. The slightly citrusy flavor pairs well with Asian-inspired dishes. Try adding it to curries, noodle dishes, or spring rolls.
How do I overwinter my Malabar spinach indoors?
Malabar spinach is a perennial in tropical climates, but it’s typically grown as an annual in colder regions. However, you can overwinter your Malabar spinach indoors by bringing it inside before the first frost. Cut back the vines to about 6 inches and place the plant in a bright, cool location. Water sparingly during the winter months and resume regular watering and fertilizing in the spring when new growth appears.
Leave a Comment