
Grow Lettuce Indoors Easy? Absolutely! Imagine fresh, crisp lettuce gracing your salads, sandwiches, and wraps, all year round, without ever stepping foot outside. Forget those sad, wilted greens from the grocery store – we’re talking vibrant, homegrown goodness right at your fingertips! For centuries, cultivating food close to home has been a cornerstone of self-sufficiency and a connection to nature. From ancient Roman courtyard gardens to the victory gardens of wartime, the ability to nurture our own food has always held a special significance.
But let’s be honest, not everyone has a sprawling backyard or the time for extensive gardening. That’s where the magic of indoor gardening comes in! And that’s why I’m so excited to share these easy DIY tricks and hacks that will have you harvesting your own lettuce in no time. This article is your ultimate guide to successfully grow lettuce indoors easy, even if you’re a complete beginner. We’ll cover everything from choosing the right varieties and containers to providing the perfect light and watering conditions. Say goodbye to expensive, pre-packaged lettuce and hello to a constant supply of fresh, delicious greens!
Growing Lettuce Easily at Home: Your DIY Guide for Fresh Greens All Year Round!
Hey everyone! Are you also tired of wilted lettuce from the supermarket? Me too! That’s why today I’m showing you how to grow your own lettuce at home, super easily and affordably—and even without a garden! Whether it’s winter or summer, with this guide, you’ll always have fresh lettuce on hand. Let’s get started!
What You Need: The Ingredients for Your Indoor Lettuce Garden
Before we get started, here is a list of everything you’ll need. Don’t worry, you probably have most of it at home already!
- Lettuce seeds: Choose your favorite varieties! Loose-leaf lettuce, Romaine, lamb’s lettuce—anything is possible. Look for varieties that are suitable for growing in pots.
- Seed-starting mix: Special seed-starting mix is low in nutrients and loose, ideal for seed germination.
- Pots or containers: You can use small pots, planter boxes, or even recycled containers. Make sure they have drainage holes so water can run off.
- Saucers: To catch excess water and protect your windowsill.
- Spray bottle: For gently watering the seedlings.
- Grow light (optional): Especially in winter or in dark locations, a grow light can promote growth.
- Watering can: For later watering of the plants.
- Labels: To identify the different lettuce varieties.
- Ruler or measuring stick: To maintain the distance between seeds.
Step-by-Step Guide: How to Succeed at Sowing
Now let’s get down to it! Follow these steps to successfully sow your lettuce seeds:
- Prepare the pots: Fill the pots or containers with seed-starting mix. Leave about 2-3 cm (1 inch) of space at the top. Press the soil down lightly.
- Sow the seeds: Sprinkle the lettuce seeds evenly over the soil. Pay attention to the recommended spacing on the seed packet. Usually, 1-2 cm is sufficient. For loose-leaf lettuce, you can sow the seeds a bit more densely.
- Cover the seeds: Cover the seeds with a thin layer of seed-starting mix (about 0.5 cm / 0.2 inches).
- Water: Gently moisten the soil with the spray bottle. The soil should be damp, but not wet.
- Location: Place the pots in a bright and warm location. A windowsill is ideal. Avoid direct sunlight, as the seedlings can get burned.
- Cover (optional): To increase humidity, you can cover the pots with plastic wrap or a mini-greenhouse. Don’t forget to ventilate regularly to prevent mold.
Germination: Patience is Required!
Germination takes about 5-10 days, depending on the lettuce variety and temperature. Keep the soil moist during this time.
- Check: Check the pots daily and spray the soil with water if needed.
- Ventilate: If you have covered the pots, ventilate them regularly to prevent mold.
- Be patient: Have patience! It takes a few days to see the first seedlings.
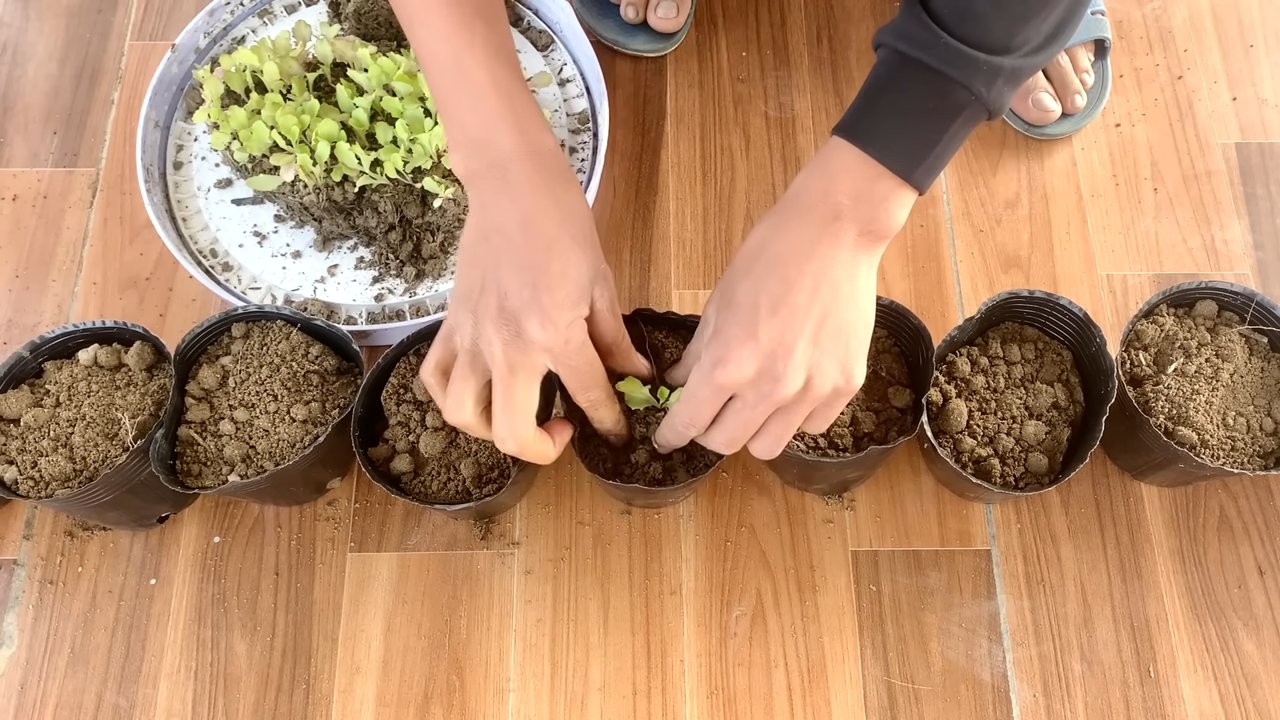
Pricking Out: Giving the Little Seedlings More Space
Once the seedlings have developed a few leaves (about 2-3 weeks after sowing), it’s time for pricking out. This means you separate the small seedlings so they have enough space to grow.
- Preparation: Fill larger pots or planter boxes with regular potting soil.
- Separating: Gently loosen the seedlings from the seed-starting mix with a dibber or a spoon. Be careful not to damage the roots.
- Planting: Place the seedlings in the new pots. The distance between the plants should be about 10-15 cm (4-6 inches).
- Watering: Water the plants gently.
- Location: Place the pots in a bright location.
Care: How to Keep Your Lettuce Healthy and Crisp
For your lettuce to grow well and thrive, proper care is important.
- Watering: Water the lettuce regularly, but avoid waterlogging. The soil should always be slightly moist.
- Fertilizing: Fertilize the lettuce every 2-3 weeks with an organic liquid fertilizer.
- Light: Lettuce needs a lot of light. Place the pots in a bright spot or use a grow light.
- Temperature: The ideal temperature for lettuce is between 15 and 20 degrees Celsius (59-68°F).
- Pests: Check the plants regularly for pests like aphids. If necessary, you can use biological pesticides.
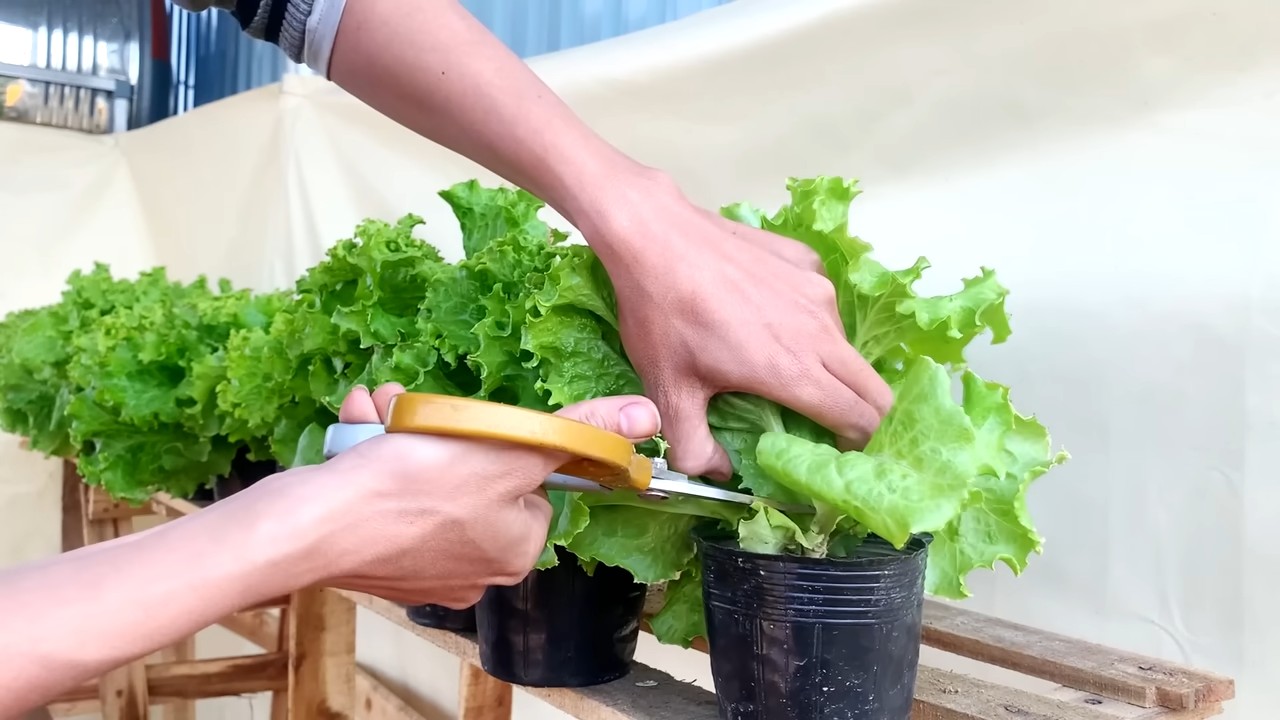
- Harvest: You can harvest loose-leaf lettuce gradually by cutting the outer leaves. Harvest Romaine and other head lettuces when they are fully grown.
Special Tip: Growing Lettuce in Water (Kratky Method)
If you want it to be even easier, you can also grow lettuce in water. This method is called the Kratky method and is super simple and space-saving.
- Prepare the container: You need an opaque container (e.g., a bucket or a plastic box) with a lid.
- Drill holes: Drill holes in the lid large enough to hold small net pots.
- Prepare the net pots: Fill the net pots with coco coir or rock wool.
- Insert seedlings: Place the pre-grown lettuce seedlings into the net pots.
- Prepare nutrient solution: Mix a hydroponic nutrient solution according to the package instructions.
- Fill the container: Fill the container with the nutrient solution so that the roots of the seedlings just dip into the liquid.
- Place the lid: Put the lid with the net pots on the container.
- Location: Place the container in a bright spot.
- Care: Regularly check the water level and top up with nutrient solution as needed.
Variety Recommendations: Which Lettuce is Suitable for Indoor Growing?
Not every lettuce is equally well-suited for indoor cultivation. Here are a few varieties that I particularly recommend:
- Loose-leaf lettuce: Very easy to grow and fast-growing. You can harvest it gradually.
- Romaine lettuce: Needs a bit more space but is very robust and tasty.
- Lamb’s lettuce (Corn salad): Ideal for winter cultivation as it grows well even at lower temperatures.
- Baby leaf lettuce: A mix of different lettuce varieties that you can harvest young.
Avoiding Common Mistakes: Tips for Beginners
Even with indoor lettuce cultivation, mistakes can happen. Here are a few tips to avoid the most common ones:
Too little light: Lettuce needs a lot of light. Place the pots in a bright spot or use a grow light.
Too much water: Avoid waterlogging, as the roots can rot.
Conclusion
So, there you have it! Growing lettuce indoors doesn’t have to be a daunting task reserved for seasoned gardeners. With a few simple supplies, a little patience, and this straightforward guide, you can enjoy fresh, crisp lettuce right from your own home, regardless of the season. This DIY approach not only saves you money on grocery bills but also provides the immense satisfaction of nurturing your own food.
Why is this DIY trick a must-try? Because it puts you in control of your food source. You know exactly what goes into your lettuce – no pesticides, no questionable fertilizers, just pure, homegrown goodness. Plus, it’s incredibly rewarding to watch those tiny seeds sprout and flourish into a vibrant, edible crop. Imagine the joy of adding freshly harvested lettuce to your salads, sandwiches, or even using it as a beautiful garnish.
But the benefits don’t stop there. Growing lettuce indoors is also a fantastic way to brighten up your living space. The vibrant green leaves add a touch of nature to your home, creating a more relaxing and inviting atmosphere. It’s a living, breathing piece of art that you can actually eat!
Looking for variations? Absolutely! Experiment with different lettuce varieties to find your favorites. Romaine, butterhead, loose-leaf – the possibilities are endless. You can also try growing other leafy greens alongside your lettuce, such as spinach or kale, to create a diverse and delicious indoor garden. Consider using different types of containers, from repurposed plastic tubs to aesthetically pleasing ceramic pots, to match your personal style. And for an extra boost, you can even invest in a grow light specifically designed for indoor plants, ensuring your lettuce receives the optimal amount of light for healthy growth.
We wholeheartedly encourage you to give this DIY trick a try. It’s easier than you think, and the rewards are well worth the effort. Don’t be afraid to experiment, learn from your mistakes, and most importantly, have fun!
Once you’ve harvested your first batch of homegrown lettuce, we’d love to hear about your experience. Share your photos, tips, and tricks in the comments below. Let’s create a community of indoor gardeners and inspire others to embrace the joy of growing their own food. Remember, fresh, delicious lettuce is just a few steps away. Start your indoor garden today and experience the difference! This is a great way to grow lettuce indoors easy and enjoy fresh greens year-round.
Frequently Asked Questions (FAQ)
What are the best lettuce varieties to grow indoors?
The best lettuce varieties for indoor growing are typically loose-leaf varieties like Black Seeded Simpson, Salad Bowl, and Red Sails. These varieties are known for their quick growth, compact size, and tolerance of indoor conditions. Butterhead varieties like Buttercrunch and Tom Thumb also perform well indoors. Romaine lettuce can be grown indoors, but it may require more space and light than other varieties. Consider starting with a mix of different varieties to see which ones thrive best in your specific indoor environment.
How much light does indoor lettuce need?
Lettuce requires at least 6 hours of direct sunlight per day to grow properly. If you don’t have a sunny windowsill, you’ll need to supplement with artificial lighting. Fluorescent grow lights or LED grow lights are excellent options. Place the lights a few inches above the lettuce plants and keep them on for 12-16 hours per day. Monitor your lettuce plants closely and adjust the light as needed. If the leaves are pale or leggy, they may not be getting enough light.
What type of soil should I use for growing lettuce indoors?
Use a well-draining potting mix that is specifically formulated for vegetables. Avoid using garden soil, as it can be too heavy and may contain pests or diseases. A good potting mix will provide the necessary nutrients and drainage for healthy lettuce growth. You can also add compost to the potting mix to improve its fertility and water retention.
How often should I water my indoor lettuce?
Water your lettuce regularly, keeping the soil consistently moist but not waterlogged. Check the soil moisture level daily and water when the top inch of soil feels dry to the touch. Avoid overwatering, as this can lead to root rot. Water in the morning to allow the leaves to dry before nightfall, which can help prevent fungal diseases.
How do I prevent pests and diseases in my indoor lettuce garden?
Maintaining a clean and healthy growing environment is key to preventing pests and diseases. Inspect your lettuce plants regularly for signs of pests, such as aphids, spider mites, or whiteflies. If you find any pests, you can try washing them off with a strong stream of water or using insecticidal soap. To prevent fungal diseases, ensure good air circulation around your plants and avoid overwatering. You can also use a fungicide if necessary.
When can I harvest my indoor lettuce?
You can start harvesting lettuce leaves as soon as they are large enough to eat, typically about 4-6 weeks after planting. Harvest the outer leaves first, leaving the inner leaves to continue growing. This cut-and-come-again method allows you to harvest lettuce continuously for several weeks.
Can I grow lettuce indoors year-round?
Yes, you can grow lettuce indoors year-round as long as you provide the necessary light, water, and nutrients. Indoor growing allows you to control the environment and avoid the seasonal limitations of outdoor gardening.
What are some common problems when growing lettuce indoors and how can I fix them?
Some common problems include leggy growth (insufficient light), yellowing leaves (overwatering or nutrient deficiency), and pest infestations. To fix leggy growth, provide more light. To address yellowing leaves, adjust your watering schedule and fertilize with a balanced fertilizer. For pest infestations, use insecticidal soap or other appropriate pest control methods.
Can I use hydroponics to grow lettuce indoors?
Yes, hydroponics is an excellent method for growing lettuce indoors. Hydroponic systems provide the necessary nutrients and water directly to the roots, resulting in faster growth and higher yields. There are many different types of hydroponic systems available, so choose one that suits your space and budget.
How do I fertilize my indoor lettuce plants?
Fertilize your lettuce plants every 2-3 weeks with a balanced liquid fertilizer. Follow the instructions on the fertilizer label carefully. Avoid over-fertilizing, as this can burn the roots and damage the plants. You can also use compost tea as a natural fertilizer.


Leave a Comment